|
|
Post by belinda on Sept 23, 2020 7:58:26 GMT 10
OK guys, I am really going to help with this. The Atlantic has really suffered from being left outside in the weather by the ex, so the boys and I now have a big job to her on the road again. Expect more posts with questions.
It looks like at least two panels of ply need to be replaced due to damage. The Winser and Porter books ("Plans for Caravans" and "How to Build Caravans") talk about 3/16" (4.75mm) for the walls and 1/2" or 5/16" for the floor. My son mesured a panel with his calipers and the Atlantic's side walls are 5 mm and the back panel seems to be a bit thinner - 3mm-4mm (hard to get access to an edge):
Q1. does it seem right that the side panels that need strength would be thicker than the back panel that needs to bend?
Q2. what are the modern equivalents? will the modern products be "bendy" enough to go around the back of the van?
Q3. does it have to be marine ply? What would they have used in the fifties?
To get at the corners, we will need to take off the aluminium moulding that goes around the edges:
Q4. can the original mouliding be re-used if we take it off carefully? I would like to retain as much of the original fabric of the van as I can.
Q5. if the answer to Q4 is "yes", what is the best way to get the paint off the aluminium? is a wire brush too harsh?
Q6. if the answer to Q4.is "no", where should I go to look for new aluminimum moulding with the right profile?
I had a carpenter come and have a look yesterday, but he was honest and said "I don't think this job for me". I have now lined up a second guy to have a look in the next few days - fingers crossed.
|
|
|
|
Post by Roehm3108 on Sept 23, 2020 11:52:31 GMT 10
Hi Belinda What a shame your van has deteriorated so much. A good lesson for those who think plywood vans don't need to be undercover! You'll get a variety of answers to your questions, I assure you. It was actually raised recently here: vintagecaravans.proboards.com/thread/17959/external-wall-thickness-bondwoodI can only tell you what I did when I built Cino Vardo. Others will have other opinions. Your Q1 YES. Especially so if they are "freestand" (without frames). The thicker ply stiffens things better and this is then reinforced by the structures such as base cupboards and overheads. Depending on the degree of curve, on the top section, 3-4mm ply is generally used as it does have enough flex. My little Hunter Minor had 3mm ply, which was reinforced with calico over it. It had a very tight curve and when I took off the old calico, I noticed the stress fractures in the ply, which justified applying a new calico cover. Your Q2 Go to the Austral Plywood site. They manufacture ply here is Australia and they are very helpful in the technical dept. 3-4mm ply should be able to wrap around your van's curve. Your Q3 Austral Plywood told me you only need marine ply for anything that actually sits in water. I didn't use marine plywood but took the advice given me by the manufacturer. (see the link above). They would not have used marine ply in the fifties. There is a fair difference in the price too. Q4 No reason not to use existing corner mouldings. They are probably better to refit than the new stuff because it is softer. I used to clean it with a wire brush drill attachment and finished off with fine sanding and finally steel wool. You probably won't find too many carpenters who want to do this sort of work. It really is a labour of love and an hourly rate would not work out cheap. You would remember fellow Atlantic owner MRFJ55 from your Coledale days. He still checks in here. Perhaps you could PM him and he might have some restoration contacts. |
|
|
|
Post by belinda on Sept 23, 2020 12:07:09 GMT 10
Thanks a heap! that gives us an excellent startng point.
The current plan is:
- the boys and I continue to do a lot of removing of bits and pieces (lights etc.) - documenting each step of course so we can put it back together afterwards
- scrape loose paint
- clean paint off the aluminium mouldings and other metal bits and pieces and store carefully.
wire-brush the hitch and give it a new coat of silver spray paint
- (me) after a hard day doing the above, spend my evenings knitting caravan tea cosies and drinking sherry
That will give us a good picture of where the worst damage is, and will let the carpenter see the main structural issues without too much further investigation. It will also make some nice knitted Christmas presents.
|
|
|
|
Post by Franklin1 on Sept 23, 2020 21:29:05 GMT 10
G'day Belinda,
When I rebuilt my "Walsh" van, I used 4mm ply for the front-top-rear curved sections; 6mm for the side walls; and 12mm for the floor. The 4mm ply bent around the sharpest radius on my van, which was the curve above the front window (similar to what you have on the Atlantic).
I used "exterior grade" ply with B-B faces for all the thicknesses I bought. Exterior grade has the same glue bond as marine ply, so will withstand weathering. Marine ply is a select grade of ply that doesn't have any small gaps in the layers when you cut the edge. Exterior grade will have some of these small gaps (called 'voids') but you can seal these gaps with polyurethane adhesive and make your own version of marine ply much more cheaply.
The "B-B" faces are suitable for painting, and will reduce your costs for the ply compared with the premium "A-A" grade which is used for staining.
I used a chemical paint stripper to remove the paint from all the metal parts I wanted to salvage and re-use. I found this method didn't damage the surface of the metal, and cleaned up nicely with soapy steel wool after the paint was stripped off.
cheers, Al.
|
|
|
|
Post by belinda on Oct 14, 2020 9:09:05 GMT 10
I spoke to Austal Plywood this morning:
- Their ply is all 1200 mm wide
- lengths are 2400mm or 2700mm
- Thicknesses are 4mm and 6.5mm
Questions:
1. are these sizes OK for the job? It would mean multiple pieces to sheet the sides and roof - five or six sheets of 4mm to sheet the van nose to stern, and two sheets of 6.5mm for each side
2. if the answer to Q1 is NO, is there anyone else who supplies larger sheets?
3. if the answer to Q1 is YES, how do we join all of these pieces together? does anyone have recommendations/hints for scarfing joints in ply?
|
|
|
|
Post by belinda on Oct 14, 2020 9:57:25 GMT 10
What do people suggest for attaching ply to a frame. The original was small nails.
What do you suggest for re-attaching the aluminium trim to cover the joins? Again, the original was small nails.
|
|
|
|
Post by Roehm3108 on Oct 14, 2020 14:22:11 GMT 10
I can only share what I did, others will probably differ. To attach the plywood to the frames, I used a timber adhesive and nails. For the aluminium edging, I used screws, that way it's easier to removed if you need to take the edging off in the future. Franklin1 is one of the scarfing experts, so he can steer you there, if that's the direction you want to head with ply joins. I took an easier route and butted the wall sheets horizontally and made a feature of the cover strip on the exterior, using 30mm by 10mm hardwood beading on the outside and 10mm by 8mm curved edging internally, after sealing the exterior of the butt with D Mastic. Screwed the two together from the inside. Exterior 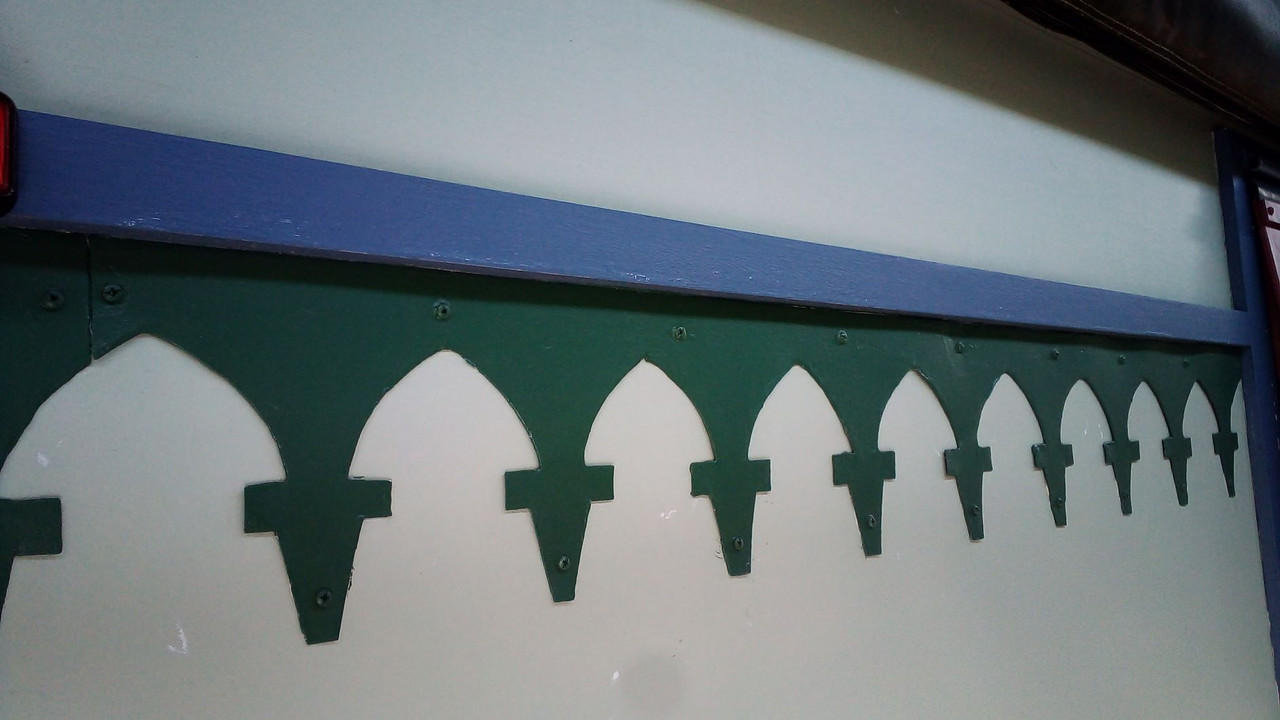 Interior  The roof I butted together along the centre double beam, glued and nailed the ply and then fibreglassed the butt using 50mm glass tape, then calico over the whole lot. You could do the same from the top of the front window to the top of the back window 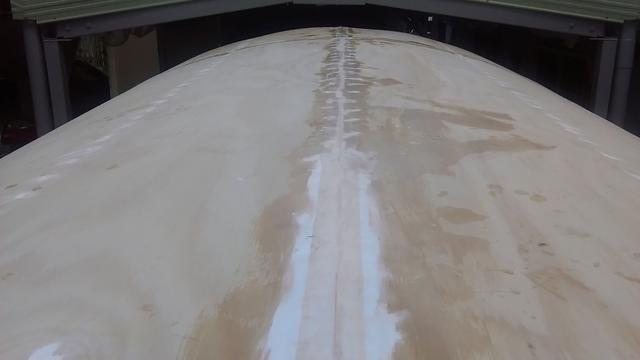 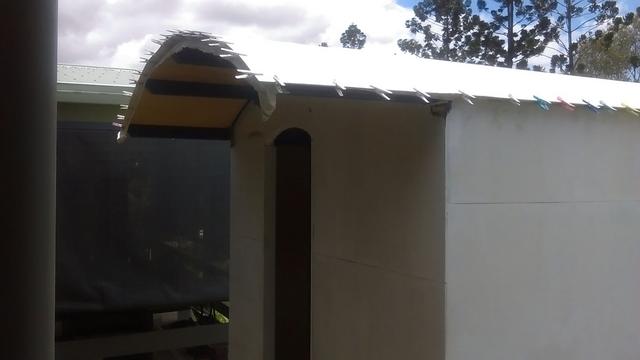 I'm not aware of anywhere that you can get plywood wider than 1200mm in any thickness, although I seem to have a vague memory of Dennis Watt (JBJ) finding something longer that 2700mm. Not sure if you're aware that you can't purchase plywood from Austral Ply. You will have to find their NSW distributors. If you're planning to use 4mm for the roof, get some feedback from others about whether it will make the necessary curve on your van. You may need to drop back to 3mm, which is what I did. Hope that helps |
|
|
|
Post by Franklin1 on Oct 14, 2020 20:26:40 GMT 10
G'day Belinda,
The sharpest (tightest) radius you have to bend the ply around is the roof curve above the front window. If that radius is 500mm or greater, then 4mm ply will bend around that ok. If the radius is less than 500mm, you'll have to go to 3mm thickness.
The wall sheets could be fitted as follows, to minimise the amount of joints:
1) first sheet from front of van to right side of doorway. Only a small joint between sheets at top right of door. 2) second sheet from right side of doorway to right side of window. 3) third sheet from right side of window to rear of van (this would be a relatively narrow strip of ply sheet).
I wouldn't bother about scarfing the sheets. It's too complicated for the thicknesses you'll be using. These days the polyurethane adhesives will give a good weatherproof joint if you join the sheets over a timber frame stud. Use small hot-dipped galvanised nails/panel pins to fix the sheets while the adhesive sets.
I used nickel-plated brass screws to fix the j-mould into position. I bought mine from Classic Fasteners in South Australia. Another option is to source some escutcheon pins/nails made out of stainless steel. I think shesgotthelook sourced some from the UK for one of her Viscount restorations.
Is the condition of your van really so bad that it requires ALL the ply sheets to be replaced? That's some pretty serious deterioration over the last 10 years or so. 
cheers, Al.
|
|
|
|
Post by Roehm3108 on Oct 15, 2020 6:59:33 GMT 10
It's probably worth calculating whether to fit the sheets to have the join horizontal. I suspect you might only use two sheets for a side. You could always cover the join internally with some beading to stop any flexing.
|
|
|
|
Post by belinda on Oct 15, 2020 8:13:10 GMT 10
"Is the condition of your van really so bad that it requires ALL the ply sheets to be replaced? That's some pretty serious deterioration over the last 10 years or so."
There are two problems here. The first is that there is a lot of deterioration at the edges of panels, plus some further away from joins. The second problem is that the new ply is not the same thickness as the old, meaning we cannot get a good match where they would meet.
Loking at the way it was built, the side panels were fitted first, then the curve over the front/roof/rear. Based on you advice, the current plan of attack is some scarf joints and some butt joints.
|
|


