|
|
Post by Koala on Sept 1, 2018 9:04:05 GMT 10
Jim, you need to remove half of the thickness of the ply so that the 2 sheets can overlap at least 20mm. The router is the only tool which i know of to do this correctly. I also use a router to cut out window openings and trim side walls to the van profile. I rarely use a jigsaw for anything. The following photos are of accident repairs to our Wayfarer where new plywood needed to be inserted. 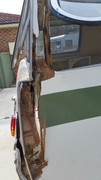 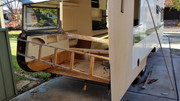 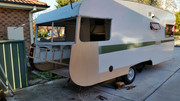 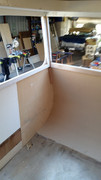 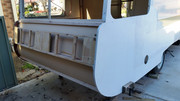 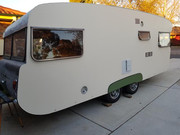 Koala |
|
|
|
Post by Surf Tragic on Sept 1, 2018 11:15:13 GMT 10
Hello KCK. What you have found with your van is identical to what I have experienced with the vans I have restored. If you click on the "54 Don 120 Ser# 784" at the bottom of this page you will find answers to most of your questions and plenty of detailed photos. This featured 120 is in much better shape than the 140 I am working on at present ! It looks to me that some ends of your bearers are completely rotted off, so will need to be replaced. The floor boards are nailed to them, so all the nails need to be cut from underneath, I use a Multi-tool for this & it works great, then whats left of the bearer can be taken out. It is a lot of work. There are photos of how to replace the bottom of the ply sheet without taking the whole sheet off, so I hope you can read these & get some clues. To try & write it all here would end up confusing you. In the photos you will see what the bearers are like in shape, how they need to be machined. I have been lucky enough to be able to restore the stabilizer legs, all these special bits are what make it a 'Don', like the little rubber wheels at the back of the chassis, the steel handles at the front, the captive ball towing connector, and of course, the smell  . I'm pretty sure the smell comes from the resins in the ply, so I paint every bit of bare ply, in the cupboards, under the seats to try & combat what we call "The Don Smell". 'Fragrance' sounds better thanks Don Ricardo. This will do for a start, see how you go. Surf Tragic. |
|
kck
New Member

Posts: 48
|
Post by kck on Sept 25, 2018 10:11:11 GMT 10
Hello again,
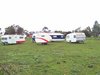
Making some headway with the 1955 Don. A way to go yet. Photos to follow.
The sanding!!! Don't get me started! It's an enormous task. That is ongoing and I'm yet to break it's back. Intend to expose all external wood and give it an epoxy coat before painting. The intention is for the Don to go strong for another 63 years.
The rot has been removed. Found a little more behind the number plate side and back panel in the curve. Suspect the 'rewiring' a few years back was not too caring about sealing the holes they made.
The plywood jigsaw puzzle has been clamped, epoxied and temporarily screwed in. Screws are out now and on with sanding. A paint job will cover all the 'dental' work. Plan to put a top layer of new ply over the existing ply floor for even more strength.
I have a few questions for you my fellow Don Folk.
The lead light windows are going to cost very similar amount to restore as to replace. (I do not want to do a night class) Would it be wrong to replace?
The tow ball. What is the 2018 recommendation for restoring/replacing? Security/safety first.
It's been recommended I get a tail bar too. That's a Don version of a moon boot right?
Lino. Any clue what the original style was?
The roof. Still a little (scoff) more work required. Sanding but pretty sure no filling. There is a bit of rust from the nails. Should I putty over these? Hammer in a few new ones? Copper nails?
I'm putting it out to the universe I need a cooker. Think originally it was a Parkinson?
The fly wire. I'm kicking myself I pulled out the original fly wire in the door and small low window beside the door with a view to painting a nicer finish!!!. I will need to replace. Was it copper? The three existing screens are in fairly good repair. A clean up should see them right. Any tips on cleaning this fly wire?
That will do for the moment. I have work to do. My right shoulder aches, my neck is stiff, my fingers now have no grip strength but I'm loving this new 'volume' in my hair lol
Cheers for now
kck
|
|
kck
New Member
Posts: 48
|
Post by kck on Sept 25, 2018 10:31:24 GMT 10
The op shop smell seemed to be a rotten bottom shelf in the side entrance cupboard. I think there must have been a battery in there?? It had an electrical smell to it too.
Soon enough I will be asking for intel on these electric things.
|
|
kck
New Member
Posts: 48
|
Post by kck on Sept 25, 2018 10:34:45 GMT 10
The special bits that make it a 'Don', the little rubber wheels at the back of the chassis, the steel handles at the front, the captive ball towing connector...these things I don't have!!!
|
|
|
|
Post by Don Ricardo on Sept 25, 2018 23:03:27 GMT 10
|
|
|
|
Post by Don Ricardo on Sept 26, 2018 23:02:30 GMT 10
Hi KCK, Some responses to your questions... 1. Windows: If it's much the same cost, I'd restore the original. But that's my personal preference. I don't think anyone would think badly of you if you decided to replace the leadlight, though. 2. You're allowed to keep an old style coupling if its original to the van, even if it doesn't meet current regulations. However, your coupling has been replaced, so that doesn't apply. Either way you'd want to make sure it's safe. I doubt if the one you have has had a lot of use, so you'll have to assess how worn it actually is, and whether it is still serviceable and safe. 3. I'm not sure what you mean by a tail bar. Can you explain a bit more? 4. Lino: Don used green lino which matched or toned in with the green paint on the trim at the bottom of the cupboards, and also used on some of the external beading. The lino usually had a streaky pattern or was speckled. There are some examples of Don lino here and here. The last example in the second post (the lino from Mark T's Don) is probably similar to what the lino in your van may have been. Mark's van is serial number 1023, so not too long after yours. 5. Nails in roof: I'd be surprised if you have nails in your roof. Don normally only used countersunk screws for everything - masses of them! But maybe some repairs have been done. You should be able to clean them up and putty over them. 6. Cooker: I'm not sure what stove was in the van. I didn't take a photo of that when I saw the van back back in the day. There doesn't seem to be any sign that the van was set up with a gas stove (no gas holder on the A-frame that I can see). So the van may just have had a petrol pressure stove like a Coleman. 7. The fly wire wasn't normally copper - just the normal old steel wire which tended to get a bit rusty. I guess these days you'd use copper or nylon, or something that doesn't rust. I think copper would be a problem for a while, while it was still shiny because it wouldn't 'disappear' when you're trying to look through the window - in other words you'd be more conscious of it being there. I'm sure others will be able to make comments, but there's a start. Don Ricardo |
|
kck
New Member
Posts: 48
|
1955 Don
Oct 24, 2018 6:24:57 GMT 10
via mobile
Post by kck on Oct 24, 2018 6:24:57 GMT 10
Hello again.
Sanding is done and the don now sports a fake tan (epoxy)
Looking the goods now!!
Looking at starting the process for registration. Discovered the vin no on the draw bar so took that off to Vic Roads. Aside from telling me ithe don was last registered in 2011 and that it is in “the archives” there were no other details.
So I’m left with this question.
Apparently the Don weighs 650kgs (unloaded?).
Here in Vic the heavy vehicle rego weighs in at above 750kgs.
Any advice on which rego to go for? Should I weigh it? Where? Any other gems regarding rego you might share?
Photos up date to follow
Cheers for now
Kck
|
|
|
|
Post by shesgotthelook on Oct 24, 2018 7:16:10 GMT 10
|
|
kck
New Member
Posts: 48
|
Post by kck on Oct 30, 2018 2:24:30 GMT 10
Good advice thanks a bunch
|
|
kck
New Member
Posts: 48
|
1955 Don
Nov 4, 2018 9:51:13 GMT 10
via mobile
Post by kck on Nov 4, 2018 9:51:13 GMT 10
Hello fellow campers.
I’m at the part where rewiring comes into play.
Rather than reinventing the wheel, I’m looking for a little direction on how and where I might run wires so as to keep them out of sight, create no new holes and not pull apart the Dons cabinetry.
Also, I’ve kept the existing power points. Hoping these are able to be kept too? I’d love to get my hands on an extra one mind you.
Do any of you have some insights, experiences and /or direction?
Not really wanting to put anything extra in the Don than what was originally there so the standard fit out is the plan...just new wires and existing fittings.
Tail lights...now there’s another bag of fish!!!
Thanks again. Look forward to gaving your options and advice.
Kck
|
|
|
|
Post by Don Ricardo on Nov 4, 2018 16:44:03 GMT 10
Hi KCK, I have been meaning to reply to a couple of your posts, so I'll start off with your queries regarding rewiring your van... We had some changes made to the wiring in our Don a few years ago (1982!). We were able to keep the original wiring for our lights, etc, because it was in good condition, and still is. However, the original 240 volt connection consisted of a power cord running down inside the offside wall which was connected at the top to a single 240 volt powerpoint above the stove alcove and connected to a three pin plug hanging off the cord under the floor. Your van possibly has a similar arrangement? We replaced that with a modern outside caravan power inlet which was connected to a modern two outlet powerpoint which replaced the original powerpoint. That was all able to be done through the hole in the wall from the original powerpoint without making extra holes, etc. In addition we added another two socket powerpoint at the rear end of, and beside the head high cupboards on the offside wall. It is mostly hidden there, unless you are looking for it, and the electrician was able to run the wires for the second powerpoint inside the cupboards, and hid them in a little square channel he made out of ply at the back of the cupboard. Again most people wouldn't even notice it was there even when they're looking inside the cupboards. We also made a couple of other changes, including replacing the original 6/12 volt battery connections with a 240>>12 volt transformer so that we could continue using the original 6/12 volt lights. The wiring for that again was able to be hidden inside cupboards and also ran under the floor to connect up with the 240 volt power inlet. That's just a bit of sketch, but in summary you should be able to hide any new wiring inside the cupboards or inside the walls of the your van. You should also be able to keep your original outlet and switches. We only added the double powerpoints because one single powerpoint just wasn't enough for what we needed in the van at that time. These days with phone and laptop chargers, etc, having an extra couple of powerpoints has been a boon. However, I don't see why you won't be able to keep the original powerpoint and switches if you wish to. If you would like me to explain further, or would like to see some pics, just let me know. Or if you would like to come and have a look at how it's been done in our van, you'd be very welcome. We're not that far apart geographically.  Great to see the progress you're making. What are the questions you have about the tail lights? Don Ricardo |
|
|
|
Post by Don Ricardo on Nov 4, 2018 17:54:00 GMT 10
The op shop smell seemed to be a rotten bottom shelf in the side entrance cupboard. I think there must have been a battery in there?? It had an electrical smell to it too.
Soon enough I will be asking for intel on these electric things. Hi KCK, Yes, the bottom cupboard on the right of the doorway was the cupboard where a 6/12 volt battery was kept to power the lights in the van. There should be a couple of battery clamps there to attach to the battery, or perhaps they have been removed. The battery was charged from the tow vehicle when towing. Don Ricardo |
|
kck
New Member
Posts: 48
|
1955 Don
Nov 10, 2018 3:38:52 GMT 10
via mobile
Post by kck on Nov 10, 2018 3:38:52 GMT 10
Thank you don. Auto electrician coming this morning. Just dealing with the 12 volt stuff and the tail lights. Think I have hit the jack pot with the tail lights I found. Not 100% on the blocks needed to sit/position them on to the van. A Feature?
Alas.
Today I have another question.
I have a van guard (car) door handle and lock Smith is telling me I cannot have similar on inside and cannot get his head around why I wouldn’t be happy with his modern lever handle! Yes, it’s inside, yes, I can still have the vanguard handle on outside but surely to come this far, I can have better options. Love to hear/see what others have done.
Kck
|
|
kck
New Member
Posts: 48
|
1955 Don
Nov 10, 2018 3:42:16 GMT 10
via mobile
Post by kck on Nov 10, 2018 3:42:16 GMT 10
Will the Don be ready for the Hawaii Christmas in Anglesea??
|
|
|
|
Post by shesgotthelook on Nov 10, 2018 9:34:24 GMT 10
I have car door handles & deco backing plates on my 1947 homebuilt. Took some engineering to make it work but wasn’t that hard! 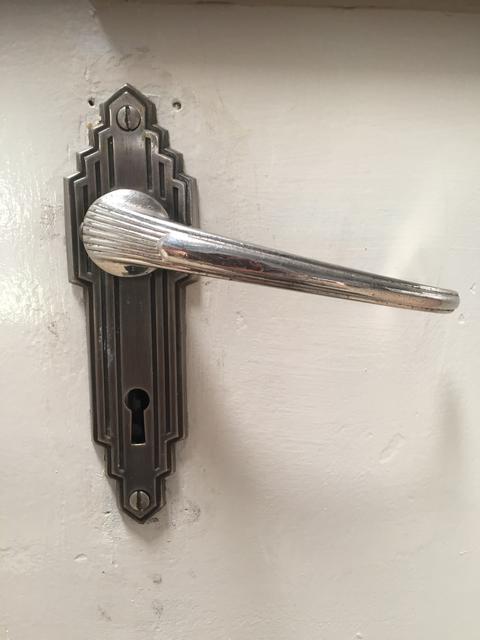 Inside had to be vertical due to barn door dropping down 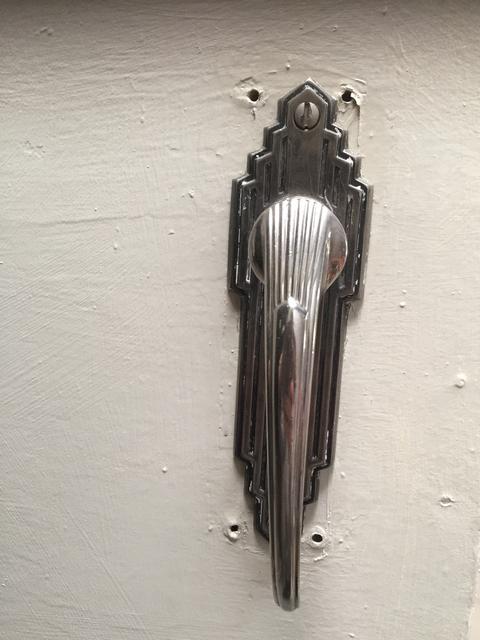 |
|
|
|
Post by Don Ricardo on Nov 17, 2018 21:16:19 GMT 10
Hi KCK, Sounds like you're making a lot of progress on your Don. Well done. I'm impressed with what you've achieved. For what it's worth, I thought I'd show you the door furniture on our van. First the inside - note the pull handle, latch mechanism and locking bolt: 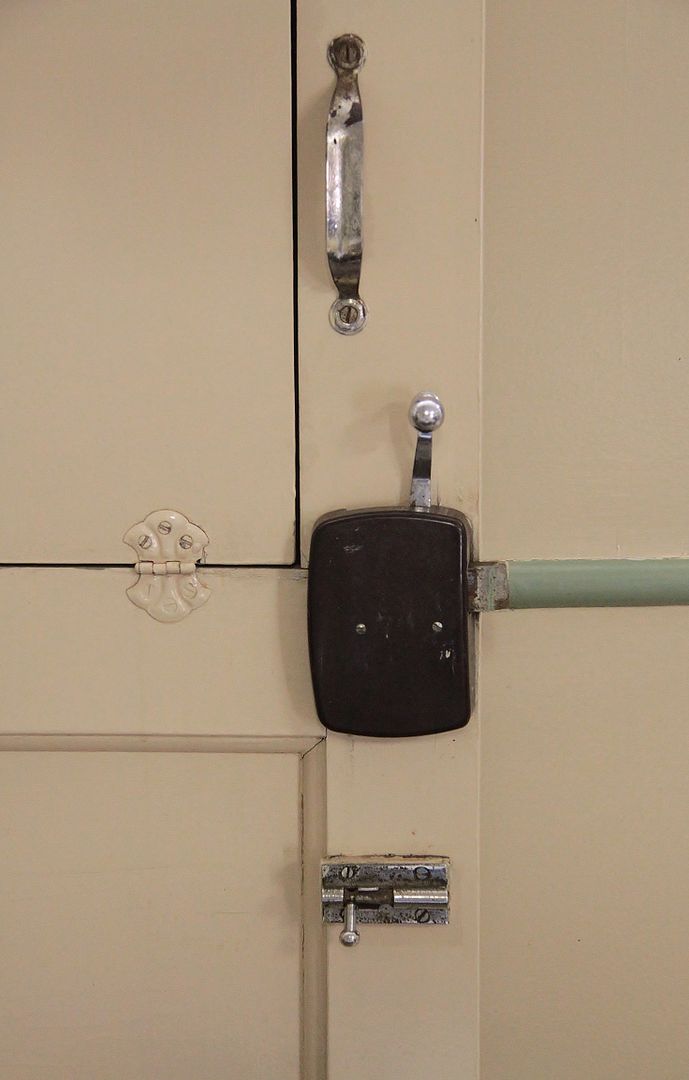 And a closer up view of the latch mechanism which has a bakelite cover: 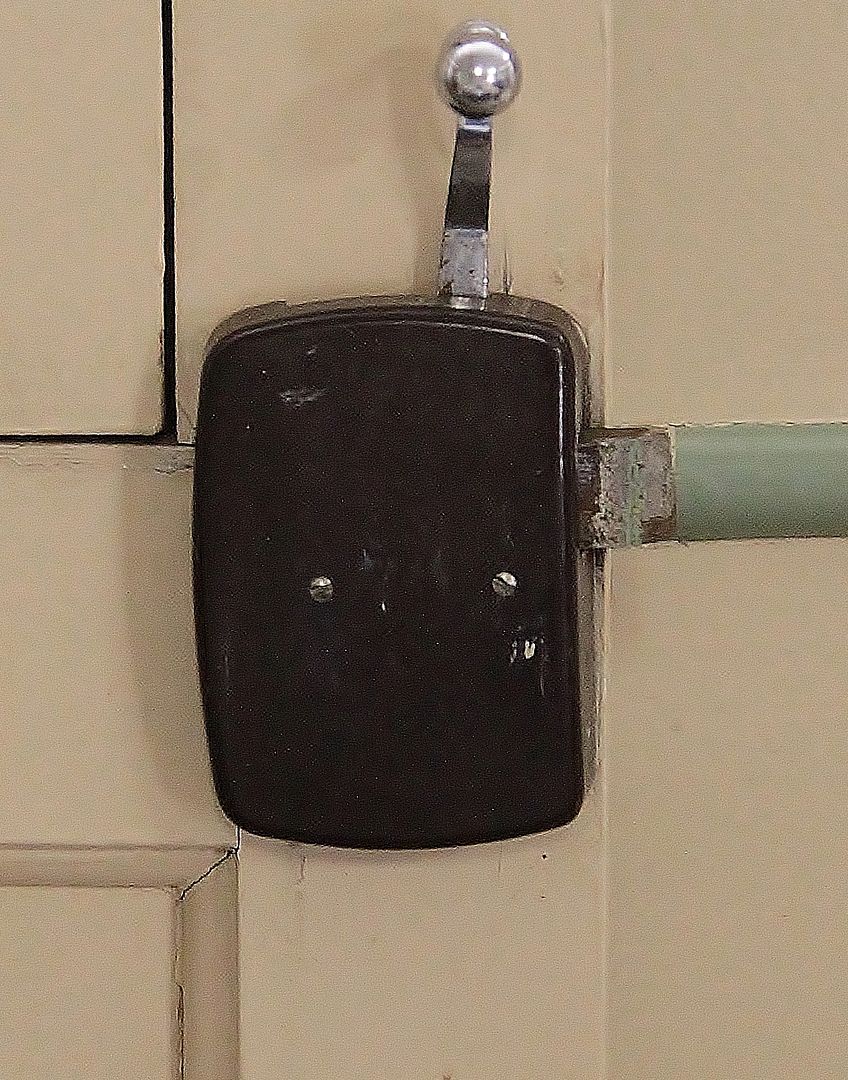 The external door handle: 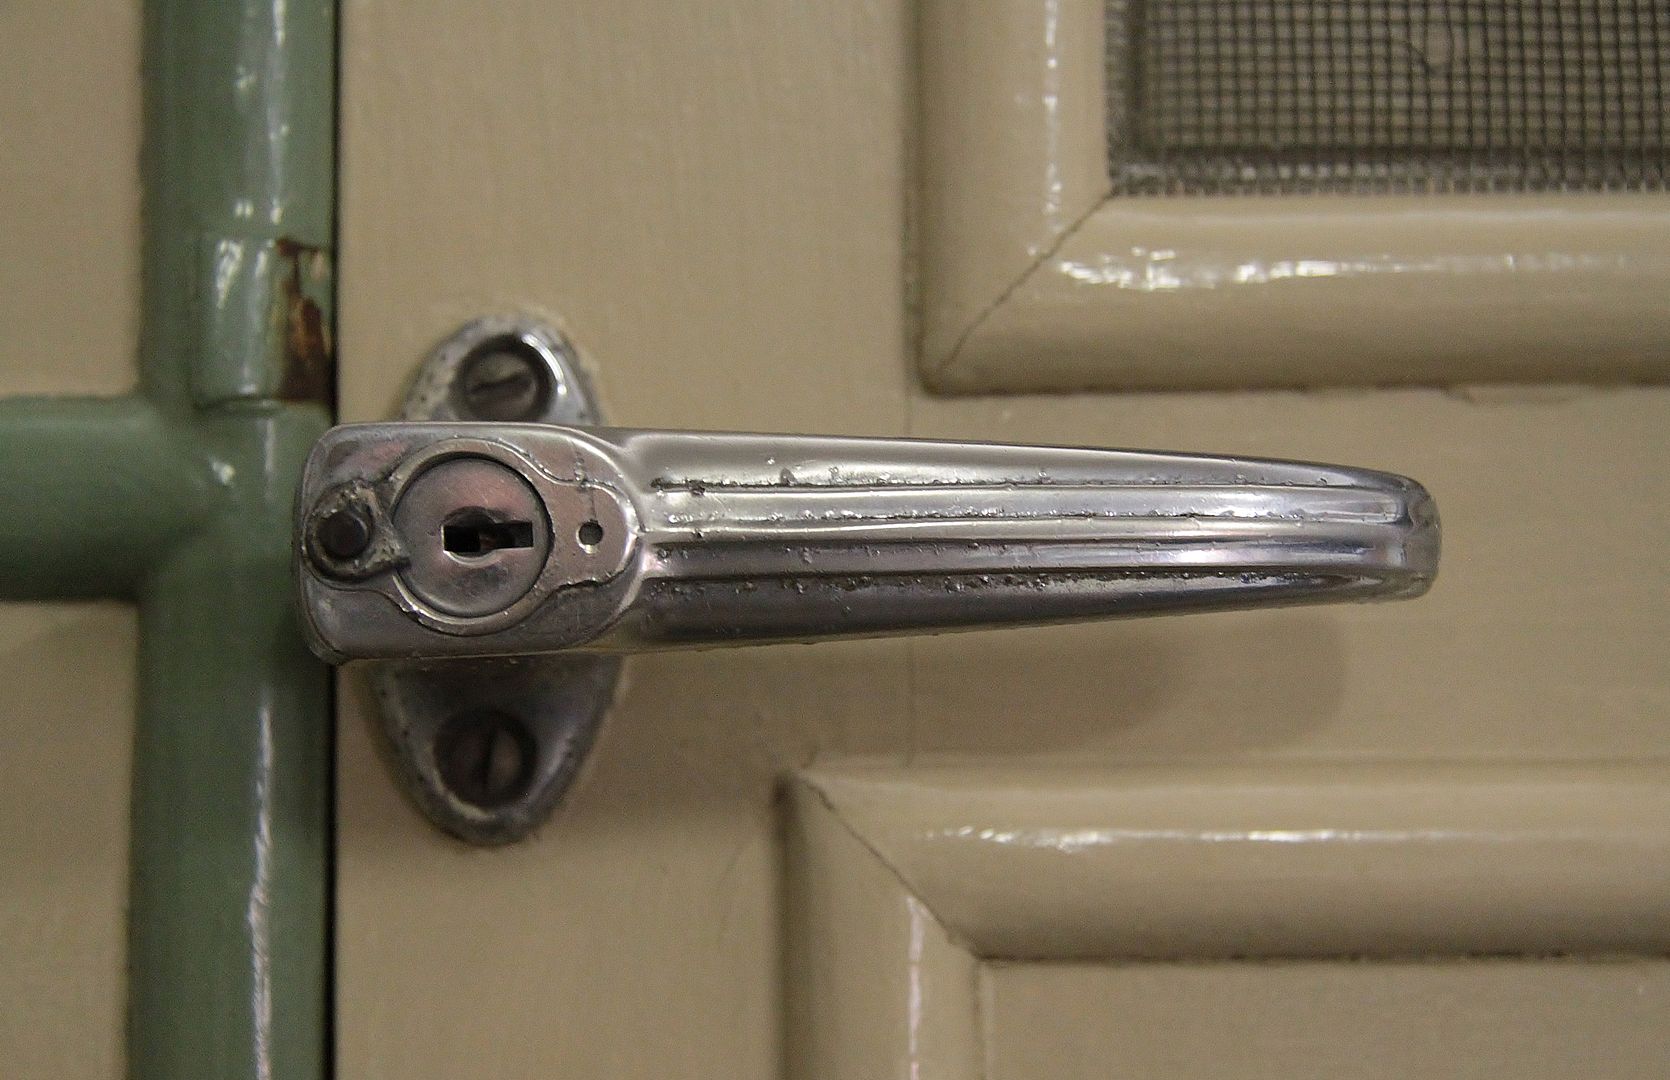 The lock should have a little cover plate, but that broke off many years ago. From the photos I have of you van, I see that the latch mechanism is different to our van's. At first I thought your mechanism might have been replaced at some point, but I've done a bit of digging and discovered that the vans built sometime before yours have the same mechanism as yours. For example the same mechanism can be seen on this van, which is serial number 944: 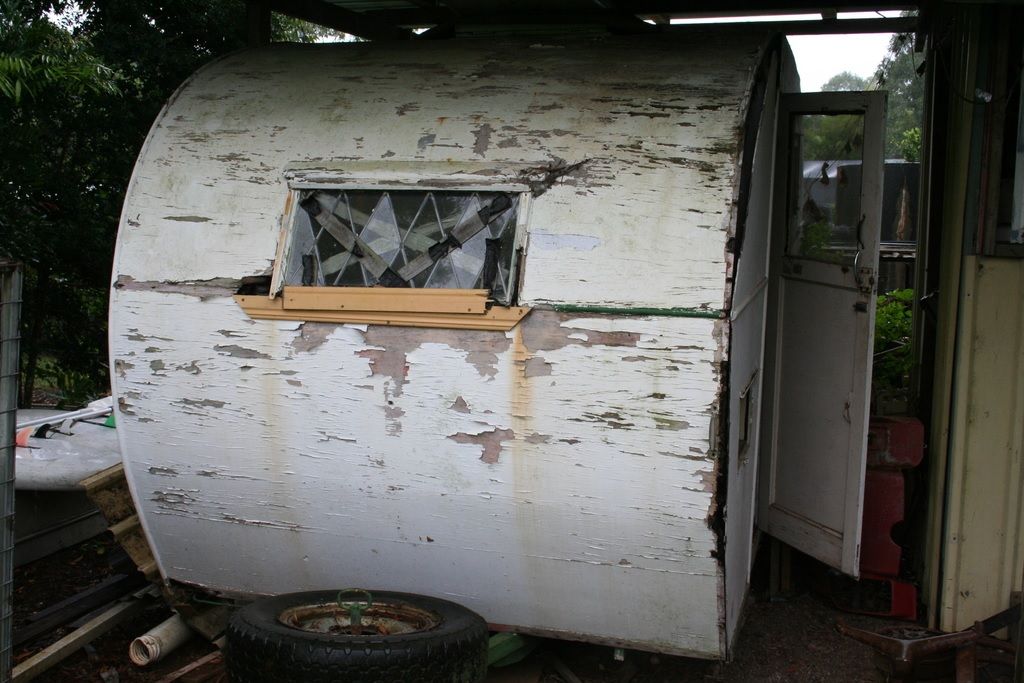 The same pull handle and locking bolt as on our van are also visible, so should no doubt be on your van. (Incidentally after this photo was taken, the van was beautifully restored by Dosse. ) The same latch mechanism as yours was retained for the later 133 model - this is serial number 1102:  It appears from both these vans that the chrome door handle should be mounted vertically on the latch mechanism. Hope that's of some use to you. Don Ricardo |
|
kck
New Member
Posts: 48
|
1955 Don
Dec 2, 2018 7:13:50 GMT 10
via mobile
Post by kck on Dec 2, 2018 7:13:50 GMT 10
Hello and thank you for the help and advice to date.
I have 2 sets of beehive lights that I was hoping to use as clearance lights. Single red x 2 and single amber x 2
They would be flush rather than facing front/back.
I understand there is a vintage caravan exemption but not sure how it relates to clearance lights. Not sure what was the original set up either.
What are you fellow don people using?
Any pictures? Hoping to stay true and not use anything modern.
Primer almost finished. Getting close now
Cheers for now.
|
|
|
|
Post by aussieute on Dec 2, 2018 14:59:39 GMT 10
Hi kck I got my jennison registered with out clearance lights as it didn't have any on it without any problems and it is 17 feet long Vic roads were easy to deal with they did want a weigh bridge docket cheers chris
|
|
|
|
Post by Don Ricardo on Dec 2, 2018 17:00:25 GMT 10
Hi KCK, Lots more progress by the sounds of it. Good on you. I'm looking forward to seeing the finished result. The clearance/side light(s) issue is an interesting one because Victorian road law seems to have changed around 1953. When you ask about clearance lights thugh, do you mean clearance lights or side lights? I gather from the context of your post that you are meaning side lights, but just to be clear Victorian road law in the 1950's referred to: Clearance lights - these were red 'tail' lights that needed to be attached either side of the rear of the caravan, if the caravan was 7 ft or more wide. Side lights - from 1953 onwards these were amber & red lights required to be attached to the sides of the caravan when the van was 7 ft or more wide, and/or the van projected 6 inches or more beyond the sides of the tow vehicle. I will answer your query on the basis that you were asking about side lights. It seems that prior to 1953, caravans used in Victoria may not have required side lights at all. According to the summary of regulations in Keith Winser's 1953 Caravan & Touring manual which was published in 1952 and presumably based on on the law at that point: "Victoria
"Trailer caravans as such are not required to be registered, if they are not used for the carriage of goods in the course of trade.
"The caravan must, however, bear the same registered number as the car by which it is drawn (the owner supplying his own number plate), and if used at night, it must be fitted with a tail light.
"The car that draws the caravan must be insured with the right to attach a trailer." [Emphasis added.] There is no mention at all of side lights. Whether that was the case or not, our 1949 Don had and still has just the one amber beehive style clearance light located on the offside (ie away from the kerb). My parents told me that that was all that was required at the time, and that a side light on the near side was not required. The off side of our van is currently facing a wall in the garage so it's a bit difficult to get a good photo, but this pic does show you how the light is attached. The light base is attached to a U-shaped bracket, the bottom arm of which is screwed to the wall of the van: 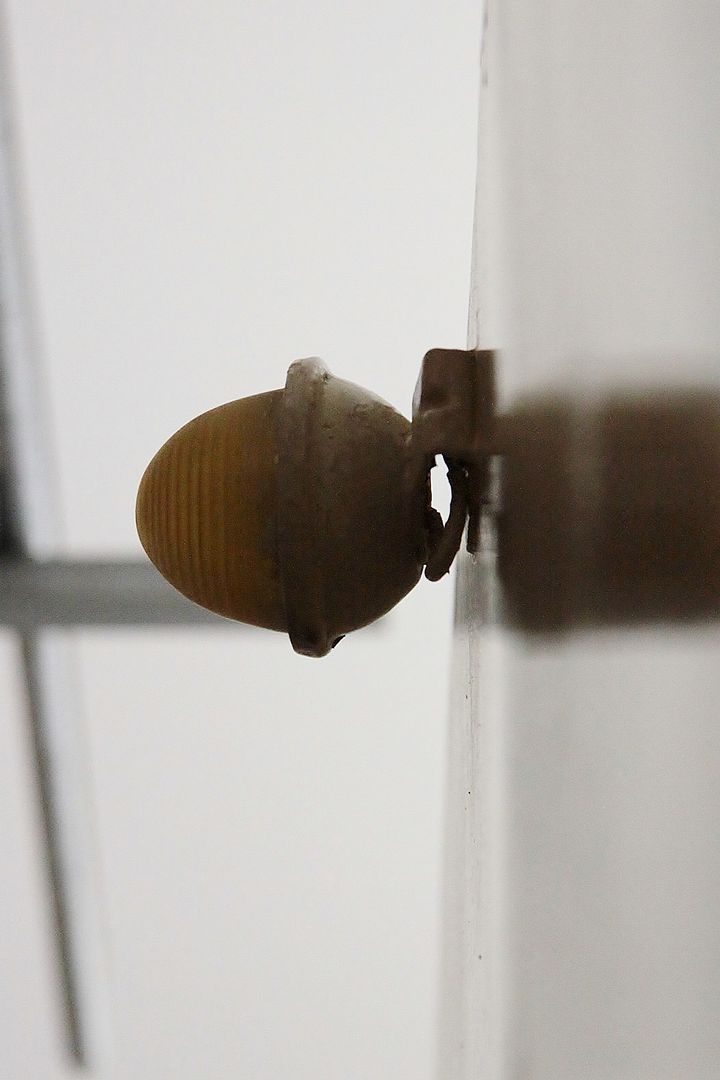 By 1953 however, the law was definite that yellow and red side lamps were required. You will find the Victorian regulations for 1953 here, but note that there is a typo when it says that side lamps are required if the van projects more than 6 ft beyond the sides of the car. That would be a very wide caravan! It should say 6 inches as it does in the 1957/8 regulations. You commented that the beehive lights you have 'would be flush rather than facing front/back'. The regulations are clear that the side lights must be visible at least 600 feet to both the front and rear of the van with amber facing frontwards and red facing backwards. So the distance your lights can be seen for will determine whether your lights are OK or not. I've hunted out an example of a Don caravan showing clearance lights which appear to fit the 1953+ regulations. This van is serial number 675, which I've dated as 1952, and although it's been restored, I think the side lights are most probably original: 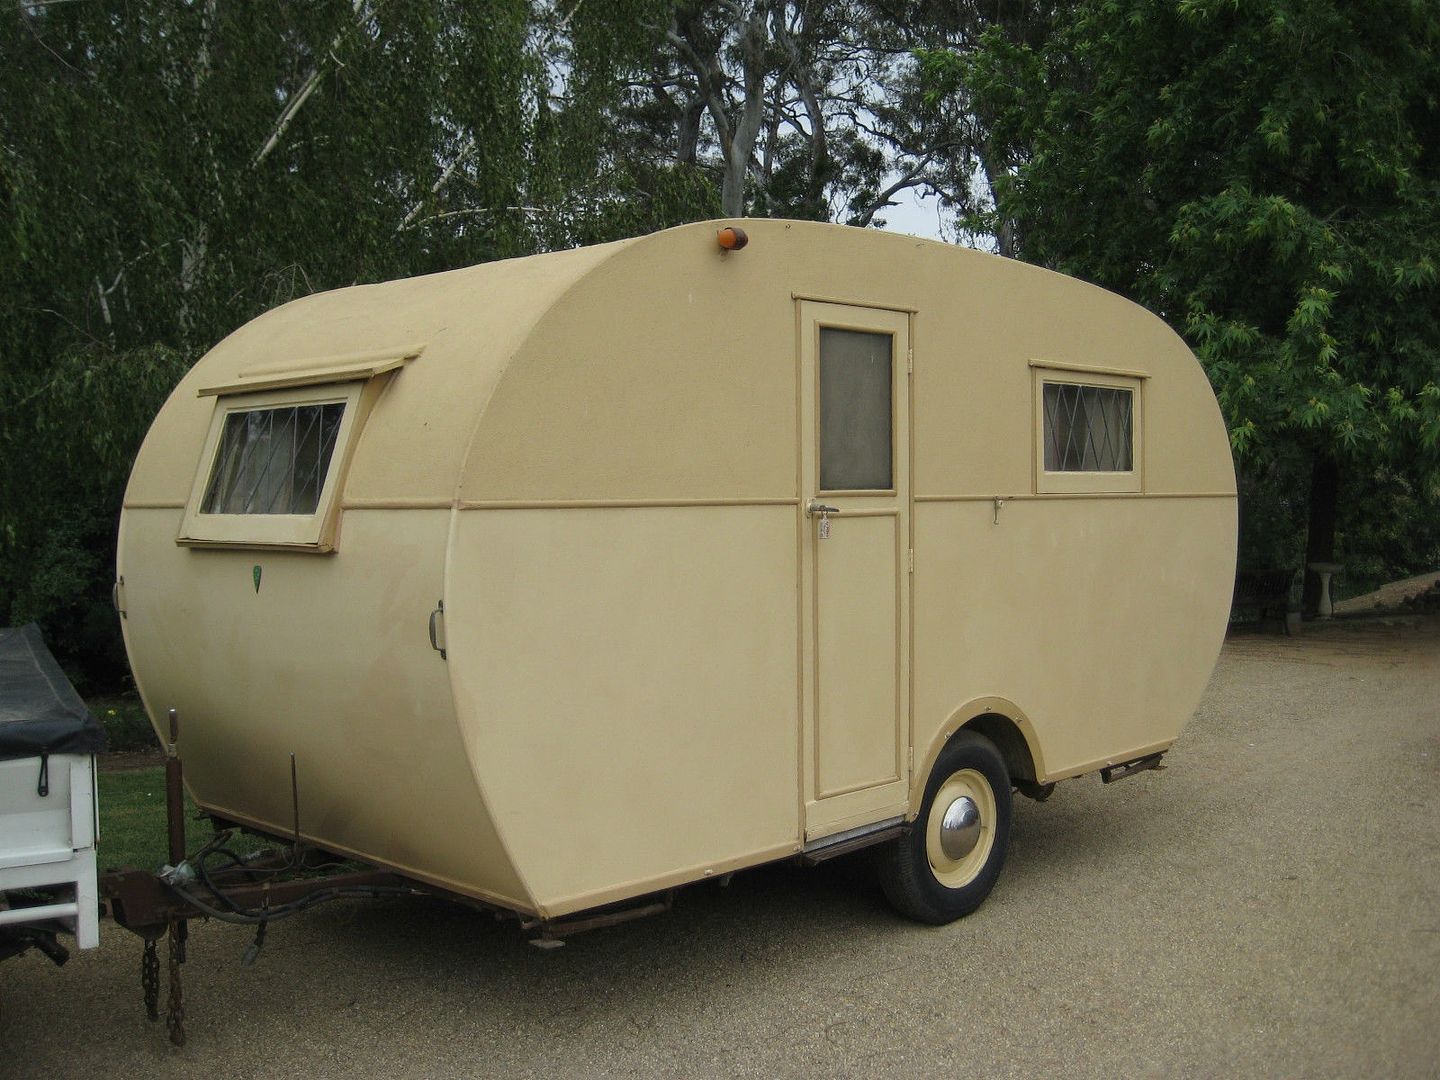 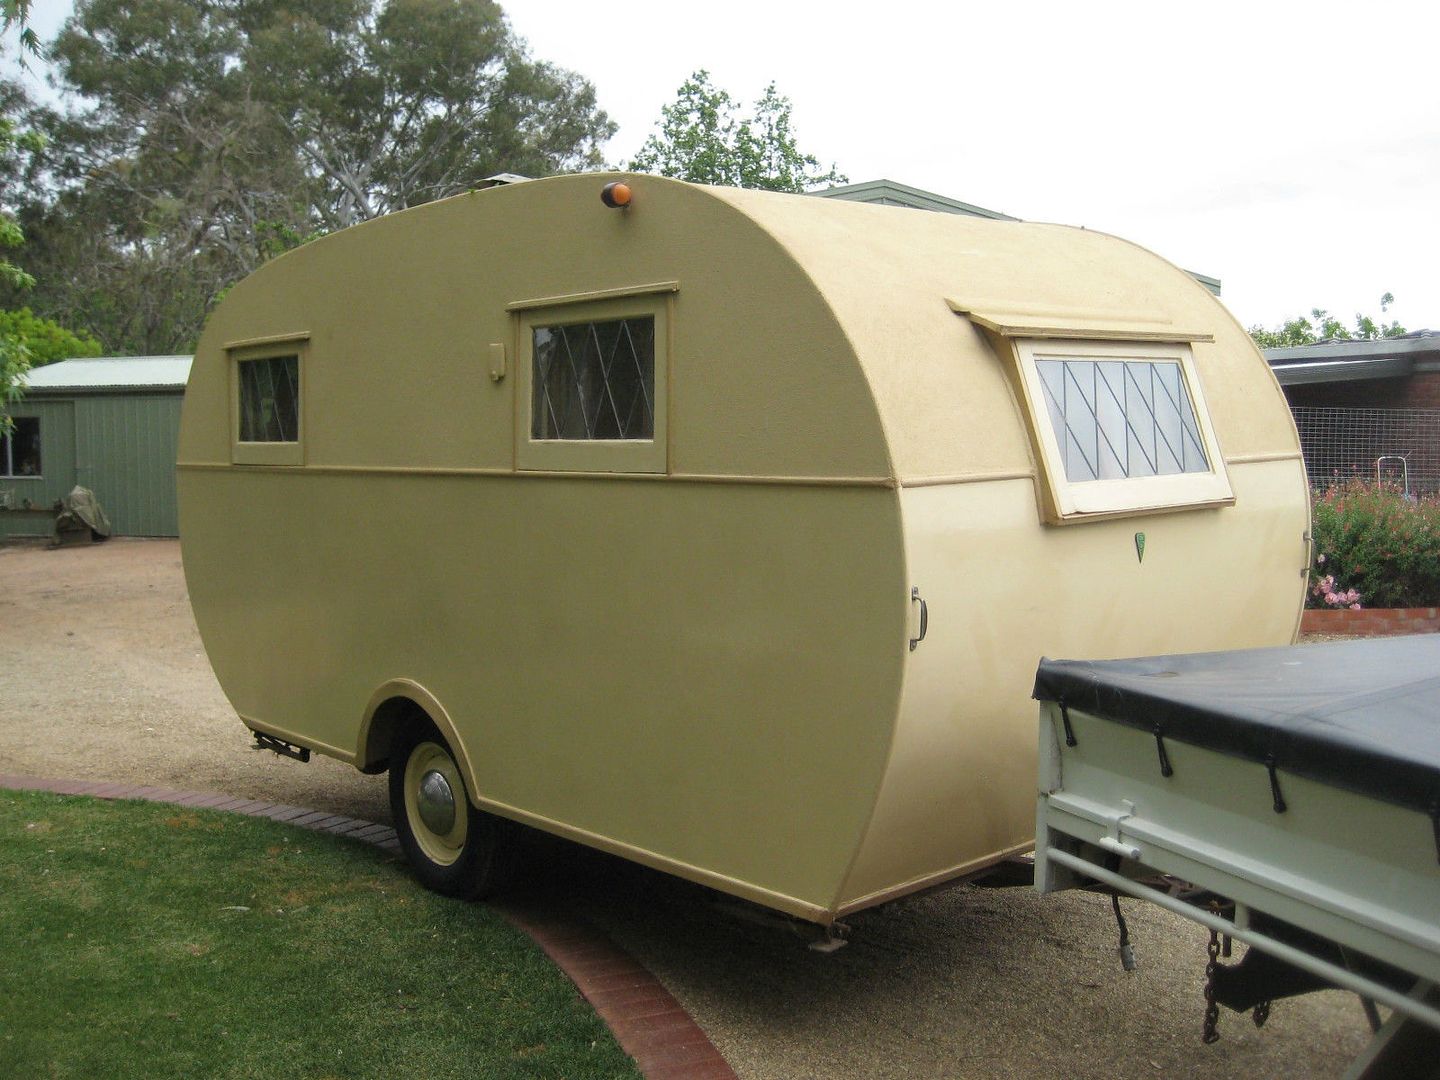 As it happens, the side lights on no 675 appear to be the same as the ones that are, or were on your 1955 van:  So you need something similar or a modern equivalent. I think Aussieute was referring to his 1957 Jennison when he commented that he didn't need side lights on the van for registration. I'm not sure how that may have happened. My reading of the 1953 and 1957/8 Victorian regulations is that side lights are definitely required for a van built in 1953 and later, unless the van is less than 7 ft wide, and no wider than the tow vehicle. But maybe that says something about the rigour of the VicRoads rego people as much as anything? all the same being the nice people they are, we wouldn't want them to change in any way would we?  Hope that helps, but if you were actually asking about clearance lights and not side lights, then the regulations I referred you to will also provide the answers I think. Don Ricardo |
|
kck
New Member
Posts: 48
|
Post by kck on Dec 3, 2018 10:25:52 GMT 10
Thank you Chris and Don,
Think the pairs I have need to some how become “heads and tails” and face forward/backward and not sit side by side flush onto the side wall of caravan.
I’ll kerp working and thinking. Again, thanks for the clarification.,
Kck
|
|
kck
New Member
Posts: 48
|
1955 Don
Jan 23, 2019 6:50:29 GMT 10
via mobile
Post by kck on Jan 23, 2019 6:50:29 GMT 10
Hello again,
I’m temporarily fitting the windows back in for size (pre paint). Good job I did too. Some adjustments necessary. To fit the Leadlight panels back in.
Question.
The three windows on the two sides open and close.
The two windows, front and back are fixed.
Has this always been the case?
I’m seeing other Don’s with opening windows front and back.
Interior complete. Looks amazing.
About to paint exterior.
Wiring still to be completed.
Definitely at the pointy end.
Still have not found an affordable option for a replacement water tank.
Cheers for now
|
|
kck
New Member
Posts: 48
|
1955 Don
Jan 25, 2019 7:51:43 GMT 10
via mobile
Post by kck on Jan 25, 2019 7:51:43 GMT 10
One step forward, two steps backwards.
What’s the go with the ice chest?
What’s the best I can expect from it?
It looks nice, I’ll give it that.
|
|
|
|
Post by Don Ricardo on Jan 25, 2019 19:26:11 GMT 10
Hi KCK,
Great to hear that the internal painting has been done, and that you are pleased with the way it looks. I’m looking forward to seeing your van.
The answer to your question about the windows is that the way you have described them is correct for your model van - the 120 4-berth model. It has the two bunks at the front and a small non-opening front window.
In contrast, the 10 ft, 100 2-berth model, and the 14 ft, 140 4-berth model had opening front windows. I think the 12 ft, 121 3-berth model also had an opening front window, but I will need to check that when I can access my files. They will be the vans with an opening front window which you have seen. The 100 model has the galley at the front, and the window provides venilation for the stove, etc. The 140 and 121 models each have a front dinette, and the larger front window on those provides ventilation and vision.
None of the leadlight model Dons had opening rear windows. I was told that Don found it too difficult to get opening rear windows to be dustproof, and therefore decided to make them fixed windows. Don only introduced opening rear windows in the post-1956 models with aluminium framed windows.
Regarding the icebox, when it was possible to get block ice, our icebox used to last 2 to 3 days on one block of ice in summer, depending on the temperature. However, we found that crushed ice - once we could no longer get block ice - was pretty useless. It lasted a day or less.
A few people on the forum freeze water in ice cream tubs to make blocks of ice before they leave home, and have said that they last pretty well over a weekend. So that is worth a try. Whether that works well enough for you depends on how you intend to use your van and the over what length of period.
Hope that helps,
Don Ricardo
|
|
|
|
Post by Roehm3108 on Jan 25, 2019 20:35:51 GMT 10
kck, further to DonR's comments, you will find that a lot of vv'ers have some sort of portable fridge to keep things cold. In past vans, I found ice boxes made good bread boxes!!  |
|


 . I'm pretty sure the smell comes from the resins in the ply, so I paint every bit of bare ply, in the cupboards, under the seats to try & combat what we call "The Don Smell". 'Fragrance' sounds better thanks Don Ricardo.