|
|
Post by Observatory on Mar 17, 2015 13:11:35 GMT 10
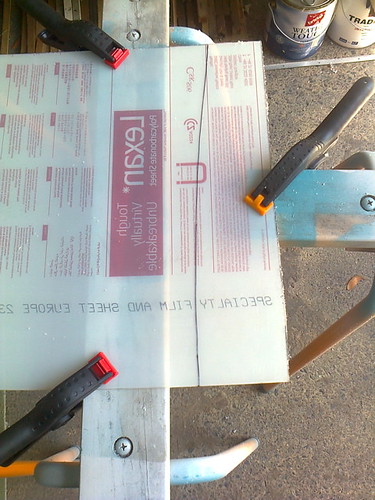
Cutting out wrap around windows (2mm polycarbonate/Lexen sheet): - cut using a jigsaw with metal blade on the slowest speed.
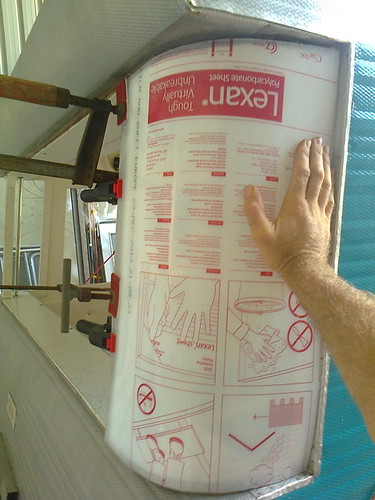
- Test fitting the new window - figuring out how to clamp it in place for attaching.
This one is super tricky.  There's quite a bit of force in the flexed window which I'm worried the small screws won't hold. Suggestions welcome. There's quite a bit of force in the flexed window which I'm worried the small screws won't hold. Suggestions welcome.  ??? ???
  |
|
|
|
Post by shesgotthelook on Mar 17, 2015 13:22:54 GMT 10
|
|
|
|
Post by DC3Td on Mar 17, 2015 16:31:19 GMT 10
Gday Pete.Coming along in leaps & bounds now.I would have thought at least 5mm window thickness.Guess materials have improved since i last used them jigsawing perspex/lexen,steam bending signs for w estfields/ reuben f s carff/b est & l ess & installing across Oz.Cloth straps might have helped in holding the shape.Three lengths about an 1" wide- leaving a tail of around 2 - 3" inside the right side (where your hand is in pic)tacked in place & pulled taut across face of the lexen to where the clamps are & again tacked in place.Once silicone is set & window is firm in its shape neatly cut the cloth straps.The only residule of the cloth straps (the pieces tacked) should be totally hidden. gordon
|
|
|
|
Post by Observatory on Mar 17, 2015 19:31:50 GMT 10
Thanks SGTL (the link goes to page 3 but found it on page 2), Gordon - for the suggestions  - great info and food for thought. Might do a test experiment with a heat gun on some polycarbonate off-cut; to see how far it can be pushed before bubbling. The silicone I'm using has excellent adhesion properties and should cope with dual purpose (i.e. as a glue and sealant.) Pity I lent my rratchet straps to a mate.. they'd be handy for what you're suggesting Gordon. BTW You sure have done some interesting occupations Gordon.  Shall mull over these options and gradually form a plan. Kind regards, Pete |
|
|
|
Post by Franklin1 on Mar 17, 2015 20:24:50 GMT 10
G'day Pete, I'll give you a couple of links to threads on the Classic Caravans forum, relating to replacing the curved windows on Viscounts. In this first link, he talked about making a timber jig that was clamped to both sides of the perspex/lexan: Link #1In the second link, a fella talks about a mould he made, including photos. Read from the linked post down to the bottom of the page: Link #2It would seem there are a few different ways of achieving what you want to do.  cheers, Al. |
|
|
|
Post by DC3Td on Mar 17, 2015 23:07:44 GMT 10
|
|
|
|
Post by Observatory on Mar 18, 2015 14:35:18 GMT 10
Thanks Al and Gordon... Liking the second link which has the photos of the made up "form" to mould the new window (courtesy of "Arms" on the classic forum). So I went out and got a heat gun to do a test bend on some off-cut lexan and the results are promising. Okay so the plan is: make up a "form" using old window as template, then use a heat gun to get the lexan to take the shape and clamp into place to cool. Fingers crossed.  Shall keep you posted. Kind regards, Pete |
|
|
|
Post by Observatory on Mar 19, 2015 9:57:46 GMT 10
|
|
|
|
Post by Observatory on Mar 20, 2015 12:00:53 GMT 10
After a few failed attempts  (pic above ^^^) at drape forming polycarbonate I've decided it's time to change tact. The main problems were the uneven heat of the heat gun causing unwanted warping and occasional bubbling. Spoke to a technical representative at Sabic Lexan Australia who was very helpful with information. He explained that using a heat gun was extremely difficult due to having to maintain such a high even temperature (i.e. around 130 C). Lexan also cools very quickly; losing its malleability. He suggested an oven was a better alternative because it's a soaking more even heat. I also asked about working with perspex/acrylic. He said it's less difficult to work with due to the lower heat needed to stay malleable (i.e. around 80 C). But still, an oven achieves much better results. So... back to the original plan: to cold bend the window and screw into place. - Pre-drill the lexan with oversized holes and file smooth to help prevent cracks.
- Use the original j-mould (acts like a big long washer) to evenly distribute the pressure onto the lexan and fasten with the dome head screws only.
He said don't use the little counter-sunk screws that were originally used under the j-mould; as they would most likely cause cracks down the track (which indeed they did). That's it - back to work.  |
|
|
|
Post by Observatory on Mar 23, 2015 10:20:39 GMT 10
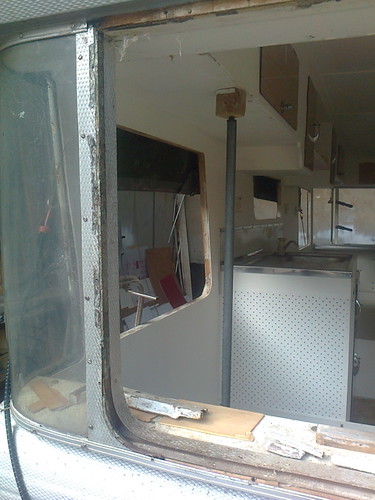
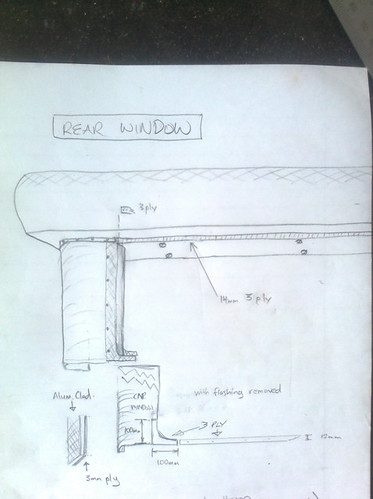
Mapping front window for rear window reassembly: - mapping the front window for sealant placement, hardware etc on back window.
- 3 ply - 3mm chocks are wedged between the front window and the wrap around window flashing (to make the window sit flush over the wrap arounds).
  |
|
|
|
Post by DC3Td on Mar 23, 2015 18:31:27 GMT 10
Thought you were drawing a treasure map at first.Was looking for where the beer might be hidden.Doing well Pete.
|
|
|
|
Post by Observatory on Mar 24, 2015 12:37:34 GMT 10
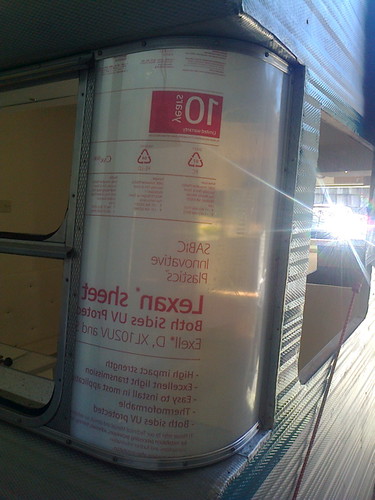
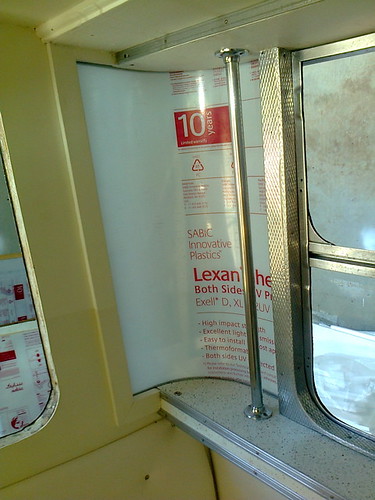
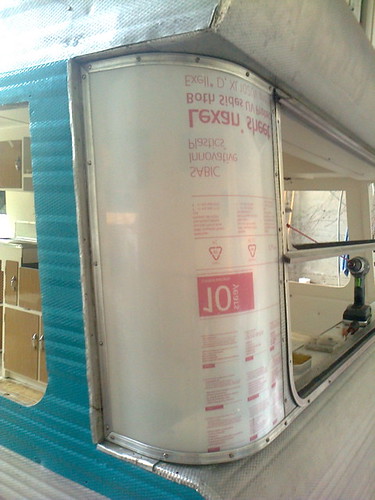
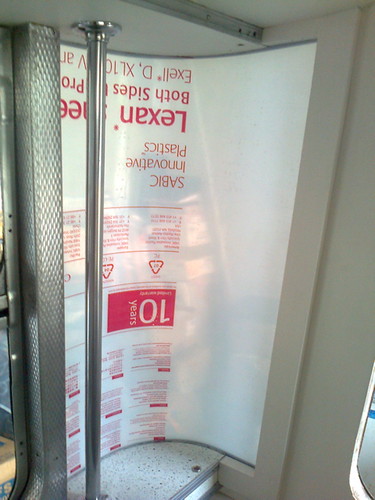
Wrap around window test fitting: PROCESS - wedged the lexan under the lip of the back window
- flexed it into place and marked the 5 screw holes of the front/vert j-mould (kudos to trusty off-sider)
- removed the lexan to drill holes; then attached with vert/j-mould using 5 screws
- marked the rest of the curvy j-mould and flashing holes; removed to drill the remaining holes
- screwed it in with all the j-moulds and flashing attached
NOTE: lexan holes all pre-drilled, over-sized and filed smooth (to prevent the screws grabbing and cracking the holes).
    |
|
|
|
Post by Observatory on Mar 26, 2015 14:37:27 GMT 10
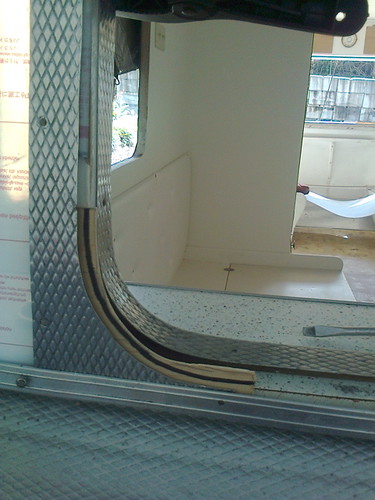
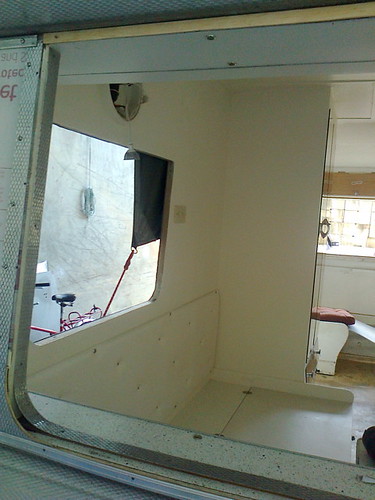
Rear window mounting (i.e. padding up the faces with 3mm ply to make them flush with the wrap arounds): - wedged 3mm ply (100mmx100mm) on the bottom window corners - between the flashing and window bed (shaped with flap wheel on angle grinder)
- made 15mm wide strips for along the top and bottom perimeters.
  EDIT: 27/3/15 Re-pinned the trim around the inside of the rear window because the 3mm ply that I added creating a 3mm gap  Of course nobody in this forum has ever fixed the same thing twice, three times.. ah who's counting  Now done in the right order  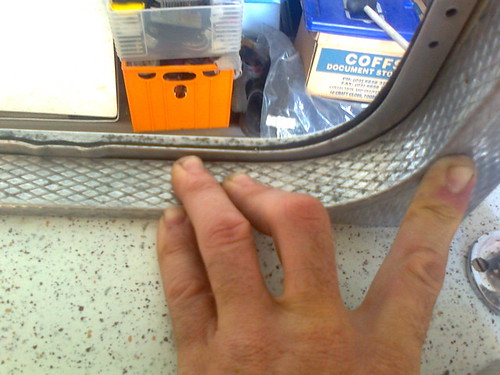 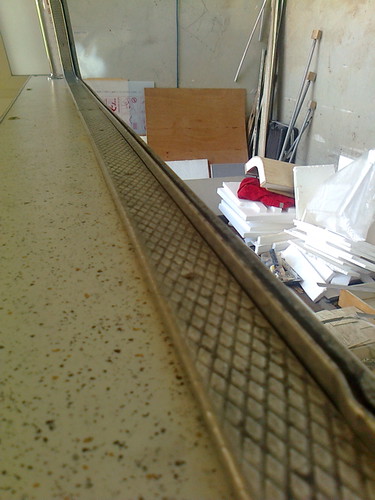 |
|
|
|
Post by Observatory on Mar 31, 2015 10:18:31 GMT 10
Window sealing - some investigating. These windows mounts were originally put together like wafer biscuits; creating a minefield of possible sealant failure points. - showing the use of original d-mastic sealant (now like flaky paint); showing 3mm ply spacer with a layer of d-mastic behind and in front of it.
- other side showing weak point where dry wrot has eaten the top window frame - between the perspex wrap around and 3 ply spacer.
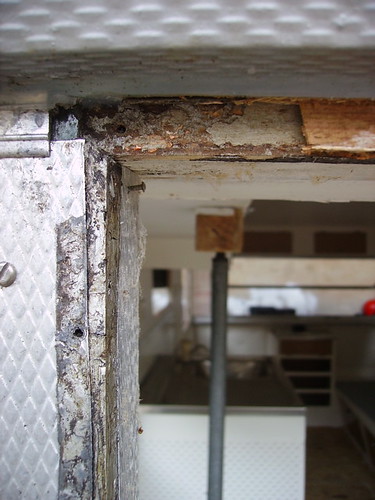 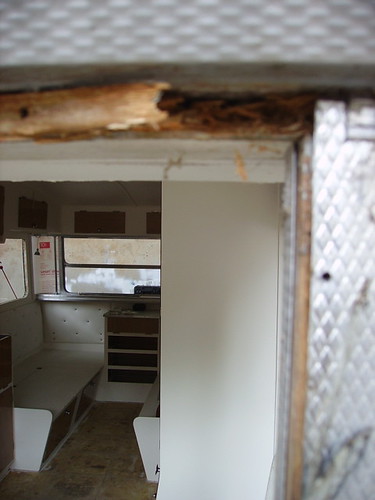 |
|
|
|
Post by Observatory on Apr 8, 2015 11:12:28 GMT 10
Roof cladding - join surfaces prepping: - Blue strip disc getting rid of old sealant
- stripped back to bare wood ready for sealant
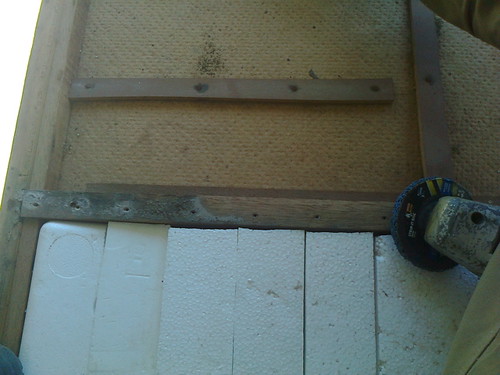 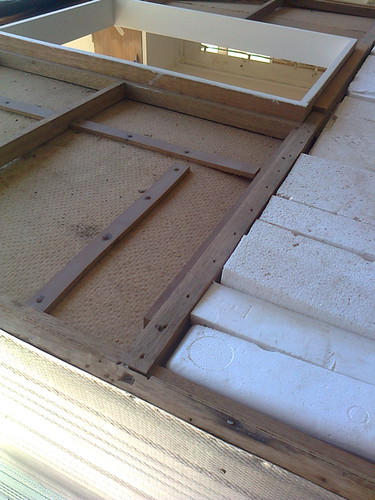
|
|
|
|
Post by DC3Td on Apr 8, 2015 17:16:53 GMT 10
Gday Pete.Now this is merely an Observatory moment - do you like that? - a couple of drop sheets ala the big green shed or such like taped over the roof with enough side overhang as well as around the hatch perimeter which in the event of any roof leaks after its all been screwed/popped will take the water away or the very least stop it from sitting on the ceiling top. gordon
|
|
|
|
Post by Observatory on Apr 9, 2015 9:49:43 GMT 10
Taking your Observationary idea on board Gordon  I'm not quite sure what I'd fear the most: a leak through my newly painted ceiling or the creation of an overhead, penthouse lap pool.  I'm hoping that if I do the right prep work and seal the joins with sealant in the same places it was originally, then I stand some chance of making it water tight (for a while). Being a newby though means I'm doing lots of detective work and planning, to make the sealing effective and in the right places. Cheers, Pete |
|
|
|
Post by Franklin1 on Apr 9, 2015 12:02:47 GMT 10
G'day Pete,
"Sealing" is the one part of caravan restoration that will make or break you in the end. I used 28 cartridges of sealant around the (Classic) Millard poptop I restored five years ago, and I still ended up with a leak in one spot in the front corner, but I couldn't work out where the water was actually getting in. I ended up having to run another bead of sealant along the edge of the cover moulding to try and stop it happening. It was SO frustrating after all the care and attention I had put into the project. There's an old saying, "if you are not wasting one in every four cartridges of sealant when you're applying it, then you're not using enough!" I certainly had sealant oozing out all over the place when I was refitting mouldings and window frames back into the van, but just the one spot apparently wasn't done properly.
I think an important thing to concentrate on getting sealed properly is all the screw holes. And that means not only putting sealant between the moulding and the cladding, but also pumping sealant around and into each screw hole so the screw head is sealed when it is screwed down.
I've got a late model (1992) Windsor van in the front yard, and a couple of years ago after a rainy period, I went into the van to discover one of the overhead cupboards was flooded with water. When I climbed up to inspect the roof, I found the TINIEST gap in the sealant where the edge moulding had a join in it up on the roof. The profile of the roof cladding was such that the water puddled and ran to exactly that spot and then siphoned down into the roof cavity and into the cupboard. And it only took a SMIDGE of sealant to plug the gap and eliminate the problem.
What I'm trying to illustrate is that you only need one "pinhole" to ruin all the hard work you've put into the van.
cheers,
Al.
|
|
|
|
Post by Observatory on Apr 9, 2015 13:16:27 GMT 10
Thanks for the heads up Al - one pinhole - aargh.  One thing seems for sure: every van will leak eventually, so we owners best love maintenance. Pete |
|
|
|
Post by Observatory on Apr 13, 2015 15:52:38 GMT 10
Attaching roof cladding for alignment and more insulation: - screwed in at each corner for alignment (using old screw holes)
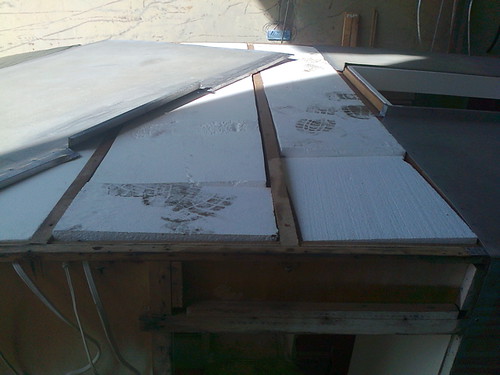
- more insulation
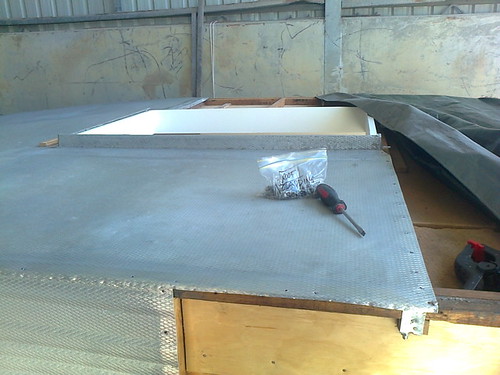 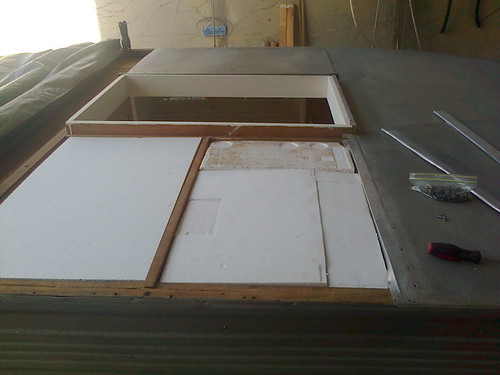
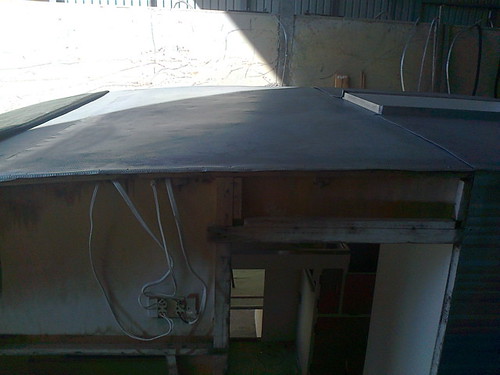
EDIT: 14/4/15 ....more insulation; temporarily fitting the cladding to check new hatch alignment etc.
  |
|
|
|
Post by shesgotthelook on Apr 13, 2015 17:36:19 GMT 10
Are you putting a waterproof sealing tape under your roof joins?
|
|
|
|
Post by Observatory on Apr 13, 2015 20:33:26 GMT 10
Hi SGTL, yes the sealant between the wood frame and roof cladding. I do intend to put sealant in this area as it was originally; but still researching all this sealing business. Researched a lot (months) on the net forums/sites, trying to weigh up all the pros and cons of butyl mastic and silicone NC (neutral cure)... (not looking at sikaflex due to the difficulty in getting it apart later on). Opinion on the forum seems to generally lean toward butyl mastic for vintage alum, but still considering both at this stage. I had sealed (with silicone NC) the top outer wooden ridge - under the rear roof cladding panel; (which I had to undo to fit the side cladding under it) and found the adhesion very good - to both the wood and alum. Also wasn't too difficult to clean up the surfaces for resealing. Anyways, keeping my mind open - can you tell me where you got the sealing tape that you used? Thanks in advance  Pete EDIT 14/4/15: Also considering Denso tape for the wood frame to roof cladding joins at the roof perimeter and battens. |
|
|
|
Post by shesgotthelook on Apr 13, 2015 20:48:12 GMT 10
The sealing tape I used on my Viscount was 'denso tape' which was very good & easy to work with, BUT when I purchased more of the same name for later projects, I received a completely different product  It was very sticky, difficult to work with & I notice it is sort of weeping on my bondwood Phoenix. The original lot looked like a roll of licorice whereas the later stuff more like a gelatinous chewing gum. Sorry I cannot be more helpful  vintagecaravans.proboards.com/thread/13199/sealing-edges-bondwood vintagecaravans.proboards.com/thread/13199/sealing-edges-bondwood |
|
|
|
Post by Observatory on Apr 15, 2015 12:18:15 GMT 10
Observatory did a 180: - now ready for the front end dismantle/rebuild. (reason for move; front end a bit more protected from the elements)
 |
|
|
|
Post by Observatory on Apr 16, 2015 13:12:35 GMT 10
Front window frame dismantle: - Diagram for making new frame (still a couple more measurements to make)
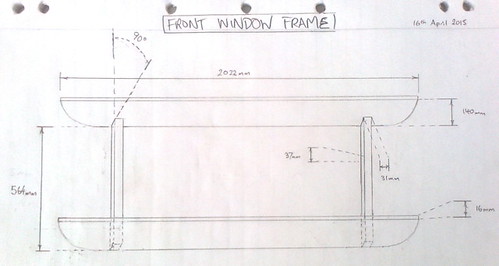 - Stripped back view
- A single exposed escutcheon pin (photo)-(was pinned into the wrap around window frame) reveals a clue; the pin is sandwiched by the edge of the shelf - thus the lower cladding panel was put on before the window frame.
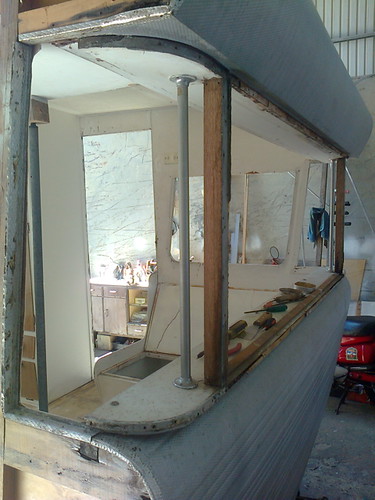  Further more, the side cladding is sandwiched under i.e. lapped over by the front/back/roof cladding - suggesting the side cladding was done first - then the ends and roof cladding. |
|