|
|
Post by DC3Td on Jan 27, 2015 14:43:03 GMT 10
Pretty smart idea Pete. Sure you weren`t a sparky in another life? gordon
|
|
leeron
Junior Member
  1966 Viscount Duralvan 14' 6
Posts: 69 
|
Post by leeron on Jan 27, 2015 15:41:06 GMT 10
Love the progress photos Pete,
Great craftwork and perseverance. Although mine is a duralvan whith an alloy frame she is identical in so many ways! Recently had to replace all the floor pop rivets as they had all fractured between the frame and the ply.And finally found a glass wedge seal I was happy with. (Pending delivery from the uk)
Will you be staying with butyl mastic or silicone with the resealing?
Leon
|
|
|
|
Post by Observatory on Jan 28, 2015 9:08:53 GMT 10
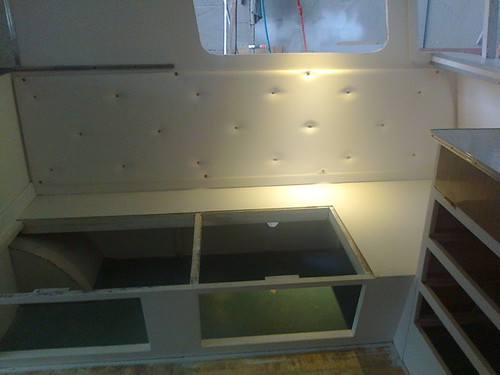
Alas, a sparky I was not Gordon... trick of all trades and master of none perhaps  Going for silicon for the reseal Leon (although still a little way off in the order of events). Reason for silicon - a local van repair company that has been in the trade for 30 odd years has gone through the whole demastic/silicon/polyurethane(sikaflex) cycle and has been using just 680 silicon now for over 10 years and swears by it for it's sealing and workability properties. Oh - and I get it for under $10 a tube  Thanks for your interest.. and yes I had to do the pop rivet replacement thing as well - although I went for metal screws (a forum tip - another cheque for Gordon  ) pulled the ply floor very snug into the chassis. Cheers , Pete - Back rest refitted while the cladding's off - easy to find solid wood to screw into.
 |
|
|
|
Post by viscountofmydomain on Jan 28, 2015 9:24:01 GMT 10
Thanks for your interest.. and yes I had to do the pop rivet replacement thing as well - although I went for metal screws (a forum tip - sorry name alludes me); pulled the ply floor very snug into the chassis. Hi Pete, Our van is showing signs of needing the floor rivets replaced, some are missing and we can hear the sound of the floor board tapping against the chassis below as we walk over it. I have procrastinated so far because the existing rivets look to be sitting proud of the floor board causing a bump under the tiles. Could you possibly put up a picture of the screws you used and what they look like when installed? Thanks Stu |
|
|
|
Post by Observatory on Jan 28, 2015 12:08:53 GMT 10
Hey Stu, Have a look here: tek screw . Should be what you're looking for (this is page 2 of my reno thread). Good luck with it. Just be aware that some pop rivets are under the cabinetry which of course won't be coming out in a hurry. Cheers, Pete |
|
|
|
Post by viscountofmydomain on Jan 28, 2015 12:21:35 GMT 10
Hi Pete,
Thanks for the link, I had read your thread from the start a while back but had forgotten that you mentioned them previously. You are compiling a great lot of information. Well done.
I like your idea of starting a new hole and filling in the old. Our project is nowhere near the extent of yours, I am just fixing small things as they arise with a cleanup inside and out. We have an aluminium frame and thankfully we don't have any rot in the linings.
Cheers
Stu
|
|
|
|
Post by Observatory on Jan 29, 2015 13:16:29 GMT 10
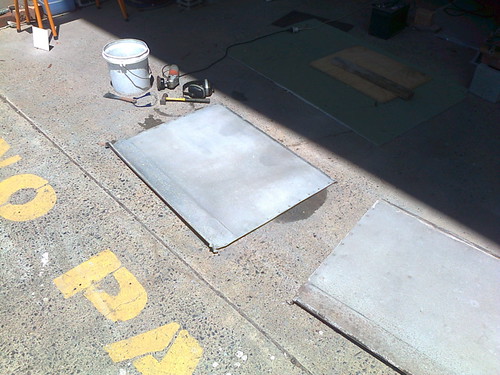
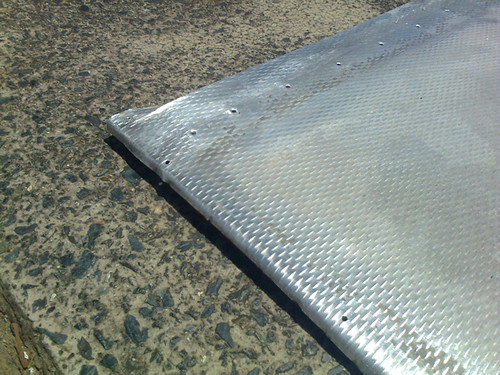
Roof cladding - prepping: - Wire brush with the angle grinder for clean joins.
- Join surfaces prepped.
  |
|
|
|
Post by Observatory on Feb 3, 2015 19:06:07 GMT 10
|
|
|
|
Post by DC3Td on Feb 3, 2015 20:03:33 GMT 10
Gday Pete.Ah,cleaning hinges.Fidly but can be therapeutic if a nice cold beers at hand.Now these hinges & i guess much any other items may over time start to show a patina(surface rust).A few products out there like clearcoat which may yellow over time but you could try crc 3-36 (note the number)as they have a series of products with some doing the same job but this particular one has an outstanding lasting effect.Once all cupboards are refitted just dab a little on a rag & gently wipe over the hinges.You barely need much to use.As an example/test grab a piece of scrap metal/steel,wipe half of it with the 3-36 then leave the scrap out in the open to the elements.See what you think after 3 months. gordon
|
|
|
|
Post by Observatory on Feb 5, 2015 11:16:16 GMT 10
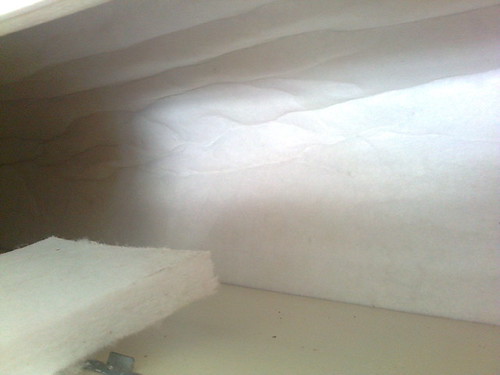
Stuffing and scraping: - found a use for some scrap partitioning; inside the end overhead cabinets (the scrap had carpet on it that I removed).
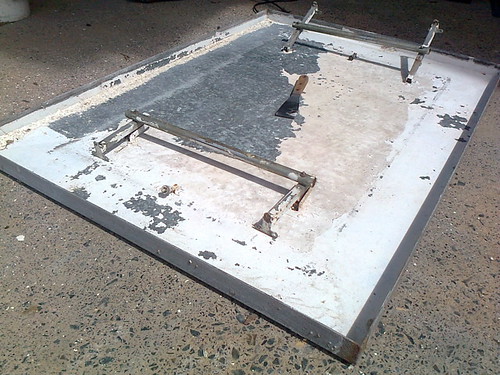
- scraping the flakey paint off the hatch (trying not to scratch the gal surface)
Thanks Gordon for the tip on CRC 3-36. I owe you a deposit to the beer economy for that one 
  |
|
|
|
Post by Observatory on Feb 10, 2015 14:18:06 GMT 10
|
|
|
|
Post by Observatory on Feb 13, 2015 8:02:47 GMT 10
|
|
|
|
Post by Observatory on Feb 18, 2015 9:54:28 GMT 10
|
|
|
|
Post by mibosa on Feb 18, 2015 18:42:57 GMT 10
Well Pete, I went to the dump three times last month and I didn't see the project-saving pile of polystyrene foam. I might have to end up using the normal insulation from Bunnings, but unfortunately that will add a bit of weight to the van. Knowing my luck that once I have finished that task I will see it on Gumtree or on the side of the road being given away!
Your van is looking good and I am watching closely as mine is very similar to yours.
Regards, Bob.
|
|
|
|
Post by DC3Td on Feb 18, 2015 19:57:29 GMT 10
Gday Bob.Most fruit shops throw out their poly fruit/vege boxes.Likewise shopping centres as well as the big markets.You dont need to collect the boxes - just the lids.
|
|
|
|
Post by mibosa on Feb 18, 2015 20:03:55 GMT 10
Hi DC3Td. That is a good idea. I was just hoping to find the nice neatly cut, right thickness, pieces of foam as seen in Pete's photos. But yes, you are right, It is just a matter of sourcing all the odd bits and making the most out of them. Thanks for that idea. I actually have a seafood shop around the corner that has stacks of them, they probably can't be bothered dumping them and I might actually do them a favour by taking them if I asked nicely! Regards, Bob.
|
|
|
|
Post by Observatory on Feb 18, 2015 20:04:51 GMT 10
Hi Bob, Sorry to hear it's slim pickings at your tip. We're lucky we got a recycle section before the entry of our tip, with a cage just for foam; that I fish out bits of with a knife on the end of a long stick  .... BTW old broccoli boxes work pretty good too. Good luck with it. Thanks for your kind comments Bob - I'll keep posting pics 'till she's done. Cheers, Pete |
|
|
|
Post by mibosa on Feb 18, 2015 21:46:44 GMT 10
Years ago I noticed Asian tourists throughout the world taking multiple photographs on their travels with their new digital cameras. I, and many others thought it strange, but then I bought a digital camera! Now when I go on a lengthy holiday I take hundreds, if not thousands of photographs, and can now understand the attraction of photographing 'everything'. I am doing the same with my renno and I have commenced a Flickr site and have nominated a few interested people, but I am not sure what they are viewing from their end. I am photographing before, during and after shots for my own reference, and it might be interesting for a very small audience but I don't think it would be for all our members plus the untold amount of guests that view this forum but don't join up. I'd like to do what you have done but just wouldn't know what photographs to show and not show. So, I will just watch what you produce on this forum and learn from you and the other experts. Regards, Bob.
|
|
|
|
Post by Observatory on Feb 20, 2015 13:33:16 GMT 10
Start of deconstructing the front end: - No spirit level needed to see this shelf has gone out.
- Front window internal J-moulds - you can just make out the original engraved letters: F.T. F.C. F.B. (i.e. front top; front centre; front bottom) The same system was on the back end. (i.e. B.T. B.C. B.B.)
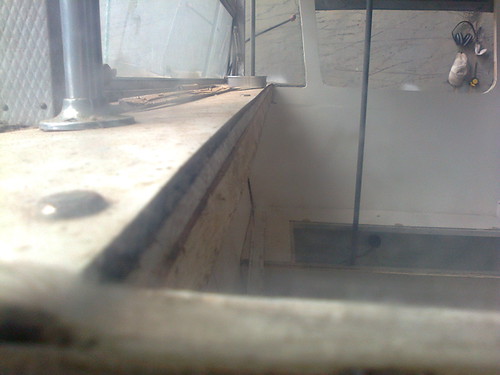 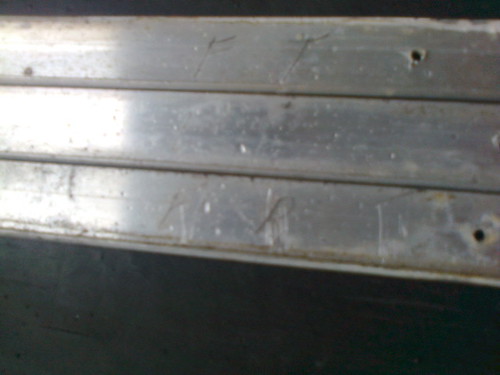 |
|
|
|
Post by DC3Td on Feb 20, 2015 16:30:57 GMT 10
Gday Pete.Just hope you dont see RBT somewhere while downing 'spirit levels'.I would think that its getting easier now the majority of hard yards have been tackled. gordon
|
|
|
|
Post by Observatory on Feb 23, 2015 10:21:45 GMT 10
Hi Gordon, Trying to show a good example for the kiddies with responsible spirit consumption. (not this >>>)  The tricky bit in this front end is going to be replacing the 4mm structural ply panel (i.e. getting a tight bend under the front window shelf - about 120mm radius). I've searched a bit and I think "bendy" ply in 5mm might be the way to go - of course, keen to know what others think? Cheers, Pete |
|
|
|
Post by DC3Td on Feb 23, 2015 17:14:43 GMT 10
Sounds good to me Pete.Should be able to 'humour' the extra 1mm into the scheme of things.
|
|
|
|
Post by Observatory on Mar 5, 2015 10:40:30 GMT 10
Look what arrived in the mail today.... A sample of their "bendy ply" which takes the 120mm radius with ease. I'll be getting the 5mm thickness with the side to side bend or long grain (also comes in end to end bend or short grain). 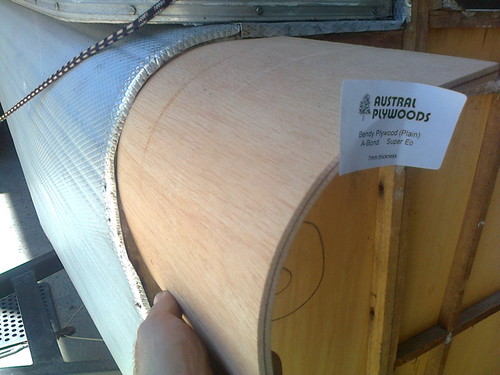 |
|
|
|
Post by Observatory on Mar 11, 2015 12:33:30 GMT 10
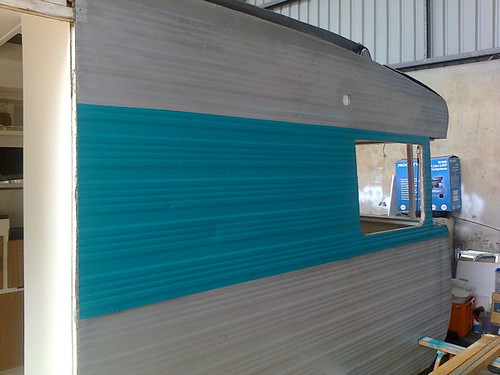
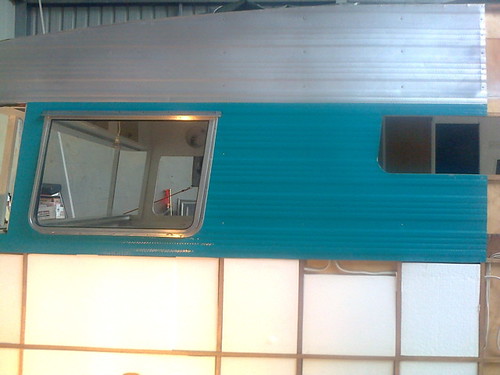
Refitting the rear side cladding - with new "turquoise" stripe. - used 2 pack enamel undercoat/primer then 2 pack enamel top coat - applied with spray gun.
- FR 13/3/15 other side refitted
  |
|
|
|
Post by Observatory on Mar 16, 2015 13:50:20 GMT 10
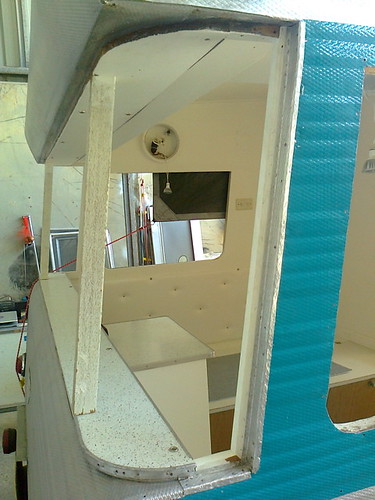
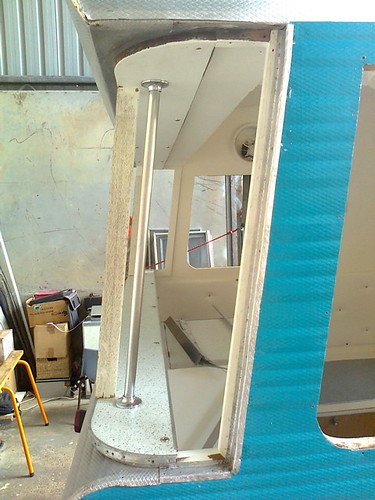
Preparing for making wrap around windows. - side/rear cladding stapled at perimeter; plus wrap around flashing nailed and silicone in the lap joint
- window support rods screwed in
  |
|