Deleted
Deleted Member
Posts: 0
|
Post by Deleted on Feb 13, 2006 23:14:43 GMT 10
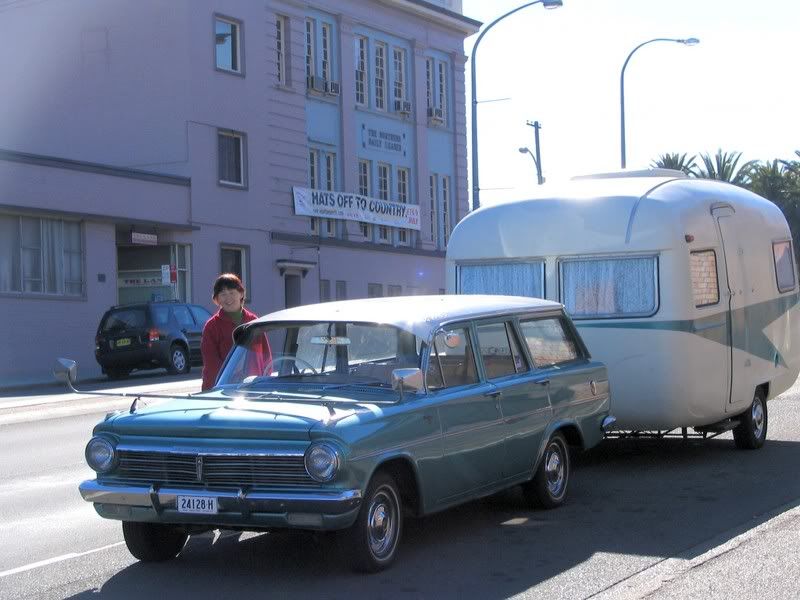
I'm about to undertake the restoration of a Don caravan: vintagecaravans.proboards30.com/index.cgi?board=photo&action=display&thread=1104763414From reading posts on this forum, different people use different methods of paint stripping. The old "Don" has the usual several layers of old paint, and I would like to strip it right back to repaint. Reddo has given me some excellent tips on repainting my old masonite van in enamel, and I'll probably paint the "Don" in enamel as well, but what do we think is the best method of paint stipping  I used a heat gun on my masonite van, coz the sanding disc cut into the masonite (masonite is a "soft" timber) and damaged it......the heat gun was good, but it took hours ... & hours .... & hours, then I had to still rub it back to get a smooth finish for the undercoat. Its great if you've got a hundred spare hours ....  I haven't used paint stripper before on a ply van, but have used it on an ali van (patterned ali), but it was very time consuming. So, for "The DON" what should I do Paint stripper? If so, whats the best product? Heat gun? (I'll need my long service leave :  OR .....sanding disc, if so, what type of disc & what grain of paper should I use? Mark |
|
|
|
Post by belinda on Feb 15, 2006 20:12:52 GMT 10
we just chickened out and paid a house painter to do it.
cheers
Belinda
|
|
|
|
Post by cuz on Feb 15, 2006 22:40:26 GMT 10
Paint stripping requires different methods for different jobs. One major concern when using sanders on old paint is the lead content. Very dangerous if you don't use the proper protective gear. Using sanders on wooden surfaces and particularly Masonite can cause problems if the surface is damaged, marine plys have a protective coating which should not be sanded through. Heat guns will of course heat up the paint and surface giving off potentially toxic fumes. Using paint strippers are probably the most material friendly way of getting old paint off and you tend to have more control over the process without damaging the underlying surface. What it all boils down to is that there is no easy way to do this job and it is a time consuming exercise. Whatever system you use it just means that you have to take it slowly and be careful with things where your health may be at risk. Hope this could be of help. Regards Cuz  |
|
Deleted
Deleted Member
Posts: 0
|
Post by Deleted on Feb 16, 2006 15:30:40 GMT 10
thanks guys for all your input on this, especially YOU Belinda ;D ;D ..... I wondered why I had constant head spins when using the heatgun on the Masonite Van, must have been spinning out on the toxic fumes ....or was it the multiple beers I was drinkin' whilst doing the job ;D ;D But seriously, you've all bought up the "for's & againsts" of all three methods, and either way, its going to take a shitload of time  So, here's the plan ......I'm going to hit the front L H side with the trusty heat gun and go at it flat out for four hours & see how far I get, then I can roughly calculate the hours it will take to do the whole van with the heatgun .... The rear of the LH side I"m going to hire a rotary orbital sander, and see how I go with that, I like Col's description of using the orbital sander. On the inside where the cupboards have been painted with thick layers of gloss paint, I'll try stripper and see how I go with that. And thanks for all your warnings about the toxic lead paint, and toxic paint stripper. I'll keep this post updated with how I go ....I'm hoping to start this weekend. Mark |
|
Jim
New Member

Posts: 2
|
Post by Jim on Feb 19, 2006 13:09:45 GMT 10
The best product that works for me when stripping old paint and rust off large areas are the black Scotchbrite ‘Clean & Strip’ discs. (Not the purple ones, they are too rigid.)
The black ones are flexible and are an open weave so they don’t clog up.
They work very well on old weatherboards, chipboard, pine, ply and other soft surfaces as well as steel.
Use goggles and a face mask as the old paint flies off once you get going.
They are not cheap and you need the right tool to drive them, but once you have the feel of what you’re doing you’ll get through old paint very quickly and end up with a good smooth surface.
Don’t use an angle grinder to run the discs, they are too fast for these discs.
I use a two speed Hitachi 7 inch buff/polisher (1900/3400 RPM) and it works well.
Usually available at industrial supplies rather than paint suppliers or ring 3M’s customer service line on 13 6136 and they can give you the name of a supplier.
|
|
|
|
Post by humpty2 on Feb 19, 2006 13:53:04 GMT 10
|
|
|
|
Post by Mark T on Feb 27, 2006 23:10:05 GMT 10
Famous word from Cuz …..”paint stripping requires different methods for different jobs” ……how right is he  !!! I’m now one week into working on “The Don” and what a week its been, the Don was nearly advertised in the local trader last Thursday ….what a dog of a job !!! The old paint (not original) is like super glue …..it doesn’t want to part with the van easily ….an industrial strength paint stripper from Bunings refused to budge it  . I followed Col’s advise an bought a rotary orbital sander, a great little machine and easy to use  . I thought I would get away with sanding the exsisting paint to use as a base for the new paint, and spent a half day preparing the van on one one side, but the thick paint had flaked aound the windows, door and seams (beading) and had to be rubbed back to the ply in those sections. When I applied a base coat of paint to the well sanded areas, the repairs were really obvious due to the different layers of paint, so it was decided use the heat gun and strip the whole side completel ::)y. And so now the whole friggin’ van has to be stripped of paint. The exsisting paint however I think is waterbased house paint, it comes off in layers of plastic paint, I don’t believe it to be old highly toxic lead based paint from the past …..so far I’ve done a lot of stripping & sanding, and have’t felt crook  . So, I use the heatgun, then the rotary sander to get rid of excess paint & to smooth the surface ……all very time consuming, but worth it in the long run  . Mark |
|
|
|
Post by Mark T on Mar 1, 2006 23:22:46 GMT 10
The work so far, The leadlight windows have been removed (except rear), a couple of new window frames have been built, and the leadlight glass panels are being delivered to "Guildford Glass Studio" for the leadlight panels to be redone. As you can see, the paint stripping job is well underway, however I'm having real problems removing the sticky-glue-like substance left after the paint peels off: .....paint stripper refuses to budge it ..... 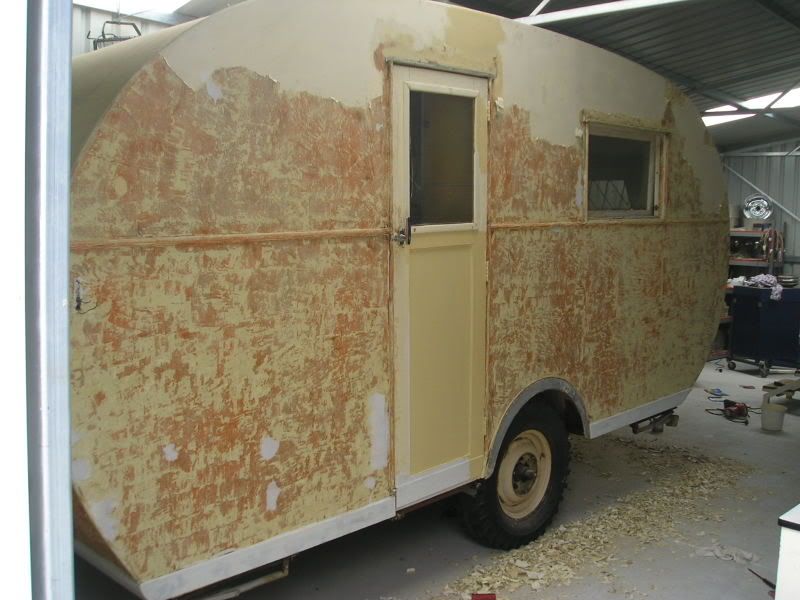 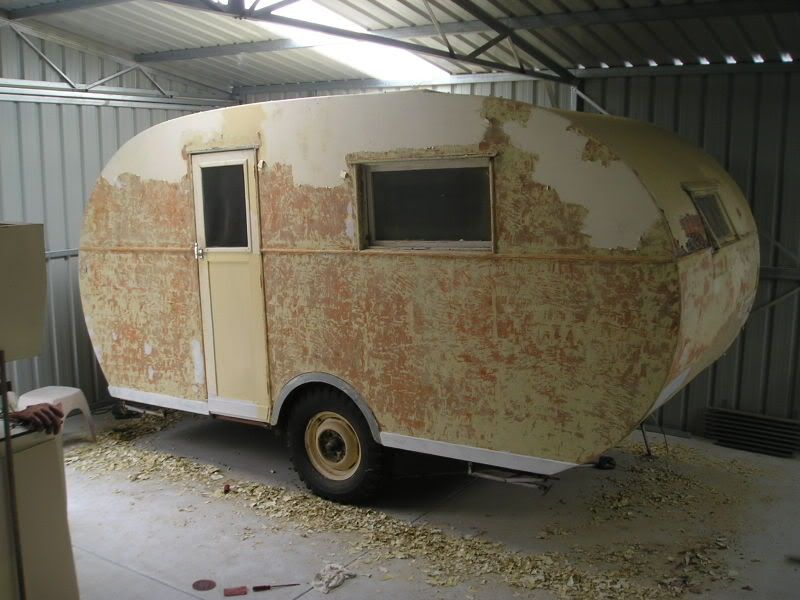 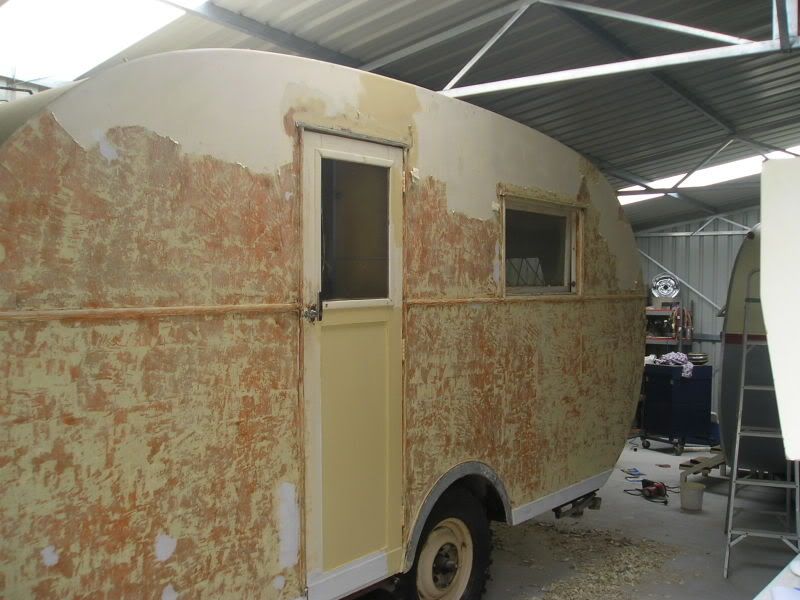  This photo is interesting .....it shows a different timber above the seam, the bottom is ply, the top is Its a horizintally lined timber, about 1.5 inched between the lines The picture also shows traces of the original "silver aluminium" colour that the roof was originally painted 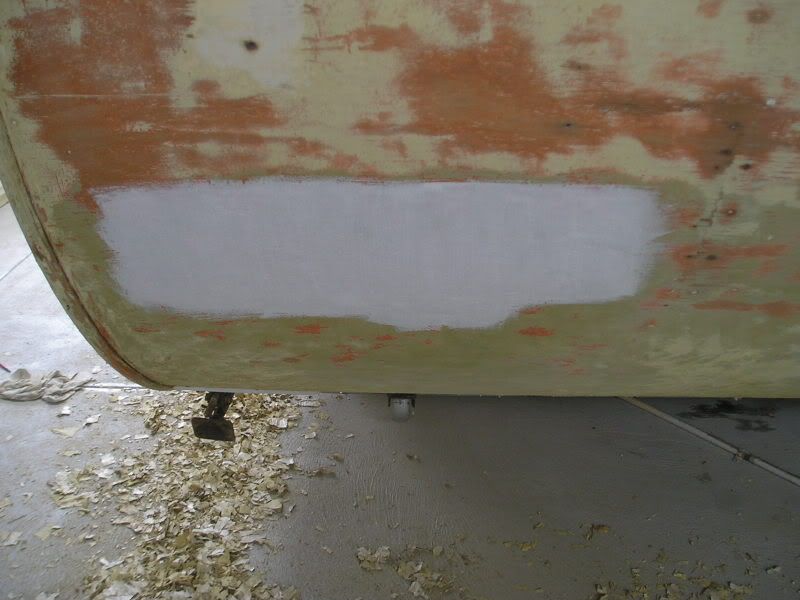 What I did here was not sand back entire panel to the ply ( as it takes forever, & is stressful on the timber), but sanded it all down to a smooth finish, then put some primer paint on .....because there is still the glue type stuff on the ply, the painted effect is the pitted look ......not good .....I have to somehow get all the glue like substance off an strip the entire van to the ply Mark |
|
|
|
Post by trodler on Mar 2, 2006 15:21:00 GMT 10
Hi Mark.
Its all hard work, but worth it in the end.
Have you tried using a small palm sander and rougher sandpaper?
The rougher sandpaper wont clog as quickly and the smaller sander will allow you to sand the painted areas without oversanding the bare ply.
Did you get my message about the lights and tap?
Cheers
Trodler.
|
|
|
|
Post by retrovan on Mar 2, 2006 18:28:18 GMT 10
Hi Mark,
A very useful addition to your random orbit sander is an industrial vacuum. I have a pretty flash sander/vac set up by Festo, and it works beautifully - there is NO dust, which is better for health, mess, finish - by preventing build-up, and extending the life of sanding discs. You've probably got other woodworking machine tools that can be hooked up to a vac too, with with benefits.
Regards, Tim (The Wayfarer gazumper)
|
|
|
|
Post by Mark T on Mar 2, 2006 22:02:53 GMT 10
thanks guys for your input ..... Trodler, I sent you a reply email with a pic of the tap ....did you receive it? Col ......I haven't tried a 90 degree scraper, but it maybe the go .....the gluey substance is really hard to shift with the normal scraper. I don't know how acrylic paint thinners would go on ply, but that too maybe worth a try ......something has to shift it .....anythings worth a try ..... Thanks for the info on the vac Retrovan, the fine dust goes everywhere ...the rotary sander does have a small dustbag, but isn't very effective. Mark |
|
Deleted
Deleted Member
Posts: 0
|
Post by Deleted on Mar 16, 2006 7:26:44 GMT 10
Hi All With all this vintage van restos going on and questions about sanding , scraping being raised i though I would copy and paste some advise given by member "Jim" in another thread . So without Jims permission here goes..... Mark, I still think you should try one of these gadgets in the picture below, along with a good respirator and eye protection equipment. Run it around 3000- 3500 RPM and it’ll work a treat on layers of old paint and whatever else is unwanted. .......... OOOOO Bugger the picture of the sanding wheel/disc didnt copy across to this thread. i was gunna quote the entire post but only wanted to include info on these discs, not the entire post............ anyway if ya still readin' this ya can see the sanding wheel under "V.Cs ... a scary obsession" thread .........Confused so am i. Jim goes on to say.......... I’ve used these discs to clean up many types of surfaces including old timber that’s been painted many times and in poor condition. If you add a Delta sander, wire brushes (flat and chisel) and some scrapers for the fiddly bits, you can breeze through 1-2 sq ft a minute to have a smooth ready to paint surface. The discs are $21 each and I’ve found they are good for roughly 1000 to 1200 sq ft on bad surfaces, as long as you don’t catch them on anything sharp. Compare that to paint stripper. I've found that old files make very good corner and crevice scrapers. Grind them flat on one side and the edges and to a long chisel edge on the other. The bigger they are the better. Sorry about the picture missing here folks but the wheels that Jim mention do a very good job and you can avoid sniffing deadly fumes from heat gun removal of lead based paint. mind you ... you still have to wear a respirator to avoid ingesting airbourne particles. Reddo |
|
|
|
Post by lisian on Mar 16, 2006 11:06:06 GMT 10
Hi Guys/ Gals,
If anyone has any trouble getting these Best Strip Discs, I carry them where I work. They come in 90mm, 115mm and 180mm and are mounted on a plastic backing pad so you can mount it on your grinder or sander. ;D
Thanks
Ian
|
|
Deleted
Deleted Member
Posts: 0
|
Post by Deleted on Mar 16, 2006 11:13:00 GMT 10
Hi Ian I use to carry them at work as well but the security mob at the gate use to upend me and make me empty my pockets before i left each day  Bugger I would have bought em back when i finished with em ..... honest i would  Reddownthepubsellingcheapdiscs |
|
Jim
New Member
Posts: 2
|
Post by Jim on Mar 20, 2006 12:17:30 GMT 10
Hi Guys/ Gals, If anyone has any trouble getting these Best Strip Discs, I carry them where I work. They come in 90mm, 115mm and 180mm and are mounted on a plastic backing pad so you can mount it on your grinder or sander. ;D Thanks Ian Ian.. From your description, I think you’re referring to the purple 3M discs. They have a stiff backing and an ‘easy mount’ that clamps in the same way you mount a cutting or grinding disc. DON’T USE the stiff backed discs to strip back paint on old vans. They are far too rigid to use on timber or soft base materials and can do damage. You need the flexibility of the plain black discs (as in the picture) on a rubber backing to cater for curves and to avoid any possibility of digging in. It’s also very important NOT to use them on an angle grinder. Angle grinders run between 6000 and 11,000 RPM, depending on the size. This speed is way too fast. As it says on the disc, 3300 is the maximum speed, and they work best at this speed. Here’s the picture Reddo wanted to pass on 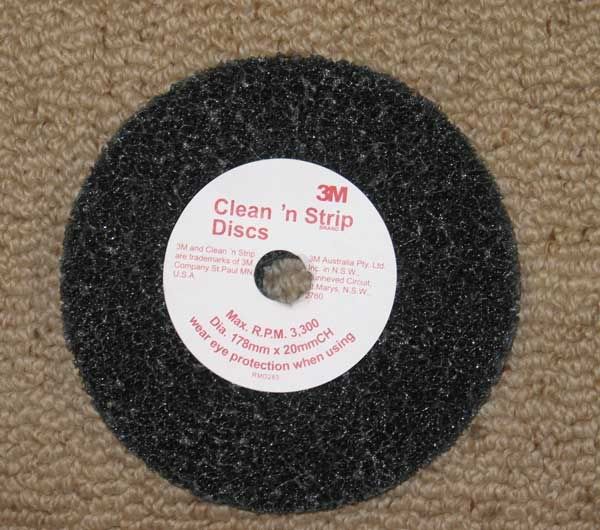 |
|
|
|
Post by lisian on Mar 20, 2006 13:26:41 GMT 10
Hi Jim,
Yes they are the hard plastic backed ones but still black not purple. I probably would only use the 180mm ones as they are designed for the sander/polishers slow speed. I may be able to keep you posted on these as I have to strip some paint to do repairs on our new van.
Thanks
Ian
|
|
|
|
Post by aussietanker on Mar 6, 2007 0:01:30 GMT 10
Hi All ... Just wanted to clarify some questions that arose from reading this post... 1. reddo and jim recommended the sanding discs pictured a few posts above for stripping paint back to bare plywood on a VV in preparation for a "repaint" ... .... what is the best type / brand / size of sander to use with these .... i don't have one ... and while i need to watch the budget, i don't want to buy a bit of junk that burns out half way thru the job - basically i want something that i can use on the next van restoration ... and the one after that ;D ;D ... i would appreciate any advice from those that have done a lot of "stripping" ... 2. do these discs get rid of the "gluey substance" that Mark T refers too - if not, what have folks used to get rid of that? 3. What is a "delta sander" 4. Does stripping it back to bare wood make a huge, noticeable difference to the finish ... as compared to just putting one more layer on top Finally ... (and most importantly) Mark T ---- or anyone else that has done this ---- how many man hours (approx) went into stripping the 14' Don back to bare wood ready for painting .... any ideas on how many man hours in stripping back a 12' bond wood? - just want to get an idea of whether this task will take days, weeks or months ... and whether it would make a significant difference if i conscripted one or two or three "helpers" - and tried to tackle it all in one big weekend, week , month etc ... really, really appreciated some feedback and ideas on this ... thanks A|T |
|
Deleted
Deleted Member
Posts: 0
|
Post by Deleted on Mar 6, 2007 1:49:48 GMT 10
A/T, trust you to resurrect this thread and bring back the vivid memories of the nightmares I encounted with this project ;D ;D And, I've only just recently recovered from the massive doses of lead poisoning I received from the Don's multiple layers of highly toxic leadbased substances. At one stage I nearly fell off the ladder with headspins from the intake of toxins  This project was shelved nearly 12 months ago due to the enormous amount of hours it was taking. The old Don has sat in a corner of the shed pretty much as it is in the photos on this thread. But seriously, only last week I had another a go at it with a heavy duty industrial strength paint stripper ($160 for 20 litres) that I've been using on another project (elsewhere on this forum) and it took four goes at it with the paint stripper to completely strip an area about 1 foot square. So, even using that method, theres still alot of time involved. Anything that can be removed (window frames, cupboard doors etc) are going to be taken to a paint stripping place where they'll be dipped in an acid bath. I've been told this method can be done with most timbers except Jarrah. As for "helpers", you'll find that after you mention to your mates at the pub that you want a hand to strip an old caravan, on the Thursday before the planned Saturday to do the job, they'll phone you and advise that the boss has asked them to work this weekend, or that the missus has planned something else for them that weekend . The solution: instead of spending hundreds of dollars on a caravan, spend thousands on one that you can simply dust off and hook up  www.vintagecaravans.com/joker_11.htm www.vintagecaravans.com/joker_11.htm |
|
|
|
Post by kingy on Mar 6, 2007 7:18:39 GMT 10
Hi A/T I found stripiping my second van a near pleasurable job as it peeled off with ease useing a heat gun & scraper. It had a pink primer/ undercoat, topcoat & and another topcoat that had been applied at sometime by the original owner with a brush . I was able to strip it back to the bare ply all in one go except for just a couple of stubborn areas, then used a large orbital sander to remove any residue without sanding the ply to much. This all took about 2 days in total. I was so happy with the result i even thought about just applying coats of clear to bring out the grain instead of giving it colour, but i got outvoted . So, i was lucky in that what they used back then to seal and paint my van, came off so easily over 50 years later. My first van was another story , much like marks, and it depresses me to think about it, so i'm not. Bye Kingy |
|
|
|
Post by aussietanker on Mar 6, 2007 11:42:39 GMT 10
mmmm .... not quite what i wanted to hear in the replies ..... but probably what i needed to hear ...... Thanks Mark and JBJ .... lot's of useful & helpful information in your replies ;D ... Mark, your mates sound a bit like mine ..... any chance of getting the name of that really good paint stripper Mark - just in case i do go that route? ... Kingy and kaybee ... also very helpful with a glimmer of optimism ... point well taken re using the water after the stripper kb..... actually the answers are pretty much what i expected .... I'm not totally discouraged - in fact i think a realistic understanding of the work involved is a better starting point ... but i am going to need to think this thru in regard to available time, patience, resources etc given that i would like to get the electrics checked thru carefully ... and in the process hide some of the electrical wires that can be seen inside the van btwn the inner and outer skins of the van - a process which i imagine needs to see some outer skin panels removed ... has anyone tried to just remove all outer skin panels and replace them with new ones, effectively giving a brand new outer skin to paint on .... that would solve two problems at once ie electricals and painting ... or is this one of those "don't even go there " ideas ...
would a professional carpenter be able to do that (ie replace old outer ply skin for new) ... or would i be better to go to a caravan repair shop - do they have bondwood skills or have those skills been "lost" in those places as they mainly work in ally these days? ..... does anyone have any idea of difficulty and ballpark costs to do that ?please keep ideas and experiences coming ... the replies so far have been VERY helpful to me in evaluating this ... a big thanks to all that have contributed so far ... regards A|T |
|
Deleted
Deleted Member
Posts: 0
|
Post by Deleted on Mar 6, 2007 14:08:00 GMT 10
Hi A/T
I have a 10KG LPG bottle ( swap and Go) i have a 3 mtr hose with a burner that screws on the end and a OXY acetylene type regulator on the other end.. It throws a flame about 150mm round when on medium pressure and roars out to about 2ft round on full pressure. We use to use 'em in the roadside construction gangs to boil the billy ... in about 30 seconds.!!!
This little sucker will reduce any Don caravan to ashes in under 30 seconds.
However when used in the right hands can wrinkle old lead based paint in no time. just work the flame gentley ahead of your paint scrapper and you could strip a vans side in less than an hour.
Just done one gaurd ( it has timber guards)on the old TD in about 3 minutes .. completely back to clean bare timber.
Dunno what they painted marks don with but it sounds like it might be tar based.
reddopyromaniac
|
|
|
|
Post by bobshannon on Mar 6, 2007 15:24:25 GMT 10
PEEL AWAY PAINT REMOVER. Hi, I just noticed this thread. There is an easier way! I have used this product and although I thought it was expensive at the time (over ten years ago when it was introduced) it was amazing. It will take off layers of paint. Basically you evenly spread the stripper over the job and cover it with the special paper squeegeeing out any bubbles. Leave overnight and peel away the paper with the paint layers stuck to it. Fold up, dispose. Neutralise the surface before repainting. Simple. There is even a version to strip paint from aluminium as the standard version is too caustic. Anyway, have a look here, and at their distributors: www.peelaway.com.au/peelmain.htmHere is a testimonial: ourhouse.ninemsn.com.au/ourhouse/factsheets/db/makeovers/05/504.aspShould be easy to use on caravans with large flat surfaces. We used it on complex skirting boards, architraves and cedar doors that had been painted over. Hoo Roo Bob |
|
|
|
Post by aussietanker on Mar 7, 2007 0:39:27 GMT 10
reddopyromaniac said ... .... man, you know how to hit a guy where it really hurts ;D so all i gotta do is find me an old army flame thrower bazooka thingy and bobs my uncle ... vans almost done just thinking about it ;D ;D ;D ... this is gonna be a piece of cake ;D maybe mrs tanker can use it to thaw out the sunday roast as well .... ;D ;D ;D gotta go check ebay for a reddo special flame thrower .... reddo, i just had to laugh .... that shed sure is "inventive" ... but are you serious, does it really work, that quickly, and without damaging the wood man, i can just see the look on mrs A|T face when i sheepishly bring in the remains of my nights renovating efforts ... one Don - reduced to a handful of very black ashes ... "here's the van honey - by the way, where do we keep the ashtray" ;D .... or perhaps ... "look honey..... i shrunk the van - - no problems working out where to store it now honey" ;D ... now how much was the brand new T@B! ... guess thats one way to get it ;D ;D aaahhh reddo - you made me laugh so much i can barely type .... ;D ;D ;D and on a more serious note .... and has anyone else used the peelaway stuff mentioned ... had alook at the web site ... it almost sounds as easy as reddos "pyrogun" .... but no where near as much fun i bet ;D ;D ;D regards A|T |
|
Deleted
Deleted Member
Posts: 0
|
Post by Deleted on Mar 7, 2007 10:01:40 GMT 10
Yo A/T I am seriuos... for a change...... .... would i lie to you ..... Old lead based or plastic paint gives up easily when heat is applied in the right manner at the right rate. Can still remember my old man up on planks at the side of our house using an old blowtorch with cotton waste soaked in kerosene which was set alight si9milar to a kero lamp wick. he just waved it backwards and forwards along the tallowood boards and burnt off the old lead based enamel ... no worries. gas just makes it safer and easier to achieve the same result. Ok the gear i have has the potential to set fire to things if used on full flame. But used properly will remove paint back to bare timber in 1/4 the time it takes to brush on paint stripper and scrape it off. Most plumbers have a similar kit for heating and fitting joins in copper pipes . You can use a hand held primus bottle but you will go through a few cylinders / refills stripping your van. Also have problems with the flame going out if you tilt the bottle beyond the horizontal position. My experience with stripper chemicals is that first up it is messy and second it will only remove paint one layer at a time . A panel beater mate use to have a caustic soda tub that we use to put our motorcycle frames and parts in. leave for a few days and lift out /hose off to leave bare metal. he ended up getting rid of the system because he had to constantly balance the chemicals to keep it effective. Mate the choice is yours . I am not saying there is a right way or a wrong way. Just speaking from past experience and thats what this section of the forum is all about isnt it ;D Reddoxybottleonorder |
|
|
|
Post by Don Ricardo on Mar 7, 2007 23:03:27 GMT 10
Hi A/T, Thought I'd give you the benefit of my experience. It's good to learn from each other's experiences, particularly when someone can say "don't go there". When I decided to repaint our van for the first time, I didn't need to go back to bare wood, I just needed to take off some old paint on the sides and tidy up a few places where there was cracked paint over joins in the ply panels. I also had to take a fair bit of flaky paint off the roof because the aluminium paint used for the roof of Don caravans (even though it's enamel) doesn't last anywhere as long as the enamel paint used for the sides. In my "wisdom" (naivety) I decided to use a circular sanding disk on my electric drill. Bad idea! I was quite pleased with the work...until the final coat of high gloss enamel went on, and I discovered that I had left quite a few semi-circular marks in the remaining paint which reflected beautifully in the high gloss. So, as other such as Kaybee have warned - don't go there!! Since then I've used both orbital sanders and belt sanders which do a much better job than the disk sanders. Even so you have to be very careful or skilled enough not to cut too far into the paint or the woodwork. I have to go for careful because I'm not skilled! Now that the paintwork is in good nick, I just give the paint a light sand with sandpaper and a sanding block when I need to repaint. However, I reckon if I wanted to go back to bare wood (and I intend to one day) I'd go for the paint stripper job. I might consider the heat gun, but as Mark has said Don's seemed to use some of the toughest paint around - it was meant to stay on and it has. You raised the question about replacing panels. As many have shown on this forum this is quite possible. Doug and Vicki have shown what can be done and the result is immaculate: vintagecaravans.proboards30.com/index.cgi?board=photo&action=display&thread=1135121702However, this is pretty radical and hopefully you will start from a better base and won't have to go as far as they did. Now a really important question to end with: Do all these questions about stripping paint, etc, indicate that you're close to buying something? If so when can you tell us about it or are you going to keep it under covers until all that paint is off?Don Ricardo |
|


 .
. . I thought I would get away with sanding the exsisting paint to use as a base for the new paint, and spent a half day preparing the van on one one side, but the thick paint had flaked aound the windows, door and seams (beading) and had to be rubbed back to the ply in those sections.
 .
. .
. 


