|
|
Post by atouchofglass on Jan 26, 2009 18:21:12 GMT 10
Hey Bobt You can have as much of it as you want.... Just have to take the humidity with it.. 80% plus.  Latest lot of photos Replaced the left hand side of the van entrance  Cut edge to size 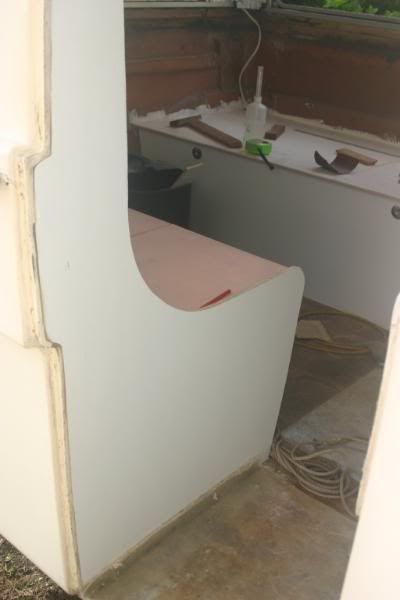 Fitted an edging in rosewood as well 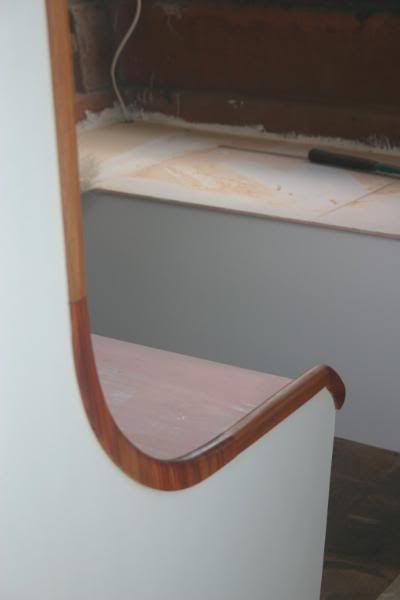 Cheers Atog |
|
bobt
Full Member
 "Ugly as Sin"
Posts: 455
|
Post by bobt on Jan 26, 2009 21:44:55 GMT 10
Hi Atog Like that rose wood.... mmmmm   One can never have enough clamps.............. They are issuing fire warnings in victoria....... Not looking forward to this week  |
|
|
|
Post by atouchofglass on Feb 3, 2009 20:25:35 GMT 10
Have added a couple of lights at the entrance Connected to the exterior light only So they all come on at the same time 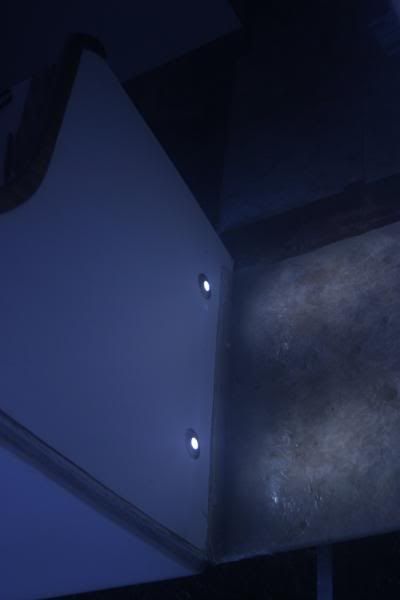 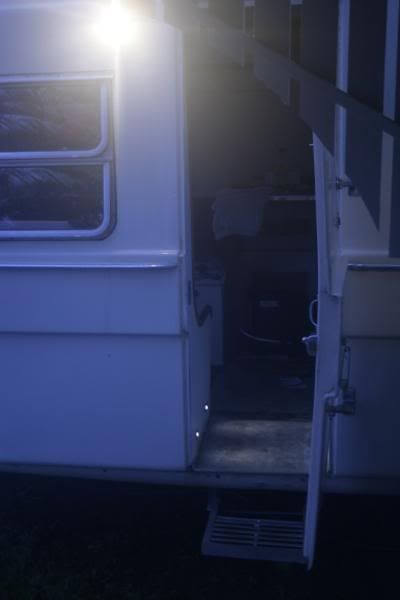 Finished fitting the clearance, indicators and brake lights Haven't had time to test them out yet Cheers Atog |
|
|
|
Post by atouchofglass on Feb 8, 2009 16:53:28 GMT 10
After the best parts of three days and still more to go The Stainless steel hinges have been assembled and installed Here's what was there before 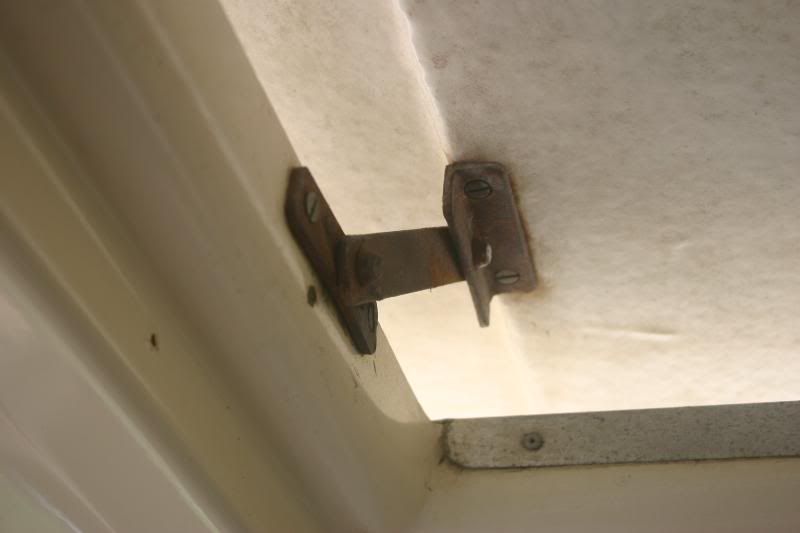 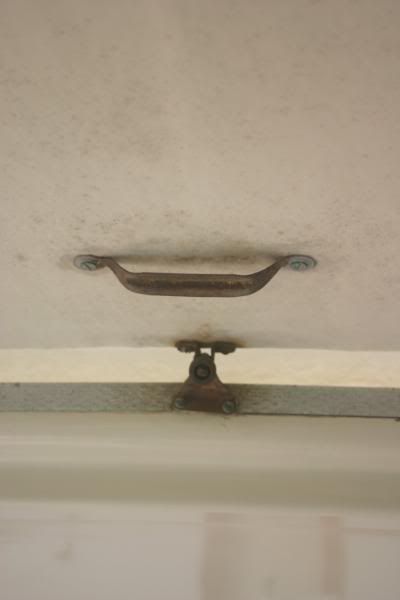 and after 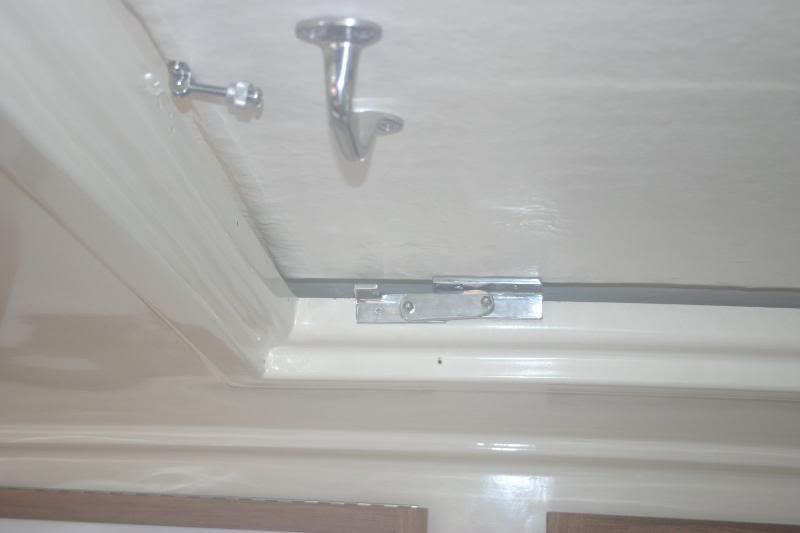 Was very sick of seeing the old ratty looking steel hinges and now am reasonably happy with the new improved ones  The tag at the front of the hinge (above and below photos) catches the hinge arm so the hatch stays up The weight of the hatch keeps it in place 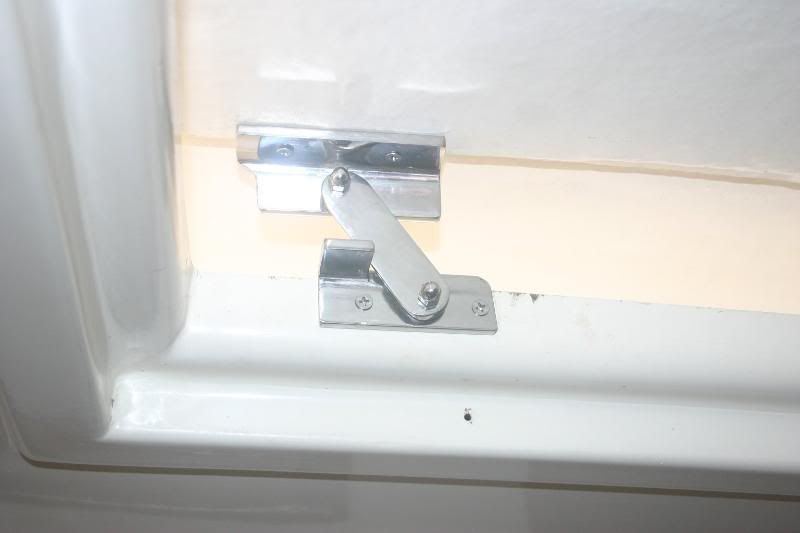 Looks a lot better 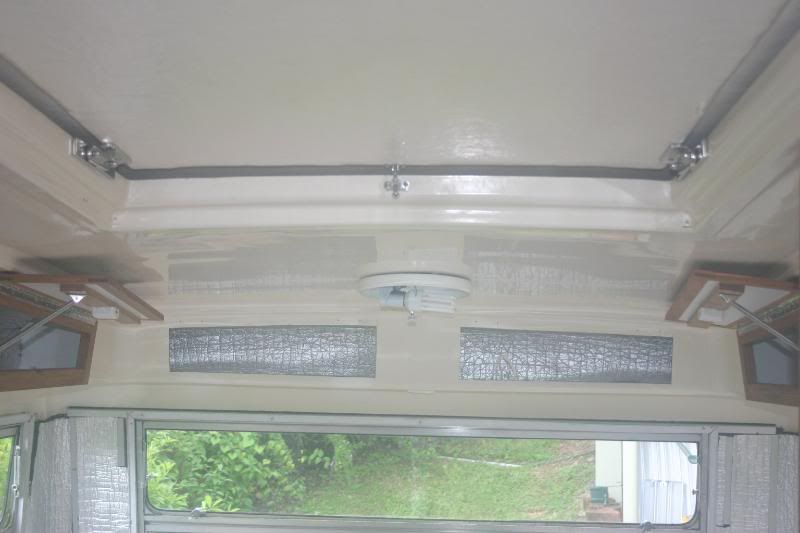 And no more rust stains on the hatch exterior Someone had used brass bolts and nuts with...... steel flat and spring washers.... Why? I'll never know Cheers Atog |
|
|
|
Post by akallabeth on Feb 8, 2009 17:43:18 GMT 10
WOW, ATOG, love the design of the hinge design. Mine has some dodgy screw tightened things that anoy the hell out of me.
God i wish mine had the hinge format.... did you have any designs or sketches? I have to have someone build it for me so i need measurements to help him along....
Would really apreciate it (even the essential measurements from the originals!)
THansk
James
|
|
|
|
Post by atouchofglass on Feb 8, 2009 18:07:46 GMT 10
Hey James The hinges are based on the originals cause i didn't want to drill new holes and there was nothing wrong with the design... Just the execution of it Was made from flat bar and angle... 25mm wide started with about 1 -1.5 metres of each from memoryThe holes are 80mm apart ... centre to centre You may want to change that to whatever your needs areThe metal is 5mm thick To make the tags just cut the angle away with a cutting disc on your angle grinder Remember to make a right and left hand not two right hand.... Like someone did  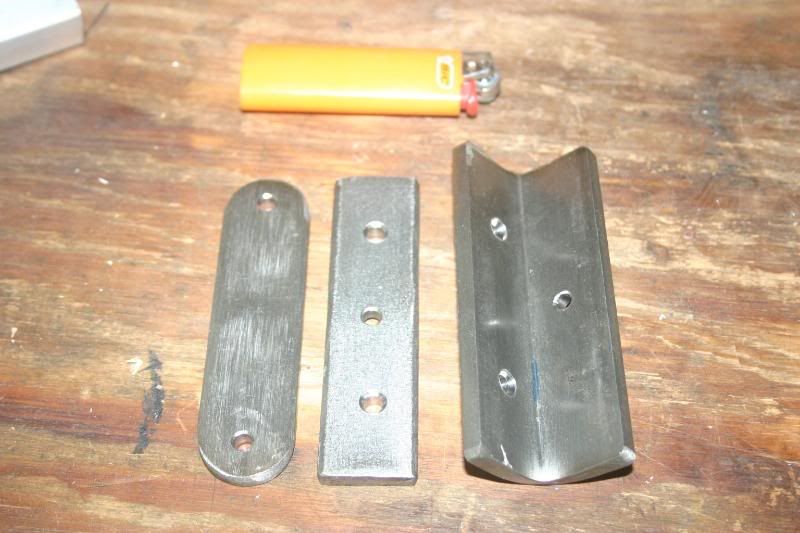 For a fuller understanding of the polishing ditzygypsy.proboards107.com/index.cgi?board=techno&action=display&thread=57It was all trial and error but seems to have worked out well 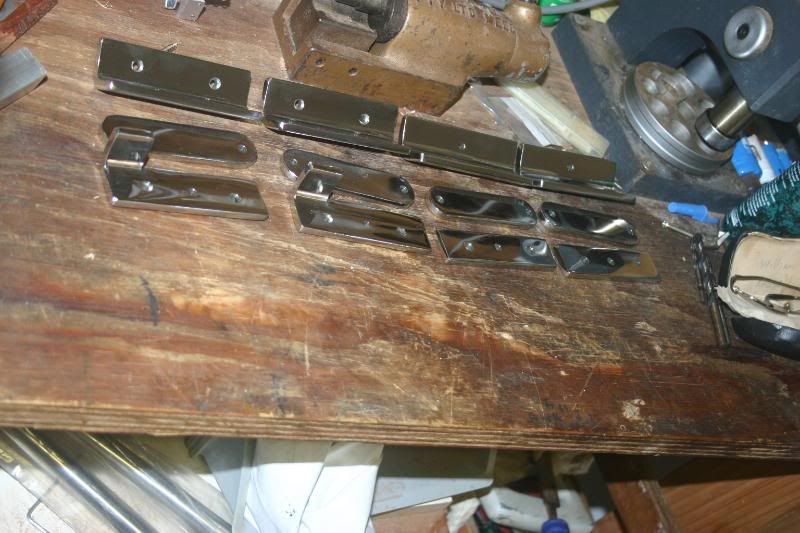 Check to see if the sides of your hatch will handle having the strain of the hinge on them You may need to have a plate on the outside to brace the hinges The polishing took forever PM me if you need any more info Hope this helps Cheers Atog |
|
|
|
Post by akallabeth on Feb 8, 2009 18:19:25 GMT 10
Thanks, will have my guru whip some up for me. Thankfully we have stocks of Stainless to work with (;-)) so it will be nice to polish.
Ill let you know how we go, just hope i can emulate your success!
James
|
|
|
|
Post by atouchofglass on Feb 15, 2009 6:29:26 GMT 10
So James How's those hinges coming along? Been doing a bit of vinyl work for the van of recent Not too sure about the colours. This type of work is that quick, if it doesn't work out I'll change the colour Did most of the prep work during the week and on Friday all the vinyl was fitted in about 5 hours For the amount of area it covered it is very quick work to my way of thinking 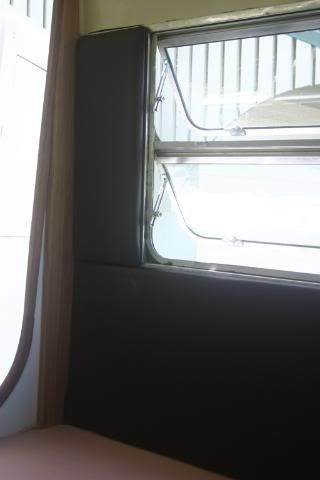 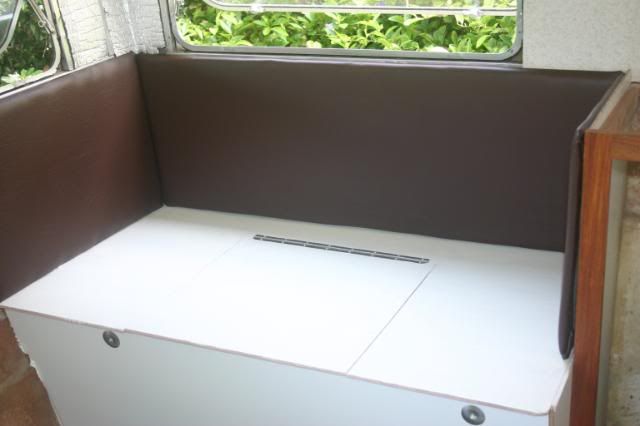 Will look something like this when finished Of course with curtains and timber framing it will lift the look somewhat 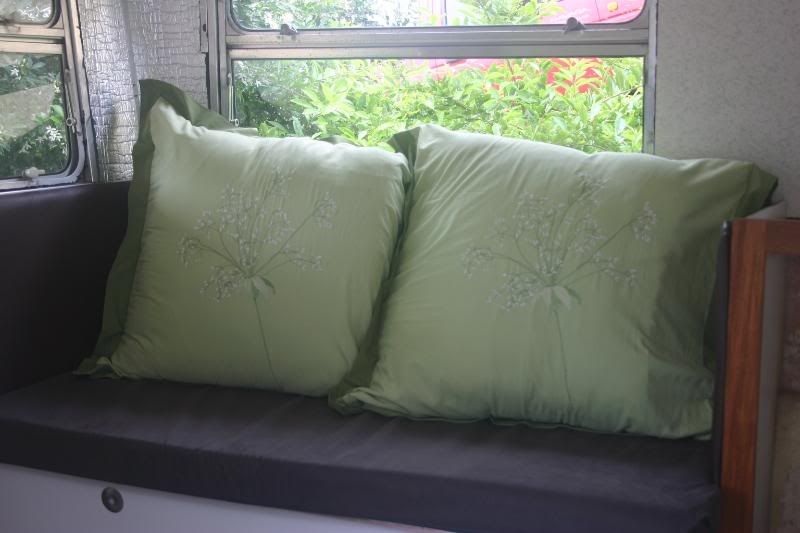 The lounge will be finished first as the foam is quite expensive compared to what I thought it would be When isn't anything? ;D ;D ;D ;D ;D You know what they say.... I'm living in the 60's ... cause it's cheaper Cheers Atog UPDATEVinyl workThought I might share it with you just in-case you have any similar work to do Having seen the mess the original boards were in, decided to paint all the 4mm plywood boards both sides So this doesn't happen 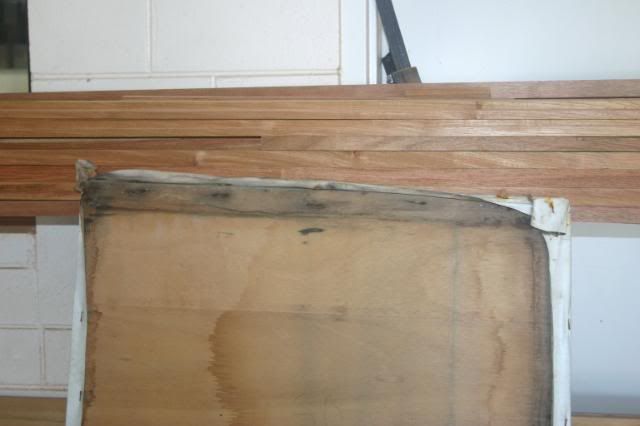 There is a foam with fabric on one side that catches the staples very well At least that is what I was told at the rubber shop This is what the upholsterers use 12mm The original was 6mm and just a little too thin for my way of thinking 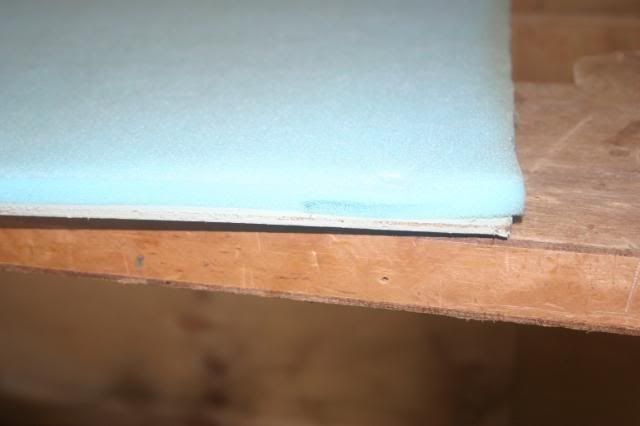 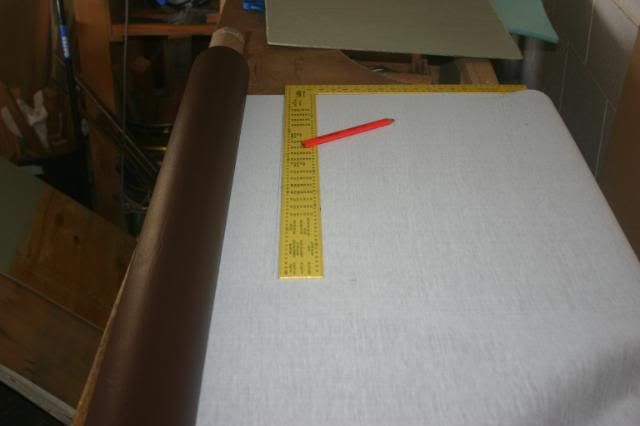 I just laid the board over the vinyl and marked approx 40mm extra around it Then used a pencil and square to mark were to cut  Start stapling from the middle and after one side is done do the opposite tightening as you go Try not to pull too tight or it will not be a smooth line along the edge 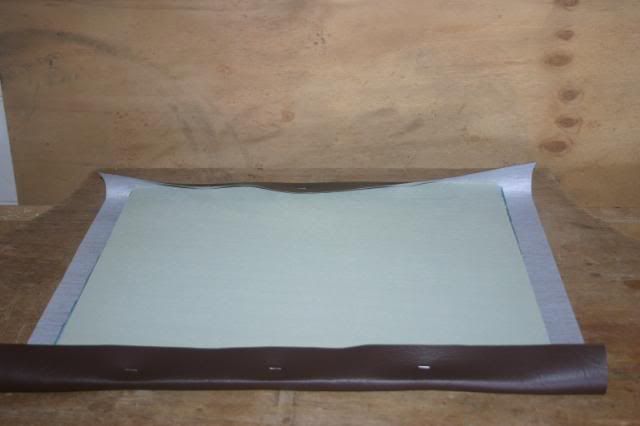 Do press down on the stapler or the staples won't go in fully Then do the other two sides 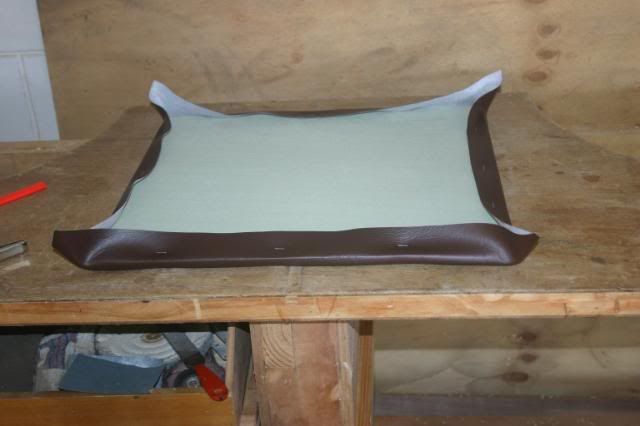 The corners will pucker up like this 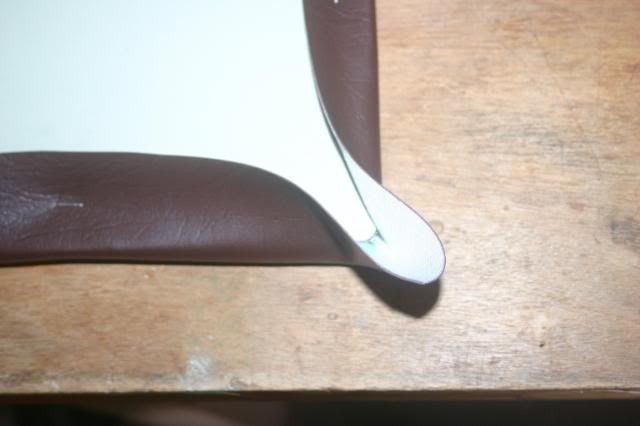 Just grip the point and pull tight before stapling 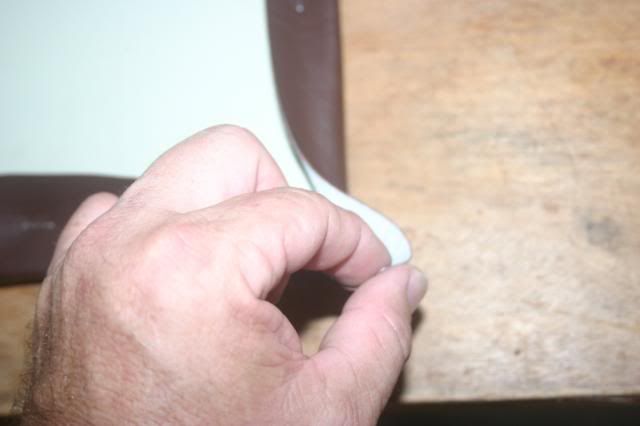 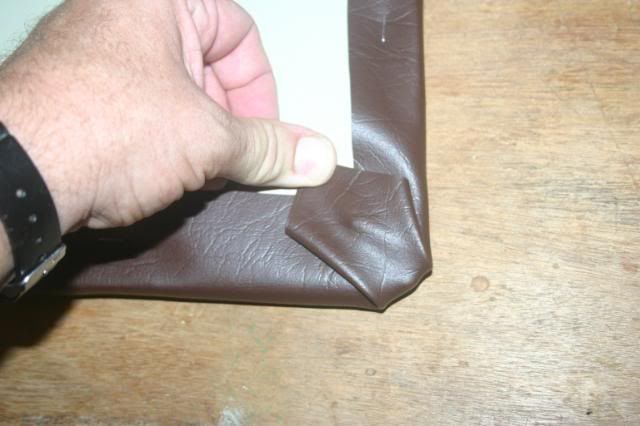 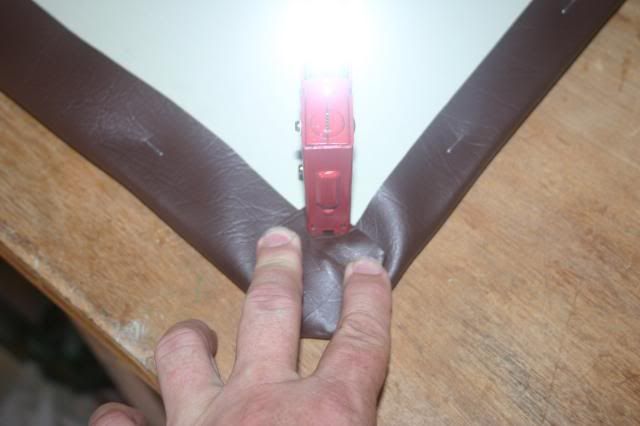 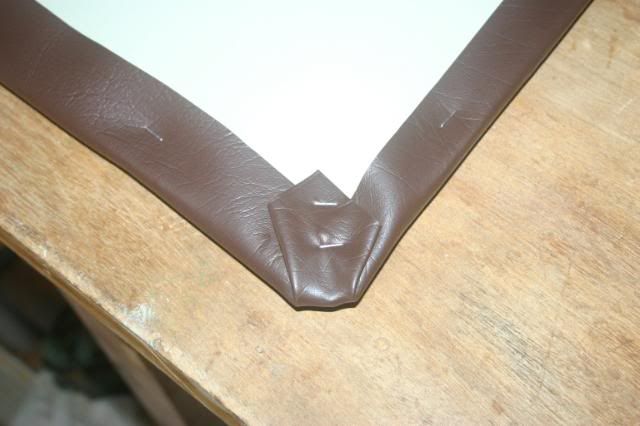 Copied the original 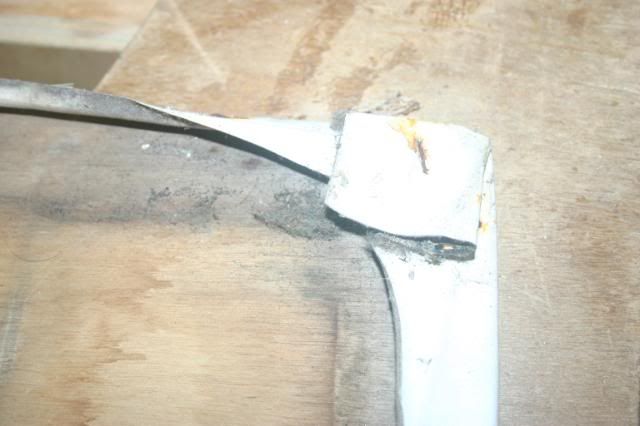 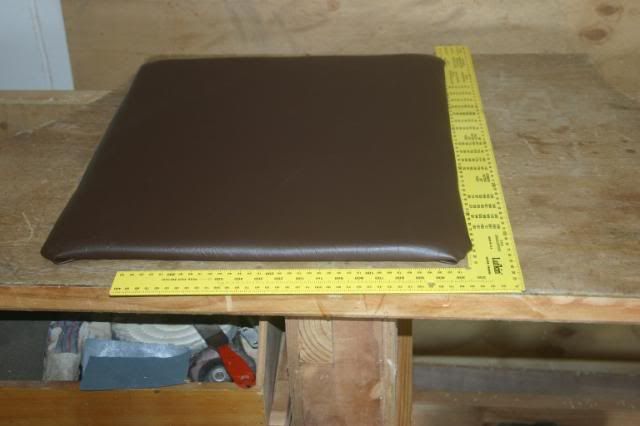 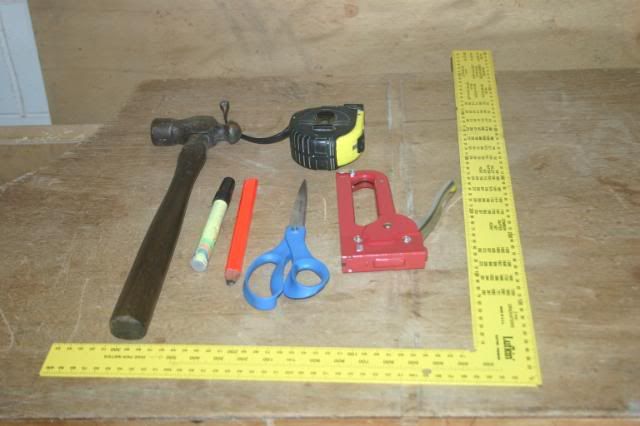 Hope this helps anyone that is doing similar work It really is very quick to do Cheers Atog |
|
|
|
Post by humpty2 on Feb 15, 2009 14:53:59 GMT 10
Spot on about the foam prices Atog, we just bought some foam yesterday......for the seats and backs only........$279.00
Enjoying your resto, I will make hinges like your too.
I will eventually get around to posting the resto of my 21footer.
|
|
bobt
Full Member
"Ugly as Sin"
Posts: 455
|
Post by bobt on Feb 15, 2009 15:51:45 GMT 10
H Atog Nice bit of vinyl work you have done there. Takes quite a bit of effort to get the vinyl stretched evenly over a straight bit of board and end up with neat looking edges. The colour looks fine to an old fella like me. Can not wait to see the rest of the wall finished and the window furnishings in place.  Thanks for the warning about the cost of foam rubber... Lucky I don't need a whole heap for my little "what ever".... ;D Hey Humpty2 come on show us all.... ya kno bigga is betta ;D ;D |
|
|
|
Post by atouchofglass on Feb 15, 2009 17:15:37 GMT 10
Hey Guys Thanks Humpty The hinges did come up well and while they take time they are of a simple design Tried to stick to the Kiss principle .... Keep It Simple Stupid  The two pieces of 75 mm foam I bought were approx 700 x 1300mm ....... $187 Asked the guy to wear a tin helmet and hold a gun to my head..... Made me feel better as he took the money ;D ;D ;D Hey Bobt How the vinyl work can be done is on this link ditzygypsy.proboards107.com/index.cgi?board=techno&action=display&thread=314Not really that hard if you have the right technique Wife showed me how to stretch the vinyl correctly before stapling Wish I had known that there are stainless steel staples ..... would have used them instead Spent part of today contact gluing vinyl to the old fibreglass covers for the corners Had to chisel/grind the wood and resin off the back of each piece Dropped the chisel and before it hit the concrete stuck my foot out to catch it as I always do when wearing steel caps..... Guess what.... Yep... Was wearing thongs The second thing I thought ;D ;D ..... was .... gunna have to sharpen that chisel..... didn't sink in as far as it should have  Anyway after removing the chisel and blood Removed the wood and resin from the back of the fibreglass Ground up the shiny side Then contact glued the 12mm foam to the fibreglass Then the vinyl to the foam and back..... Damn that takes some glue Used up almost a litre on the two front pieces 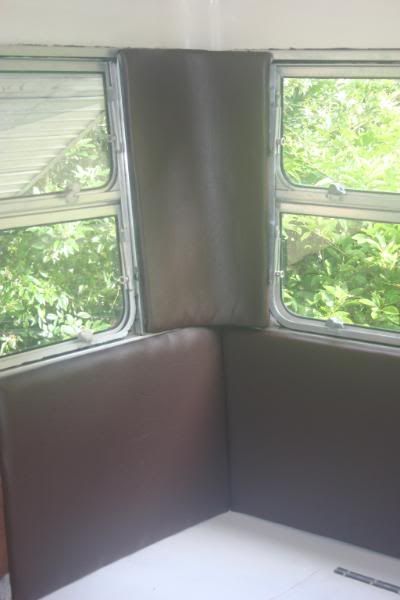 When at the rubber shop..... Leave that one alone Atog it's just too easyFound a rubber mat that was going for half price cause it was damaged Having seen one of the other forum members use vinyl checkerplate for his flooring (thanks Swellwillys)...... thought this might work 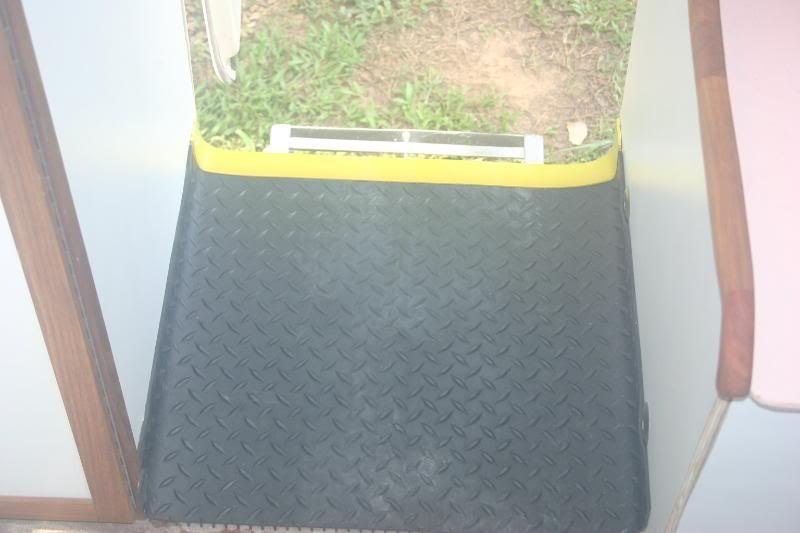 Had to cut it up and grind away some of the underside to make it fit Will fit it properly when the flooring goes in Should do the job Won't miss the step edge at night ;D ;D ;D ;D ;D Cheers Atog |
|
|
|
Post by atouchofglass on Feb 18, 2009 12:41:29 GMT 10
Hey Everyone Managed to get a bit more work done on the van this week Sanded the floor ready for the vinyl 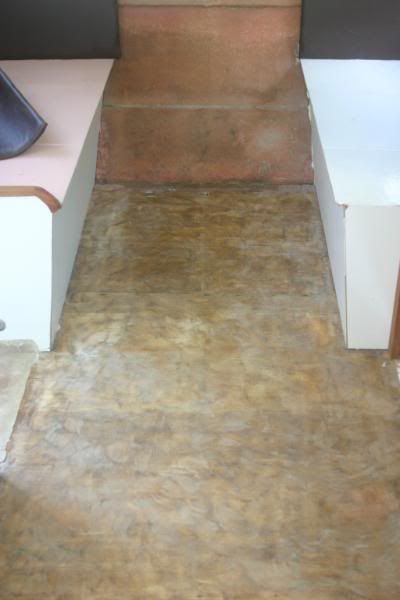 Took a bit of doing but all came together in the end 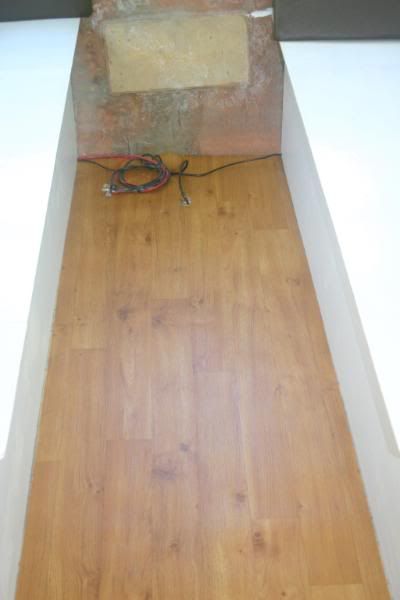 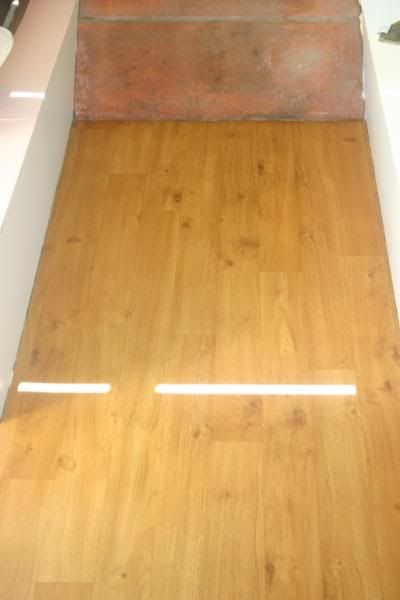 Used a water based glue that is used for vinyl squares 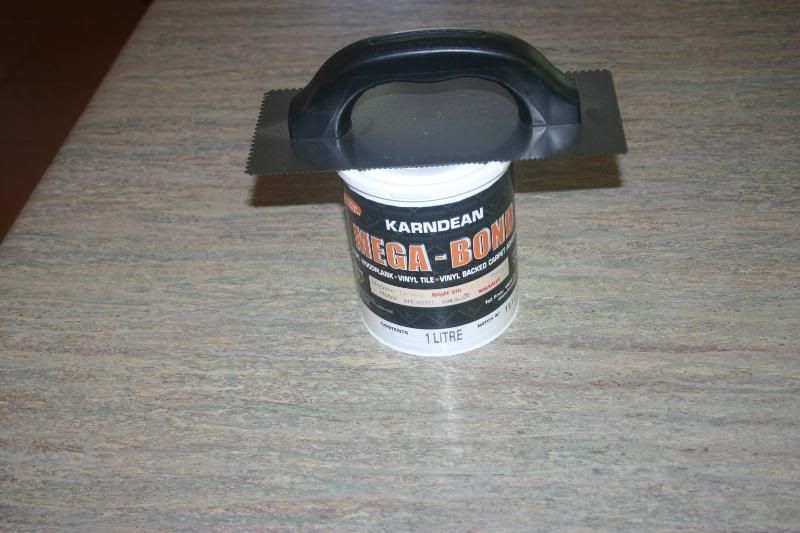 It now fits well after lots of anxiety and frantic working of the glue and vinyl Still have to do the edging/skirting boards Will leave that for another time Cheers Atog UPDATEThis is how it went down Sanded the floor to remove old glue and vacuum Back giving out ..... knock off until after dinner Cut the vinyl in half as I only need one metre width 830pm finish rough cutting to size inside the van..... sweating to death I've had enough for today Wednesday morning 7.30am Mark out the areas that need to be cut 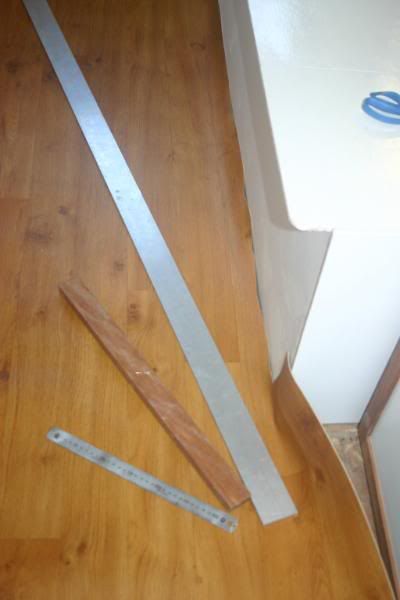 Out on the driveway trimming to size vinyl oriented same as the van to stop confusion 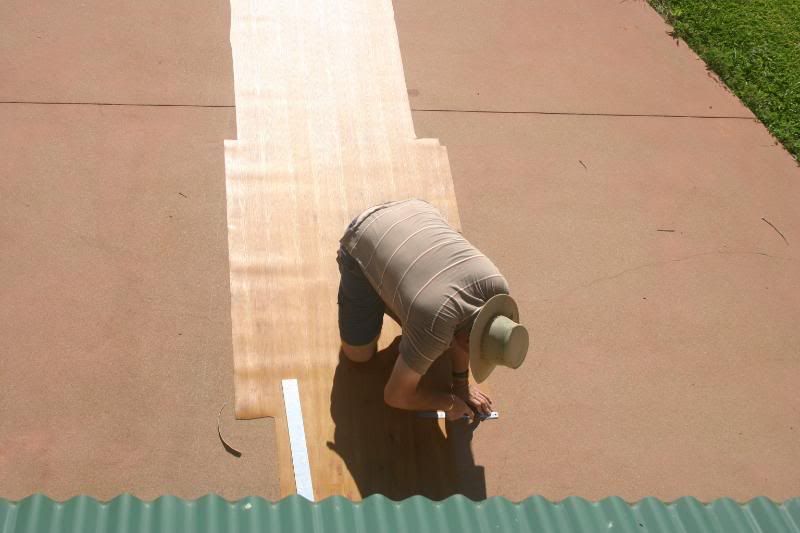 Back in the van still needs more trimming 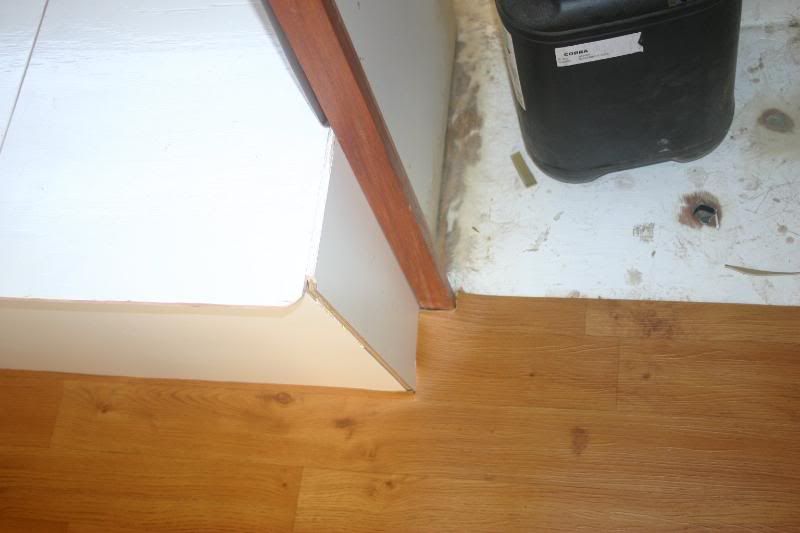 Final trimming on the driveway ..... getting hotter Photo is of the better end of me 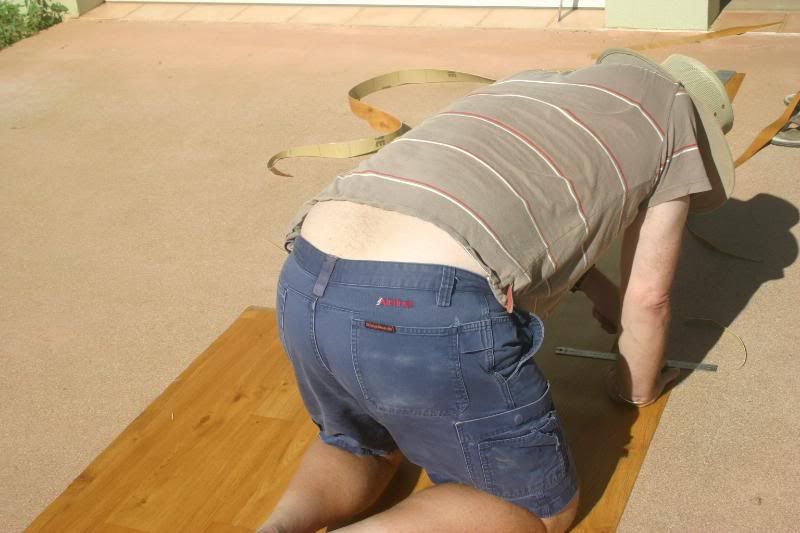 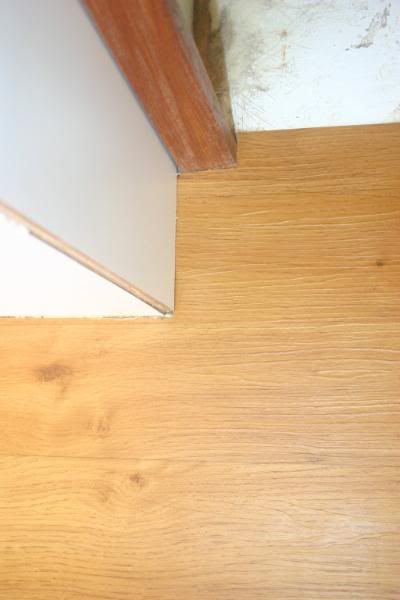 Fannnnn tastic All fits well back inside grab the trowel and glue Spread the glue with the fine toothed edge of the trowel as told by the helpful salesman All over 2/3 of the floor Spread the vinyl on the floor AAAAHHHHHH #@!**&* glue everywhere Vinyl not fitting as well as I thought %##@@!!! Glad I cut the vinyl a little short of perfect cause it actually is too long. An hour later Finish the other third of the van were I have been standing Arrrr relief..... finally done Clean up in water, take all the excess glue off the laminate and stand back to see what has been done...... Too easy What was I worrying about? ;D ;D ;D ;D ;D ;D Now for a beer..... Oh poo the sun isn't over the yard arm yet.... it's only 11am  Oh well have to go upstairs and sit in the aircon to recover Come on Midday!!!!!! ;D ;D ;D ;D ;D ;D ;D ;D ;D Atog |
|
tonyh
Full Member
"Dolly" 1967 Riviera
Posts: 256
|
Post by tonyh on Feb 18, 2009 20:11:44 GMT 10
Hey ATOG,  It all looks great but I think you are gettin' whaaayyy too far ahead and you need to slip down to beautiful Brissy to help a fellow Fibreglassie catch up ;D I'll put the divan out for ya ;D Cheers, tonyh |
|
|
|
Post by atouchofglass on Feb 18, 2009 21:53:05 GMT 10
Hey Tonyh Now if you had offered that two weeks ago....... Might have been tempted On my third week of holidays and getting a lot done on the van Tonight finished most of the edging off around the vinyl flooring 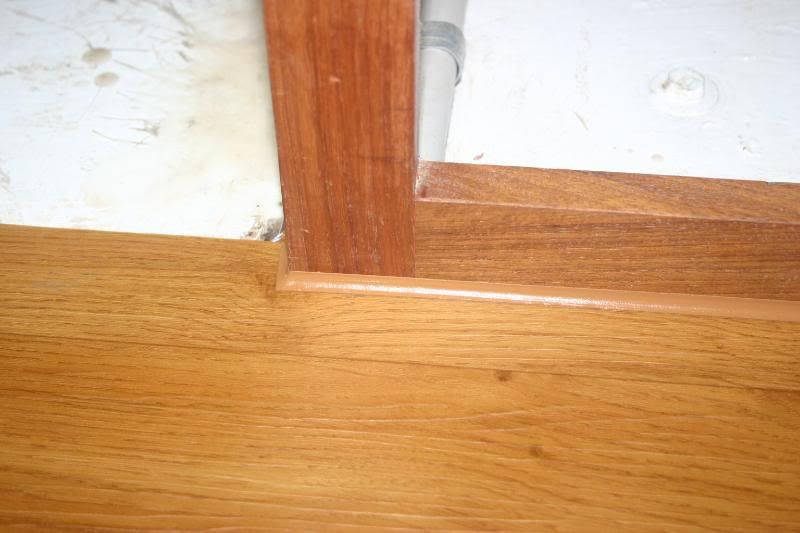 Was going to do the edges in rosewood..... still might but not in the near future This is faster and only cost $10 in materials to do Had enough left over to go around the two mirrored doors on the pantry and wardrobe 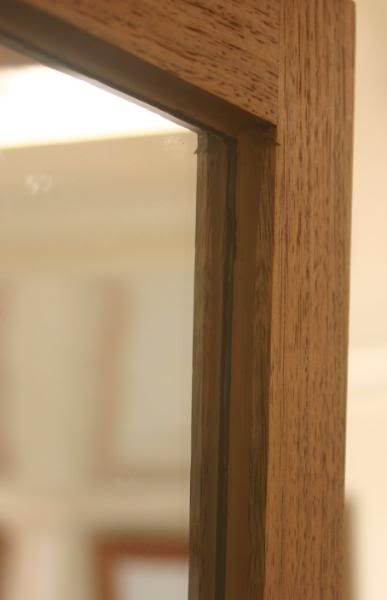 Best ten dollars I've ever spent ;D ;D ;D ;D ;D ;D ;D Cheers Atog |
|
|
|
Post by olympicriviera on Feb 19, 2009 18:05:38 GMT 10
Starting to come together really nicely Atog............cant wait to see the finished product ;D |
|
|
|
Post by atouchofglass on Feb 22, 2009 19:41:15 GMT 10
Hey Olympicriviera I'm looking forward to finishing it as well ;D ;D ;D ;D It is getting closer Over the weekend made a new table top Milled up, biscuited and glued the timber pieces on Friday Saturday - sanded, cut to size, routed and Danish oiled Sunday - sanded again and 2nd oiling The second oiling didn't really do much 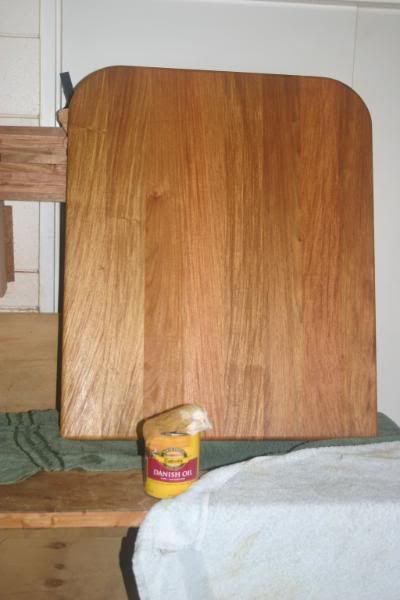 The new table is smaller and thicker weighing about the same as the original 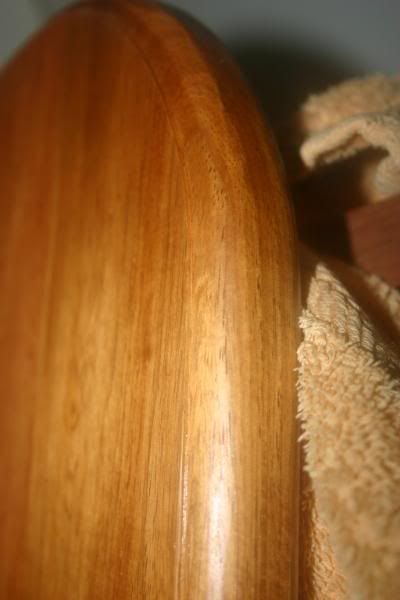 Will be easier to get around when sitting at the lounge Should also be able to be lowered to convert the lounge area into a single king size bed 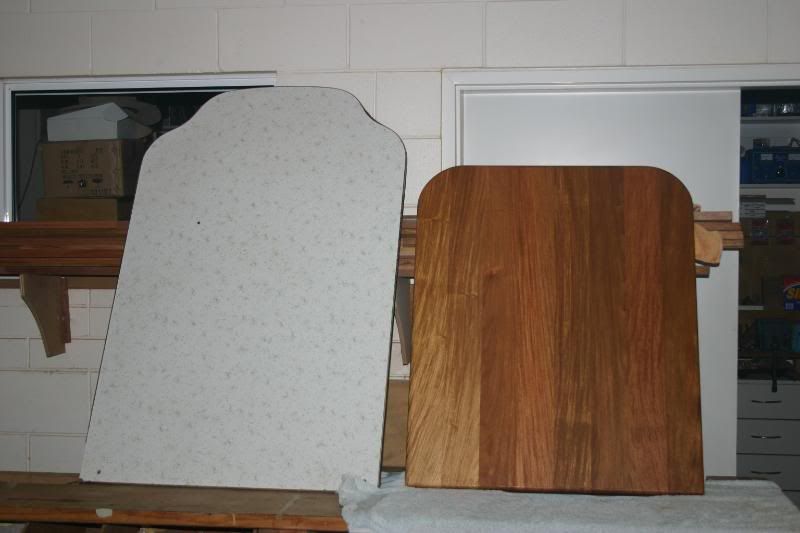 Hopefully the table stand will be next ...... over the following couple of weeks if all goes well Hard to believe I took the most twisted and bent pieces of timber of the right thickness and width I could find...... underneath all the ugly was a few great pieces of timber Still grateful for all the help my previous boss is giving me, by allowing me to use his equipment and rummage through his stacks of timber to find what I need..... top bloke Cheers Atog |
|
|
|
Post by Swellwillys on Feb 23, 2009 10:57:04 GMT 10
Well Done ATOG !
Love the timber work !
Van is coming along great!
Swellwillys
|
|
|
|
Post by atouchofglass on Feb 23, 2009 16:39:54 GMT 10
Thanks Swellwilly
Your post relating to your Sunliner and the Syrian cedar table top was my inspiration. Love the solid timber look you achieved
So was your floor tiles the inspiration for the door mat in rubber.... ;D ;D ;D
So take a bow and pat yourself on the back
It is good to use what others are doing to improve our own vans
Part of the reason for the V V forum
Keep your posts coming as the Sunny gets closer to finished as well
Regards
Atog
|
|
|
|
Post by atouchofglass on Feb 27, 2009 6:47:59 GMT 10
Inspiration was also taken from Luvshak's benchtop So on Saturday and during this week have made up a new benchtop Laminated it Saturday Fitted and routed the rosewood edging during the evenings 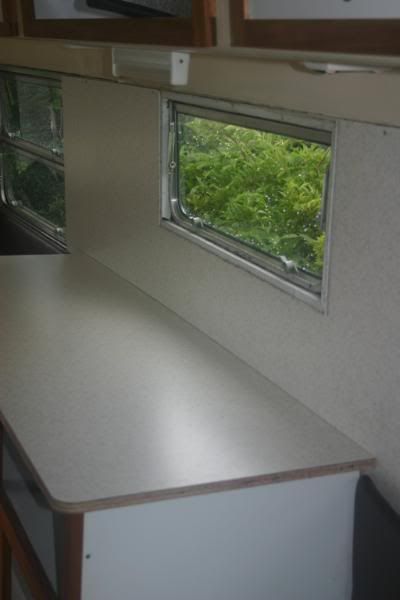 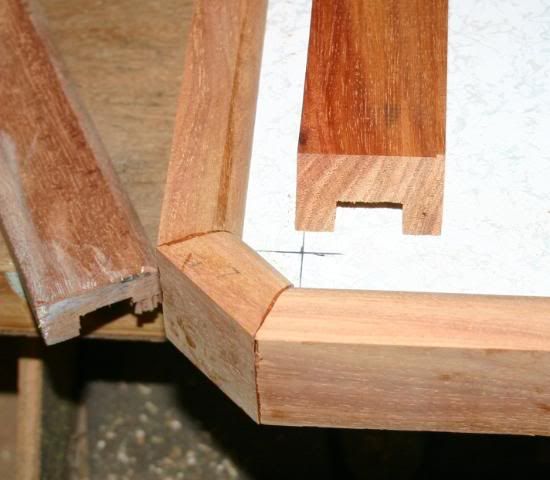 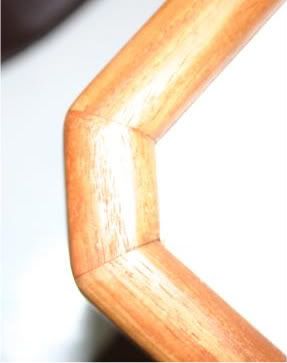 Benchtop is finished but not screwed down yet 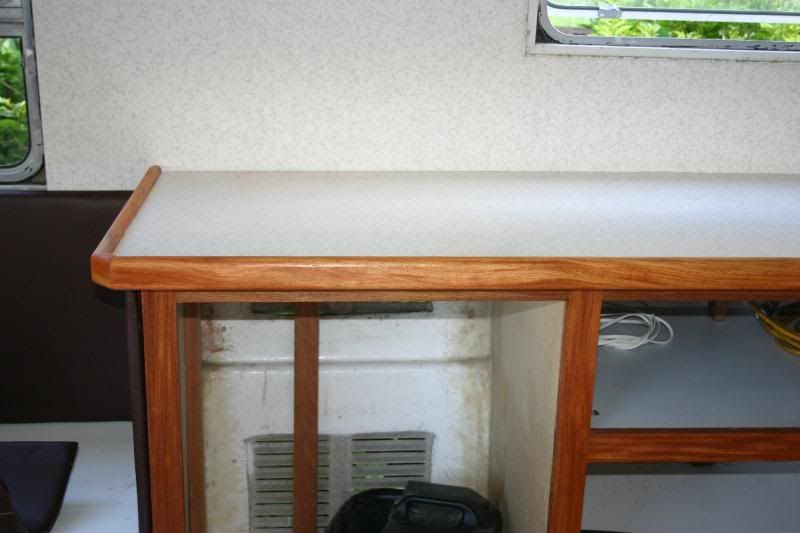 Possibly getting a new sink in this weekend all going well Cheers Atog |
|
|
|
Post by atouchofglass on Feb 28, 2009 11:08:32 GMT 10
Was easier than I thought 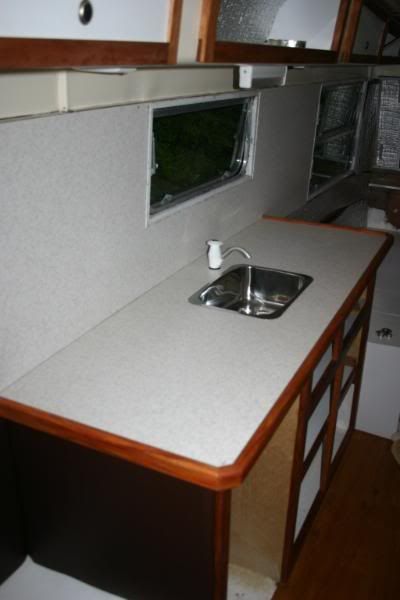 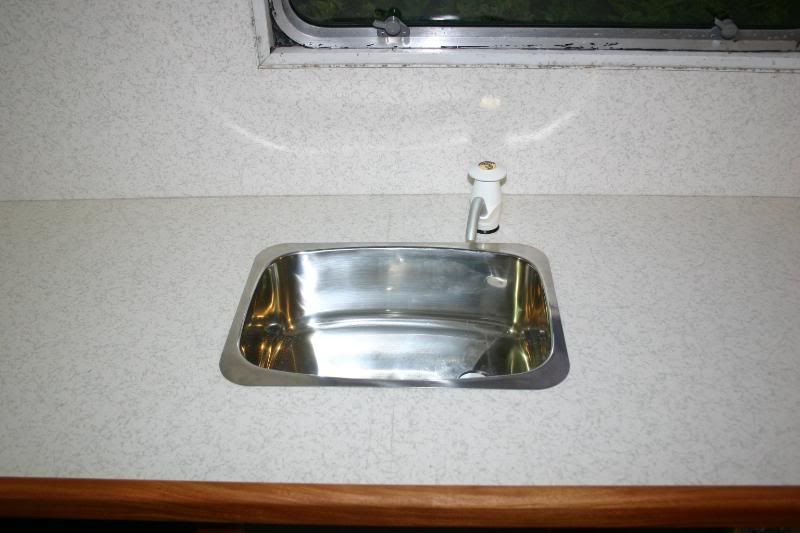 Cut a template - place where it is to go and cut Fit sink That quick .... about 2 hours Also fitted a hand pump tap Plumbed them in ..... but not fully Will remove the benchtop for other jobs Will fit a normal mains tap later That one will be in the middle at the back of the sink Cheers Atog |
|
|
|
Post by DC3Td on Feb 28, 2009 11:51:54 GMT 10
Hello Atog.Coming along very well. With all the extra woodwork you might have to up the ante in your tow cars Hp!! I imagine your cooker will sit on one side of the sink? If this is so,would you not have to place a heat shield of some description either on the wall or bench top? Or both. Laminate & wood colour works well together too. cheers gordon
|
|
|
|
Post by atouchofglass on Feb 28, 2009 15:16:55 GMT 10
Hey Gordon The Cheese and Kisses doesn't like the idea of cooking inside Would rather be cooking outside on a gas burner ring like the ones they use for woks Or our mini Webber So the only thing going on the right hand side of the sink will be a microwave for when we are hooked up to 240V The amount of crud I had to remove from the underside of the roof hatch proves her right.... took three goes plus Jiff, ammonia and detergent.... finally got it off Possibly a two burner gas plate with a black glass top later .... so the glass top will act as a backing. Today the axle, springs and brake drums got a clean up and paint Top day in FNQ to do work outside 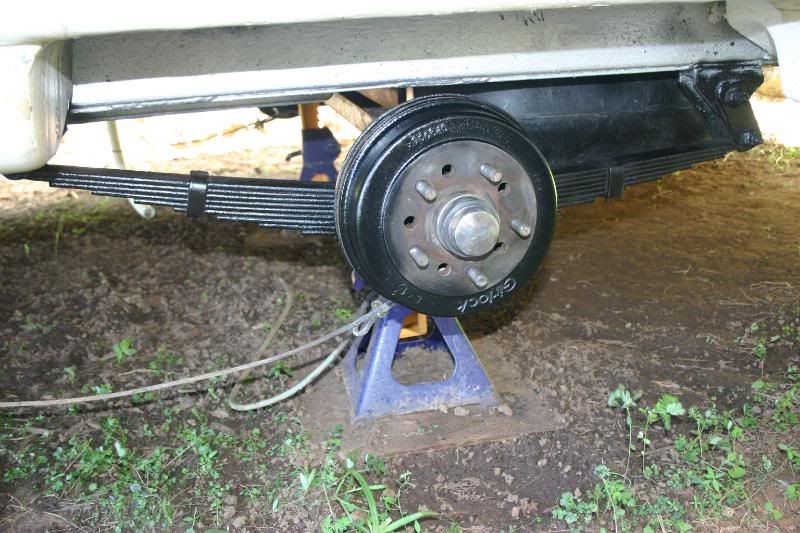 Cheers Atog |
|
|
|
Post by DC3Td on Feb 28, 2009 15:54:04 GMT 10
Hi Atog. Yeah, good that you get to see some sun after all the rain.Amazing what a bit of wire brushing/blasting can do for those springs & axles.Makes for an easier upkeep.And tells you what condition they`re really in, once you cleaned them.Is the brake cable standard size or did you opt for something a little more thicker? cheers gordon
|
|
|
|
Post by atouchofglass on Mar 1, 2009 8:53:02 GMT 10
Hey Gordon
As far as I can tell the brake cable is original
The brake drums have at some time been replaced..... I think
They are in good order so will stay for the time being
Thinking of electric brakes before it is used for any distance traveling
Cheers
Atog
|
|
|
|
Post by atouchofglass on Mar 5, 2009 18:23:19 GMT 10
Hey Guys Here's the latest bit to be added to the van Have been looking to buy a door latch for the outside door ...... 280mm long Weeeeelllllll no much chance of finding one of those Chance of finding an original ..... even less .... besides stainless is one of the themes on this van ;D ;D ;D ;D Local hardware sold me a stainless steel latch and fittings The fellow there said why not make it yourself? I liked his way of thinking Soooooo Bought a catch section that bolts to the van at a marine supplier and a 350mm piece of stainless rod Here's the result of a bit of thinking, a bit of heat, a bit of bending and then a bit of polishing 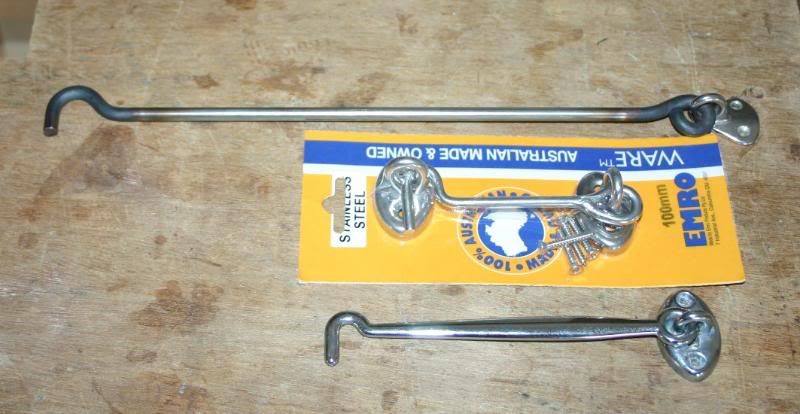  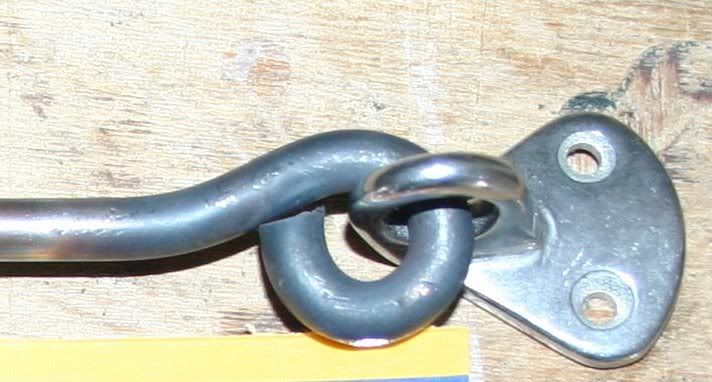 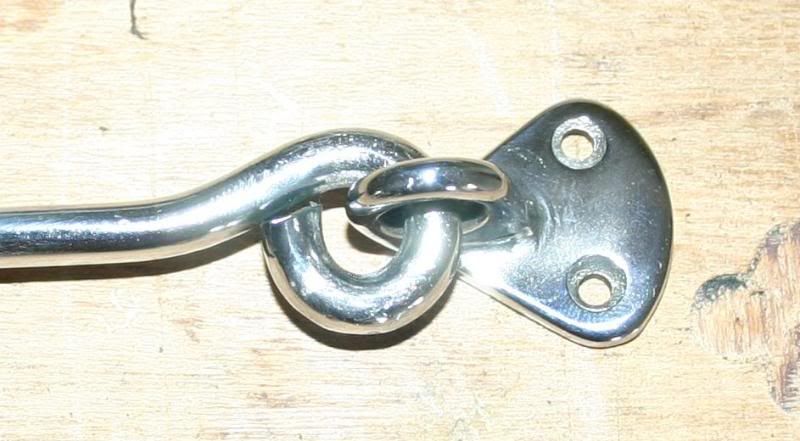 Not bad for less than $10 in materials With about 3/4 of an hour to make up and polish Tyres this weekend and hopefully registered next week Cheers Atog |
|


 One can never have enough clamps..............