|
|
Post by sportsman 1 on Jan 10, 2015 15:05:33 GMT 10
Hi Cobber,
I have plenty of the "2 lug doovers". Let me know if you still need some.
Leigh.
|
|
|
|
Post by cobber on Jan 10, 2015 16:33:52 GMT 10
G'day Leigh, Thanks mate, I'm wanting about 8 of the 'self locking' type, send me an invoice by PM and I'll give you the address if you've lost it  Cobber. |
|
carl
New Member

Posts: 11 
|
Post by carl on Jan 11, 2015 10:50:53 GMT 10
G'day Cobber, I believe that this van might have a "made in the military" back ground. I'm an ex-air force techo (instrument fitter) and all the techniques used on this van remind me of the work of aircraft metal workers, we called them "metal bashers" and they are now known as aircraft structural fitters. It was very common up until the late 80's for techos to make some of the non-Nato Stock Number (NSN) stuff that was used within the military, especially if it was made of sheet aluminium. The metal bashers only ever used aircraft techniques when they made stuff and this van is full of evidence of military techniques, right dressed screws, rivets everywhere, piano hinges, aircraft anchor nuts, etc. It’s the sort of project that recent graduates (ex-apprentices or adult trainees) from the trade school might have been tasked with.
Some of the things that make me think this is the strange hitch which looks like it might use a military style pin or hook on the tow vehicle, and the awning is the orange and white stripe pattern that is synonymous with air traffic control (ATC). The Air Force ATC guys used a lot of modified vehicles for aircraft observation and control in the field, i.e on exercises not at home base, including orange-striped VW Kombis with huge bubble roofs, and in the field the controllers might have also been accommodated in vans like this. The metal shutters over the front/rear windows might be evidence of a common military storage thing to protect the windows and interior if the van was stored outside for extended periods between exercises. They would have also been useful for sleeping during day light hours for those unfortunates on the graveyard (midnight till dawn) shift.
Anyway, unless you find evidence of civilian manufacture, this old girl might be something more at home at the war memorial. Maybe check their website for photos that might show vans like this in use.
|
|
|
|
Post by cobber on Jan 11, 2015 13:32:28 GMT 10
G'day Carl, Thanks for sharing your observations regarding this old van, I really do appreciate your input, (actually I was hopping the bloke who made it would spot this thread and come online and tell us about it)  Although the exterior appearance of the van is attractive when we look at its interior it is very utilitarian. The exposed framework, although fascinating, is certainly not pretty. The beds at the front of the van, especially the top bunk, does have a solid military feel about it. 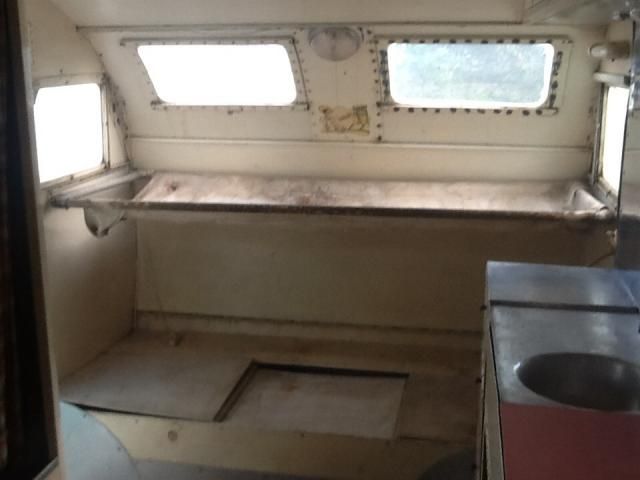 Even the two piece aluminium awning poles that came with it somehow have a precise military construction and look about them.  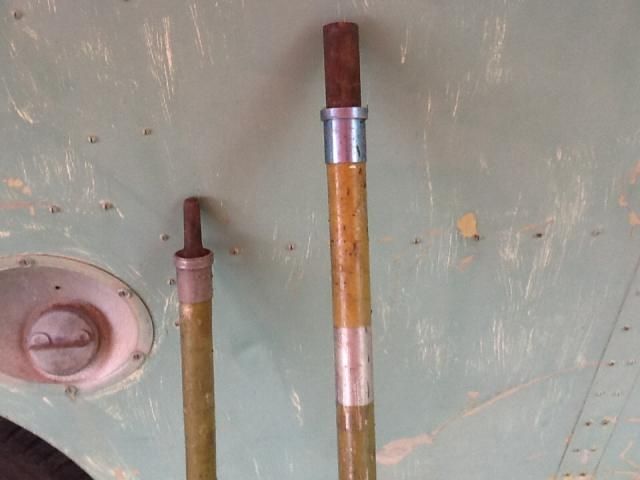  The tent pegs I suspect utilise what were once 'push rods' in the quartermasters jeep engine   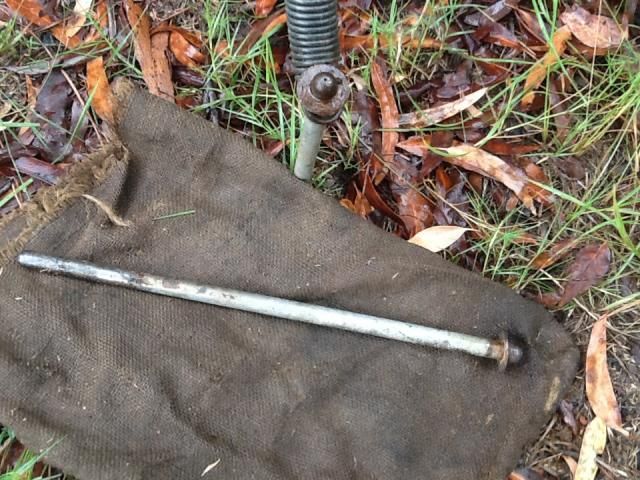 All in all, your suggested avenue for research is worth pursuing, and anybody with expertise in this area is invited to have a go  I now have two vans... this one and Ol '36[/url] that I'm sure have an interesting history, as yet undiscovered. Thanks again Carl, I appreciate your interest and your suggestions  Cobber. |
|
carl
New Member

Posts: 11 
|
Post by carl on Jan 11, 2015 14:14:20 GMT 10
Although the exterior appearance of the van is attractive when we look at its interior it is very utilitarian. The exposed framework, although fascinating, is certainly not pretty.
Hi Cobber, this is another reason why it might have been made by air force metal bashers. They would be proud to show off their skills and there would be no unnecessary "prettiness" - it would be all function and efficient and effective use of military resources. Plus, to a military person, I believe all that exposed framework is beautiful in its overly engineered strength and precision.
By the way, I'd guess that a CPL or SGT was in charge of the build and they'd be making sure the young Aircraftsmen fitters were applying their skills correctly and inspecting all joints, seams and rivets to ensure they are done properly or they'd be done again. No point practicing bad skills, especially if their next job might be to make or repair critical aircraft structures and skins.
|
|
|
|
Post by cobber on Jan 22, 2015 13:55:41 GMT 10
Just when you thought you'd seen it all ....... the 240 volt wiring has been added after the construction of the van by people less diligent than those who built the van, I think. It has two power points mounted on the underside of the shelving, the plastic thing that looks suspiciously like a box we used to store our 35mm slides in is what covers ( almost) the terminals on the power points.  The wiring to and from the compressor will bear a close inspection too because I suspect the refrigerator is actually a converted icebox. The front clearance lights are interesting too, I can't guess what sort of lens they had but anyway.... is there a regulation that says you must have a lens ?   Anyway, some progress has been made inside. 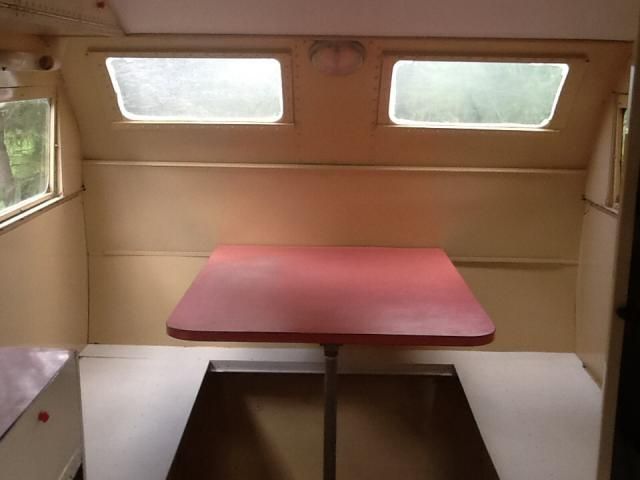   I never said she was going to be pretty inside, although some upholstery might help  Cobber. |
|
|
|
Post by Roehm3108 on Jan 22, 2015 20:09:32 GMT 10
"I never said she was going to be pretty inside, although some upholstery might help"Good way to keep the weight down cobber. Not that it matter much in this state - must have the dearest rego rates for trailers below 750kg 
|
|
leeron
Junior Member
  1966 Viscount Duralvan 14' 6
Posts: 69 
|
Post by leeron on Jan 22, 2015 20:19:00 GMT 10
Lovely old van saved from the scrap metal merchant. Looks like a great resto project and so unique!
The compressor motor and plates could easily be replaced with a 12v danfoss compressor and plates kit from waeco.
Or most mini bar fridges have universal compressors that you can just transplant and re gass.
Another nifty product to get sticky stuff off believe it or not is .... Tropical strength aerogaurd.
but be careful, I have seen it melt some paints and plastics
not bad for a product we spray on our skin
Fantastic progress photos and info, I will look forward to seeing the progress.
Leon.
|
|
|
|
Post by akeepsake on Jan 22, 2015 21:54:18 GMT 10
Cobber I love your work but as a sparky the old slide box cover just won't cut the mustard! Surely you can find a proper Junction box second at a junk shop/ building recyclers if not let me know and I'll send you one.... Besides where are you going to to put the slides??
|
|
|
|
Post by cobber on Jan 23, 2015 12:01:42 GMT 10
Yes Gordon the Government,or somebody, keeps making noises about the NSW rego regulations being adjusted this year to make 'em fairer..... we hope it happens aye ? Thanks for your comments and tips Leon. I'll see what my neighbour up the road has to say about the fridge setup, he's a semi retired 'Appliance fixer upper' which means he'll fix her up for half price I hope  Skin is wonderful stuff isn't it ? I always think it's great that no matter how well paint sticks to wood it comes off skin no problems  I'll find something to cover the back of the power points Andrew, I don't suppose you would think an old Tobacco tin would be a good idea aye?  Cobber. |
|
newbug
Junior Member
  "Nothing succeeds like a toothless budgie".
Posts: 53 
|
Post by newbug on Jan 23, 2015 20:03:09 GMT 10
While I'd normally be the first to enthuse about this weight-conscious military approach to van construction, after almost 48 hours of blessed retirement in the outside world the scales are falling from my eyes and I'm now feeling a mounting sense of alarm that, in this case at least, a dogmatic adherence to minimalism has gone too far - where is the tea-towel rail ??!
|
|
leeron
Junior Member
  1966 Viscount Duralvan 14' 6
Posts: 69 
|
Post by leeron on Jan 23, 2015 20:13:28 GMT 10
If you go to your local electrical wholesaler you can buy enclosed mounting blocks like the PDL brand shown in this link : www.electriciansupplies.com.au/shop/index.php?main_page=product_info&products_id=1967so instead of screwing into the mounting surface to hold the power points you enlarge the holes and the screws from the power points pull down the mounting block from the other side(threaded holes in the mounting block). PVC block.. paintable or drop the old tin you mentioned over to hide the plastic block. Just a thought... |
|
|
|
Post by cobber on Jan 24, 2015 7:01:37 GMT 10
G'day Judy newbug, You noticed ! NO TEA TOWERL RAIL !   Who ever said tea towel rails were worth a mention or a necessary accessory ... we military men just air dry the dishes.  Another great weight saving feature in this van is....... NO FLY-SCREENS ! on any of the windows  or the door  but for some silly reason they have fitted one to the roof hatch  Leon, thanks for that suggestion, it is the right and proper way to do it and  ..... I might even get around to buying a couple of those blocks ..... but then again what's wrong with the bottom of a milk bottle, suitably modified (another weight saving idea)    Cobber. |
|
|
|
Post by akeepsake on Jan 24, 2015 14:52:18 GMT 10
G'day Judy newbug, You noticed ! NO TEA TOWERL RAIL !   Who ever said tea towel rails were worth a mention or a necessary accessory ... we military men just air dry the dishes.  Another great weight saving feature in this van is....... NO FLY-SCREENS ! on any of the windows  or the door  but for some silly reason they have fitted one to the roof hatch  Leon, thanks for that suggestion, it is the right and proper way to do it and  ..... I might even get around to buying a couple of those blocks ..... but then again what's wrong with the bottom of a milk bottle, suitably modified (another weight saving idea)    Cobber. You're scaring be now Cobber! |
|
|
|
Post by cobber on Mar 10, 2015 12:58:01 GMT 10
Alley van slow progress  Progress has been slow on this Alley van, but I have made the decision, almost, that I don't want to go down the path that leads to polishing the aluminium. I have come to the realisation that it has been primed with zinc chromate, a bit harder to remove completely, I think, from around scratches and the hundreds of bolts all over the van, and it is not as though it was left unpainted in order to show off the aluminium surface (polished or not) so it may not be suitable for polishing anyway. So that is good, I was not looking forward to the effort involved in maintaining a shiny exterior, and besides it's so common, all these war surplus vans get 'polished '  What might be more appropriate is livery along these lines, more in keeping with where the aluminium was destined to be used...... what do you think ? 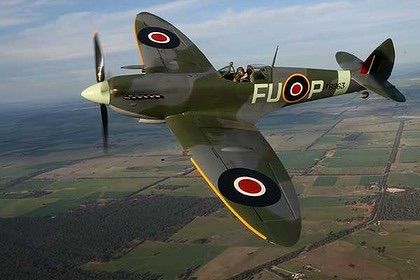 This livery might be a little bit extreme  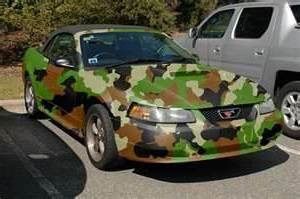 However, what has been achieved ? ..... Not a lot. I did pull the Dymwood coupling donated by 'Dayno' apart and found the the main reason it was seized was because the grease in it had solidified.  If you pull one apart be careful you don't lose the small pin that limits the travel of the shaft. 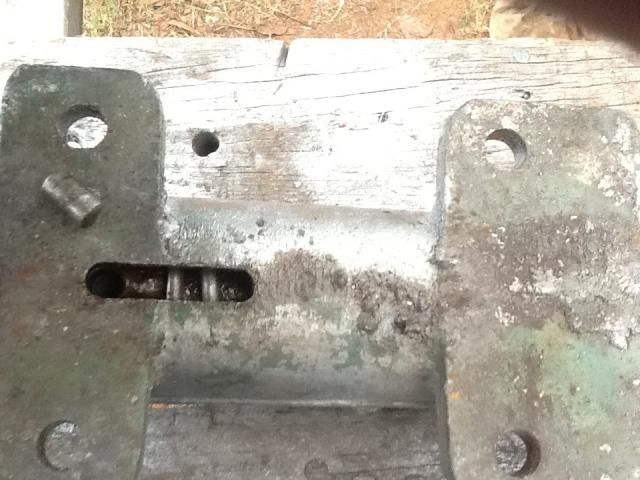 Cleaned up, new master cylinder fitted and she's ready to do service. 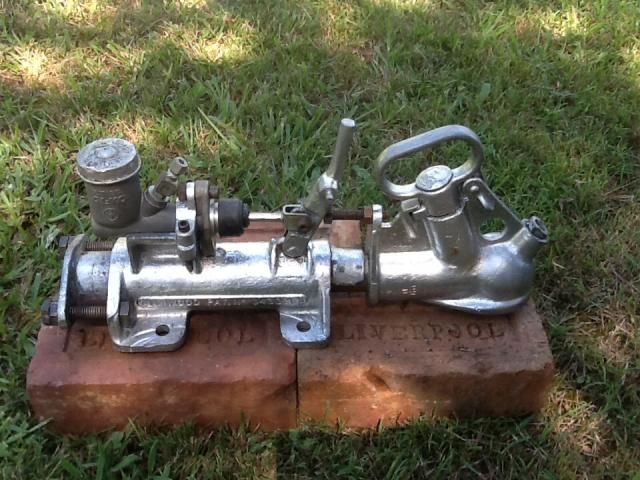 The front half of the chassis has been wire brushed, painted with rust converter, metal primer and given a coat of White Knight 'Rust Guard' black, looks ugly so I won't post a photo of that.  Those straps to brace the chassis diagonally are a bit unusual on a caravan, I think ? The 'A' frame was rusted rather badly where it had been sitting on the ground for many years. I cut the rusted bit off and made a new platform for the tow coupling to sit on.... makes the 'A' frame a bit shorter than I would have preferred, no shorter than the one on Ol '36 so I'll see how it goes ? 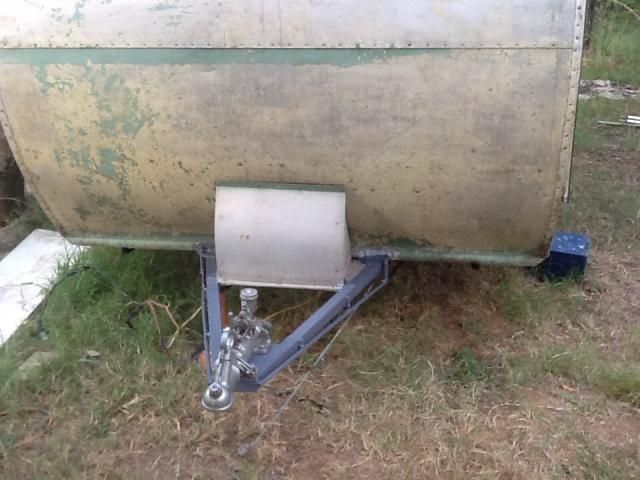 I have replaced the lock on the door and recessed it into the door as much as the thickness of the door would allow.  The wheels and brakes I think are off pre 1950 Chevy, confirmation by the wheel experts on the forum of that will be appreciated    That's it so far, I'll run it up on some ramps now and treat the rear half of the chassis, remove the water tank and repair a slight leak in it, and hope there are no surprises under there. Cobber. |
|
|
|
Post by DC3Td on Mar 10, 2015 16:28:29 GMT 10
Camo livery eh Cobber? Does that mean we have to salute you? Reckon you hit on a pretty damn good idea though.Just don`t go fitting one of those things that go bang outta the hatch!
|
|
|
|
Post by JBJ on Mar 10, 2015 19:45:41 GMT 10
Hi Cobber,
6 stud wheels in 16" diameter are normally Chev,37 to 48. Most vintage vans with 16" wheels I've come across use them, as a majority I believe.
Toyota 6 stud, & most japanese light trucks have the same bolt pattern, with varying centre holes.
The Alko brakes/hubs in 6 stud toyota will accept the Chev wheels, & I have used those brakes on the rebuild of "Lucille" a few years ago.
I do not remember any other 6 stud wheels other than Chev 37 to 48, that were used in Australia on commonly accessible cars. Vauxhall did use 6 stud,
but most of them I remember were a lighter wheel, & nowhere as common as Chev. They also looked nothing like the Chev wheel, being ( from memory)
an "artillery" type wheel or wire wheel. "Artillery" wheels had holes around the circumference near where the centre joins the rims. Chev did not use that style as far as I remember.
But then I'm getting older, & sometimes my memory isn't as good as I think it is
I'm sure I will be corrected if I'm wrong on this
JBJ
|
|
|
|
Post by beetlesbailey on Mar 11, 2015 7:46:07 GMT 10
Hello Cobber,
I have not visited this forum at all this year and am pleased to see your resto thread. Keep it up (as the nun said to the bishop).
Yes it is a slow but rewarding process. I have done a few vans (and helped on others) in the last 20 years and it seems to be easier and more rewarding than doing a car except you cant drive it anywhere so need to do the car anyway!
I am interested in all the oddball features in this van too and I am sure you will have more to show us as the time goes by.
Cheers
Beetles
|
|
|
|
Post by cobber on Mar 11, 2015 7:59:47 GMT 10
Thanks Gordon, Dennis, Beetles & Don R for the thumbs up  Gordon, if I get the camouflage paint job looking OK I'm thinking this van could be a good vehicle to display my National Emergency Service stuff in... maybe not as period correct as Ol '36 but it's all pretend anyway   These wheels are solid Den, what with the 7.00 X 16'' 10 ply LT tyres on 'em I think they'll be a fair proportion of the vans overall weight. Thanks for the wheel information, nothing wrong with your memory mate, it's just that over a life time we older blokes acquire so much knowledge it's sometimes hard to bring the earlier learned stuff to the top of the pile  ..... my excuse anyway  Graham I've been slow doing things to this van but I've been to the Bankstown Air Museum and tried to do some research in other areas, all to no avail really,I envy those who are able to get the past history of their vintage vans, it would be interesting to find out why this one was built... by who... for who, and how often it toured this big brown land, if at all. I'll keep the posts coming, she is a rare old van  Cobber. |
|
|
|
newbug
Junior Member
  "Nothing succeeds like a toothless budgie".
Posts: 53 
|
Post by newbug on Mar 11, 2015 12:05:08 GMT 10
PS - also worth giving Richmond base a call given its relative proximity to the Wiseman's Ferry area where your van was previously.
If you don't have any luck with those please send a PM and I'll chase up with a couple of long-retired RAAFies from that line of work.
|
|
|
|
Post by cobber on Mar 11, 2015 13:37:29 GMT 10
G'day Judy,     Thanks for your interest in this old van, I like the suggestions regarding the fitting of armaments to it, the possibilities are endless aye ?  I took up on the other suggestion and have already fired ( no pun intended ) off an email to the RAAF Museum and will have a go at the Richmond base as well, I'll let you know what they have to say. Cobber. |
|
|
|
Post by akeepsake on Mar 11, 2015 21:34:38 GMT 10
Cobber love the idea of camo paint ! Will it be a problem if you park it in the bush and go for a walk and not be able to find your van when you come back  Besides didn't you play Sergeant Wilson in Dads Army ?  |
|
|
|
Post by cobber on May 23, 2015 9:10:16 GMT 10
Actually...... I'm a bit embarrassed about posting an update on the progress I haven't made on this van but.... here goes. Have been doing a fair bit of research to try and get a handle on who built this van and why. As indicated previously I think it was built by blokes for blokes so, as suggested by Carl, and I tend to agree, it appears to have been built by Airframe/Aircraft fitters at sometime during their apprenticeship, or after.... they called it “Supervised Productivity”, the practice is mentioned in a discourse HERE about “The Training of RAAF technical ground staff 1948-1953” By C.D. Coulthard-Clark (I wouldn't bother clicking on that link unless you have some strange morbid interest in how I spend my time). I've not been able to get confirmation that caravans were part of that exercise from any of the sources suggested by Carl and newbug and a few other places I tried. I have decided it wasn’t used as a “Runway or Flight Control” caravan because they were especially built for that purpose and were painted in a 'checker board' pattern, either red and white or black and white, and as far as I can see this van never suffered that humiliation. Until proved otherwise I'm going to pretend it was used by RAAF personnel, or volunteers or army as accommodation in outback Northern Territory while on “Aircraft spotting” duties, that will justify painting it in camouflage colours  . If you would like to see an aircraft spotter on duty at the AWM click here [/url]. I have been fiddling around with the van as well, bought some of those “Two Lug Anchor Nuts”, I won't mention how much they charge for those things from “Air Craft Spruce” but at least I've kept up the appearances of “Originality” there. Surprisingly they seem to do the intended job, not pretty though aye? 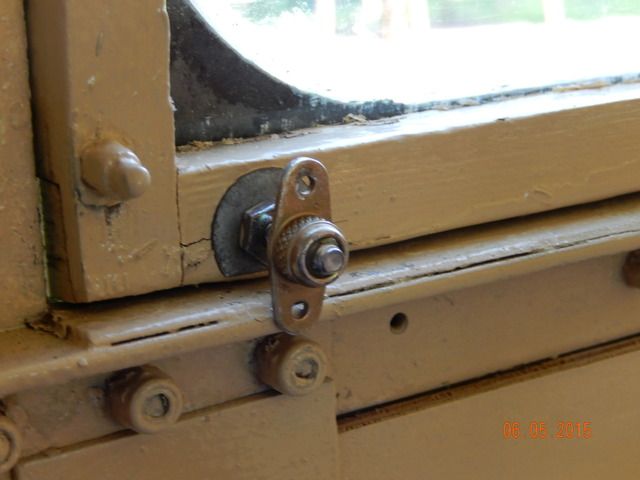 Then, with the help of a slope in the ground I run it up on some ramps so I could crawl around underneath. 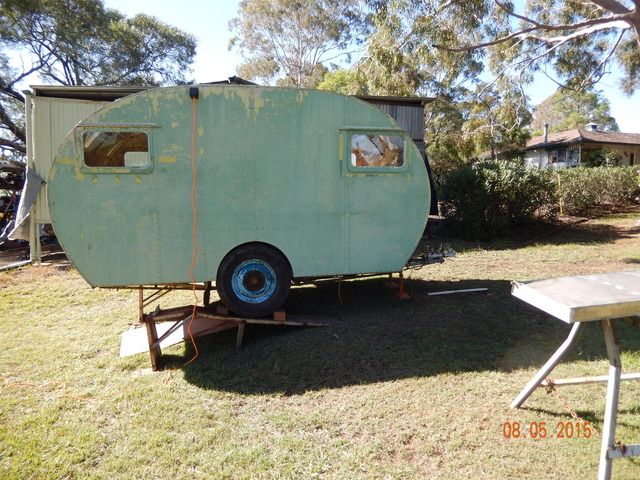 It was then I realised how large the dint in the water tank was/is so that was the first job, remove the tank, as mentioned before it only holds 42 ltr. I said previously it was aluminium... it is in fact stainless steel.  And it was weeping water around the area of the damage but, I decided it wasn't worth spending a lot of money (which the quotes I got were)getting rid of the dint when I could fix the leak relatively easily. 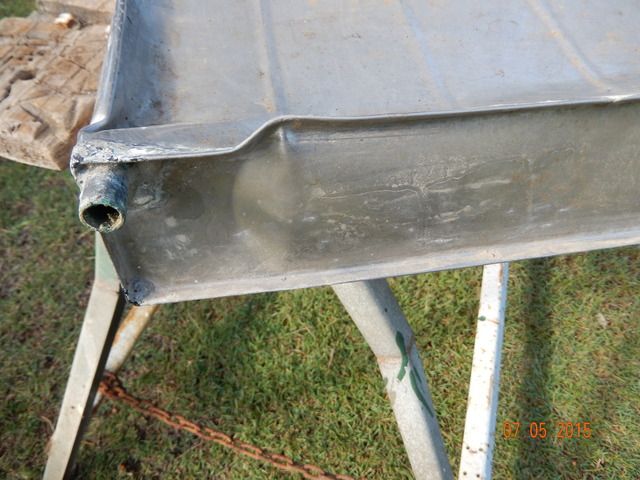 I just prised the flange apart a little in the areas it was leaking and shoved stuff called J.B.Weld into it. 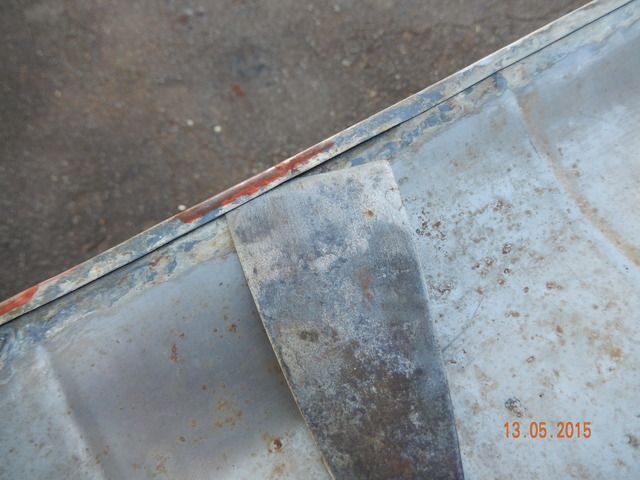 Forgot to take a photo while it was out so here's what it looks like re-installed, not pretty but seems to be working. 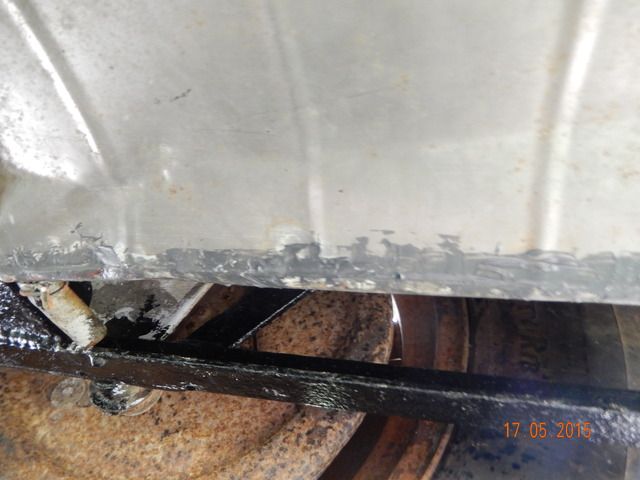 While the tank was out I wire brushed, rust converted, primed and painted the chassis. Now this is pretty, isn't it ? 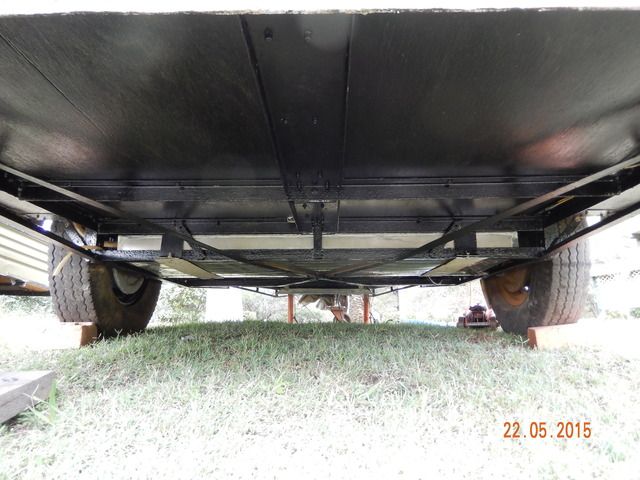 . Also pulled the Chev 1936-48 hubs apart and checked bearings and brake linings, no unpleasant surprises there. 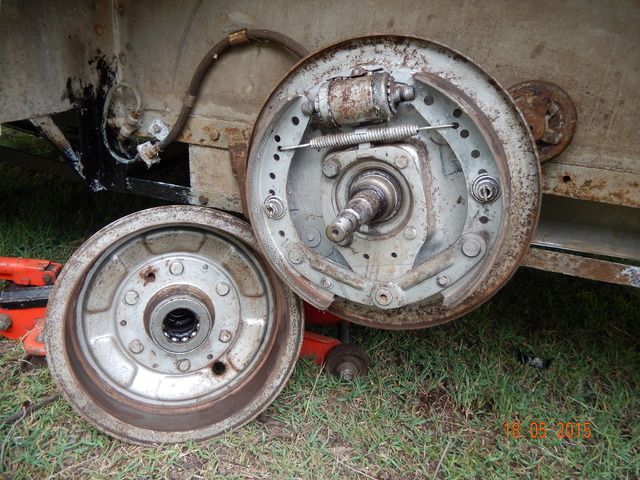 What's next ? ...might pull the front bunk out and fix it up, shouldn't take long. 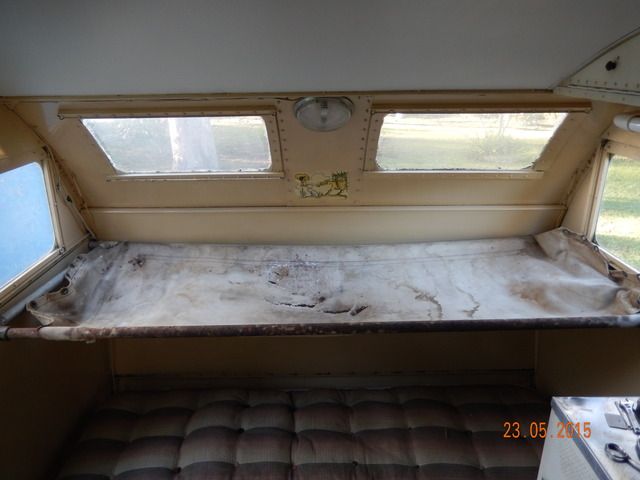 Cobber. |
|
|
|
Post by griffin on May 23, 2015 11:44:51 GMT 10
Good to see something happening on the Al van, I was beginning to think you were sitting back watching TV! I like that spotters chair, about as close as you can get to lying down on the job. And they thought of everything, arm supports and all. Now I know what I'm looking for I'll keep an eye out for a chair so you can keep it authentic.
I used one of those 2 pack epoxy steel products to seal a leaking petrol tank in my Viva GT in 2000 while on a trip in Tasmania and haven't had to touch it since so it should do the job.
George
|
|