|
|
Post by seeshell on Jan 31, 2012 22:48:09 GMT 10
Hi Al Period wood yet! Will the resourcefulness never end?  How long did it take to scribe those ends perfectly? With all this work, I'm sure your lovely wife hardly ever sees you. 8am - and he's off to the shed with his packed lunch! Cheers Seeshell |
|
|
|
Post by sportsman 1 on Feb 1, 2012 15:55:56 GMT 10
Al, old buddy, your project is looking an absolute treat, can't wait to see it in the flesh at Cowra! But wait, what is this I see? (or in this case dont see) I like the look of your walls in position but shouldn't there be a door somewhere?  Once you have clad it from the outside it will be a very nice box, but not really very practical for use if you cant get inside. Back to the drawing board me thinks. |
|
|
|
Post by Franklin1 on Feb 1, 2012 16:36:40 GMT 10
G'day Leigh, Pfffffft...about the best I could do for Cowra would be to bring the two port-hole windows and nail them to a tree somewhere, ha ha.  No door in this model. It's the high-tech "walk through" design that Keith Winser hinted at in one of his early manuals. (Nudge, nudge...wink wink...say no more.  ) That's why it looks so open at both ends. I'm just tossing up at the moment whether it's worthwhile putting a roof on or not. Wouldn't have all those hassles that people have with hatches blowing off along the highway.  I've already worked out what to do about the tail lights. Gonna do the same thing as they do when people are "Just Married" and they tie beer cans on string to the rear bumper. Gonna do the same with the tail lights. I reckon tail lights bouncing along the road would attract people's attention, don't you??  Thanks DonR and seeshell for your comments also.  ;D cheers, Al. |
|
|
|
Post by Franklin1 on Feb 16, 2012 12:47:00 GMT 10
After relentless pressure from sportsman1 ( *just joking - but see his comment above* ), I decided to cut a door opening... 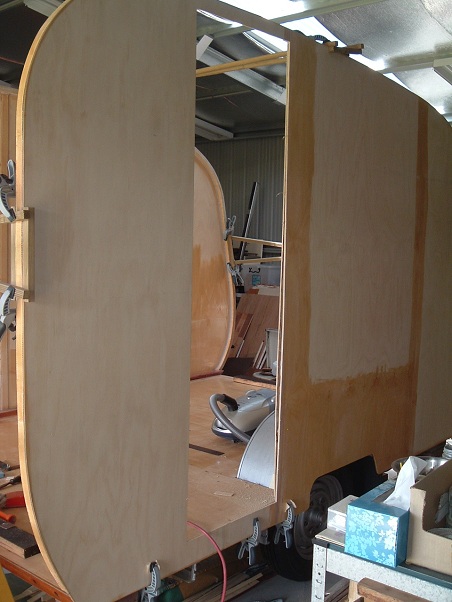 It ended up being a bit of a challenge, due to my collection of spirit levels not being reliable. I've got four levels that I use for various jobs... 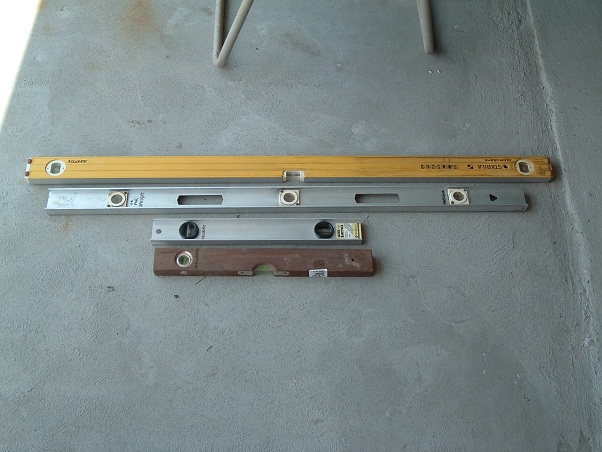 I used the long silver one to mark out the door opening, and then I cut the piece out with a jigsaw. A little later, I happened to put the long yellow one up against the vertical cuts, and it showed the verticals to be out of whack. "What the ....?" After a bit of cross-checking, I discovered all the four levels gave different results. Soooo...which bubbles were accurate, and which were not?? The only way to test them was to make up a home-made plumb bob and find out which ones I could trust. I don't have one of these fancy plumb bobs...  Mine is an el-cheapo model, made with a padlock and a length of builder's string... 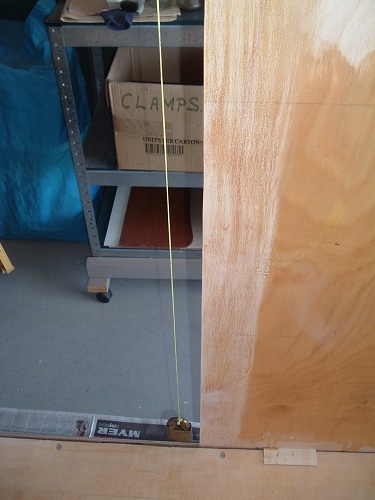 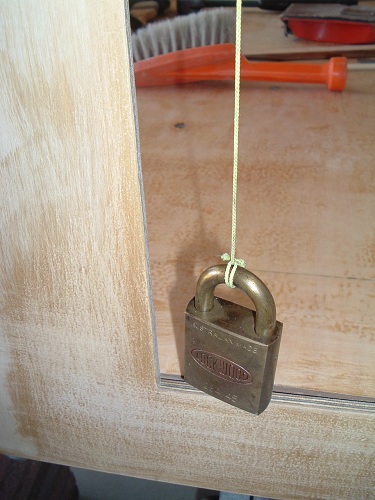 Once the string settled, I marked a distance from the string to the wall, and put a couple of pencil marks up near the top of the opening, and down near the bottom. Then I checked each spirit level bubble against the marks. The two longer levels have a bubble for measuring the verticals at each end, and the two short ones only have the one bubble. From a total of six bubbles, only two were accurate against the string marks... 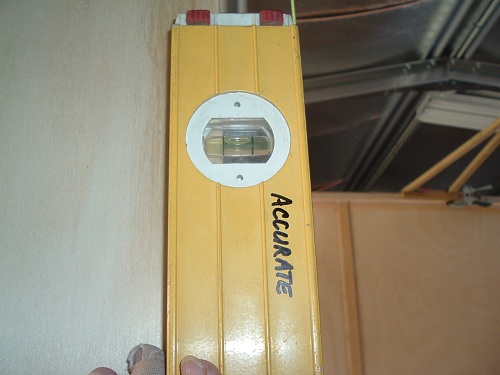 As it turned out, the door opening I'd cut was actually 5mm out of whack from top to bottom, so I had to do a bit of trimming on the opening to make it exactly vertical. The other challenge I faced came about because I decided to make the door opening a bit wider than the typical caravan door. After reading on the forum over the years about the problems people have had with getting things in and out of the van (eg. fridges), I thought I might as well make the opening wider to accommodate that sort of thing. Blow me down if the opening didn't fall smack in the middle of the sheet joint I'd made in the wall... 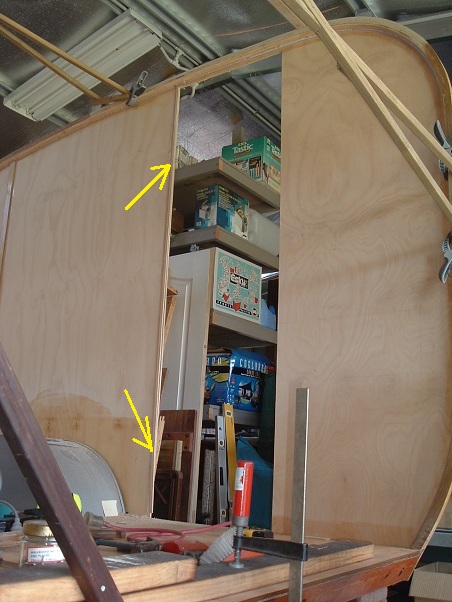 ...which meant I had to cut away the cover strip and the joint itself... 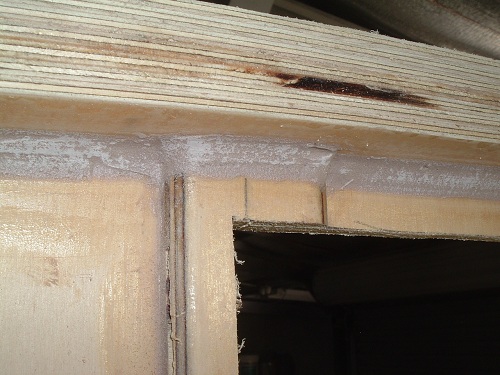  Thank goodness the Bote-Cote glue can be fairly easily removed with a heated soldering iron. I've cut some of the framework for the door frame, and with a bit of luck I should be able to glue that into position over the next couple of days. Photos to come... cheers, Al. |
|
|
|
Post by Roehm3108 on Feb 16, 2012 14:19:28 GMT 10
Sounds like Murphy's been at your van - but it's just to make sure you put some blood, sweat and cursing into the construction. Just think, on top of everything else, you're building moral fibre!!!  It's all looking good, Al. Levels and tape measures. I always make sure that I use the same one for the job I'm doing. That way I continue the same error for that project and it'll look OK in the end ;D ;D ;D Oh and Al ................. After all that checking of your levels, did ya remember to check that the caravan floor was level with the CORRECT level Boy I enjoy watching other people work ;D ;D ;D Ray |
|
|
|
Post by Franklin1 on Feb 16, 2012 17:57:47 GMT 10
G'day Ray, yes I did spend a fair bit of time making sure the floor was as level as possible when I put the chassis up on blocks in the shed. It was no easy feat, I can tell you. There's quite a bit of "hill and dale" along the length of the floor. I think the original van must have been bounced along the highway on a number of occasions, and the chassis has been slightly buckled as a result. I had to use a long length of square aluminium tubing (an old post from an aluminium awning ) to see how bad the ups and downs were, and then work out the best fit over the length. I put the spirit level on top of the tubing, and checked the level in both directions to make sure the bubble gave the same reading. Somehow or other, I forgot to do that when I marked out the door opening...  We live and learn, ay?! cheers, Al. |
|
|
|
Post by Franklin1 on Feb 26, 2012 15:03:34 GMT 10
I finally got the door frame finished (yep, this IS a sloooow project... ). You can see in this photo how the original door was offset to the right of the step. I'm not sure if this was intended, or was the result of a bit of poor planning. I wanted a wider doorway, so I increased the width on the left... 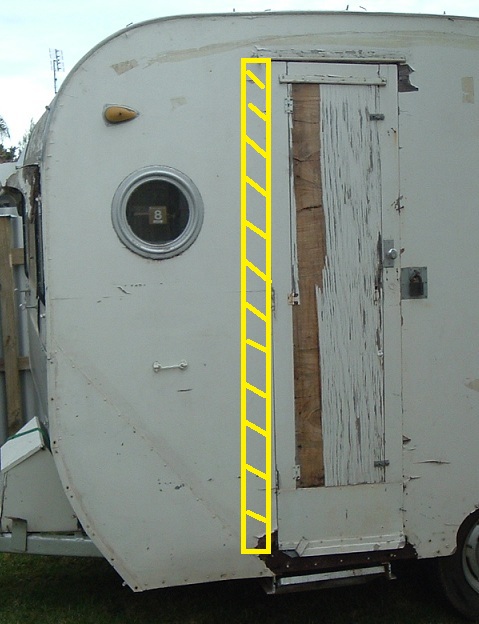 You can also see in the above photo how the plywood under the door had rotted away. I had a bit of a think about how to avoid that in future, and decided to build a doorway similar to what you'd find at the front door of a house. This involved making a step tread out of two bits of timber... 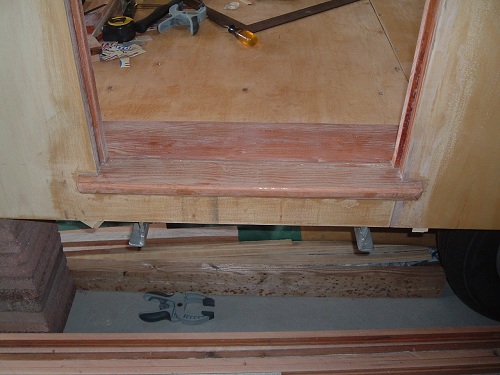 The front piece is a bit of architrave, which I cut so that it had a 5 degree slope on the top surface, to deflect water away from the step... 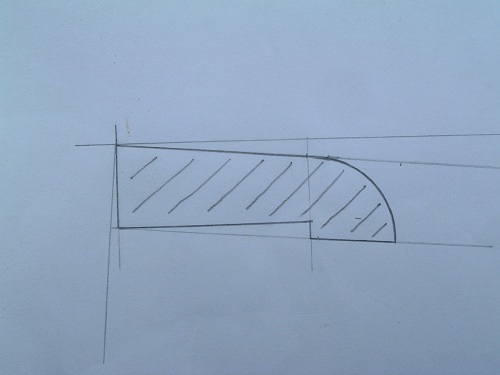 A bit of quad timber was glued underneath to provide extra strength and support... 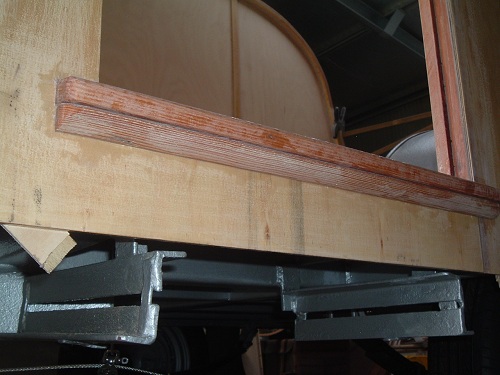 The "door jambs" were made out of two pieces of timber on each side, to weatherproof the door opening... 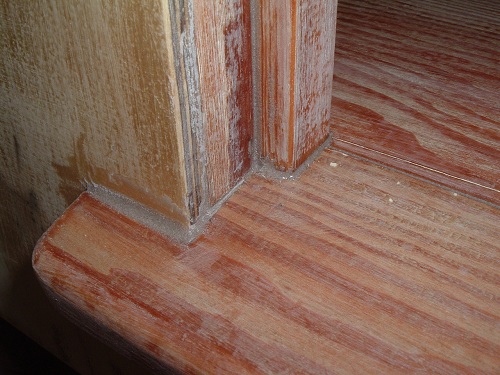 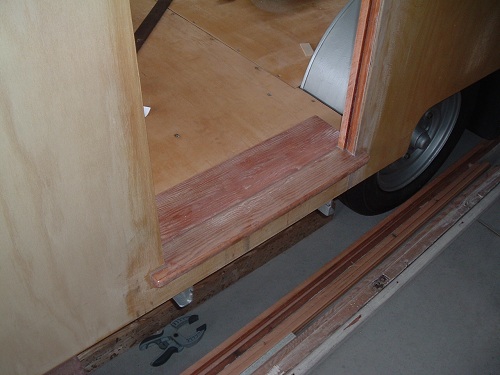 The new opening has an effective width of 510mm, so it's a much more practical size now... 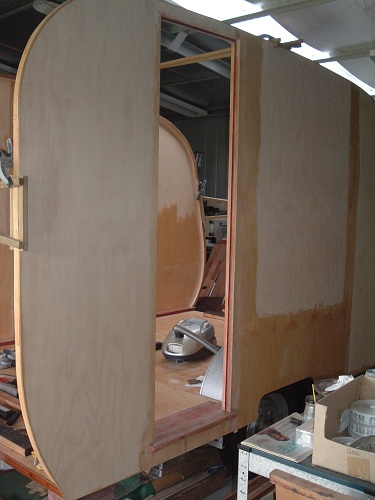 I'm going to order a new door from Cruisindoug Doors Pty Ltd, because I see on this forum that he makes pretty good doors for caravans. cheers, Al. |
|
|
|
Post by cruisindoug on Feb 26, 2012 16:48:09 GMT 10
No worries Al, you'll find my rates very competitive ... but the frieght might be a killer! Of course, I'd have to come down and fit it so my travel expenses might add up to a bit as well .... ;D ;D ;D ;D ;D Your doing great work there Al I'm sure a door will be no challenge for you! Cheers Doug. |
|
|
|
Post by Franklin1 on Mar 14, 2012 8:05:47 GMT 10
Well, it was a funny old day yesterday...  There's a gap between the mudguard and the wall on both sides of the van. Something to do with the original chassis not being the same width all the way along its length, and being a bit "hourglass" shape in reality. Anyway, yesterday was the time to do something about the gap. "No problem", I says. "I'll just pump some gap filler into it and she'll be right!"... 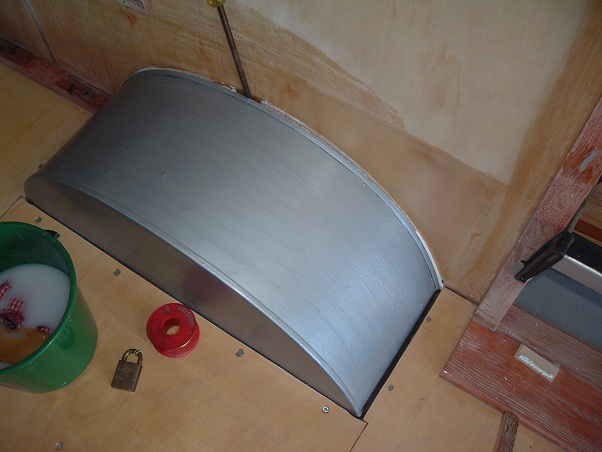 So I did that, and then stood back and watched the gap filler slide down and disappear into the gap. ... 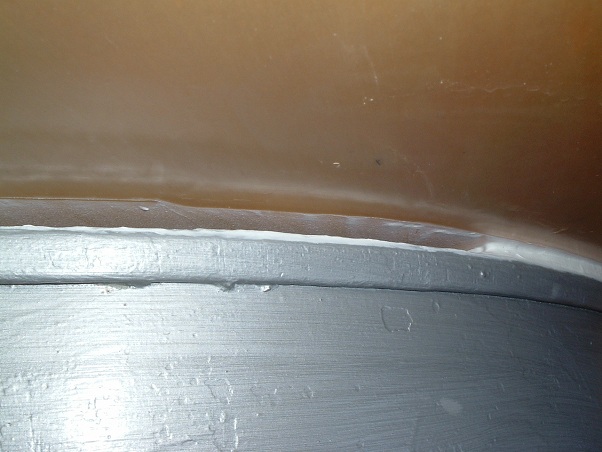 So I pumped more filler into the gap... and watched that all slide down as well. "Shikes!!" I says. "The bloody stuff is gonna end up leaking out the bottom!" A frantic grab for some clamps to clamp the bottom edge of the mudguard to the plywood... 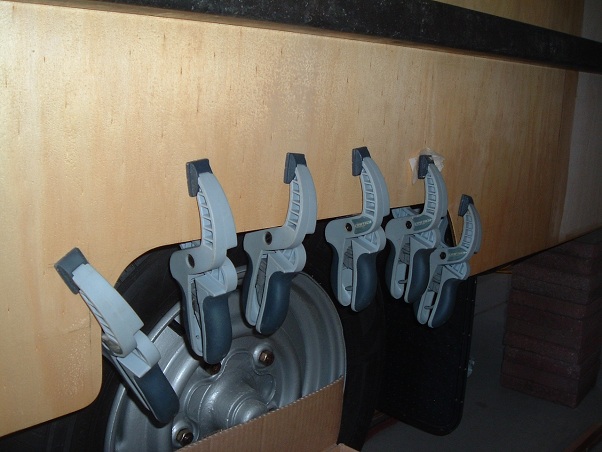 Figured I'd leave that to cure overnight, before heading back out today to pump even more filler into it to bring it level with the top edge of the guard. In other news, framework is being cut and prepared for various internal fittings. You can see the rear bed framework starting to take shape in this photo... 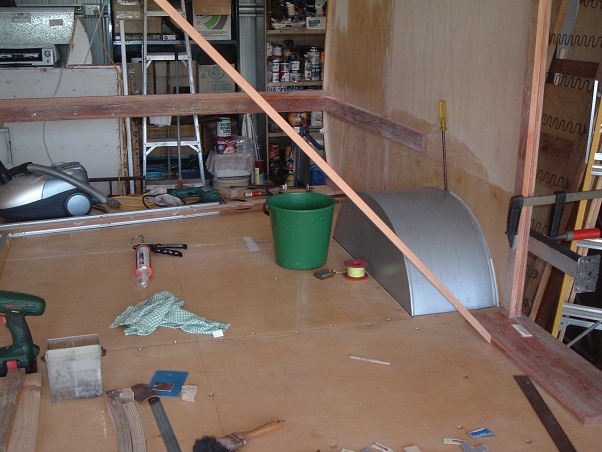 Somebody in a unit around the corner put a complete timber double bed (in parts) out on the footpath a couple of days ago. Ends, rails, and slats. I was walking the dog when I spotted it, so I grabbed an armful of the slats to carry home. Took me another two trips from home to carry all the rest, but it's gonna save me a heap of dosh. I'll just cut it down to fit in the framework I've been building. Gotta love recycling! cheers, Al. |
|
|
|
Post by seeshell on Mar 14, 2012 10:57:43 GMT 10
Hi Al What about some of that expanding foam as filler? Then you're not trying to fill a canyon, just seal the edges. Cheers Seeshell |
|
|
|
Post by Rattles on Mar 14, 2012 11:11:03 GMT 10
To Check a Spirit level for plumb just turn it around 180 deg (Bubble side to job) if the bubble is in the same place then it is accurate, to use an out of plumb spirit level to give an plumb measurement just split the difference then the job will be plumb to check for level just turn the level around and the reading should be the same.
It is always good practice to do this each time as even a good level can shift calibration
Rattles
|
|
|
|
Post by Franklin1 on Mar 14, 2012 13:21:58 GMT 10
G'day seeshell, Yep, expanding foam would probably work better. It's just that I already had the cartridges of gap filler in the shed left over from previous projects around the house. It was supposed to be a "quick and easy fix", but it looks like the Bote Cote resin on the plywood in that area is too smooth on the surface to stop the filler from slipping. This morning's effort to top it up (again) was 'much more betterer'. -------------------------------------------- G'day rattles, good advice about the spirit levels. I'm determined not to get caught out like that again. cheers, Al. |
|
|
|
Post by Franklin1 on Mar 27, 2012 10:49:22 GMT 10
Another fortnight gone, another piece of timber glued in position... The gap-filler saga ended up being a mini-disaster. Left the filler for 24 hours to see if it would cure sufficiently. Seemed to be ok on the top, so I took the clamps off at the bottom. Luckily I put some newspaper on the floor underneath "just in case", because a heap of filler slid out from the gap and plopped on the newspaper. Had a cow of a time trying to clean up all the mess up in the mudguard area. I think the problem might have been partly due to the cartridge of filler being a few years old and maybe not setting like fresh stuff does. Anyway, finally got it all sorted out on that first side. Used a fresh cartridge on the other side and had no problems whatsoever. Things are happening slowly elsewhere on the van. I gave my old dowelling jig a bit of air after having it shut in its box for a fair few years... 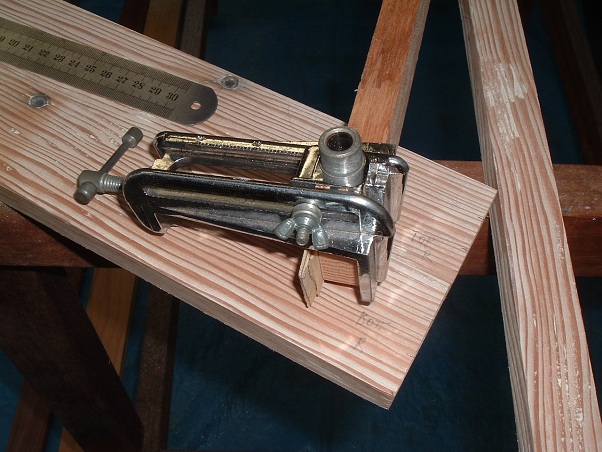 Used it to make the first of many cupboard frames the van will require. This one is for the wardrobe door...  The rear trapdoor opening has been cut, and framework is progressing... 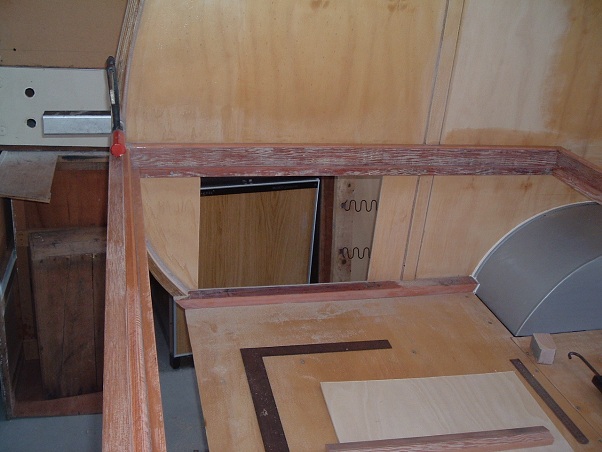 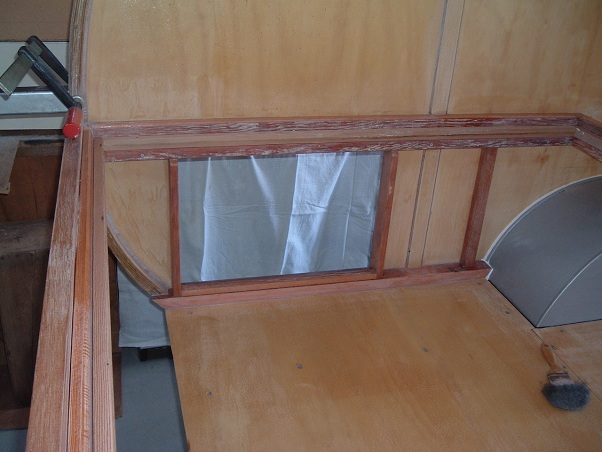 The bed frame has been cut and glued to the walls and rear framework...  The double bed that I scored for free off the footpath has been cut down to size. The slats sit on their own little frame inside the bed framework. This allows the option of removing the slats and going back to a true vintage bed of plywood base and straw mattress (...like, as if! ). Here's the slats and their frame being test-fitted... 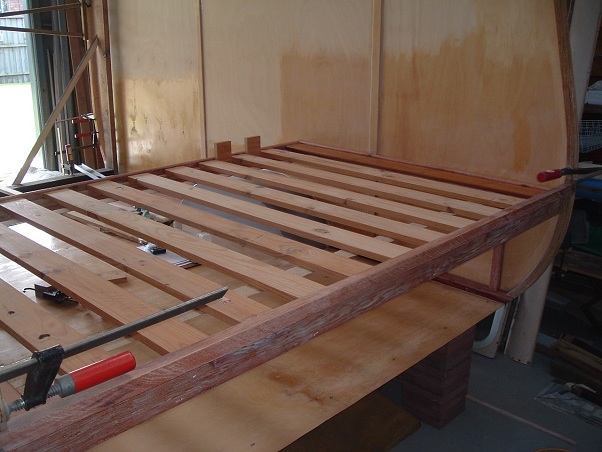 Still got plenty to do in the rear section. A few "options and possibilities" are being tossed around in my head, so we'll see what comes of it all. cheers, Al. |
|
|
|
Post by humpyboy on Mar 27, 2012 11:45:08 GMT 10
Careful tossing all those ideas around in your head mate, you don't want to hurt yourself. ;D
|
|
|
|
Post by cruisindoug on Mar 27, 2012 19:57:14 GMT 10
Looking good Al!
|
|
gregw
New Member

Posts: 43
|
Post by gregw on Apr 4, 2012 15:17:03 GMT 10
You are doing a fantastic job Al. Your explanations and attention to detail will allow a lot of ot,hers to have the confidence to have a go at lots of these tasks, you seem to do it with the minimum of fancy equipment as well. The photos on your last post seem to have disappeared, is this the same for all ?? Keep up the good work.
Greg
|
|
|
|
Post by Franklin1 on Apr 4, 2012 17:13:57 GMT 10
G'day Greg (and Doug above), Thanks to you both for your encouraging words. Greg, I was kinda hoping my photos would DETER other people from attempting such a job , but if it spurs anyone on, don't come whingeing to me later, saying "Why didn't someone TELL me!!", ha ha. The photo links have been reinstalled. I discovered yesterday I'd put the photos in the wrong album in my photo hosting account, so I shifted them to the right album, which severed all the links. Now they are back. cheers, Al. |
|
|
|
Post by seeshell on Apr 15, 2012 15:28:10 GMT 10
Hi Al I found this on Youtube the other day and thought of you about the full glue construction: www.youtube.com/watch?v=c7cVvYdLeekIt's clearly a bit of propaganda about Mosquito construction here in Australia, but it is interesting because it shows how the bodies were laminated 3mm ply/balsa filler/3mm ply outer and held together with straps while drying up (which might be relevant for your roof?). Surely your Newcastle will be rock solid. Enjoy! Seeshell |
|
|
|
Post by Franklin1 on Apr 15, 2012 16:53:43 GMT 10
G'day seeshell, Thanks for that. That's pretty interesting, and will be similar to how my project ends up being done. I wouldn't mind all those blokes popping round to my shed to lend a hand. Funny you should mention the words "rock solid"... I have to make a number of notches in the laminated block around the perimeter of the walls to anchor the roofing cross beams into position. On the first go, I made two cuts 30mm apart, and tried to hammer the small piece out with a chisel and rubber hammer. I couldn't budge it! I was really belting on the chisel but it just wouldn't give. I ended up having to make a couple more cuts inside the 30mm marks and chiseling the notch out in smaller pieces. Heck, if a 30mm length of laminated block is that hard to remove, the rest of the perimeter will still be around in another thousand years!! Amazing stuff, this Bote-Cote! ;D cheers, Al. |
|
|
|
Post by Franklin1 on Feb 24, 2013 16:41:39 GMT 10
Ok, here we are 10 months later, and stuff-all has happened with this van. Time to psyche myself up and get back into it. Thought I might just "fluff around the edges" for a bit, until the mojo tank is full and raring to go. Dug a rusty old "Kwang Hwa" kero lantern out of the shed. Made in China in the 1960s or '70s. Got it from a mate's ol' man who has retired from camping. Thought I might as well spend a lazy Sunday converting it to 12V operation. This is the lantern, with the hook that will hold it up in the foreground (...a genuine brass hook, cobber! )... 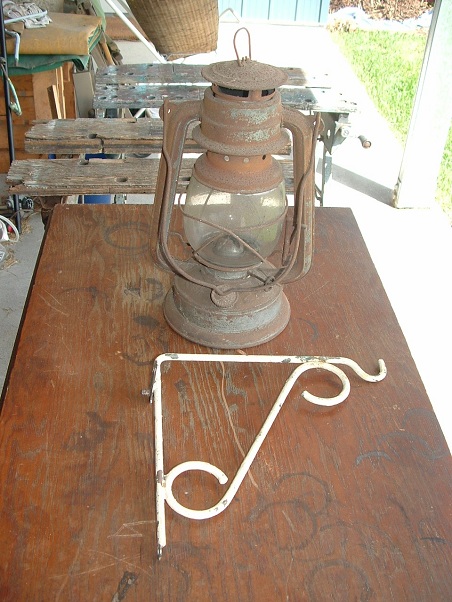 I took the wick out of the lantern, and pop-rivetted a BA15D globe socket onto the wick guard... 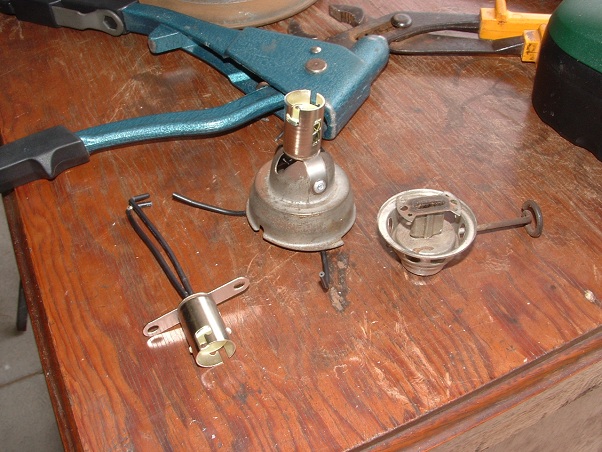 Drilled a couple of holes around the base. One for the push-button switch, and one for the 12V power cable... 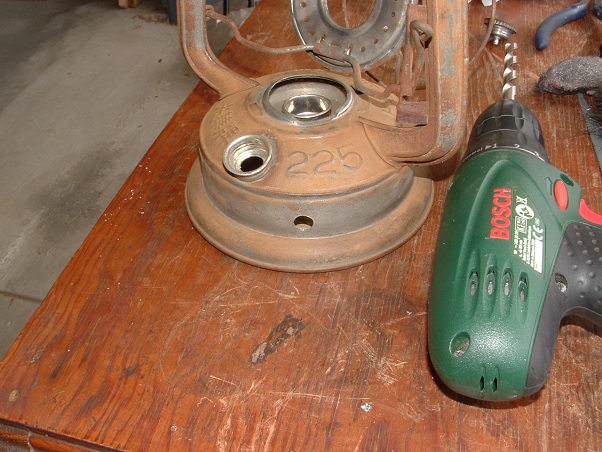 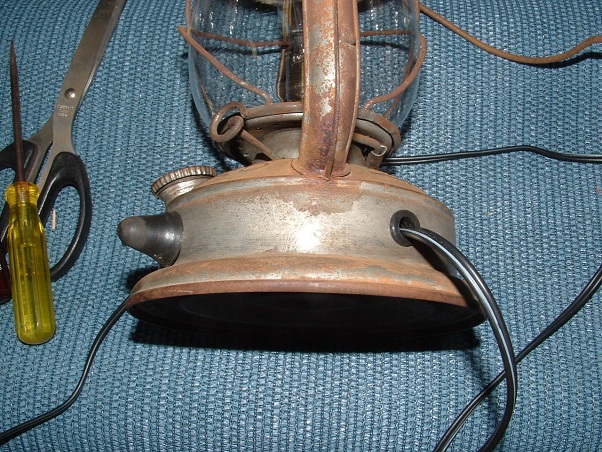 Hooked all the wiring up and connected it to a battery... 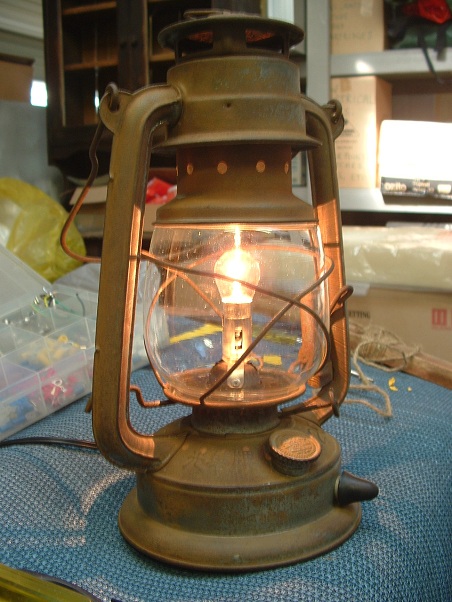 It'll be the annexe light, if'n I ever get this van finished. I need to make a backing board for the bracket so the whole kit and kaboodle can be taken off the van for travel. "One small step for man..." cheers, Al. |
|
|
|
Post by hilldweller on Feb 24, 2013 17:50:49 GMT 10
Very clever. Those old lamps are lovely Now can you do something to the van itself please - I enjoy watching your work! |
|
|
|
Post by Roehm3108 on Feb 24, 2013 18:58:22 GMT 10
|
|
|
|
Post by Franklin1 on Feb 25, 2013 13:21:20 GMT 10
G'day Ray, So do I! But it's not a new idea - I found it while searching through 'vintage lamp images' to get some ideas. There's probably already one like it sitting in reddo's shed of invention. And yes, Hilldweller is a hard taskmistress, but she's probably exactly what I need at the moment - a cyberspace kick up the bum. I had a look at the proposed backing board this morning. It's the side of this box... 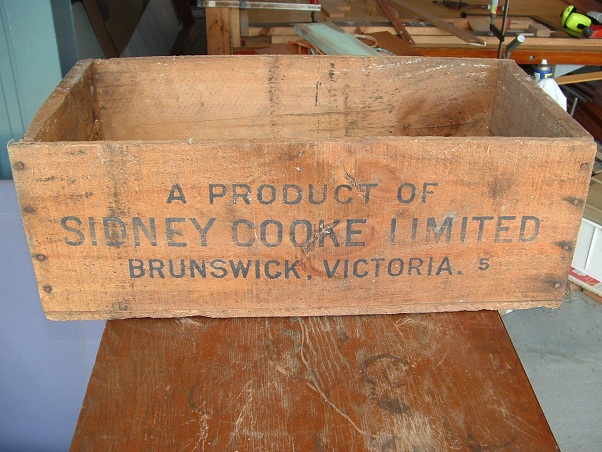 Riddled with borer holes, it is, but fortunately there doesn't seem to be any active holes now. I don't know the age of the box, but it 'looks' old. This is sort of how I'm thinking it will look when completed...   And then hanging off the bottom of the board will be this... 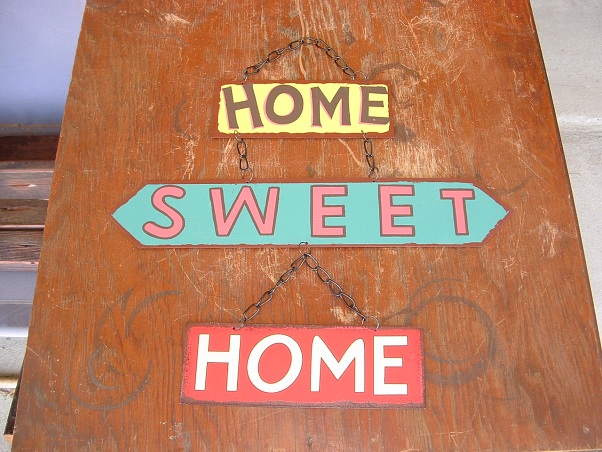 If any forum ladies want more bling for their van, the Home-Sweet-Home sign came from this ebay seller in the UK. It's not for blokey blokes, but I'm exempt because my birthday is on International Womens Day. We did a bit of landscaping in the front garden last week, using treated pine sleepers for the borders... 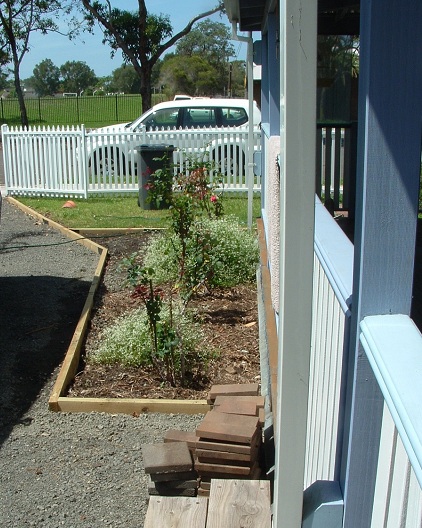 The timber offcuts were put to good use. There are no rear stabiliser jacks on the van, so I'll have to use stacka-jacks instead. I made some timber bases for the jacks out of the offcuts... 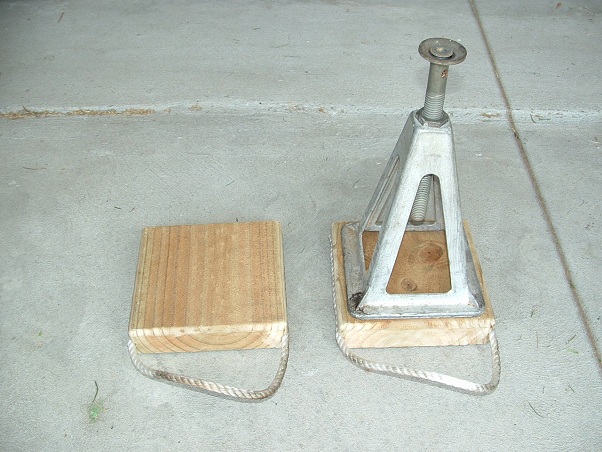 Just proves I haven't been totally ignoring the project... cheers, Al. |
|
|
|
Post by Roehm3108 on Feb 25, 2013 16:22:23 GMT 10
Those Sidney Cooke boxes would definitely be early to mid 60's, Al. Around that time I was on a working holiday in Tassie and used to make the fruit packing boxes out of timber, at night. Used to get $12 a hundred, including lids At best you could build 30 an hour - you do the sums!! I think they phased out timber fruit boxes in the late 60's, so that's probably when the nail boxes were replaced by cardboard as well. Good to see you're still working with timber, albeit in the garden ;D ;D ;D Ray |
|
|
|
Post by hilldweller on Feb 25, 2013 17:23:37 GMT 10
Nah bugger the garden, get back to the van!
(...says she from the safety of cyberspace...)
|
|


 How long did it take to scribe those ends perfectly?


