|
|
Post by gregh on Jan 21, 2018 10:44:32 GMT 10
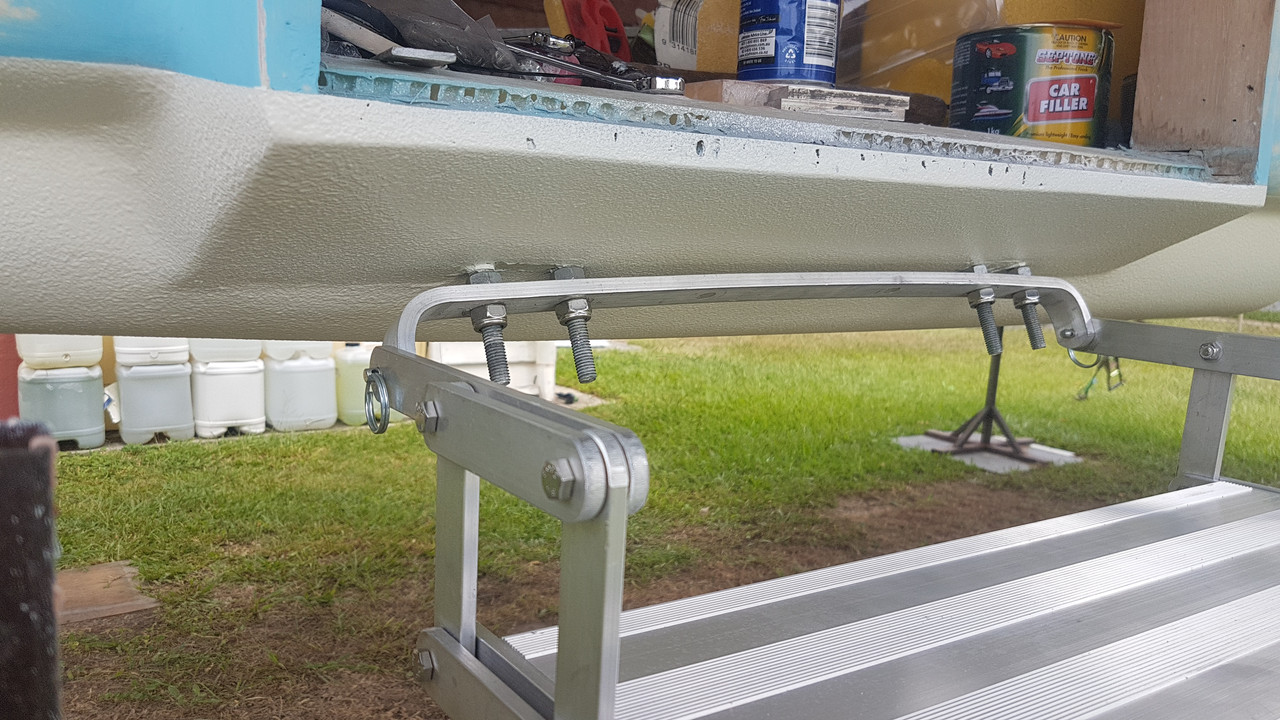
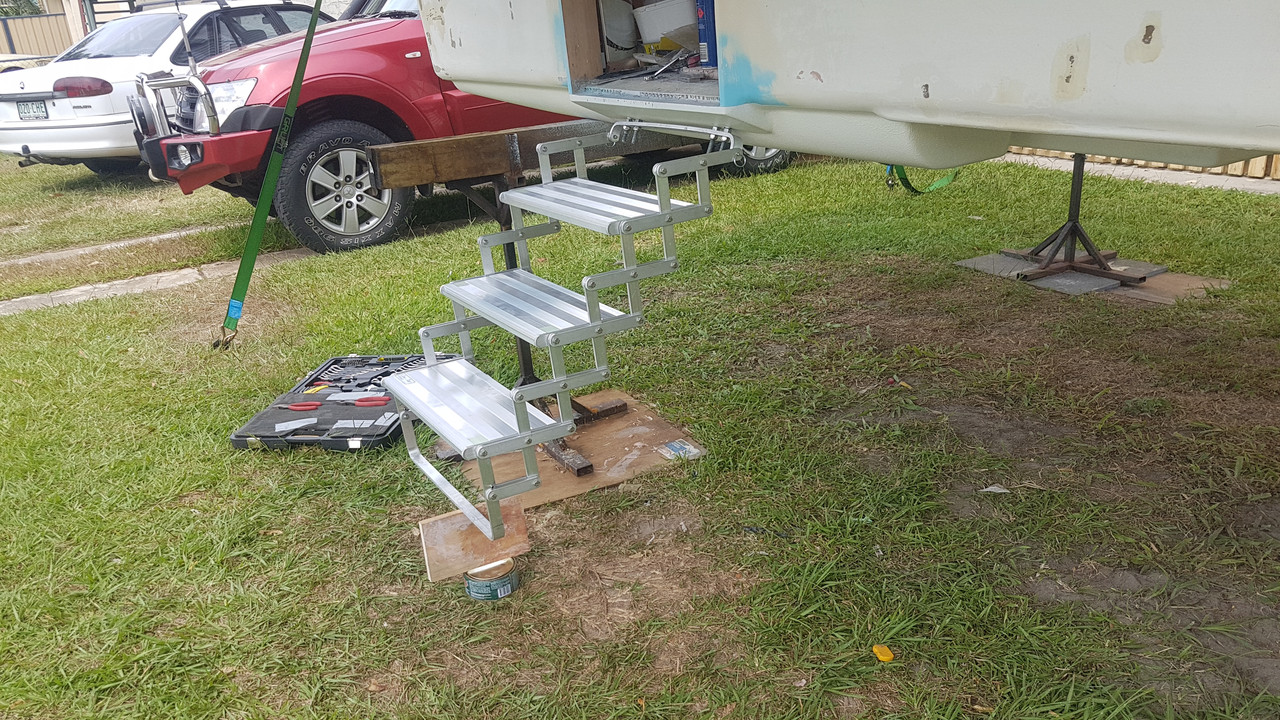
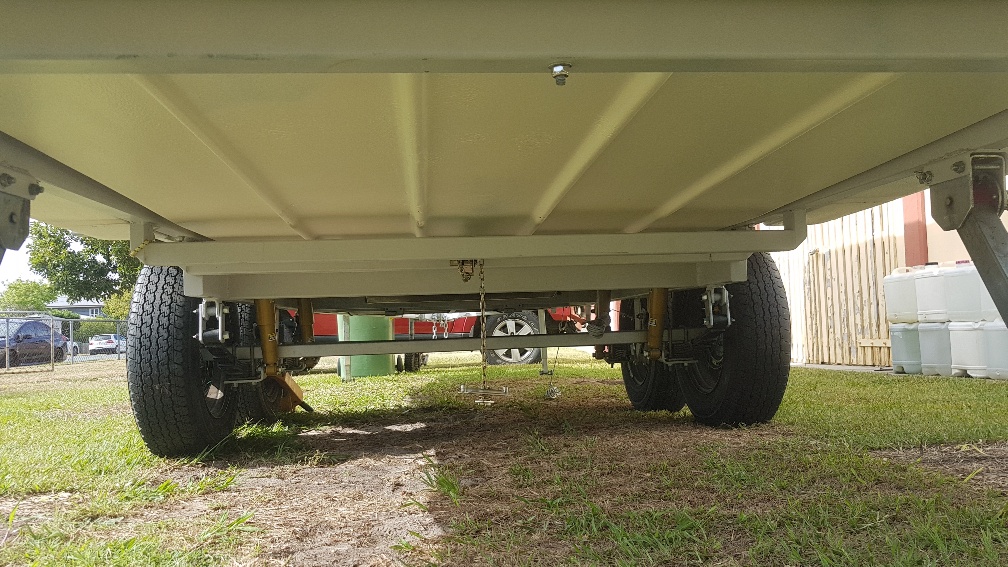
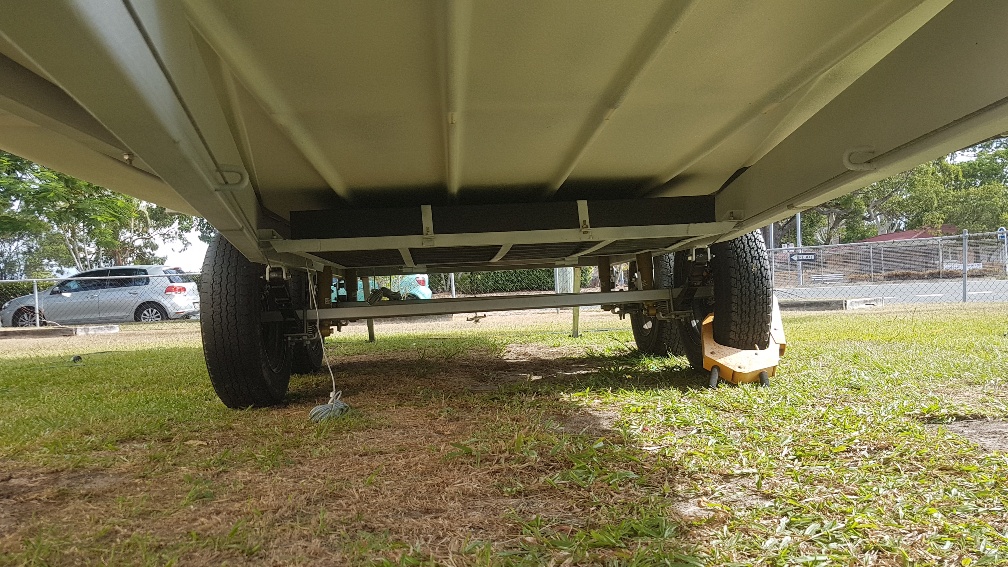
Finally got the underside of the van coated with Rapture ute liner. Wait 7 days for it to cure; then roll the chassis back under her. Only just got it in; it rained again this morning.
Also fitted and tested the new steps to the reinforced body. Major milestone coming up next weekend. 
Greg
|
|
cster
New Member

Posts: 49 
|
Post by cster on Feb 1, 2018 17:50:56 GMT 10
So I guess that means no more stone chips?? The ute liner stuff is meant to be bullet proof yes??.
It does look schmick in the photo's.
|
|
|
|
Post by gregh on Feb 1, 2018 19:07:41 GMT 10
|
|
|
|
Post by Mustang on Feb 2, 2018 7:14:33 GMT 10
Certainly one of a kind.
|
|
cster
New Member
Posts: 49
|
Post by cster on Feb 2, 2018 16:35:22 GMT 10
It's shaping up to be a real head turner, the chassis is a beaut, the body just has the right look. Must be that 60's-70's look.
Looking forward to the resto
|
|
|
|
Post by gregh on Feb 2, 2018 19:56:28 GMT 10
Yes I was a bit concerned it might look obscenely high, but it actually doesn't look to bad. No worse than the new "off-road" vans on the market selling for obscene prices. I believe it will fit right in and as you say a "one-of-a-kind". I wonder if anyone would be stupid enough to steal it? We have the Bay Expo on 16-18th Feb. Hoping to get there to get some updated ideas for the reno. Particularly in the area of en-suites. Ours will need to be on the sidewall and compact due to height issues in the rear of the van and we both want a club lounge at the front. Here's our "almost" final design. 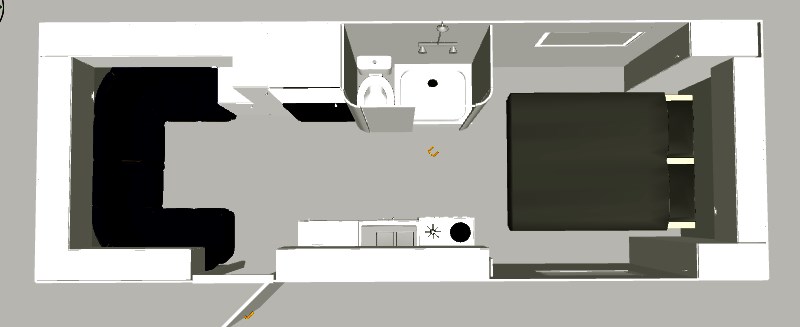  |
|
|
|
Post by gregh on Mar 5, 2019 18:58:03 GMT 10
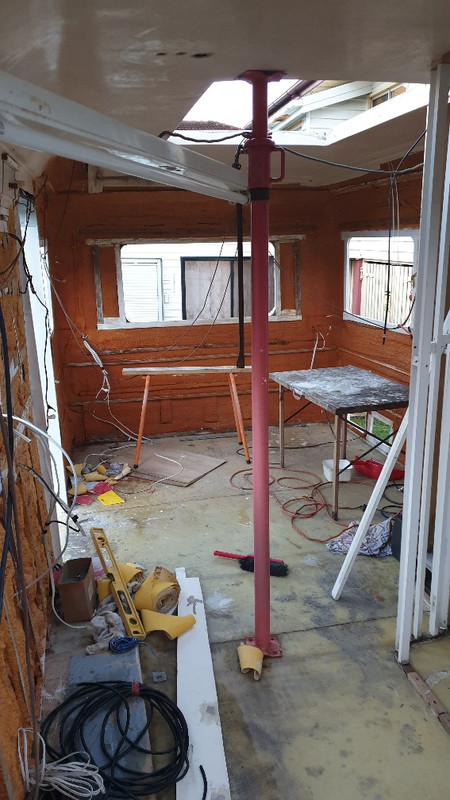
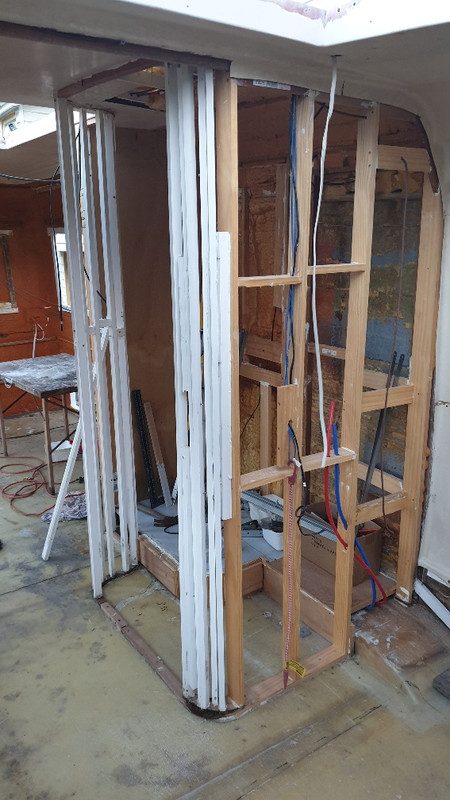
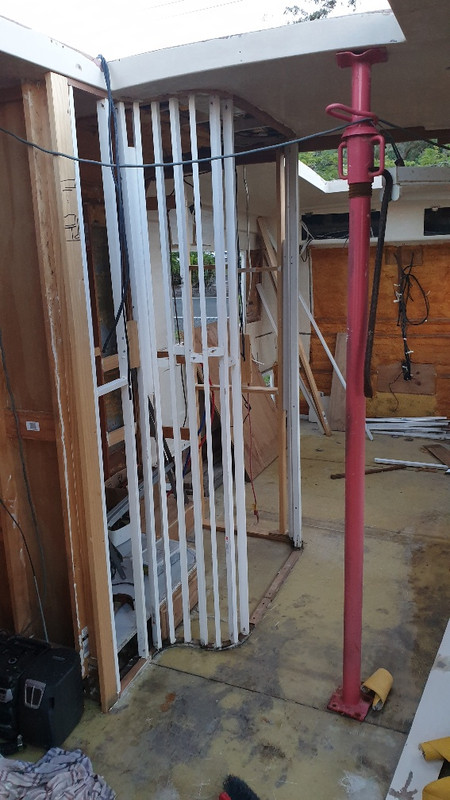
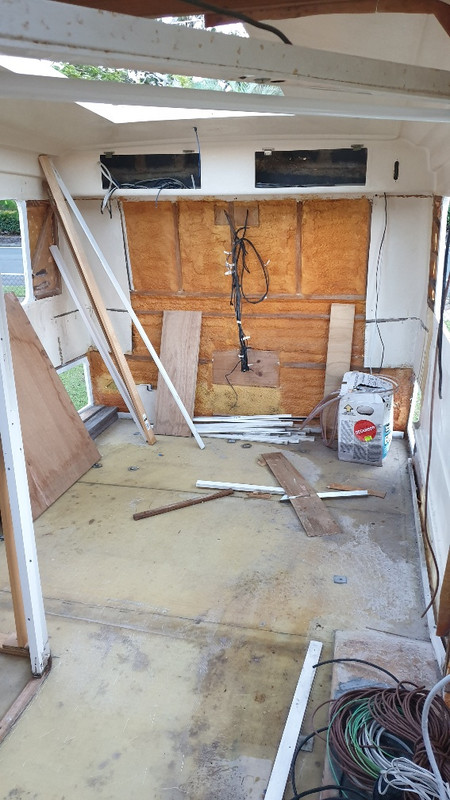
OK. So it's been over a year since I did an update I'm a bit disappointed with myself for not getting more done on this old girl. Unfortunately I got caught up in another van resto that had to be finished. Progress has been minimal - just a few body repairs here and there. However the next part of this update will be considered sacrilege by some members.  Some of you may already know that I plan to put a lot of solar up on the roof - 600w plus actually. Not having a great deal of flat surface space to mount solar panels, I've elected to use the super thin/flexible solar panels - 3x 100w panels mounted diagonally across the top of each hatch. I've fibre-glassed some light-weight meranti to the top of each hatch to mount the panels to -this also provided ventilation under the panels to improve their efficiency. The solar panels weigh under 2 kg each, so I'm adding around 6kg to each hatch including the timber. Total weight of each hatch is now around 24kg. The good old wifey complained about the weight so, I've taken another unplanned step. See images and video below.  Now that that's all sorted, I've started repairing and sanding the roof in preparation for the special coating I'm going to use. I'm using the Van Pack supplied by Globalcote which I'll have tinted to match the rest of the van. - Paint the roof
- Repair and paint the rest of the body
- Fit the new windows and door
- Move inside and start the fitout
Anyway; I'm hoping to get much more done this year.  Greg |
|
|
|
Post by Mustang on Mar 6, 2019 7:56:40 GMT 10
Looking Good!!!!
I fiberglassed my Viscount hatches both sides to preserve them, after adding hardware it is amazing how that weight adds up, especially over an old guys head.
|
|
|
|
Post by gregh on Mar 6, 2019 8:40:46 GMT 10
Yes Mustang, the weight does add up; in fact I underestimated the weight of each hatch - they're actually weigh closer to 28kg each.  The 12v Linear actuator is rated at 150kg. I'm not sure if anyone has noticed, but I have re-manufactured the hatch opening with a flat surface using aluminium angle; I've also re-manufactured the underside of the hatches to have a flat surface. The idea being it will be dust proof once I add a foam seal. Just on a different topic. I just finished reading my entire forum thread; Between back problems, heart problems, other resto's etc. It's been nearly 6 years on this project!!! and still going. Started in Jan 2013. I'm seriously hoping to get a lot done this year. Greg |
|
|
|
Post by Warrenk on Mar 7, 2019 20:34:34 GMT 10
Greg, flexible solar panels have a pretty high failure rate. I know of a owner of lithium battery supply and install company that has stopped suppling these panels until he can find a reliable one.
Warren
|
|
|
|
Post by gregh on Mar 7, 2019 21:32:16 GMT 10
Greg, flexible solar panels have a pretty high failure rate. I know of a owner of lithium battery supply and install company that has stopped supplying these panels until he can find a reliable one. Warren Hi Warren. Well I do hope your wrong obviously.  I have been using a couple of them (the ones I plan to use) for about 18mths for camping - just laid out on the ground; no particular care taken; so far they haven't been a problem. I have had a few cheap and nasties in the past, which weren't performing very well. But through self education, I have learnt what to look for and replaced the cheapies with panels made with Sunpower A grade cells. Unlike the cheapies which are super light and super flexible, creek and crack when you flex them, and you can feel the cells through a thin gloss coating on them, mine are a bit heavier and have a heavy mat finish, slightly thicker and less flexible. Also there are no thin metal strips visible. All metal strips are embedded behind the panels in one of the layers. Having said that, I got these at a good price; which warranted giving them a go. The way I figure it, even if I have to replace one a year, I'm still better off than staying at caravan parks for power. Greg |
|
|
|
Post by atouchofglass on Mar 31, 2019 14:16:52 GMT 10
Shaping up real nice Gregh!
👍👍
|
|
|
|
Post by gregh on Jul 17, 2019 13:53:08 GMT 10
|
|
|
|
Post by Roehm3108 on Jul 17, 2019 16:49:40 GMT 10
|
|
|
|
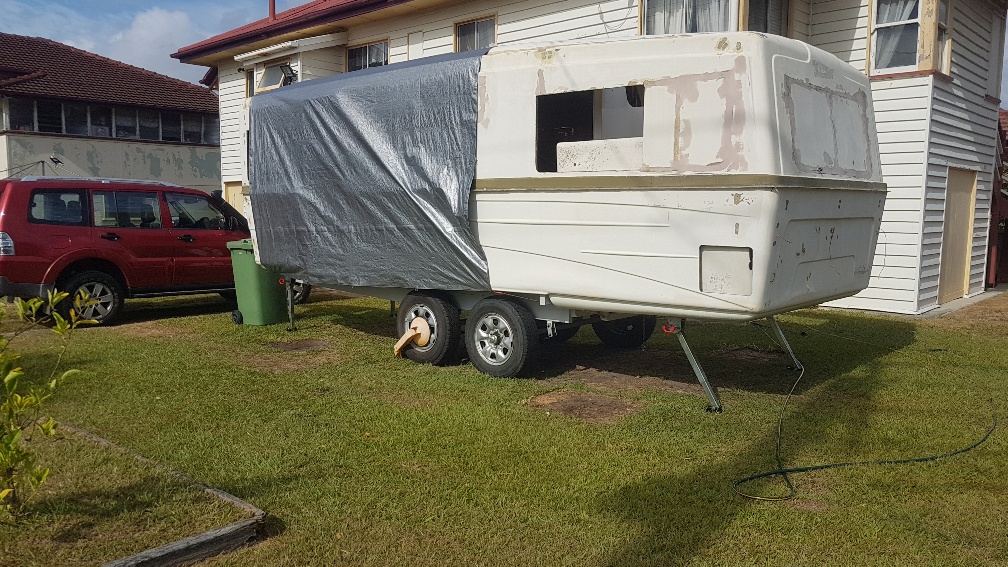
Post by Mustang on Jul 18, 2019 7:47:42 GMT 10
I think your idea of glassing the back totally is a good move for strength. Most moderns have done away with the rear (& the front).
Adding to your difficulty working without a shed!!! I take my hat off to you.
|
|
|
|
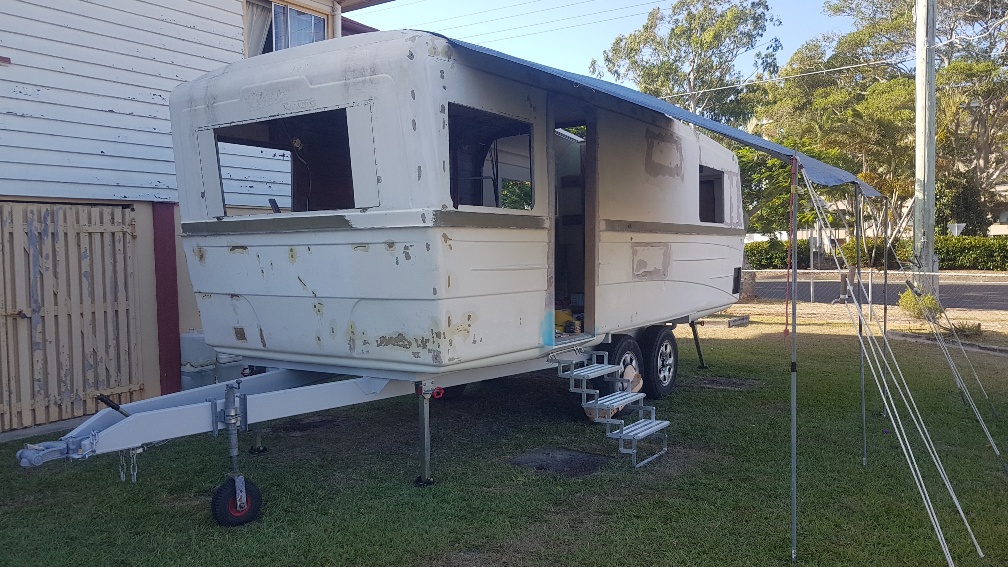
Post by gregh on Oct 28, 2019 21:40:28 GMT 10
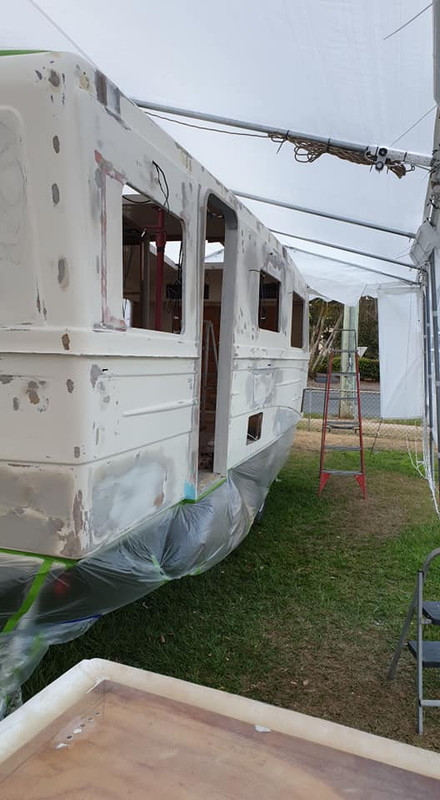
OK. So there's been a lot more body work done since my last post. I've cut out all the bulges and tried to smooth out all the ripples in the fibreglass, along with 100's of gelcoat cracks and fractures - what a job!!. As you can see by the many colours of filler,, I've been over her a few times. I took all the car bog out (really crap stuff for this type of job) and have redone it with fibreglass resin/talc first, then resin and some other much lighter filler. This was completed 2 weeks ago. Last weekend effort in next post. Body is completely sanded and ready for spray on high build polyester undercoat. I'm using a product call Reface from Upol. This hides all the sandpaper scratches and minor blemishs. I really do hope the effort shows in the finished product. ......so I'm still going on her. Greg 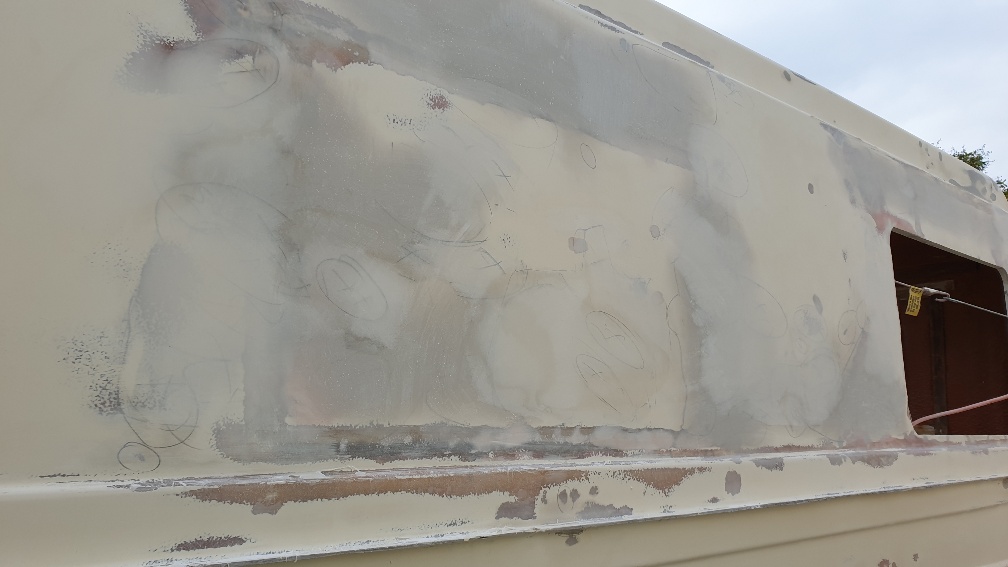 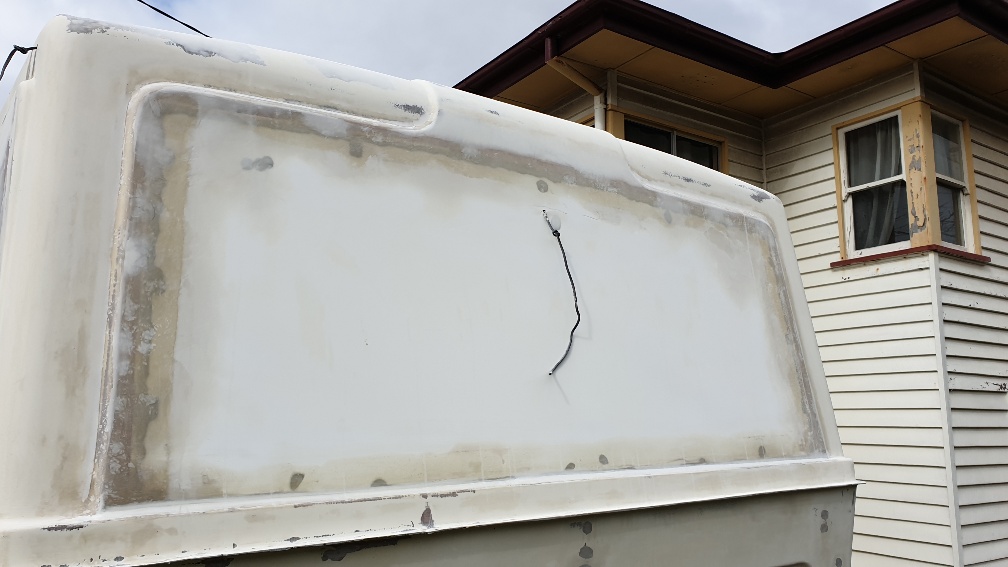 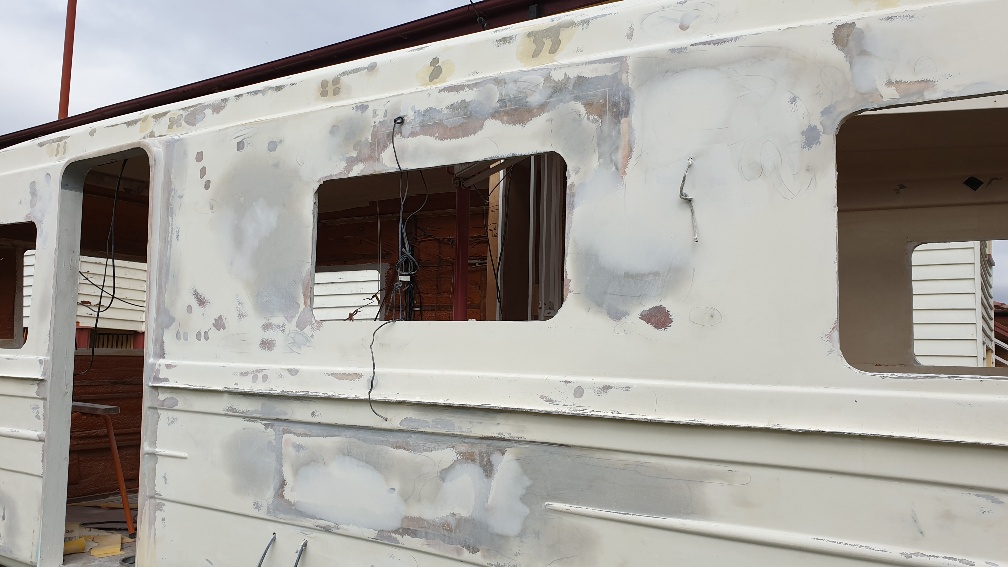 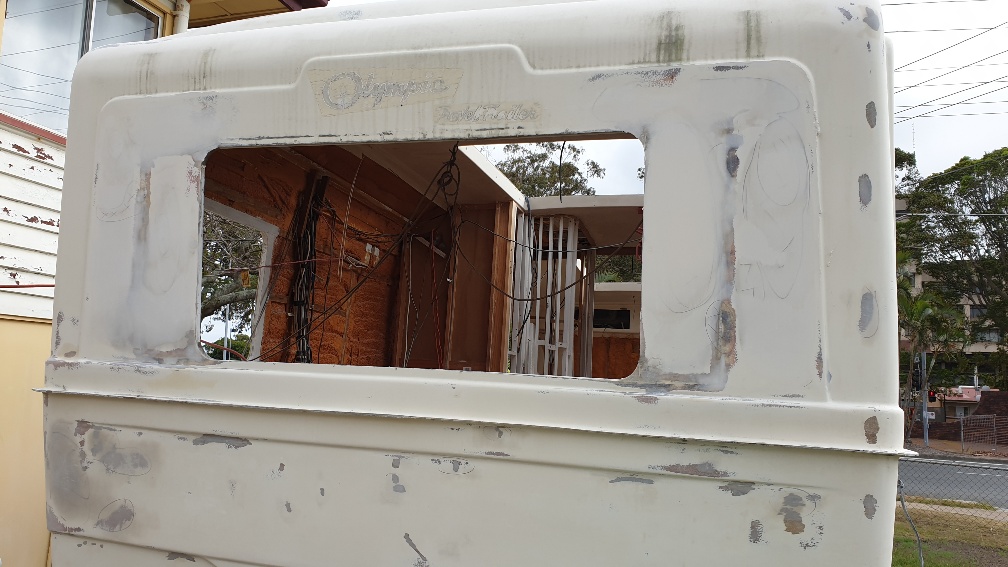 |
|
|
|
Post by gregh on Oct 28, 2019 21:54:16 GMT 10
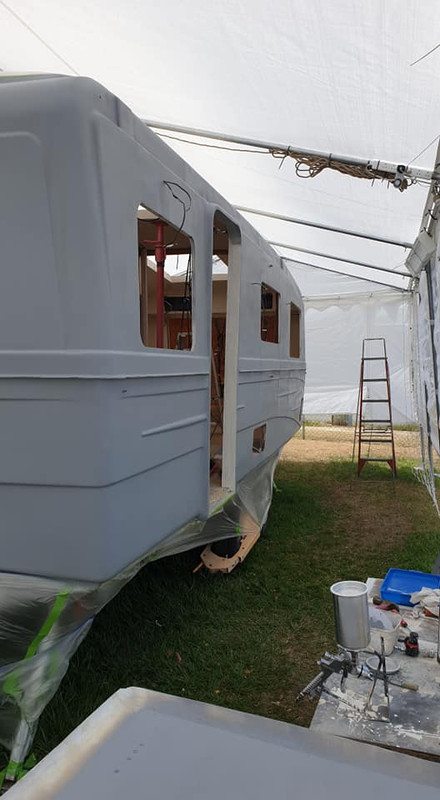
So, despite mild windy conditions on Saturday, I managed to get the roof painted with Globcote. I sprayed this on and got a nice even satin/semi glass finish. I think in hindsight, it would have looked more glossy if I rolled it on. The multiple gland outlets you see are for the solar wire inputs - yes lots of solar mentioned in previous posts.  I've also provisioned for a roof mounted satellite disk; still thinking about that one. Now to put up my 10m x 6m marquee which I'm using as a spray booth to paint the body. Hope to be able to show a fully painted body in 3-4 weeks - weather permitting - possibly with windows and door fitted.. Greg 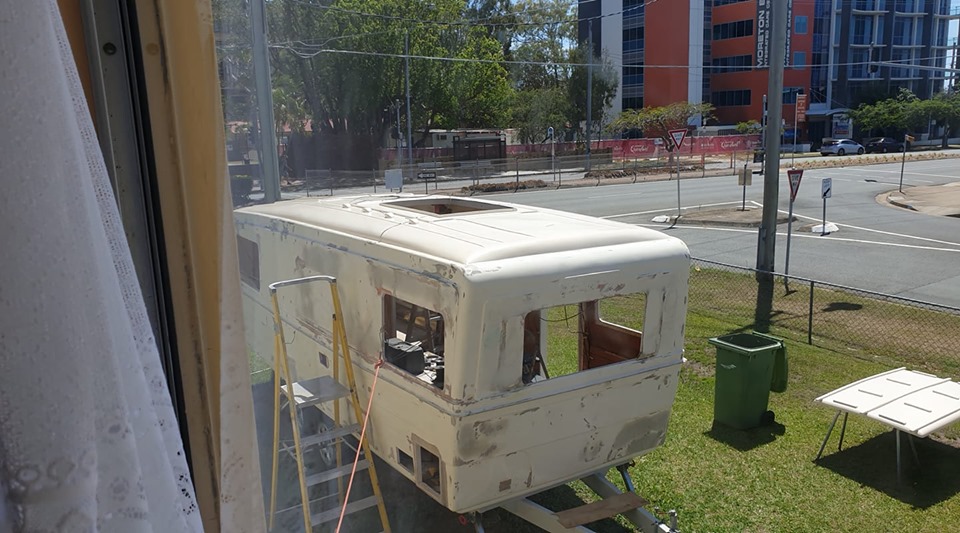 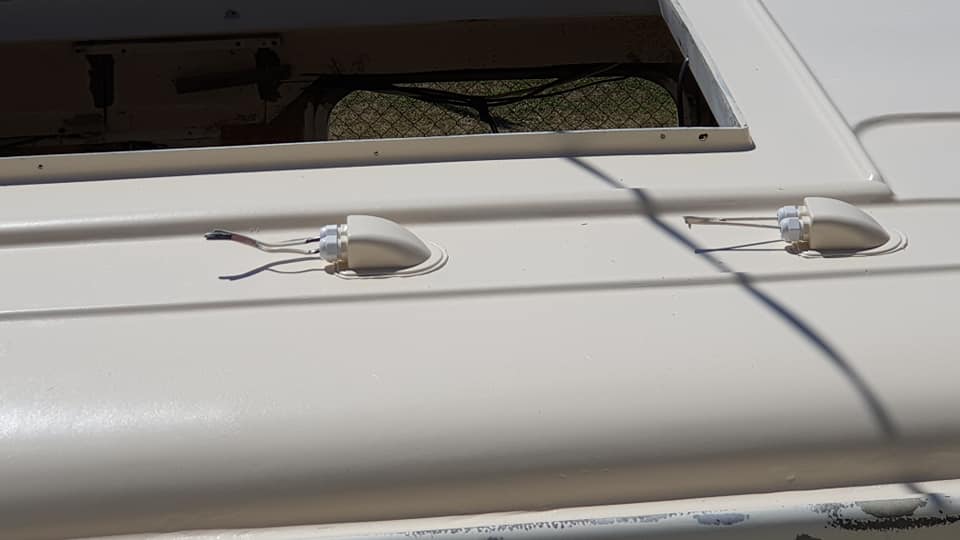 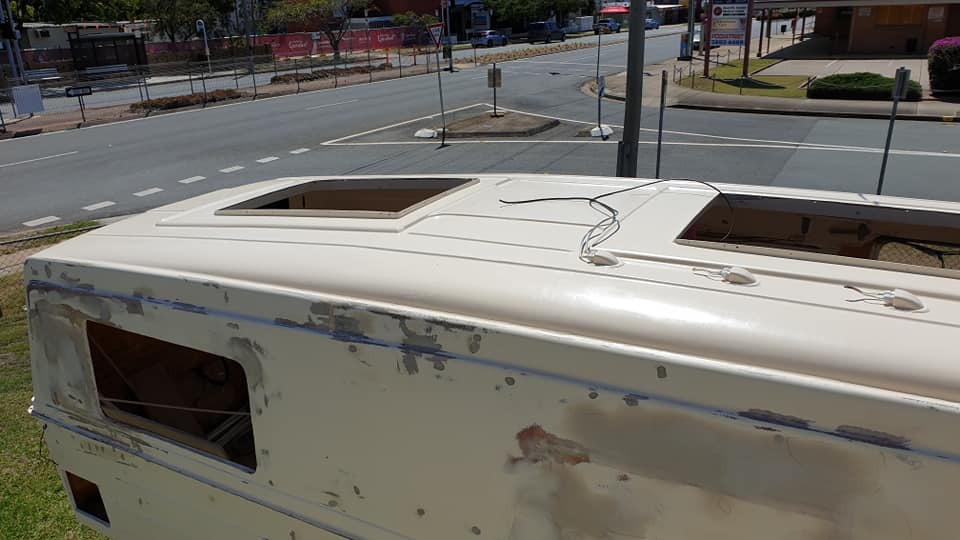 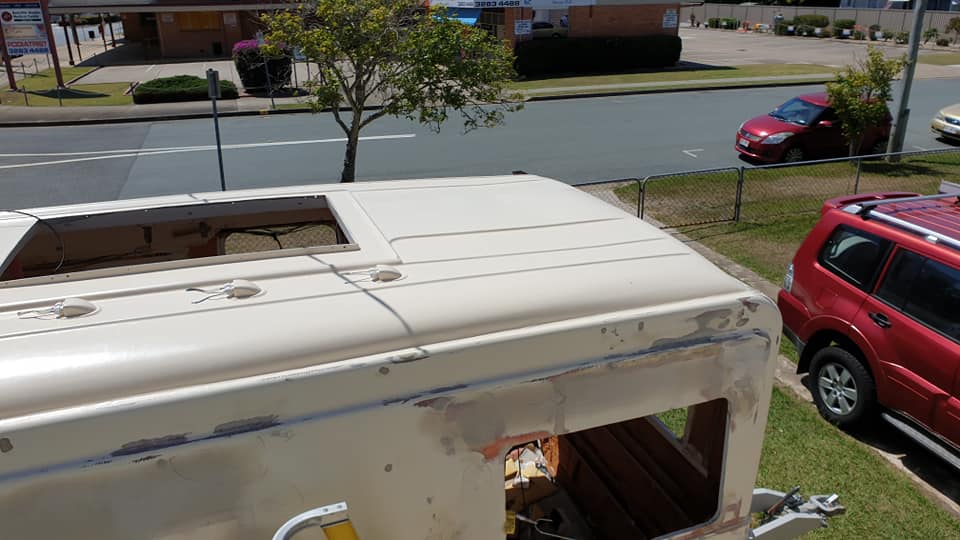 |
|
|
|
Post by gregh on Oct 28, 2019 22:04:42 GMT 10
By the way, could I get some feedback on a good quality 2 pack paint to use please.
Thanks
Greg
|
|
|
|
Post by Mustang on Oct 31, 2019 15:51:43 GMT 10
Hi Greg,
I used Norglass marine fiberglass 2 pack primer & top coat with a gloss softner.
Very happy with the outcome considering we didn't go to your trouble of removing the wooppys.
Any marine outlet sells it & the Norglass help line is great.
Cheers
Brent
|
|
cster
New Member
Posts: 49
|
Post by cster on Nov 4, 2019 11:49:06 GMT 10
Wow you have been busy, With a monumental amount of prep work. It is looking great.
|
|
|
|
Post by gregh on Dec 29, 2019 22:34:11 GMT 10
|
|
|
|
Post by Roehm3108 on Dec 30, 2019 12:15:04 GMT 10
Isn't there some sort of prep paint spray putty filler for fibreglass, like spray painters use on those pinholes???
|
|
|
|
Post by aussieute on Dec 30, 2019 16:14:43 GMT 10
With the undercoat you can use a car spray putty on it. Then spray with a very light coat of black paint to be
As a guide coat to show up the imperfections and sand with 320 grit paper on a sander to save time if you put on spot putty it will take forever and still have to be sanded also will show up any scraches you have missed
Cheers chris
|
|
|
|
Post by gregh on Dec 31, 2019 14:07:42 GMT 10
I did use a spray putty to start with, and found it useless - had to spray it on too thick to get it to fill the holes.
Using the same spray putty product but used a small brush to plug the holes.far less sanding. 😉
|
|
|
|
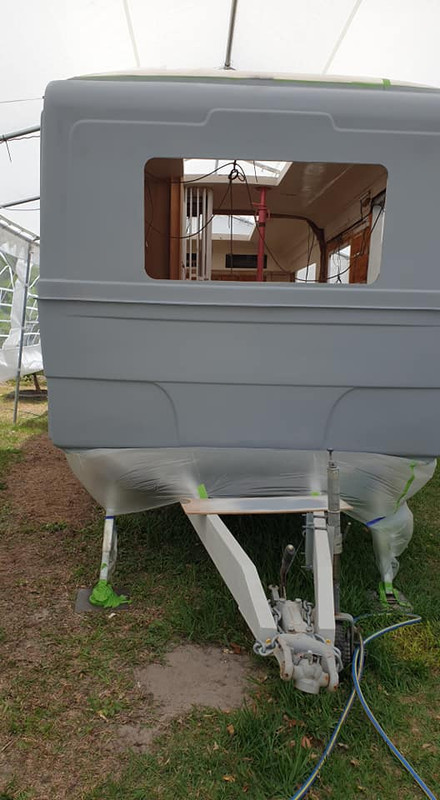
Post by gregh on Jan 5, 2020 15:09:20 GMT 10
Soooo.... back where we began after fixing all the pin holes. Have her masked up and ready to spray the red waist colour on first. First coat will be an etch primer. 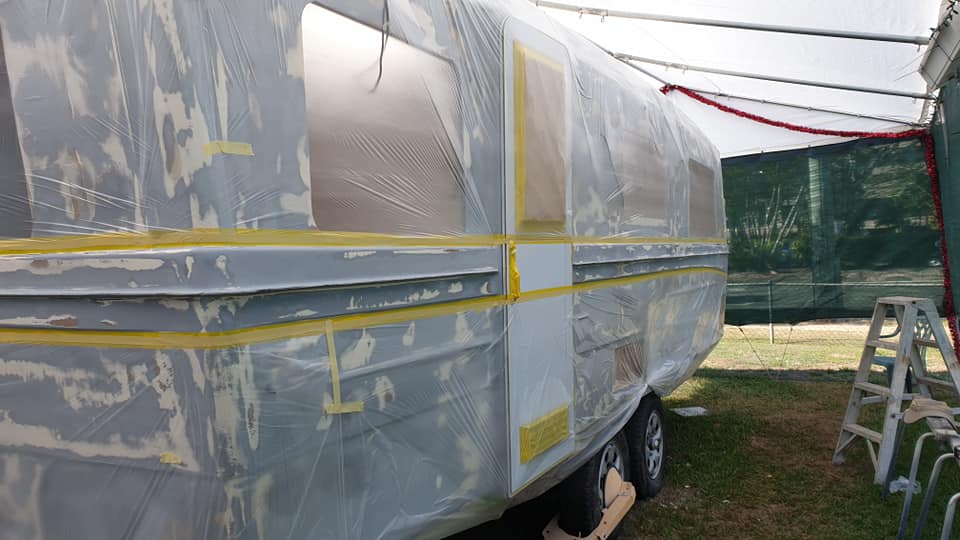 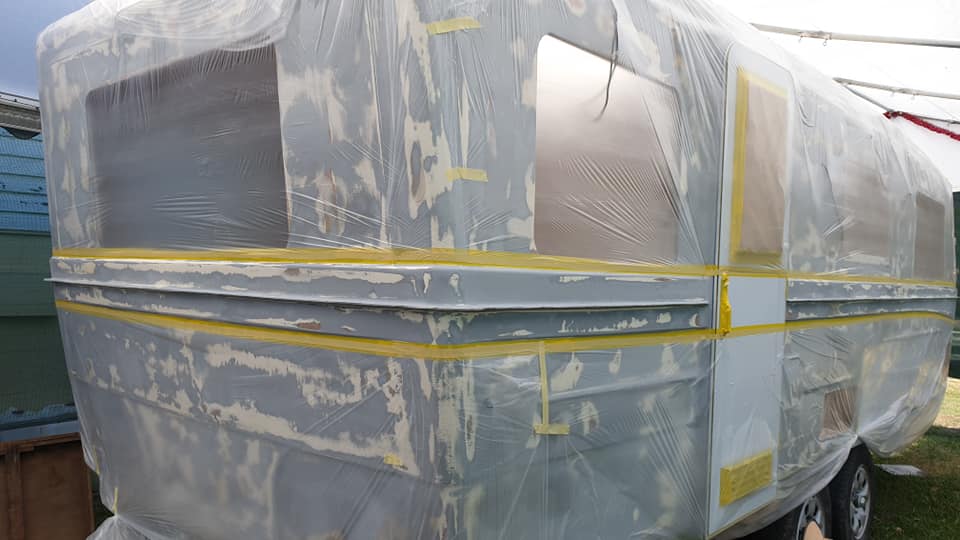 |
|


 The 12v Linear actuator is rated at 150kg.


 Am I being too anal about doing it right??? Nahhhh.


 I've also provisioned for a roof mounted satellite disk; still thinking about that one.