Deleted
Deleted Member
Posts: 0
|
Post by Deleted on Jun 9, 2013 19:18:11 GMT 10
 I'm thinking 12V motorbike starter motor.... low amps draw.. small.... easy adapted to suit.  Gosford swapmeet next weekend.... eyes wide open.  After that its back to Hospital on Tues 17th for a carve up of the left hand .. carpal tunnel again.. Strewth.. I have worn out both hands building a TD  . Seriously watching a few old bikes on "The Bay" Might use the rehab time to travel interstate to collect em..... Only problem is .. one is in NSW .. other is in QLD.  and.. I have to win em first  Times like this I wish I owned an automatic car Reddo
|
|
|
|
Post by Surf Tragic on Jun 12, 2013 10:51:36 GMT 10
I must say I always find myself following this interesting project Reddo & wondering what will be next ;D The add-ons all look a bit unique & complement each other. Have often wondered how you managed doing so much after the 1st hand op, it must have been a success, probably all the work helps get your hand movement going again. Good luck with the next one . ST. |
|
Deleted
Deleted Member
Posts: 0
|
Post by Deleted on Jun 30, 2013 17:44:29 GMT 10
Howdy folks Op went OK on left hand . Ended up with 12 stitches ...but... not enough to keep me out of action... Took off to Nagambie near Shepparton Vic 2 days after the op and collected a 1939 Matchless 500 cc motorbike. Up at 4.00am .. arrived 2.00pm loaded and headed back to Holbrook for the night... Holbrook is ( was ) the only town on the Hume that the Hwy traffic still goes through... including a whole stacka semis... Stayed at a Motel a few hundred yards up from an all night Roadhouse... Fell asleep counting truck gearchanges...  Ironically they opened the bypass 2 days after I got home... Anyway... Got home Ok 1975 ks in 2 days .. Managed to focus on the TD... idle mind.. was looking at a rack I built years ago out of stainless steel a mate and I was using to build mobile storage racks to use in a take away chicken shop cool room. 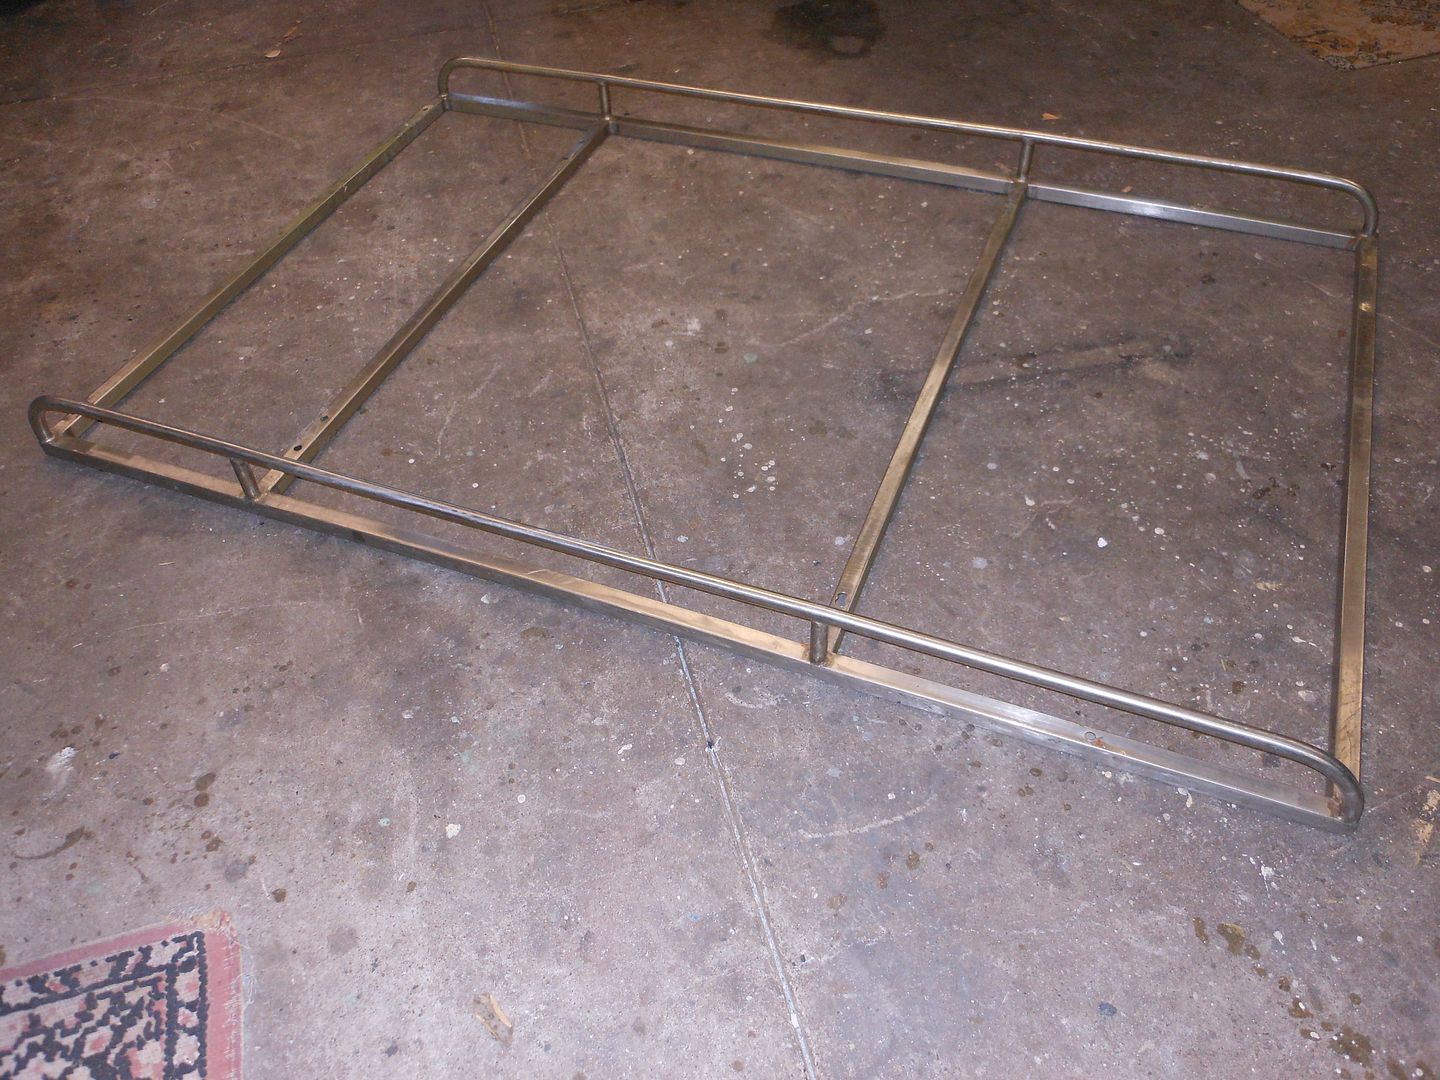 nice and light... 1100mm wide by about 1400mm long... Next thing ya know its on the roof of the TD for a trial fit up and a looksee.... 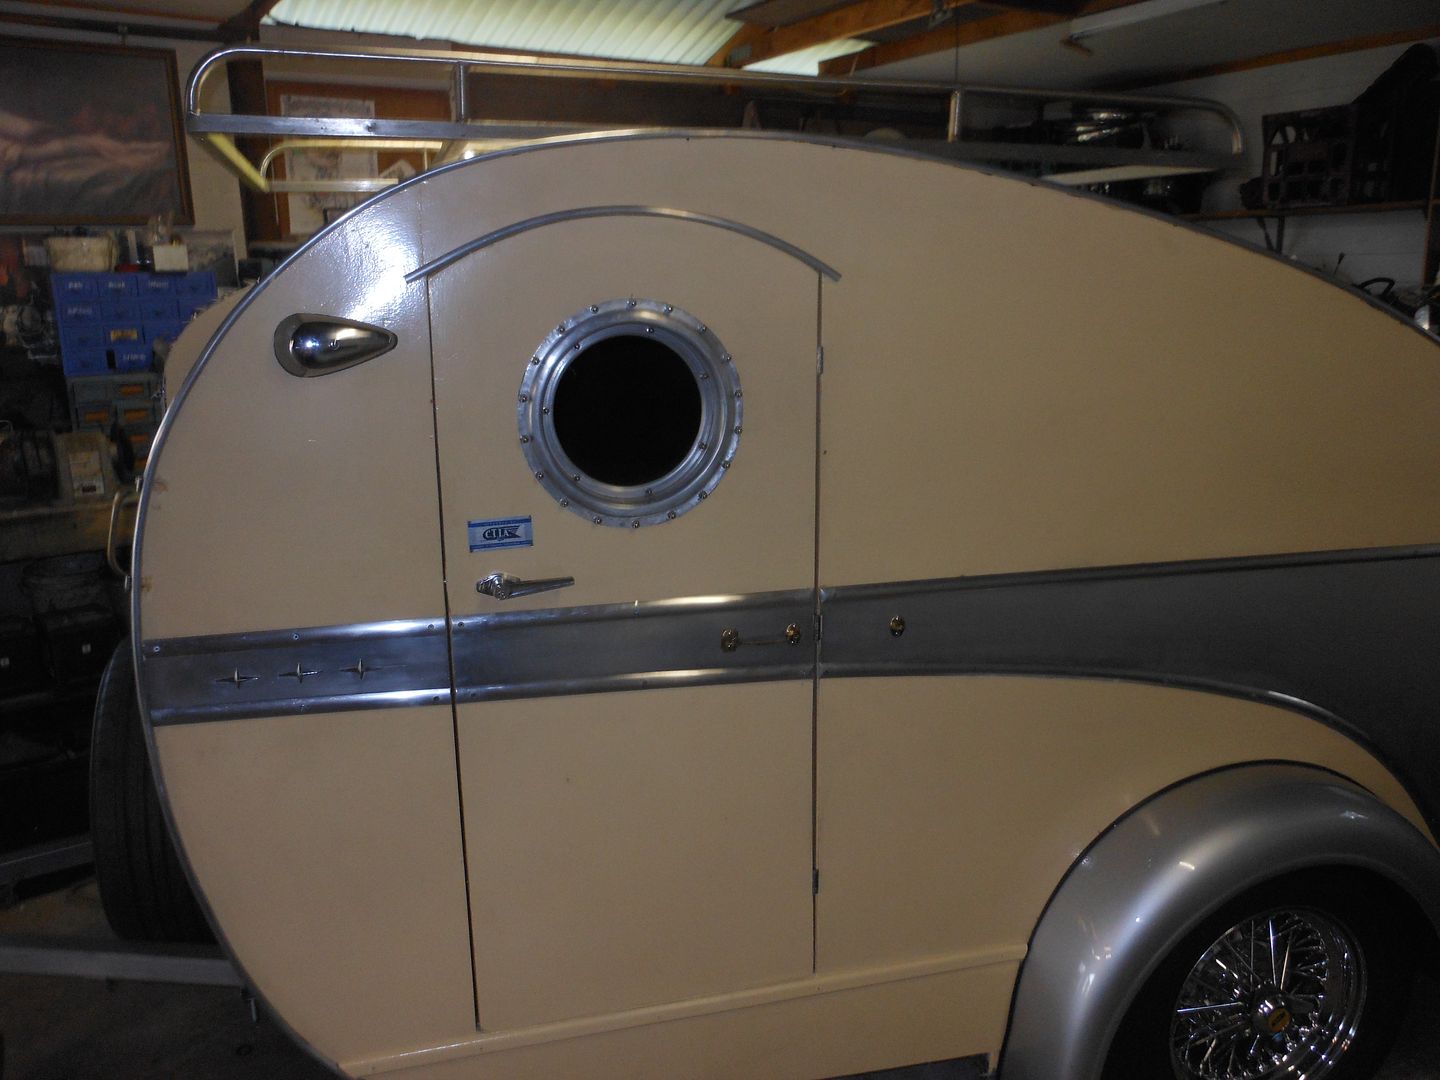 Jury is out on wether to make it a permanent fixture Moved on inside the van and made a start on the front shelves either side of the bedhead ( or front wheel of the motorcycle support bracket area). Bit limited with use of hands .. but happy with todays effort...  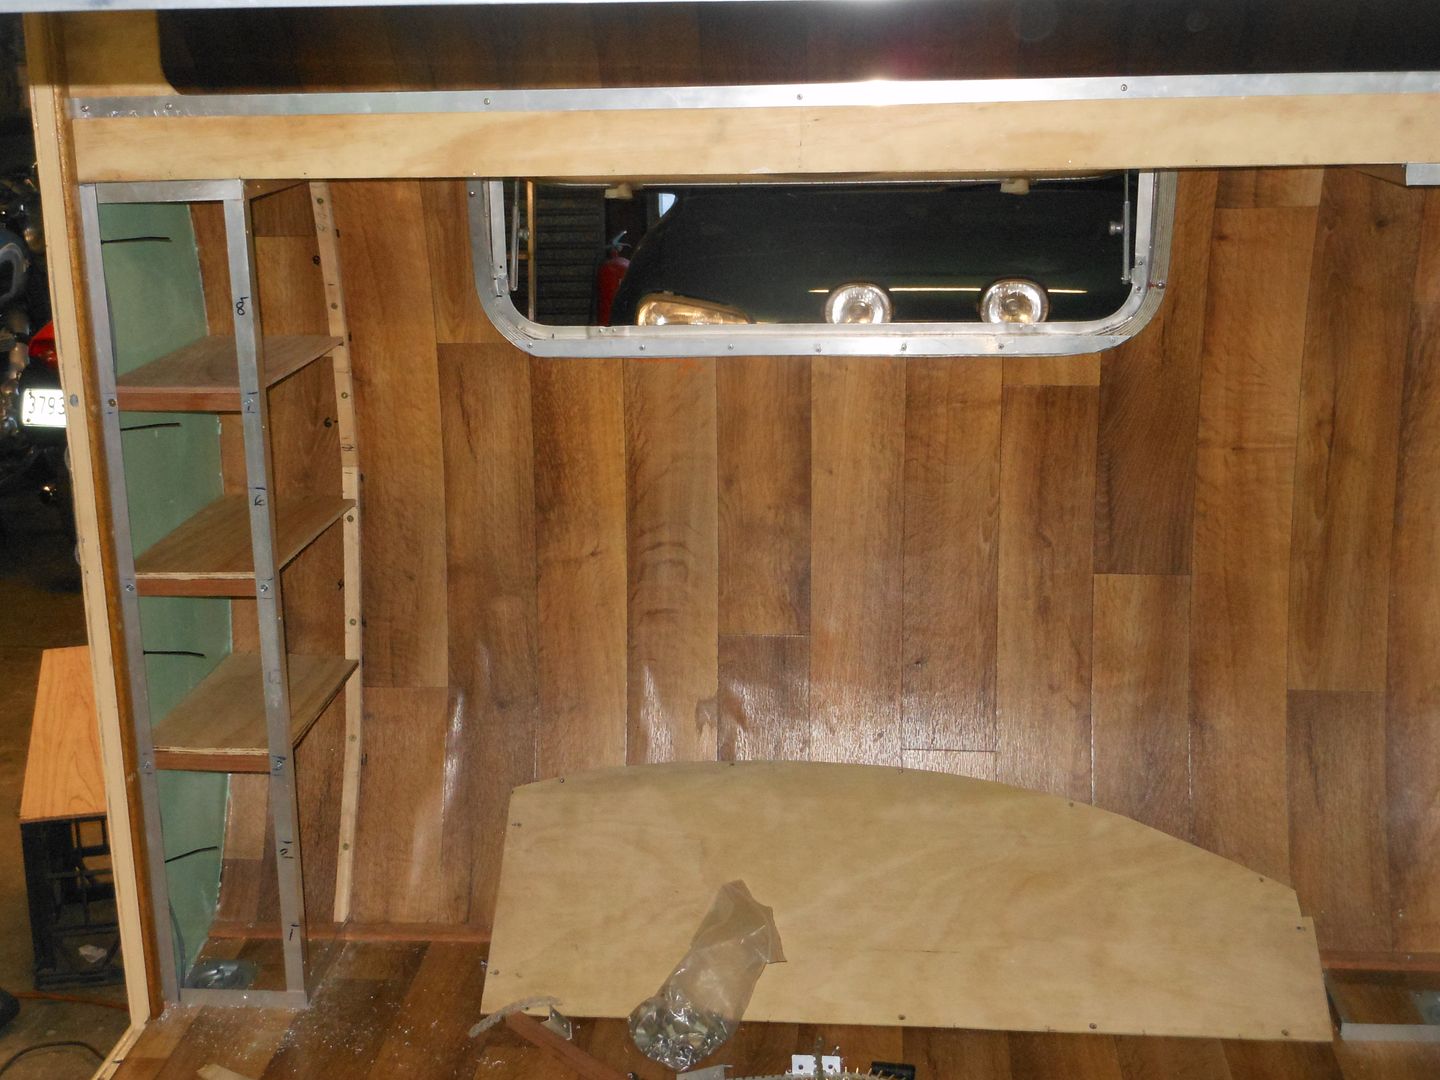 All good.... Would have liked to have thrown the thing out in the yard for a few days while this heavy rain is happening to test for leaks ... but when ya have time on your hands and a dry shed to work in ... well then ... ya just make the most of it... Cheers Reddo
|
|
aquamum
Full Member
 1968 Viscount Ambassador - Sydney NSW
Posts: 493
|
Post by aquamum on Jun 30, 2013 18:24:54 GMT 10
Reddo
I'm glad you have picked up your "VB" (vintage bike LOL) - photos please as my dad who is now 83 had such a bike in his youth.
I have driven through Holbrook many times in the past year - good food, good people.
|
|
|
|
Post by sutcac on Jun 30, 2013 21:23:54 GMT 10
|
|
|
|
Post by JBJ on Jul 1, 2013 8:59:40 GMT 10
Hi Reddo,
I agree with Sutcac on the rack. The shape is wrong for a curved roof in my eyes.
The idea of a rack is good, but as the van is being used as a trailer for bikes predominantly, I would have thought most of what needed to be carried would fit inside.
But I'm sure you will work out how to make whatever you decide on work & look good
Time will fix your wrists eventually, just go easy on the hard work & concentrate on relaxing
JBJ
|
|
|
|
Post by Geoff & Jude on Jul 1, 2013 9:44:08 GMT 10
hi reddo good to see your hand is healing well. i agree with suttie and jailbar, keep the lines smoothe and ditch the rack (unless you can bend it to suit the roof line - that would be cool). geoff 'n jude |
|
Deleted
Deleted Member
Posts: 0
|
Post by Deleted on Jul 6, 2013 20:32:23 GMT 10
|
|
Deleted
Deleted Member
Posts: 0
|
Post by Deleted on Jul 7, 2013 19:14:23 GMT 10
Yo.. Got a full day in on the TD cupboards.. I have nearly worn through the lino getting in and out that side door... Trying to get some form of storage up and finished ready for Forster in a couple of weeks. Managed to get the front cupboards in. Going with the simple "Bin " style of shelves for now. They might end up with hinge up doors ... but I have made them deep enough that nothing can fall mout of there anyway. 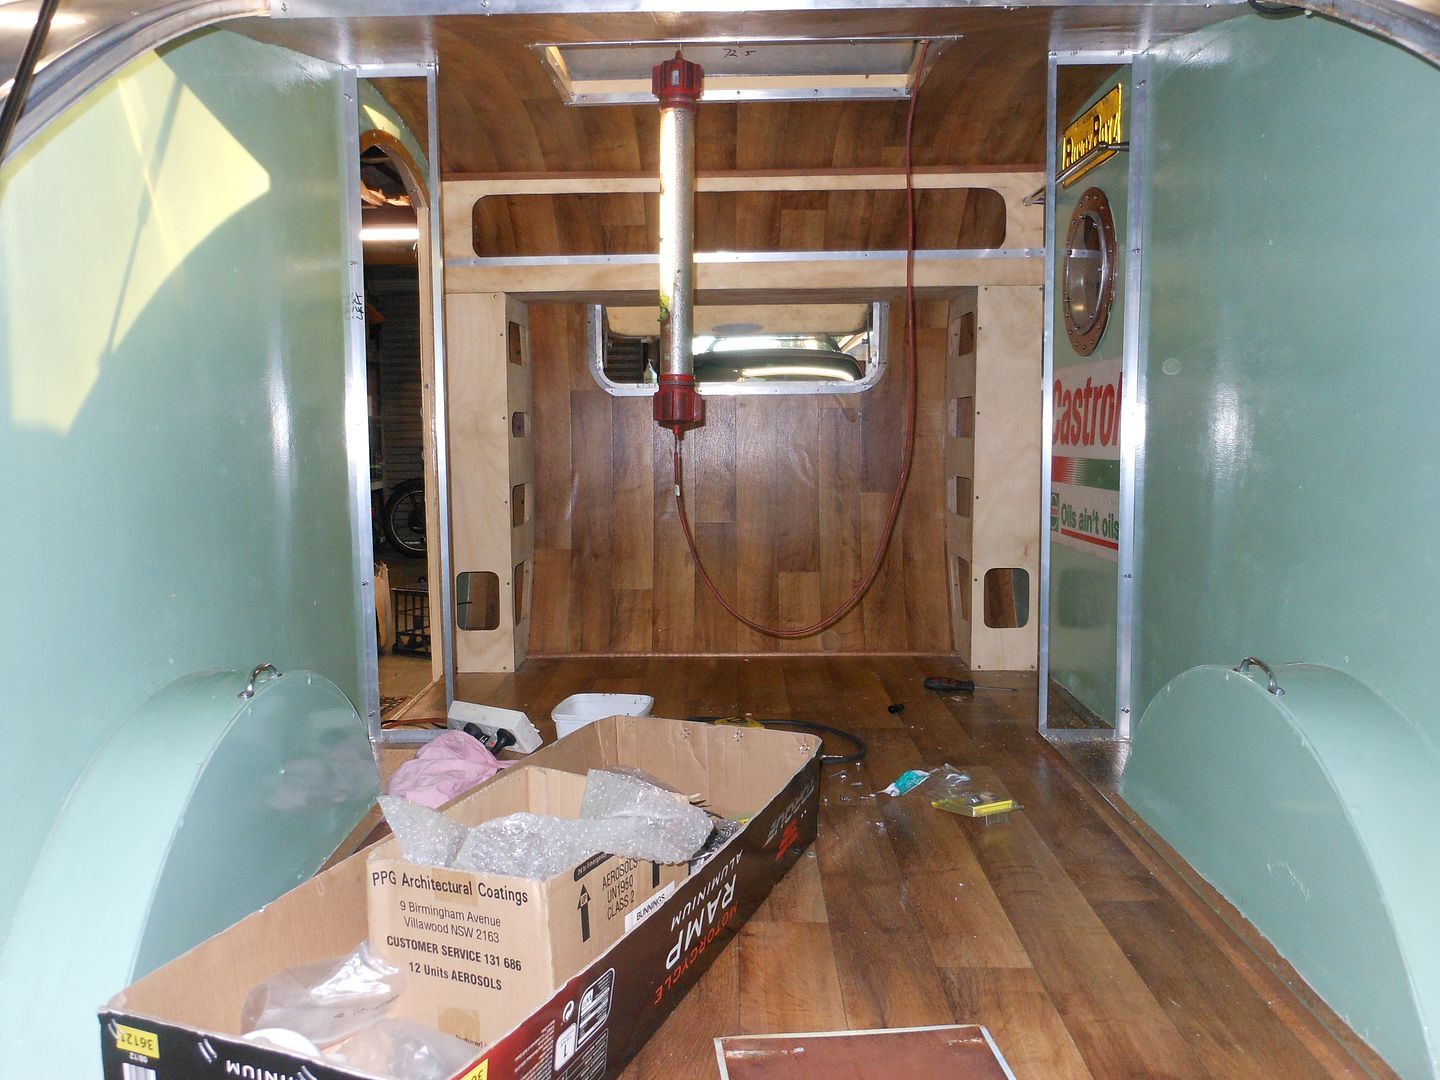 The 2 squares down the bottom facing back are for the bike tie downs to feed through to the tie down anchor points in the floor...just getting the holes in the right spot so that the tie downs don't rub on the ply when attached to the handlebars was a exercise in geometry. I will probably end up fitting two stereo speakers up towards the top of the rearward facing panels. Managed to start the frames for the cupboards that will run down either side of the van for clothes etc. 20mm X 20mm angle is cheaper for a 6.5 metre length than 2 pieces of 20mm X 12mm D.A.R softwood. also had a bit of a happy hour where I bugger about just bunging screws and things in to see what they would look like in the van Ended up with a towel rail above the right side port hole....  Seeing as though I am hopeless at sewing and cant make curtains I figured I can hang my towel on the rail ... 2 problems solved.. no need to make curtains.... and.. the sun coming through the porthole can dry the towel after I have been for a shower..... Can also be used to hang coathangers with clothes on it. It is 600mm long so is plent wide enough . Area across the bottom of the Castrol sign will have a flat shelf about 175mm wide so I can plonk a small flat screen telly on it so the bike has something to watch while its being carted down the road. This old 1939 Matchless clunker would probably be happy sitting through a WW11 movie...  ;D.. are we there yet... are we there yet?? 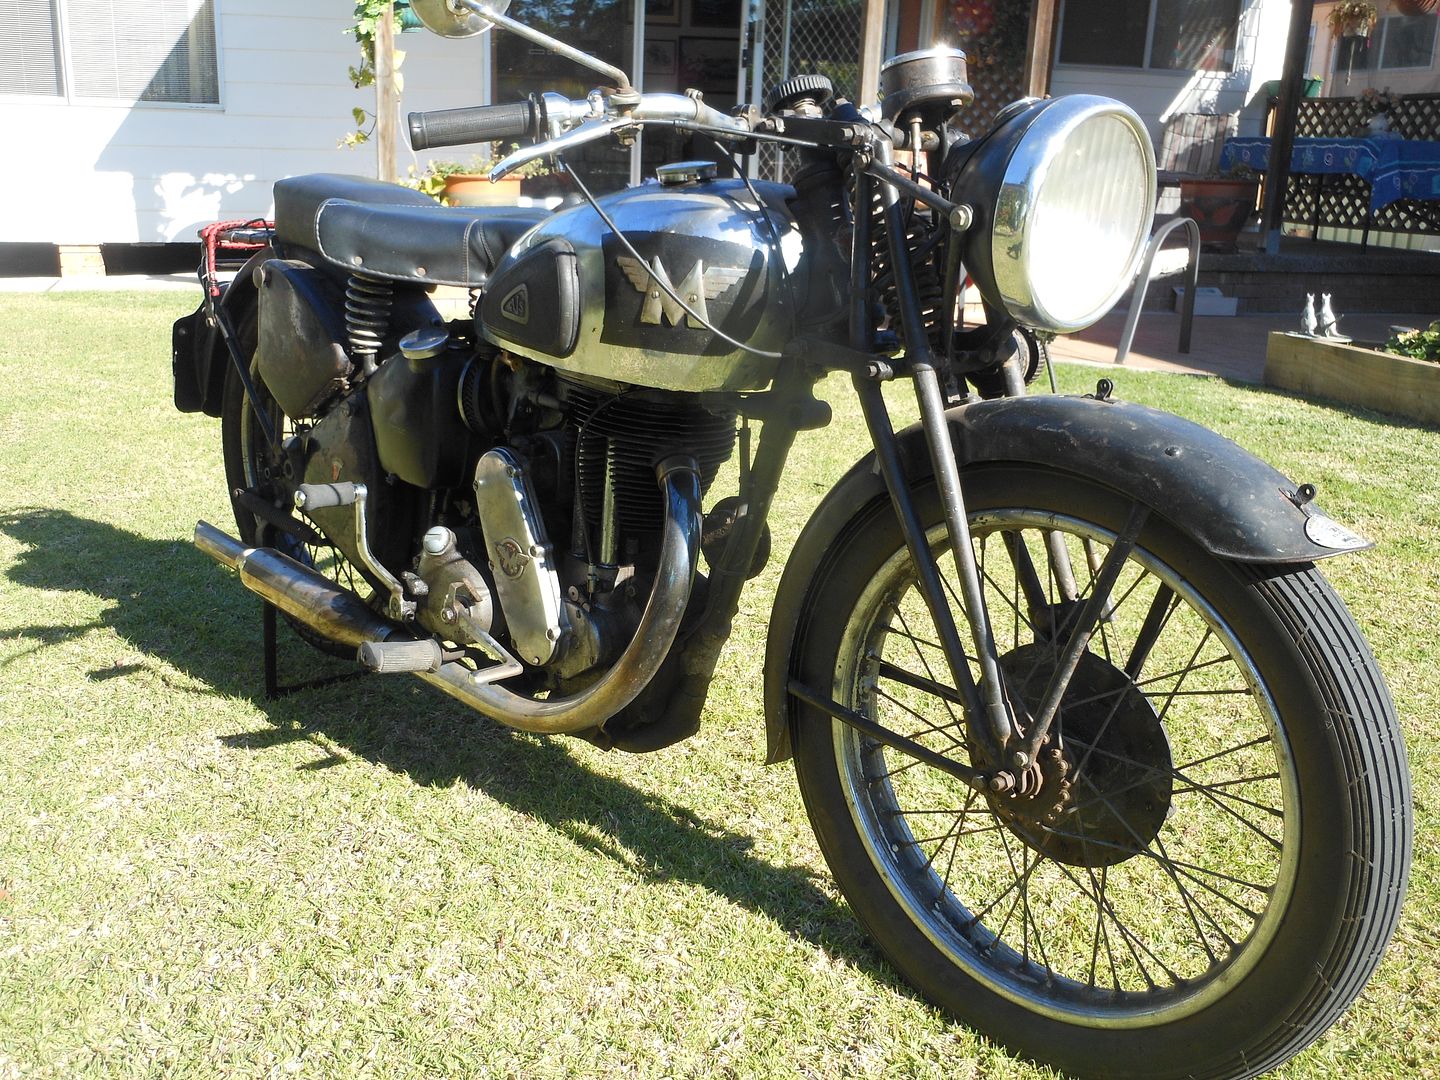 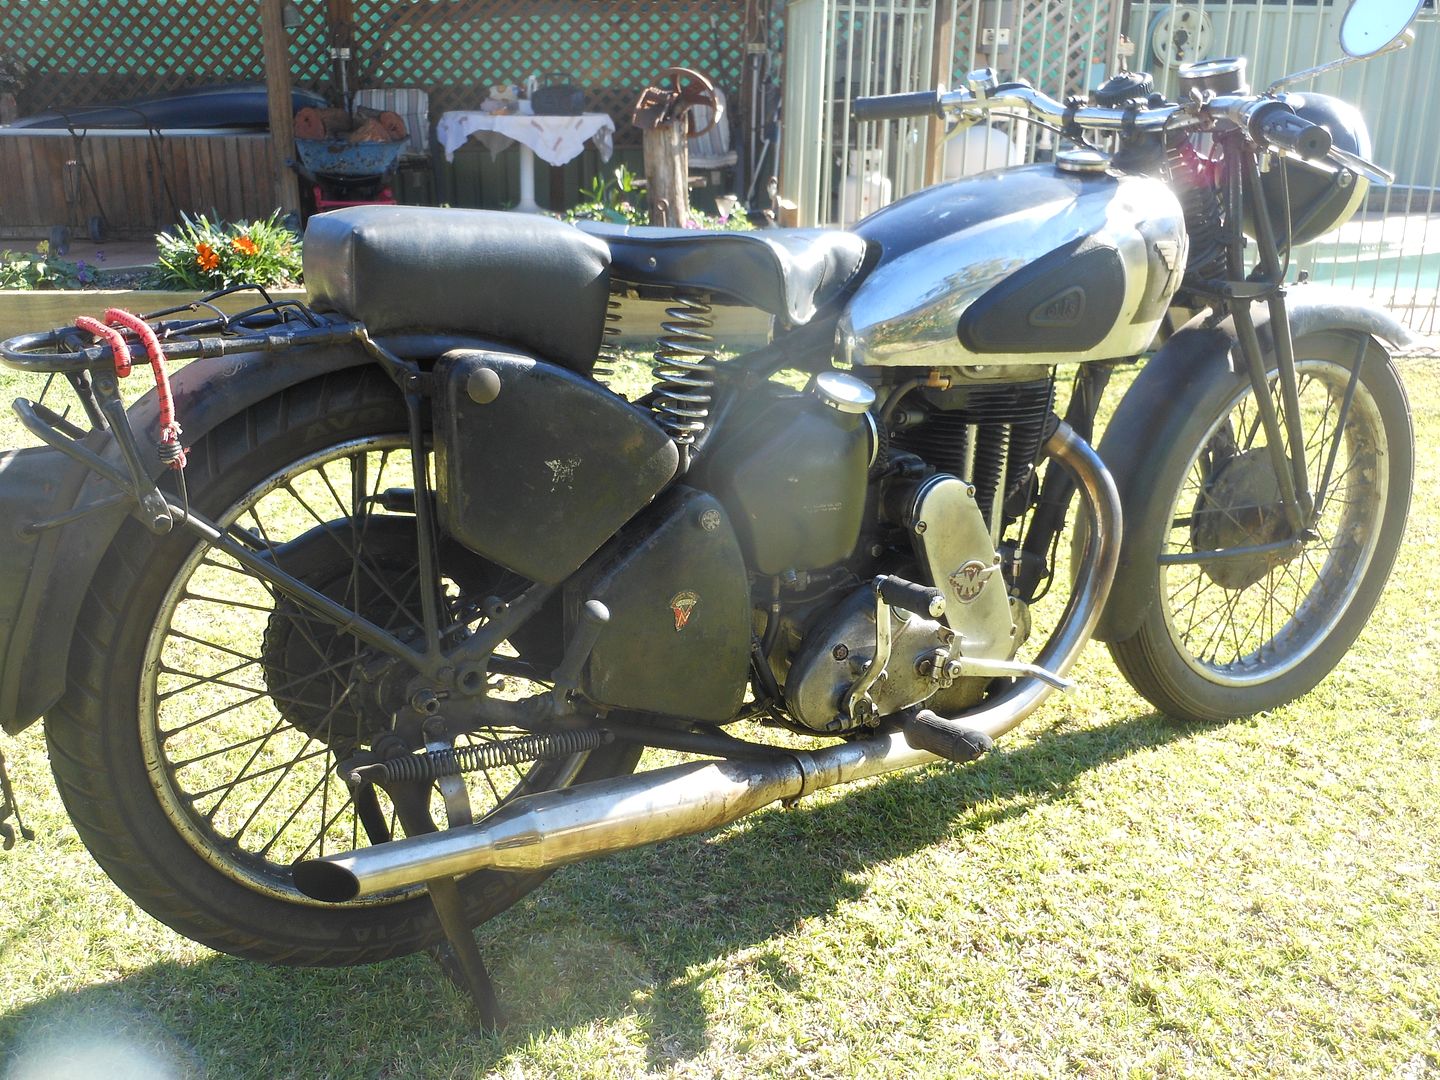 Roll on Forster. Reddo |
|
Deleted
Deleted Member
Posts: 0
|
Post by Deleted on Aug 24, 2013 20:28:00 GMT 10
Hidey Ho thar vantypes... Been a bit slack on the TD since its trip to Forster for Christmas in July.. The trip was a good shake down for testing the anchor points that hold the bike in place... All was sweet until I hit a humungas pothole in the road near Failford.. and The weight of the bike tore a front tie down point clean out of the floor... which in turn allowed the bike to crash through the cupboards ( only 3 ply) on the right hand side of the van... No damage to the bike. So... the first job when I got home was to re-enforce the mount points...and.. rebuild the cupboard front.. That done I moved on to thinking about a fold away kitchen at the rear of the van...?? Had to be something that lived in the van permanently .... but got out of the way when I was loading the bike to go away on a trip??.. and also was out of the way when unloading But .. didn't want a whole heap of bits of plywood that had to be assembled to make a kitchen when the bike was removed from the van. . This left a few theorys.. Hinge around from the side walls.. hinge up out of the floor.. or... Hinge down from the ceiling.... In the end,, after much .. uuumming and aaaring I chose the latter of the 3... I bought 4 x 1200mm lengths of continuous chrome hinge from Bunnings at $7.00 per metre. Screwed a length across the top of the van where the tailgate hinge is...and cut a sheet of ply so it cleared the cupboard fronts when hinged up into the roof.. Then cut a similar piece and fixed a hinge between that and the first piece.. 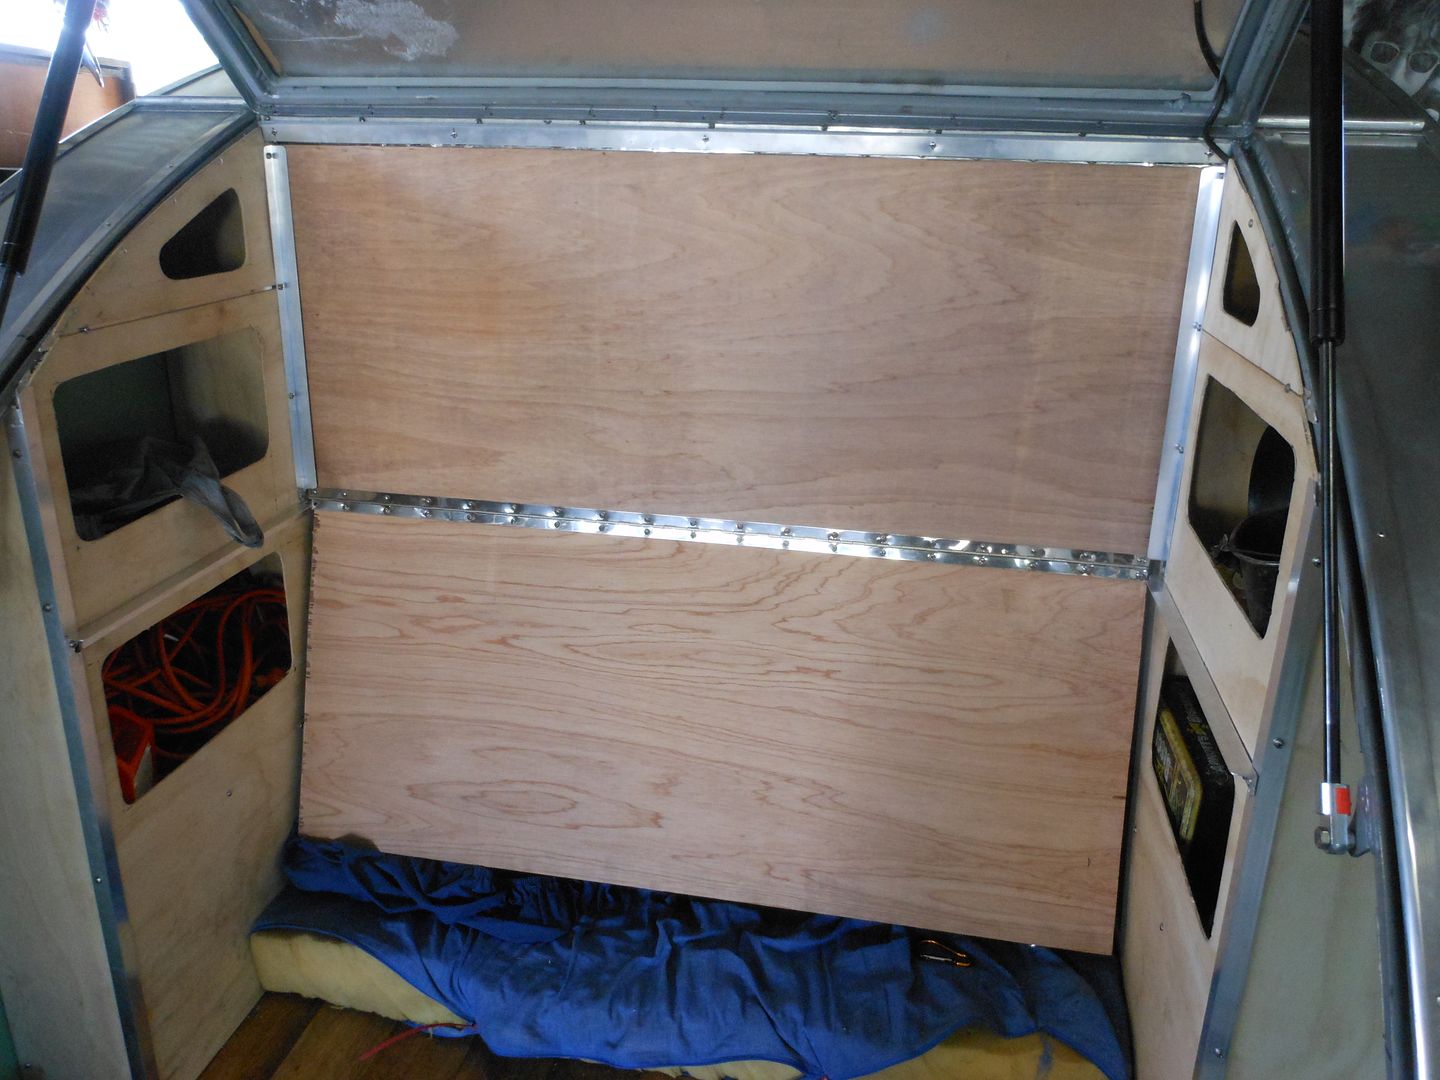 Then screwed a couple of 20mm alloy angles along the cupboards horizontally at the mid hinge heigh as well as vertically to stop the panel swinging out of the rear of the van when lowered from the ceilingt. This allowed the bottom section to hinge up from under the alloy angles and be secured in place with a couple of pad bolts... Gotta try and stiffen the horizontal bench top too.. its got a 4mm sag in it without sitting anything on the bench... thinkity think.. cant just bung a rib uner it... it has to hinge flat in the ceiling... Stay with me folks.. it works.... honest.. Reddotel patent pending... up to the point where it collapses and kills someone... ;D ;D .. The all design patents denied.. 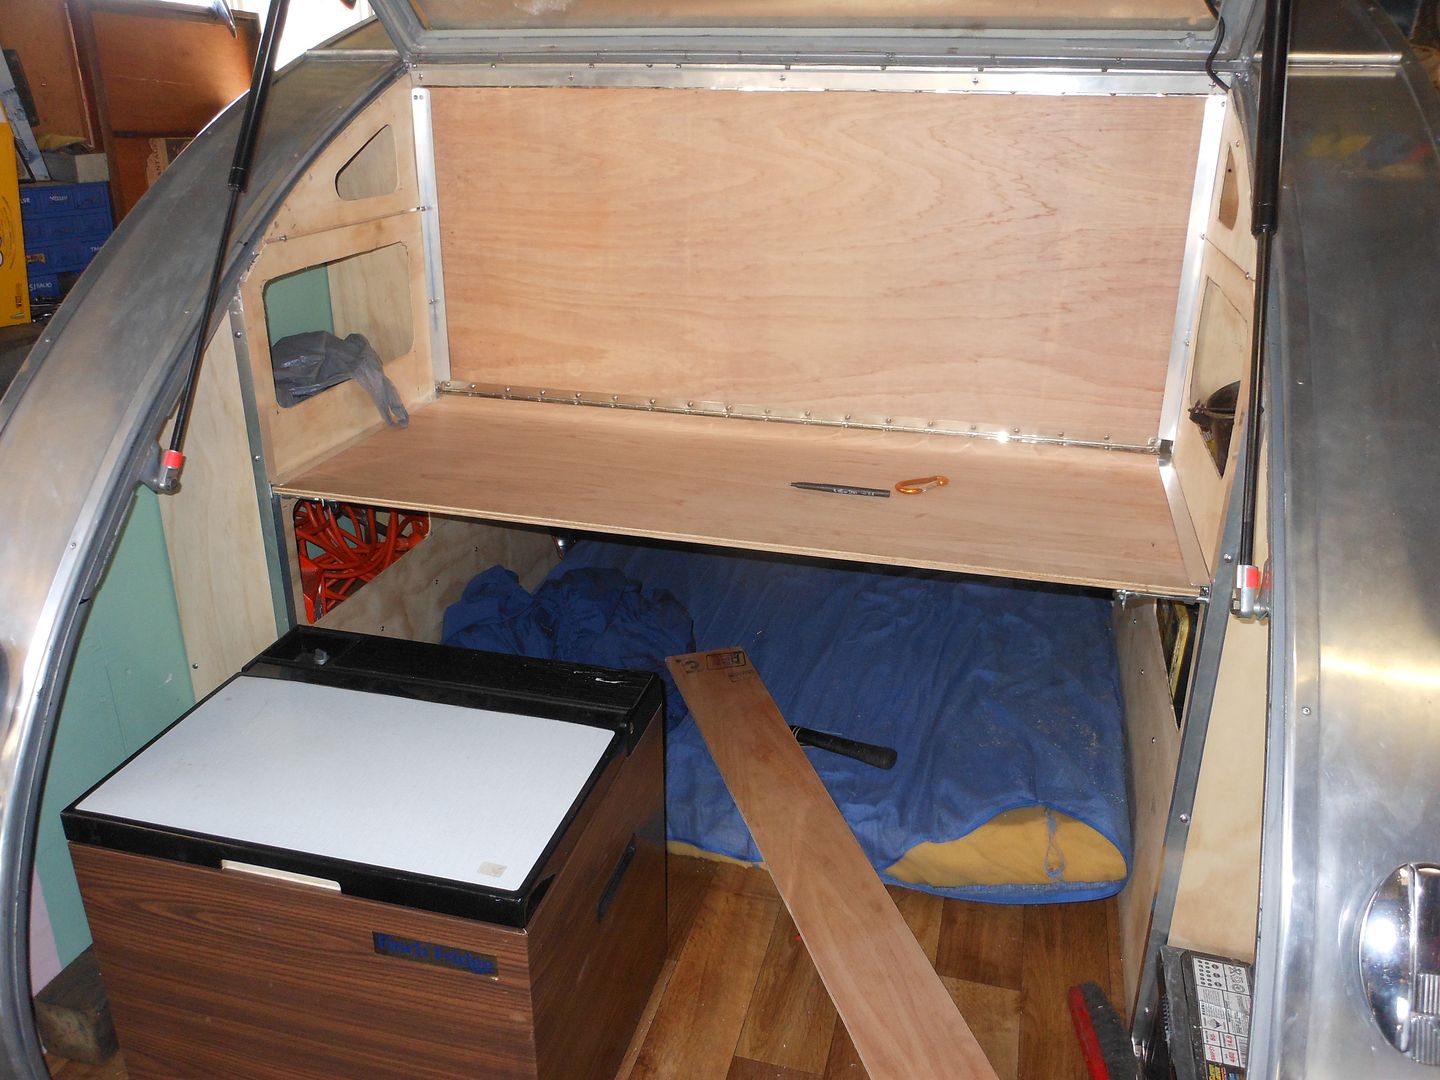 That done .. it was time to see if the whole shamozle would swing up into the roof and not stick down into the rear open area making it difficult to load the bike without clouting me melon.. 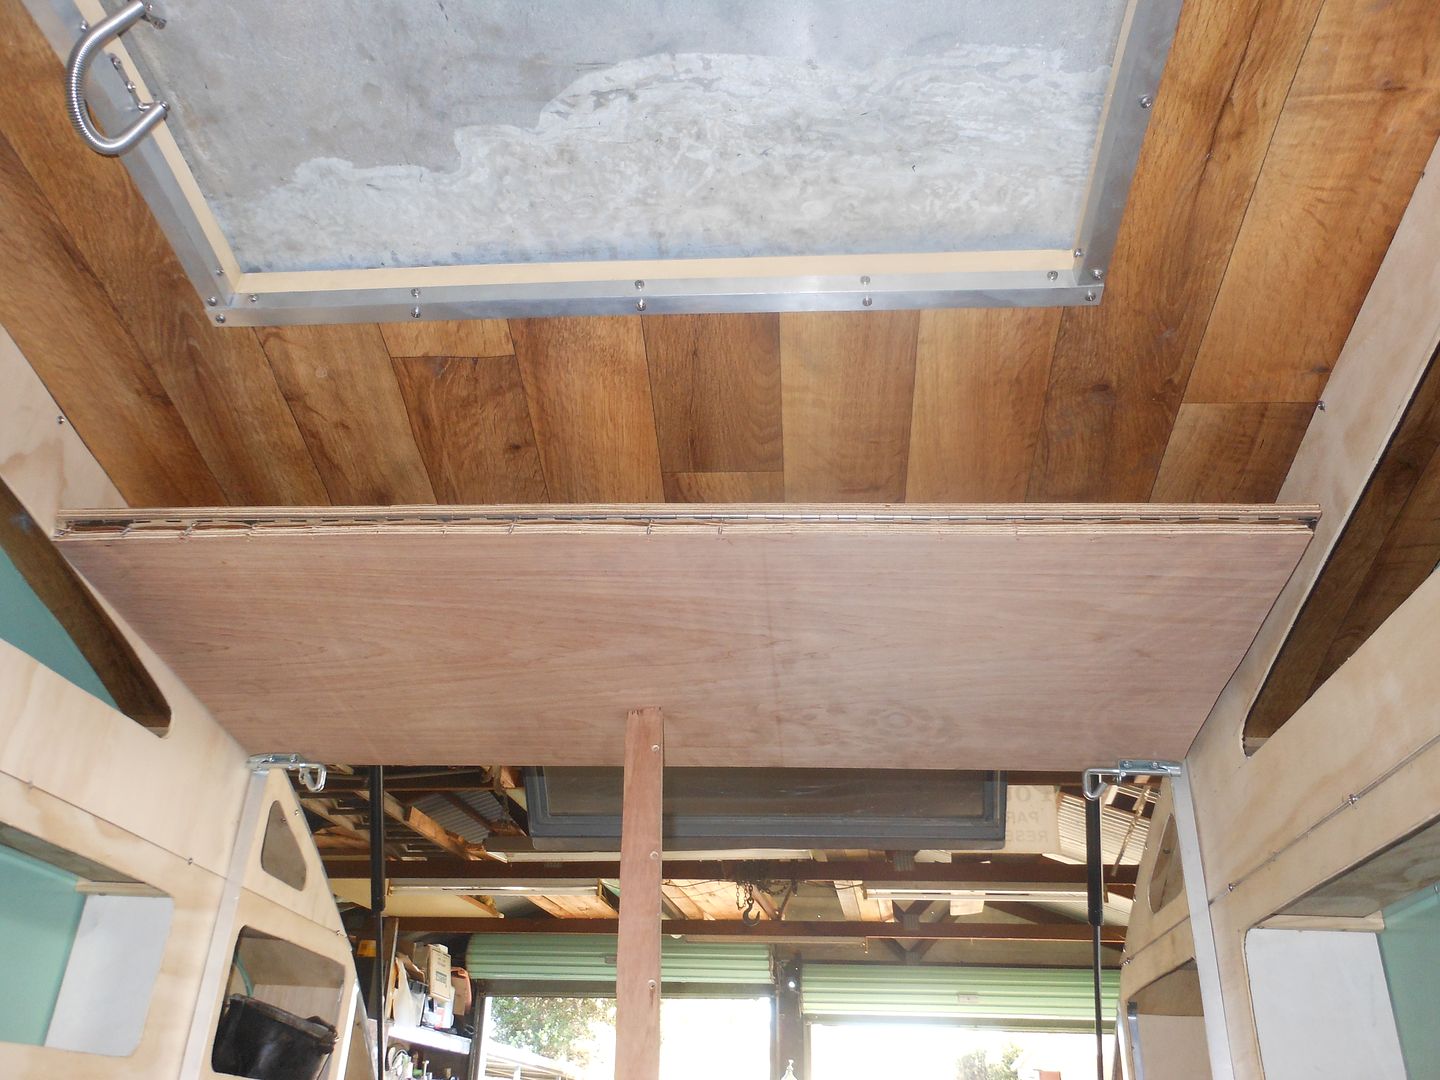 So far .. so good... the 2 panel weigh a few kilos and I am gunna havta come up with a strong means of securing the panels so they don't drop on the bike or .. simply tear 'emselves down from the roof due to rough roads etc.... can use the 2 padbolts to hold one hinge.. will need another two on the second panel... Done a bit more fiddling today .. trying to sort out a lower bench level at the same height as the Finch fridge so I can incorporate the laminex top on the fridge into the benchtop... More beers... more headaches.. its all gotta fold out of the way.. I hate assembling camp cupboards ... done enough of that when the family use to go "Tenting it" for a week or so.. Took a break this arvo to work on the Matchless.. gave her a kick the other day and the kickstarter spring broke letting the kicker dangle down like a broken arm... Got it in pieces and the search begins for a replacement spring.. otherwise its a case of heat and bend spring steel to form an eye in the end of the spring to locate back on the gearbox shell stud.,.. something I am not a believer in ( heating and bending spring steel).. More on the van later. Cheers fa now Reddo |
|
Deleted
Deleted Member
Posts: 0
|
Post by Deleted on Sept 1, 2013 18:34:36 GMT 10
Yo. .. Another weekend lost in the shed.... but any sort of progress is good... Sorted out the swing up back wall of the kitchen.. Goes from this.. 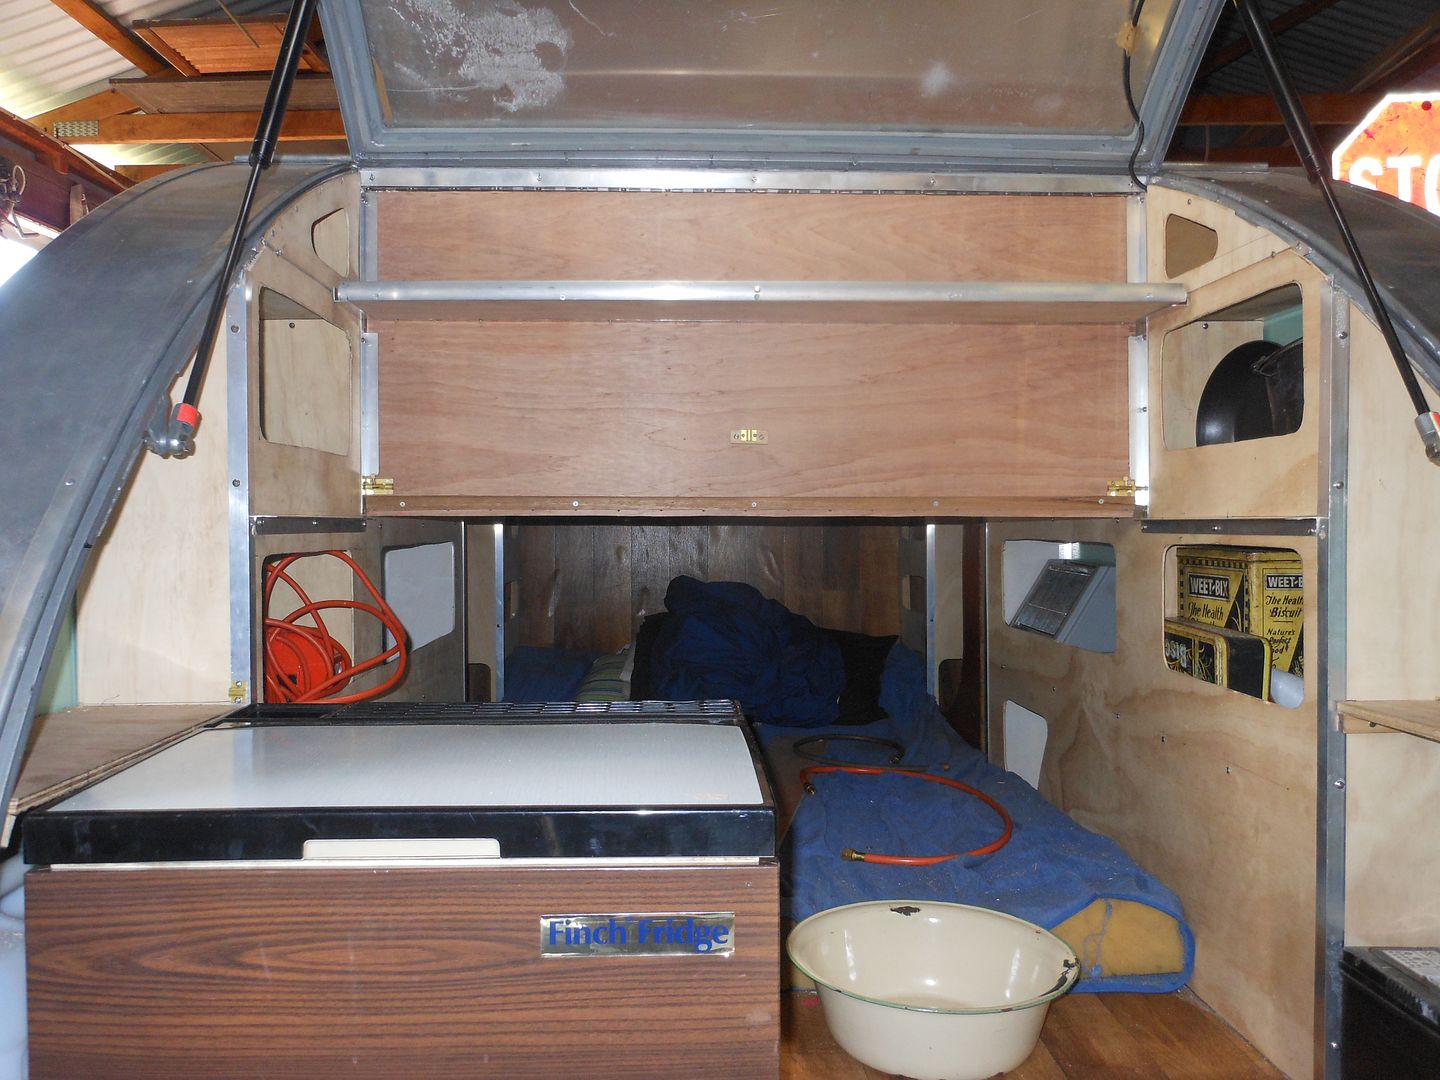 and swings up.. 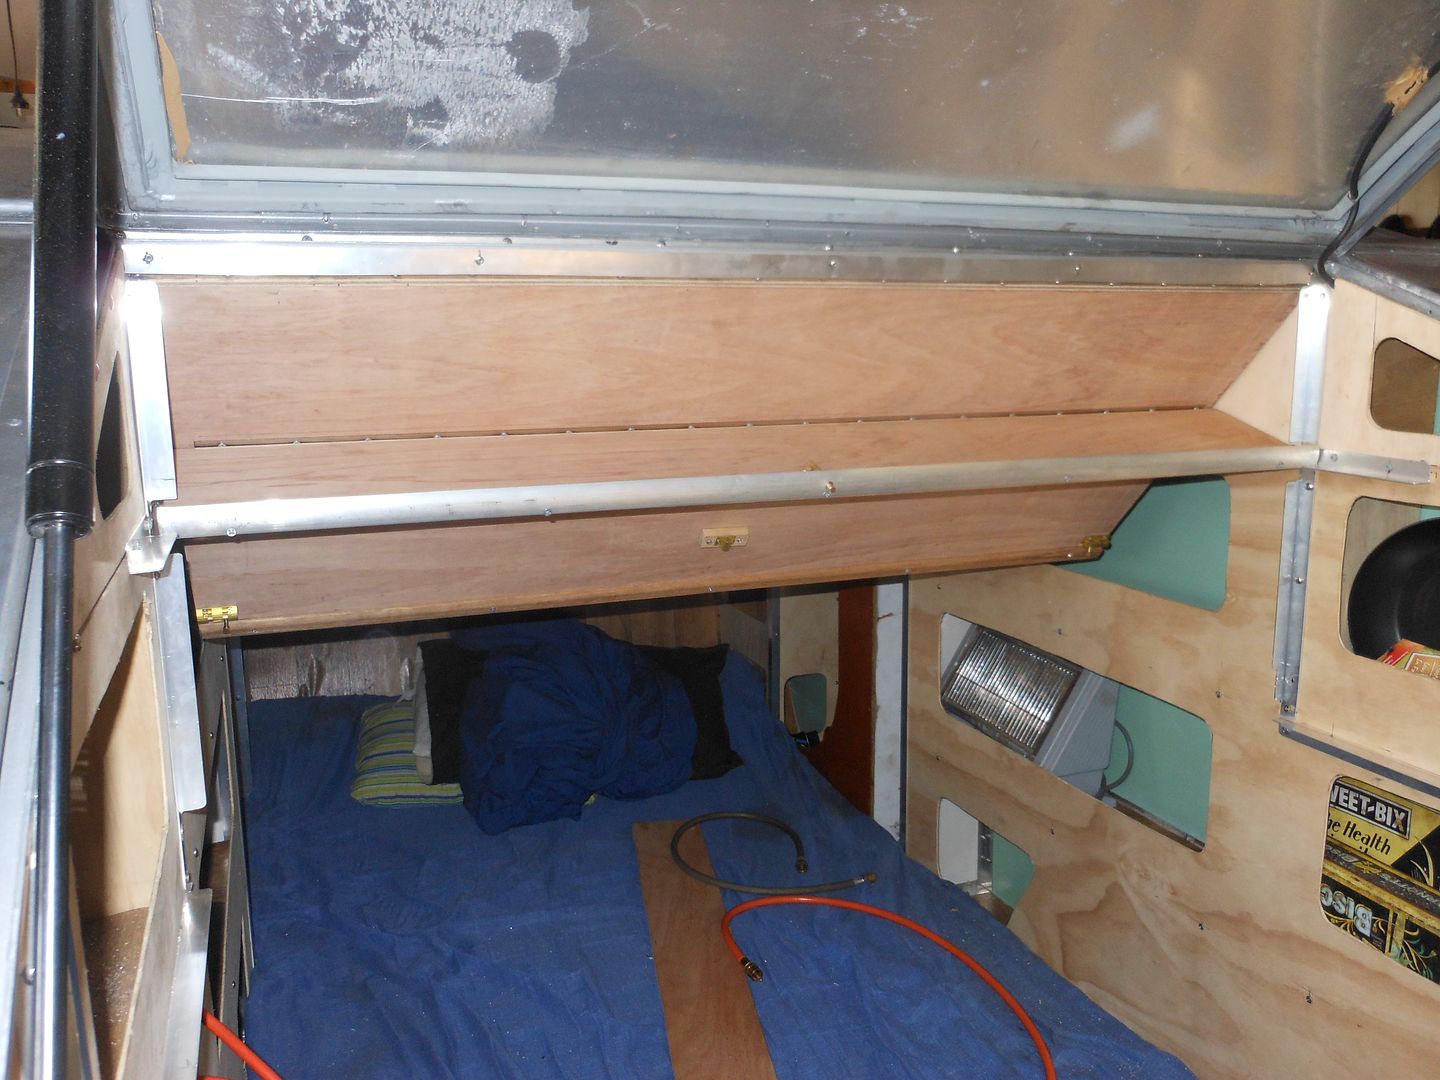 and locks away in the ceiling 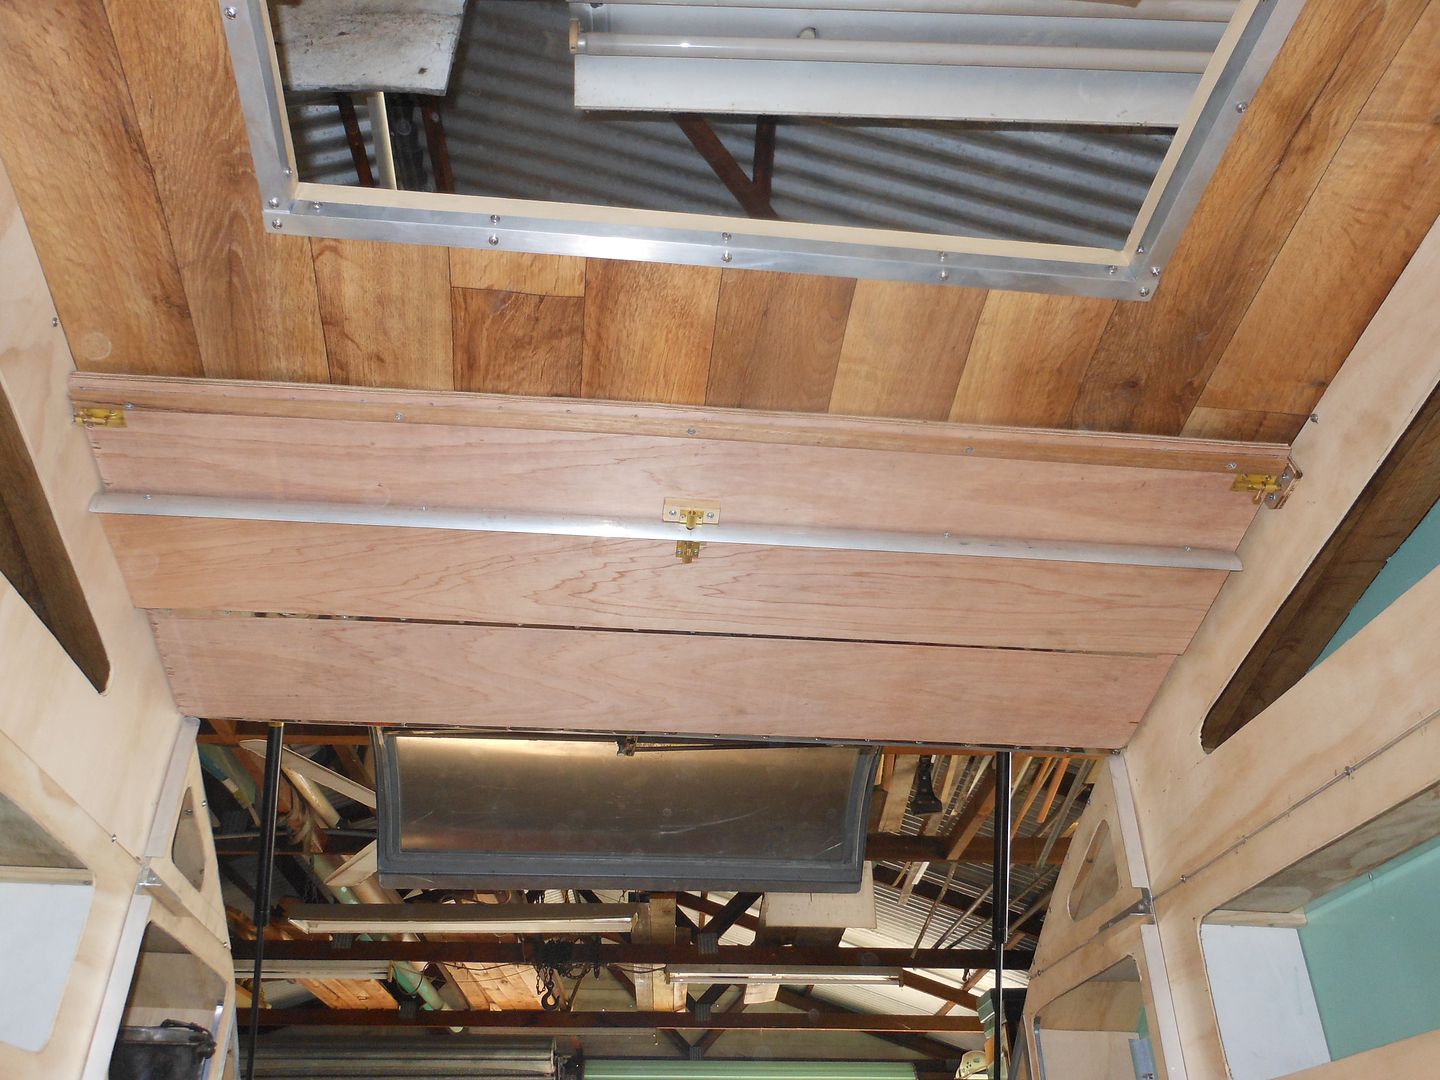 The lower half would have been too much weight to try and secure .. so I made it a slide out fold up gizzmo..with three hinges 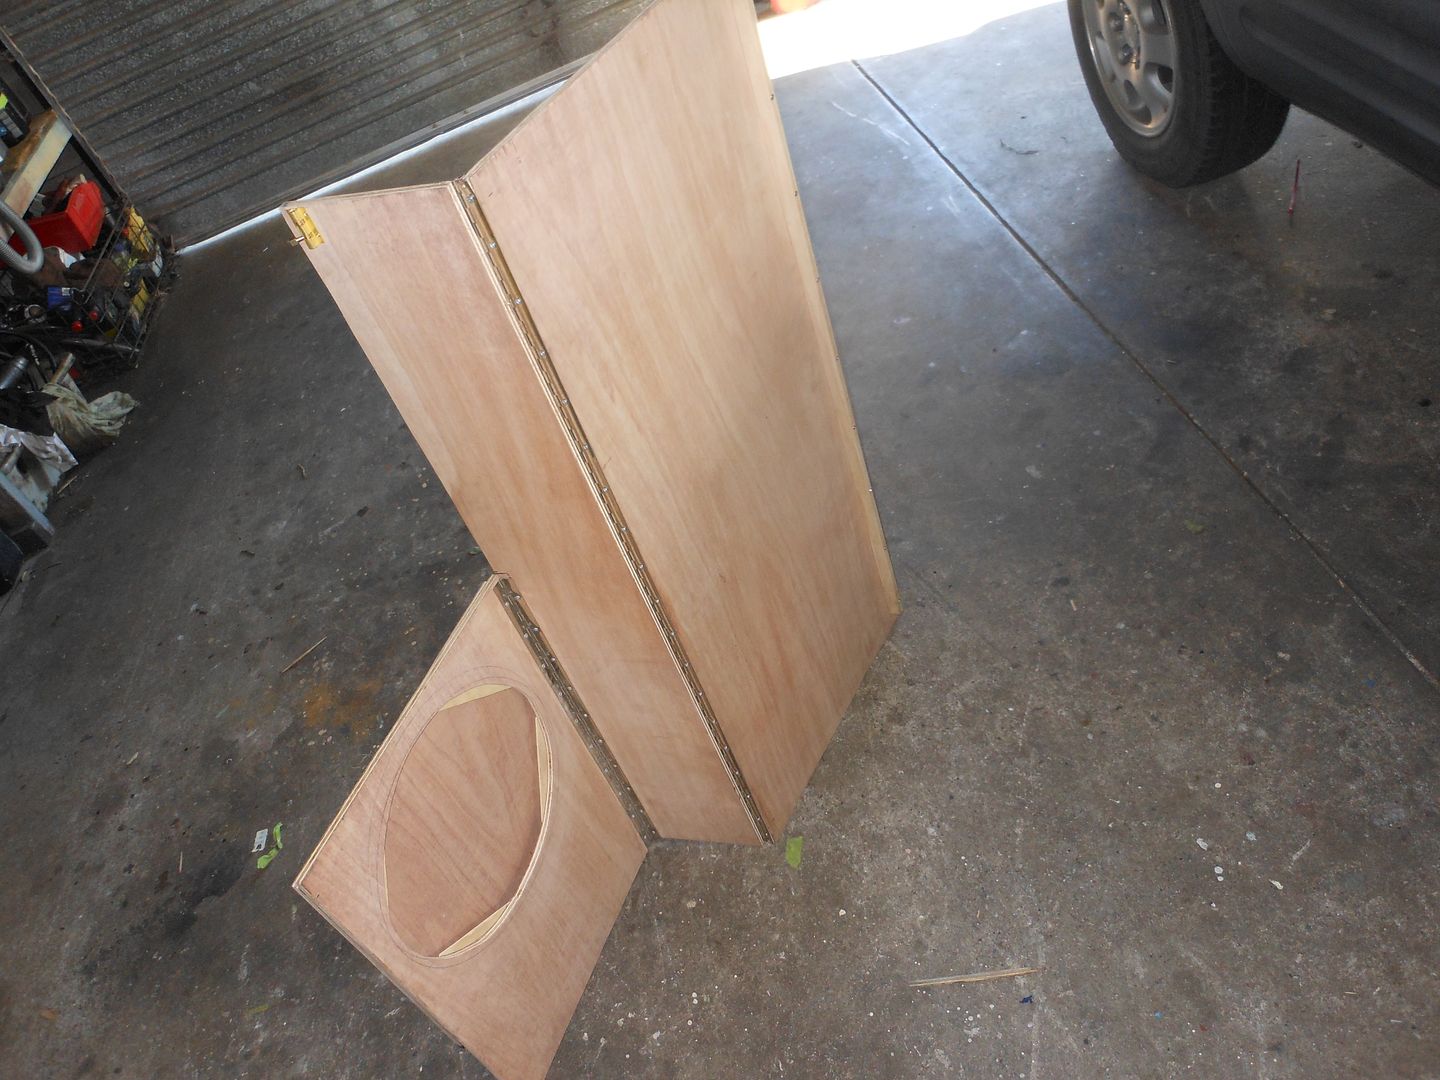 It folds up into a 1100mm x500mm flat pack 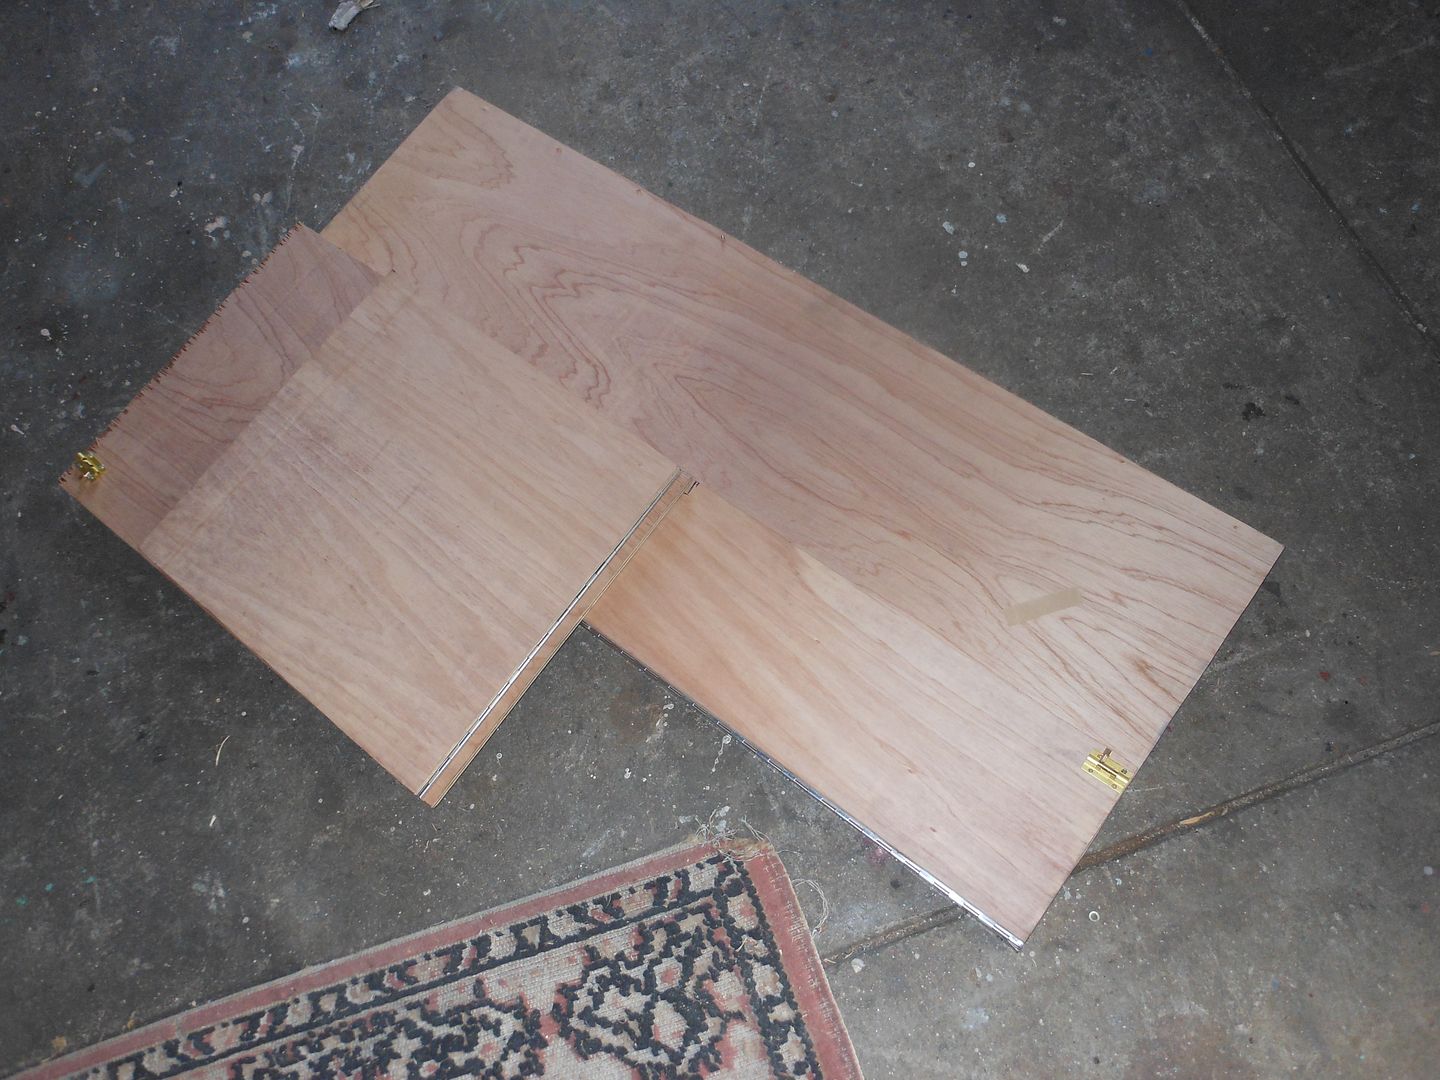 That can be stored behind the "bedhead" or behind the front wheel mount that holds the motorbike in place when hauling the bike inside... 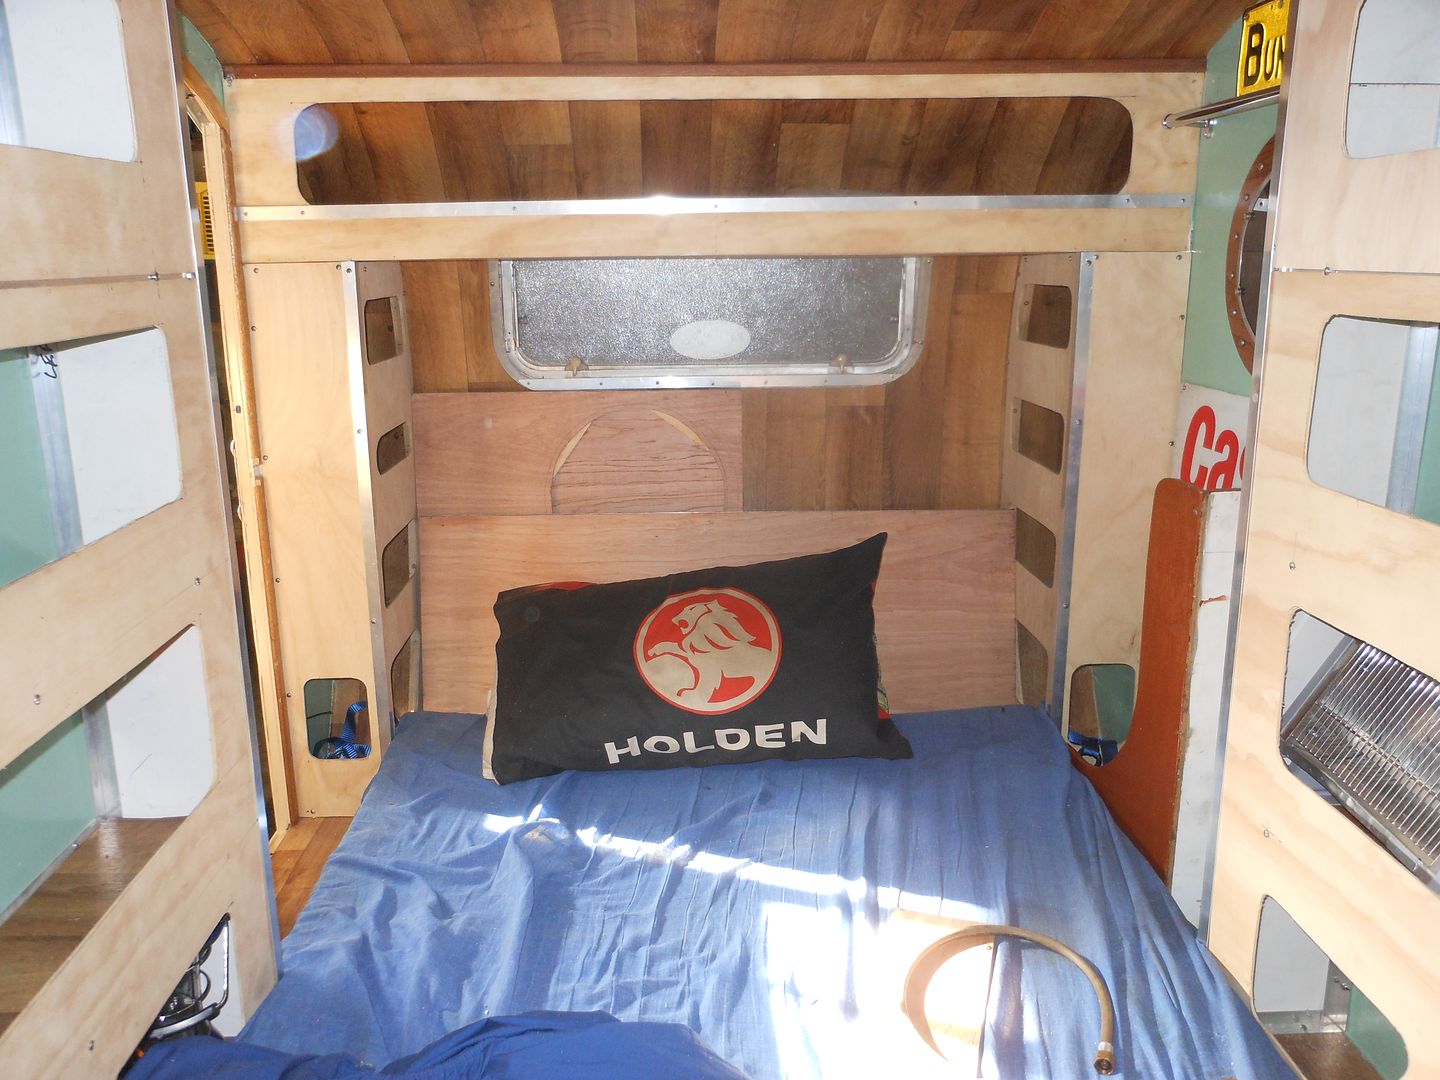 Takes about 30 seconds to install once the bike is out.. 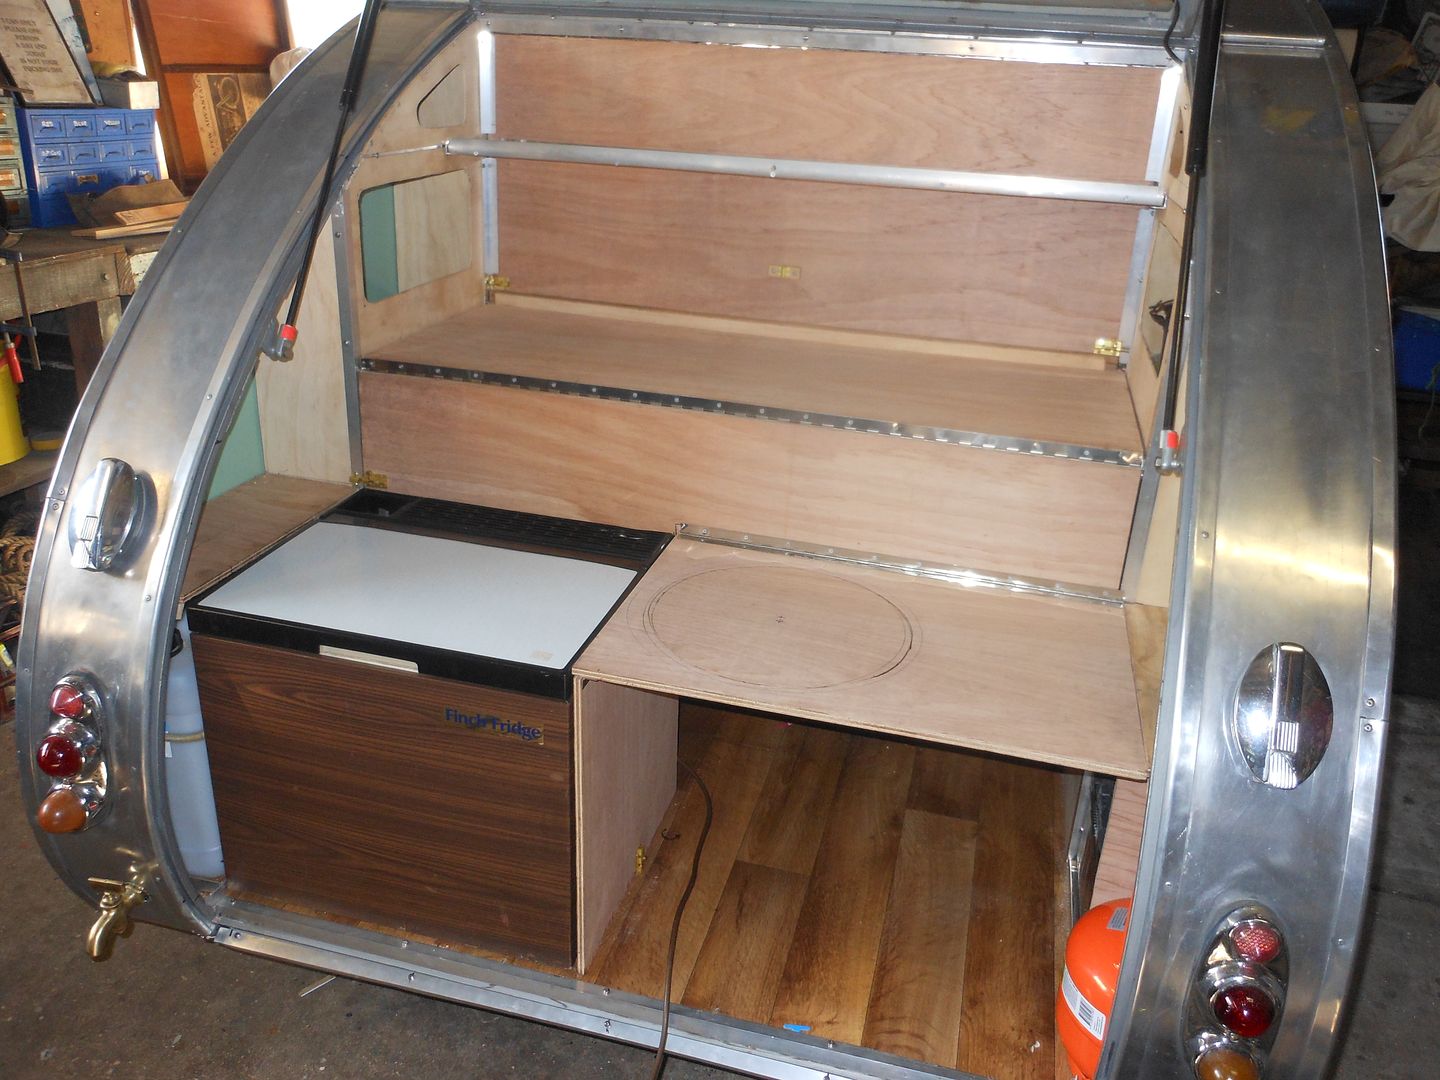 Has a cutout for the wash basin... 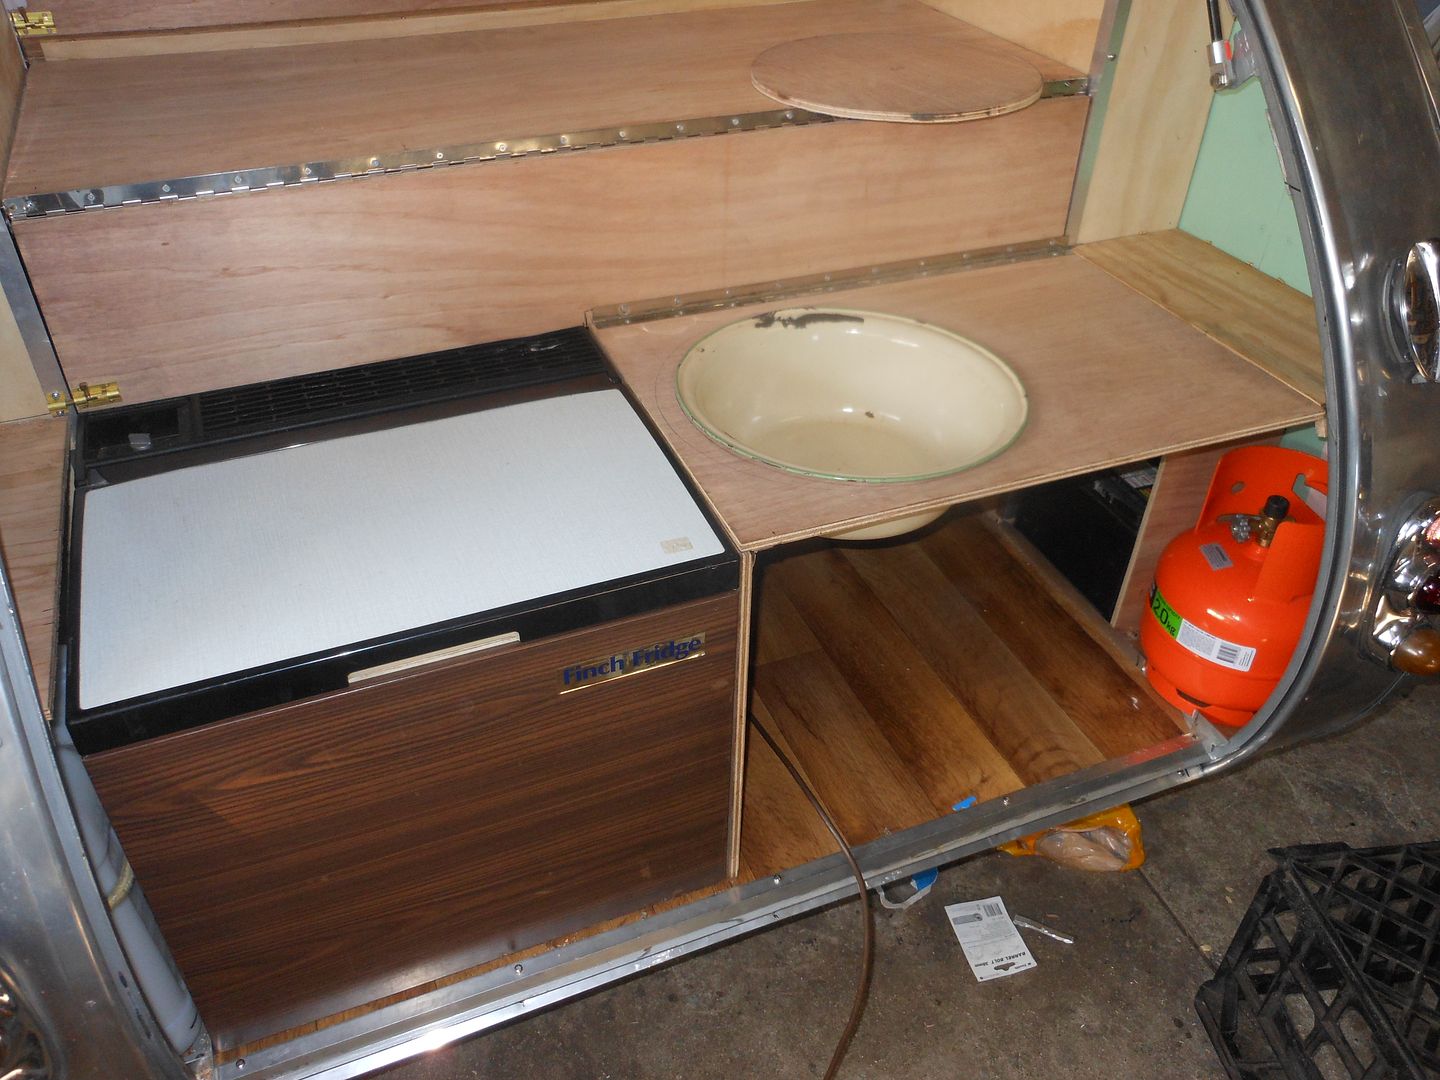 or .. with the cutout back in place the 2 burner BBQ fits on the lower deck nicely.. 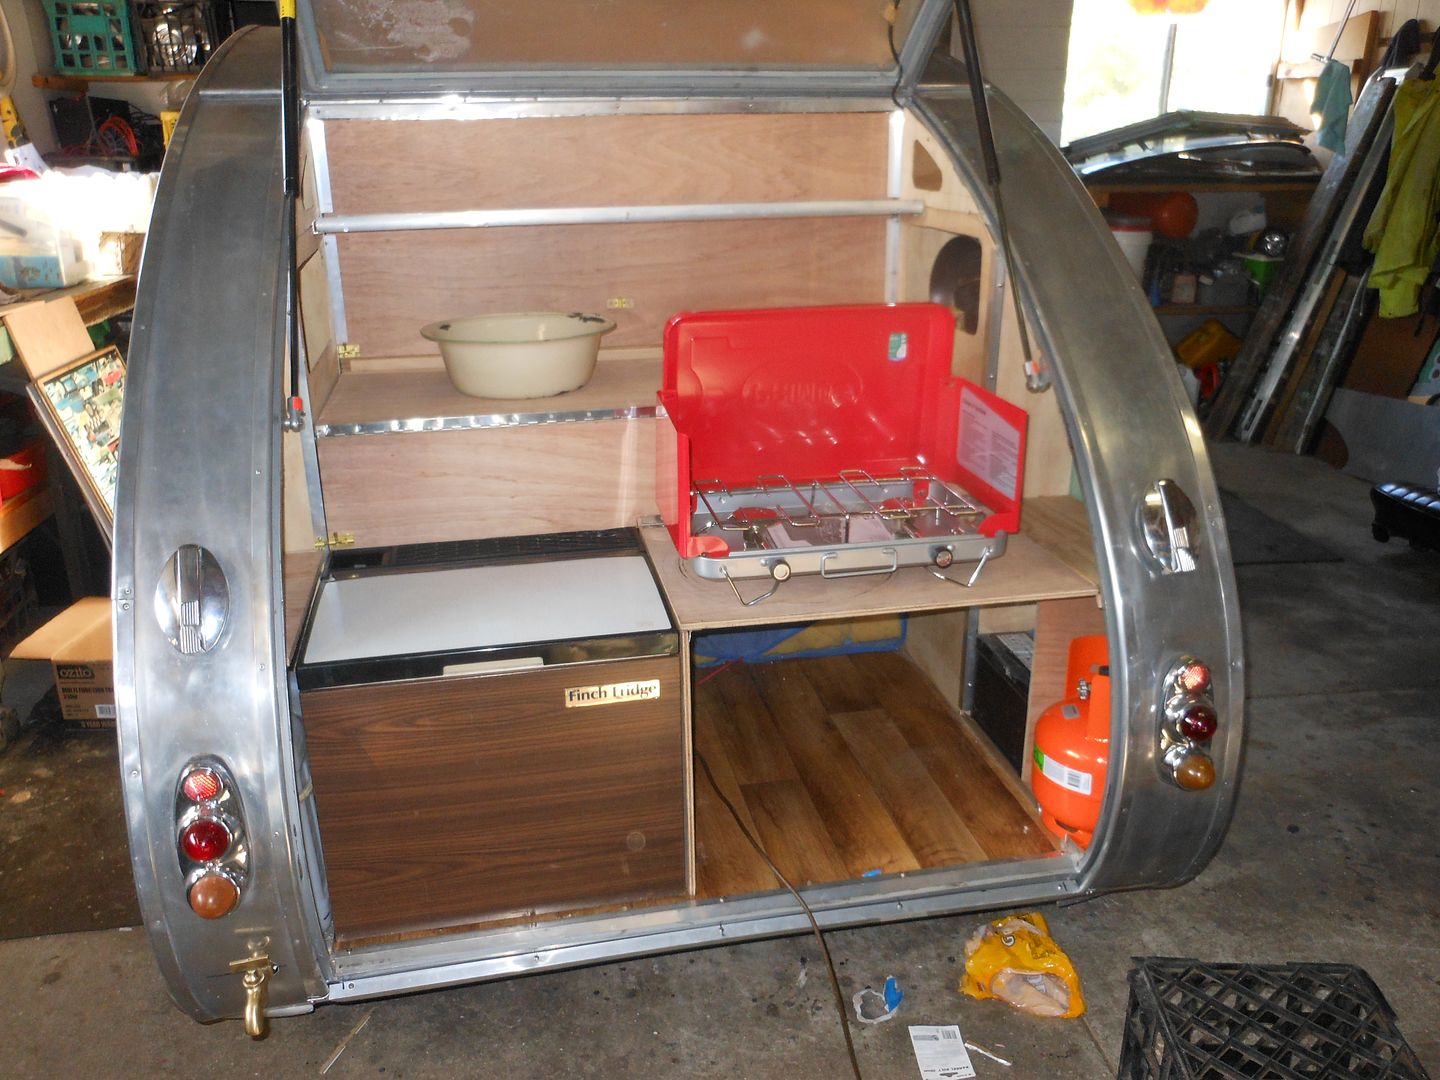 A little 2KG gas bottle live happily under the bench on the right side...  Managed to fit up a small 10 litre water tank in the left inner guard behind the wheel arch. still have to make a securing strap up to hold it in place... it can't fall sideways as the finch fridge sits up against it neat... Old brass tap similar to the one I used on the Splinter Hilton TD. Taillights should be a good enough reminder not to take short cuts when walking around the back of the van. 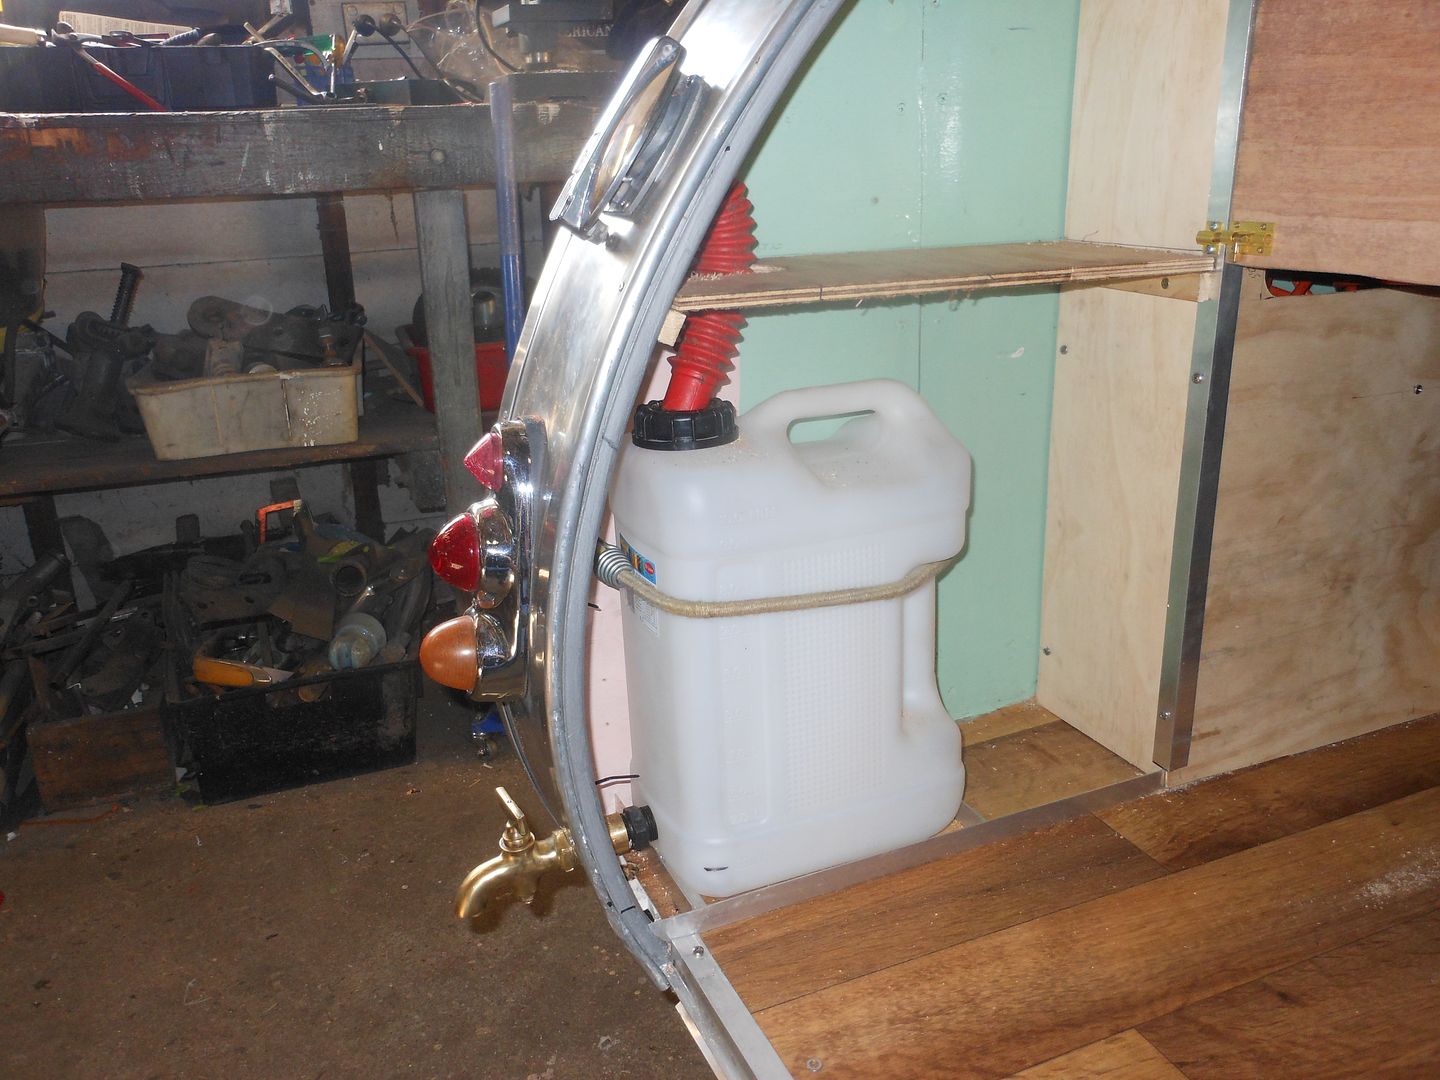 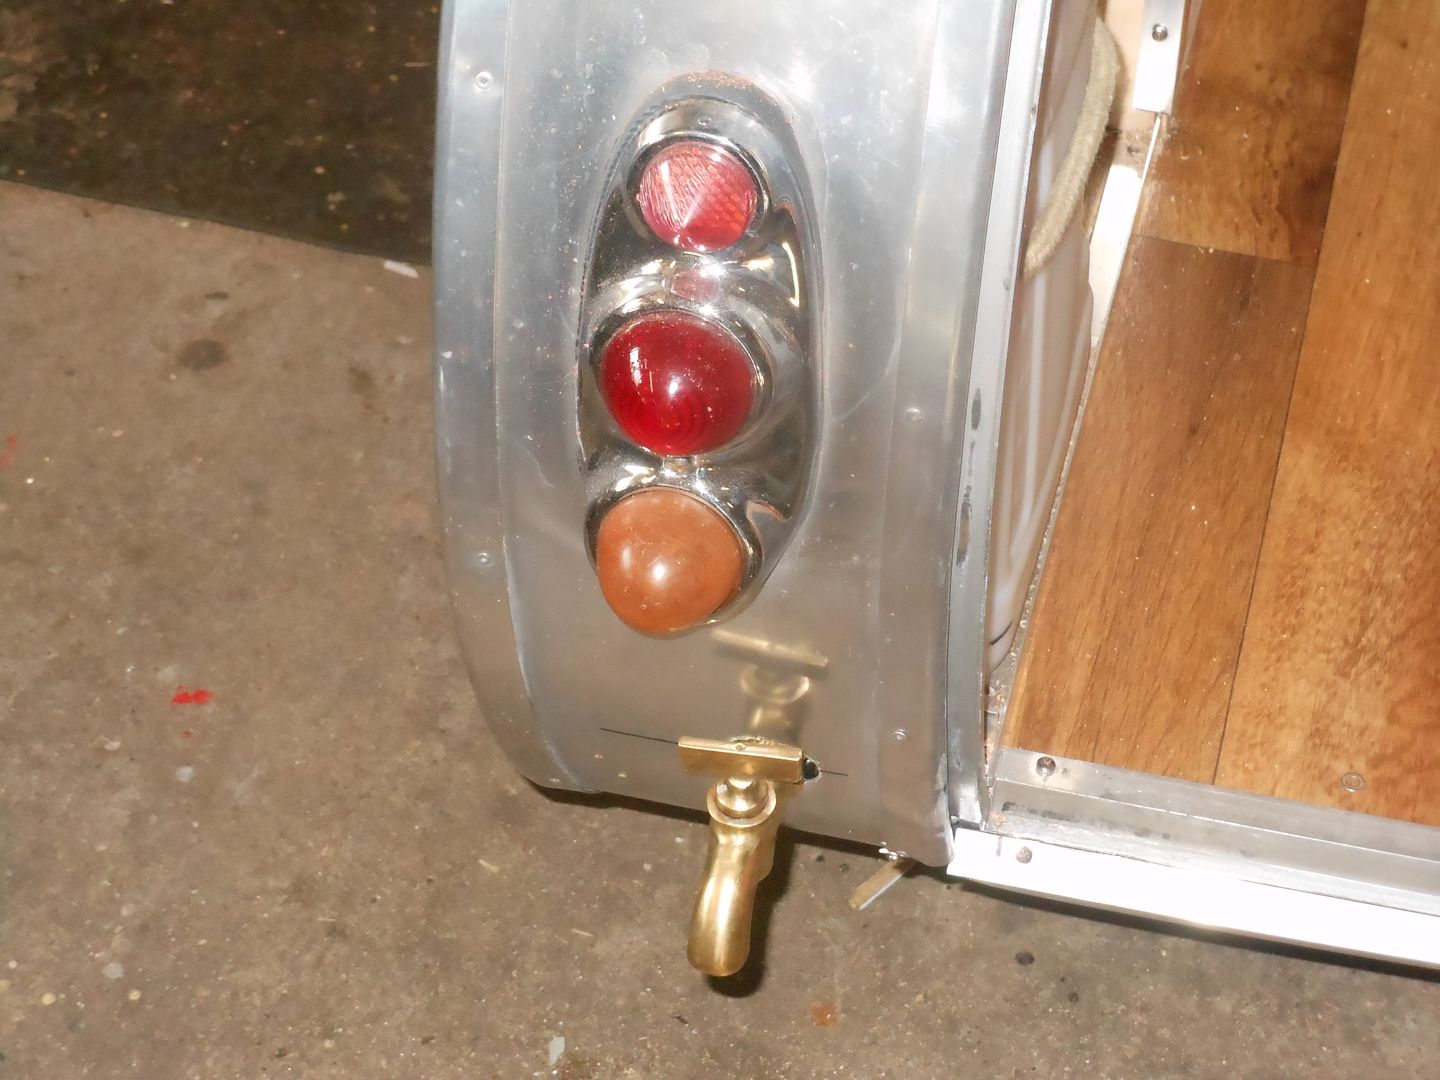 Was planning on using a monkey tail style pump but not enough room with everything having to fold up out of the way.. So.. this is how it looks when set up... The large gap next to the fridge is fr a Fish tub to slide in .. will store the BBQ, pots n pans and some groceries etc in there. will probably just screw a piece of stained ply on the end of the tub to hise the plastic... Bought a tin of Cabots marine Varnish /clear... going to give all the raw timber a couple of coats and see how it looks.. Still haven't run any wires for 240v or12v power yet. So .. will probably be roughing it with LED lamps and plug in fluros at Kendalls Beach in a few weeks time... . I have 2 "Propert " sink strainers I am going to mount through the right side of the van just above the gas bottle and battery to try and give some sort of ventilation in that area...law says the gas bottle has to be in a separate vented cabinet with a door that opens to the outside of the van.. It only takes a minute to disconnect the bottle and pack in the camping gear tub... whole lot easier than hacking a door in the side of the van,,,and the 2 small vents will /should be enough venting while camping as the tailgate will be open while cooking anyway. Finished fathers day off with me n the missus going for a chug around the lake on our bikes....and then a nice BBQ for Fathers Day... I pick up my new bike from a Newcastle M/C shop on Wednesday.. Naaa. it wasn't a fathers day gift.. had to find the bucks myself... Im happy... Cheers Reddo |
|
|
|
Post by Franklin1 on Sept 1, 2013 21:21:52 GMT 10
G'day reddo, I think you've done an exceptional job in getting the shelving sorted out. It all looks like it is quite easily set up when required, but cleverly packs up when not needed. The ol' Shed of Invention has really earned its keep in coming up with some brilliant ideas. I picked up on your comment: I have 2 "Propert " sink strainers I am going to mount through the right side of the van just above the gas bottle and battery...Can I suggest you look at having at least some of the venting down near the bottom of the gas bottle if possible. LPG being heavier than air will go to the floor if there's a leak in the bottle. I don't know how your Finch fridge operates, but if there's any chance of a spark from the fridge, you wouldn't want your TD to be the first TD to land on Mars. (And I know you are involved in Safety Training, so I'm not trying to tell you how to suck eggs... just giving another point of view.) cheers, Al. |
|
|
|
Post by Don Ricardo on Sept 1, 2013 22:06:42 GMT 10
Hi Reddo, I've said it before and I'll say it again - you're a creative genius!! I love the way you work through problems and come up with really inventive solutions. The NECT is looking terrific. Don Ricardo |
|
Deleted
Deleted Member
Posts: 0
|
Post by Deleted on Sept 3, 2013 0:36:48 GMT 10
Reddo. Just thinking, instead of the roof rack, what about the roof rack things that screwed into the roof of an old Holden/Ford Valiant back in the day ?? (They went from the front to rear of a wagon) The rails from one of those racks are chrome/stainless and cut down they would take the shape of the roof of your toy hauler  Or should I stop drinking and thinking about now |
|
Deleted
Deleted Member
Posts: 0
|
Post by Deleted on Sept 3, 2013 5:58:13 GMT 10
Thanks for the comments and ideas guys.. Al.... yup... your right about the gas hanging low when it escapes and I will mount the vents one above the other ... one near the base of the bottle ... one near the outlet. I don't want to use those rectangle shaped fluted vents.. wouldn't suit the lines of the van... so .. the stink strainers will be the go. jg33... Yep.. I know the racks your talking about.Kingswood wagons had em.. Side rails where low and unobtrusive and offered somewhere to hook an Ocky strap or lash a rope around...but the main rails ran lengthways and the chrome strips screwed to the roof for the load to sit on I suppose the roof hatch sticking up will prevent me from loading anything like a table up there. Geoff and Jude suggested I make a rack up in the old style that curved and followed the roof line... I have scored an old .. covered in surface rust...rack that I might have a fiddle with... Its the sort you use to see on old cars.. has gutter grabber clamps and suction caps that sit on the roof. made out of 1/2" tube steel with "loops on either side.... Photo later !! Regards Reddo |
|
|
|
Post by Franklin1 on Sept 3, 2013 10:25:31 GMT 10
G'day again reddo, I'm always looking through piles of junk to see if there's anything there that could be adapted for use on an old caravan (I'm a bit like you when it comes to the ol' Steptoe and Son stuff ). Something I came across recently that looked like it had a lot of potential for a vent cover was this fan belt cover off the back of a clothes dryer... 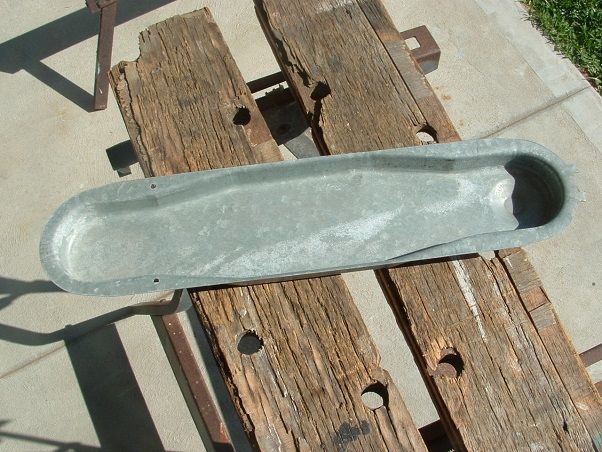 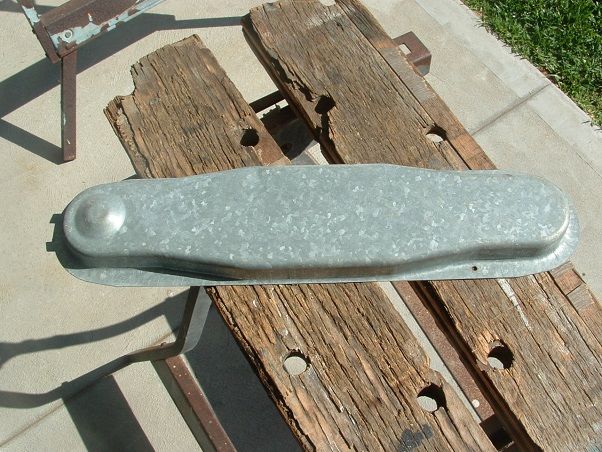 It's about 4 inches wide, and 1 inch deep, with a large flange around the outside (plenty of meat for screws)... 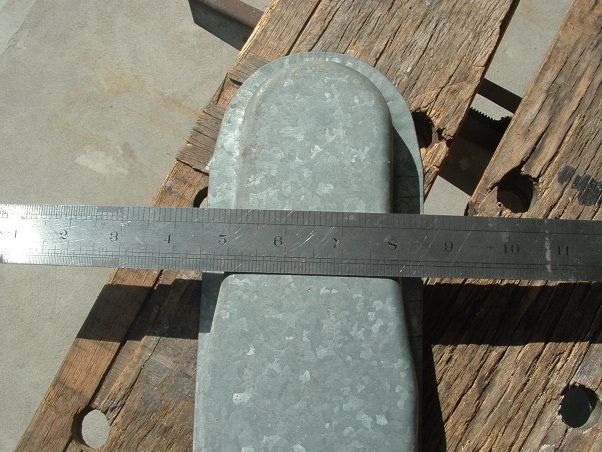 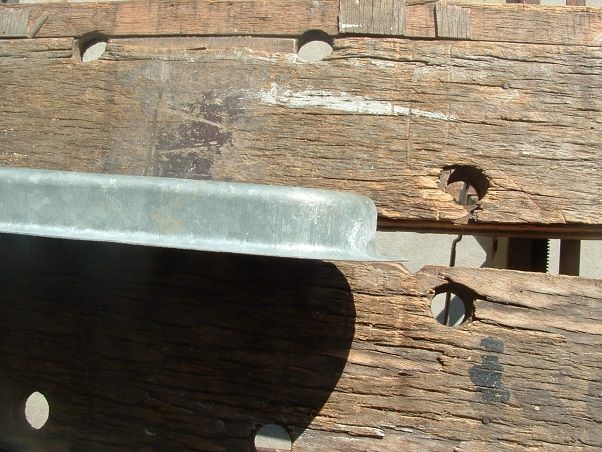 For a flash looking TD like yours, I reckon you could cut the cover at an angle to give a racy look to it... 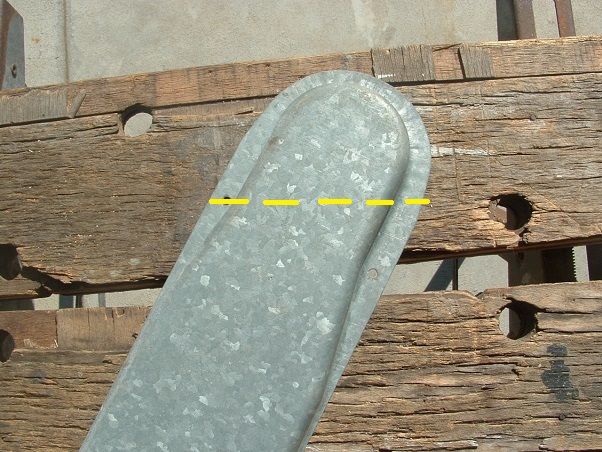 The cover is heavy duty galvanised, so it will last a lifetime. I reckon a bit of flyscreen under the cover, and a bit of chrome spray paint, and she'd be a pretty flash vent. cheers, Al. |
|
Deleted
Deleted Member
Posts: 0
|
Post by Deleted on Sept 3, 2013 19:58:13 GMT 10
;D Hi Al How much do you want... ...for those planks the cover is sitting on  Yup.. am familiar with the belt cover on the clothes dryers.. I must have repaired about 20 elements and door switches in the old Simpson minimatics. That was when it was worth repairing them.. tis cheaper to buy a new dryer nowadays than it is for me to chase the bits and repair them. Thanks for the idea on the custom vent cover....I have a domed Fobbergross vent out the side of a sunliner I picked up after one of the Coledale auctions..... twas JBJs Trouble is I don't want things sticking out off the body... have to be flush.. So.. it,s The sink ( Not the stink as typed in my previuos post) strainers that will be being improvised... although .. when ya think about it.. they will be straining the stink!!! Cheers Reddo |
|
|
|
Post by cobber on Sept 16, 2013 15:15:10 GMT 10
Hey Reddo, Remember at Kendalls I told you how your NECOT reminded me of the English Caravan company's teardrop Well.... maybe yours looks even better ( But don't you ever quote me... OK?)  A master piece of ingenuity, you can feel very proud of your efforts Cobber. |
|
Deleted
Deleted Member
Posts: 0
|
Post by Deleted on Sept 18, 2013 5:50:28 GMT 10
|
|
|
|
Post by Jennison on Sept 18, 2013 16:44:39 GMT 10
Must agree with Cobs having seen reddos "1934" ;D teardrop (long story ask Reddo ;D ) ( sorry cobber! ) in the flesh at Kendalls beach I am in awe of his ingenuity in how he kitted and fitted it out. It is a fantastic unit and well worth a look when you all get a chance. Top rig Reddo Jenno |
|
Deleted
Deleted Member
Posts: 0
|
Post by Deleted on Apr 8, 2014 7:51:18 GMT 10
Yo... Been fiddling with annexe design. Was think about a rollout/ roll in spool on the roof behind the hatch.. but that would mean an annexe only 1500 wide and.. a spool about 200mm round on the roff if I made the annexe 3.6 long.. So.. took the soft option and bought a 3.6 x 4.1 brattice. Fiddled with a couple of 25mm sadlles and adjustable tent poles on the roof.. 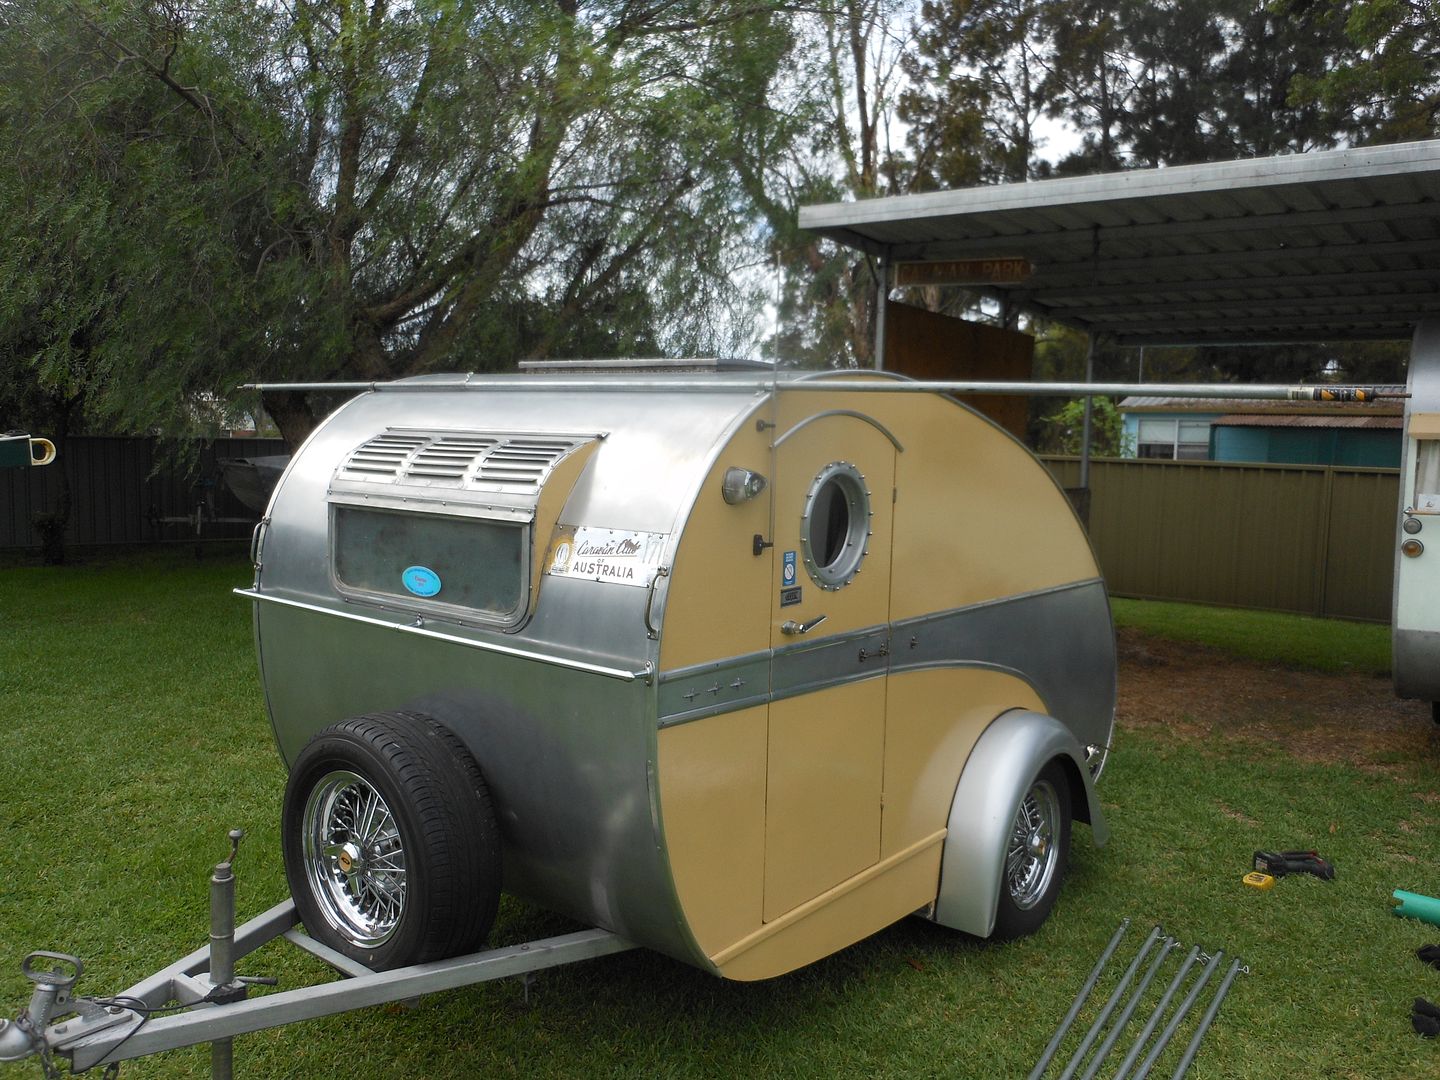 extends 2200mm out on the door side 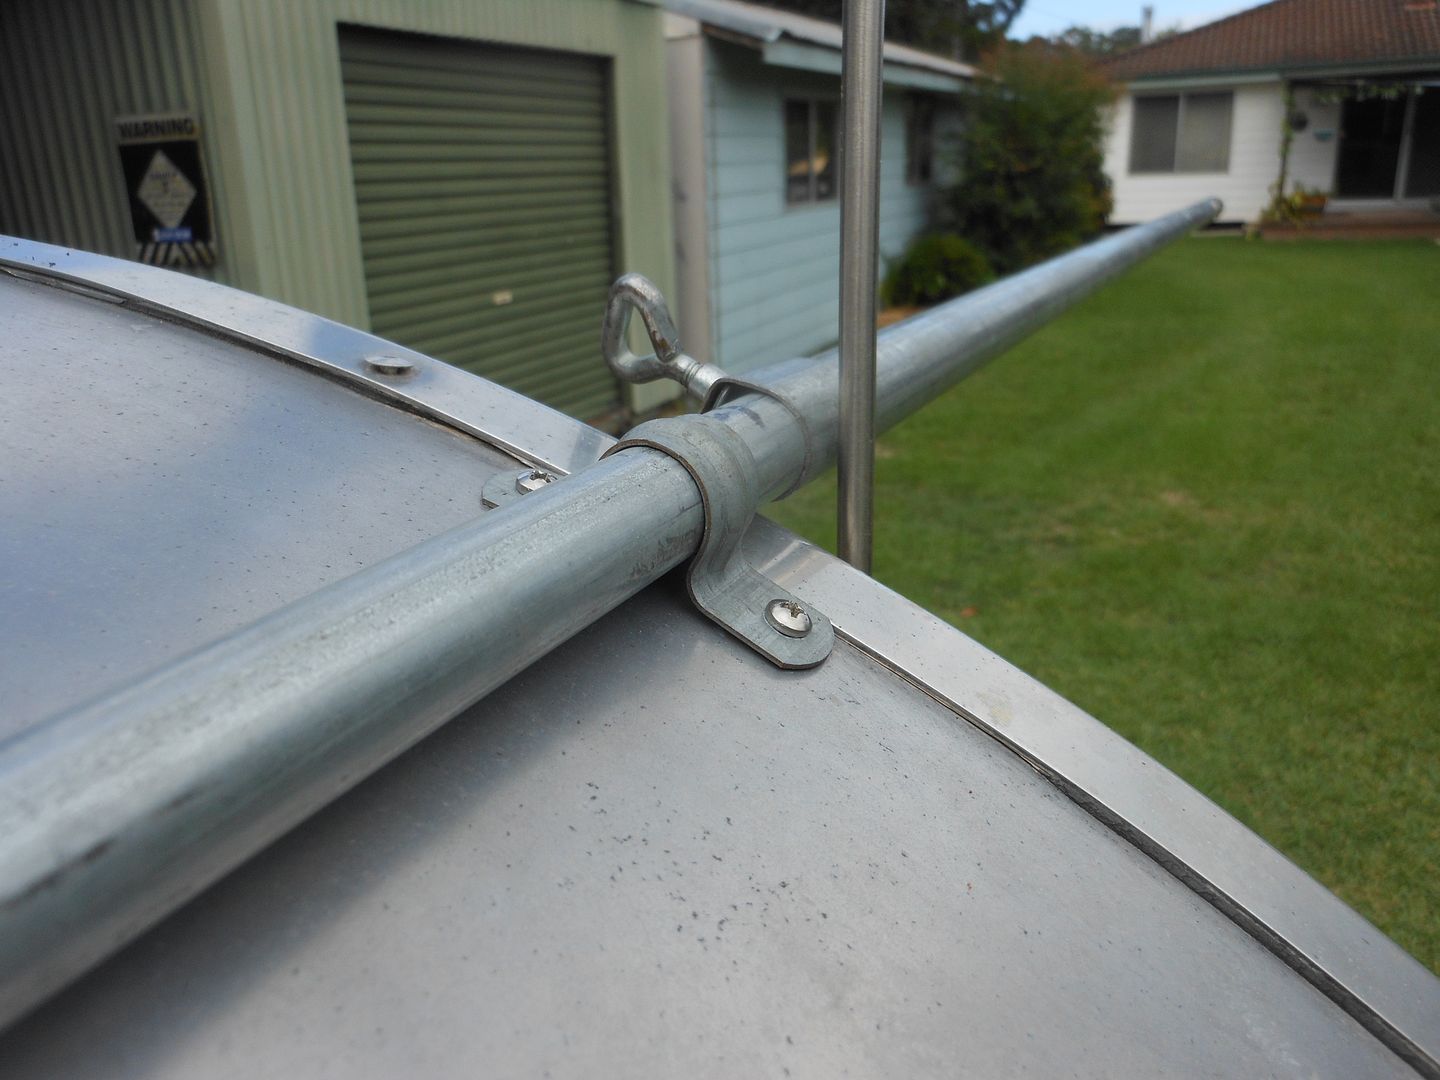 and about 750 mm on the opposite side. 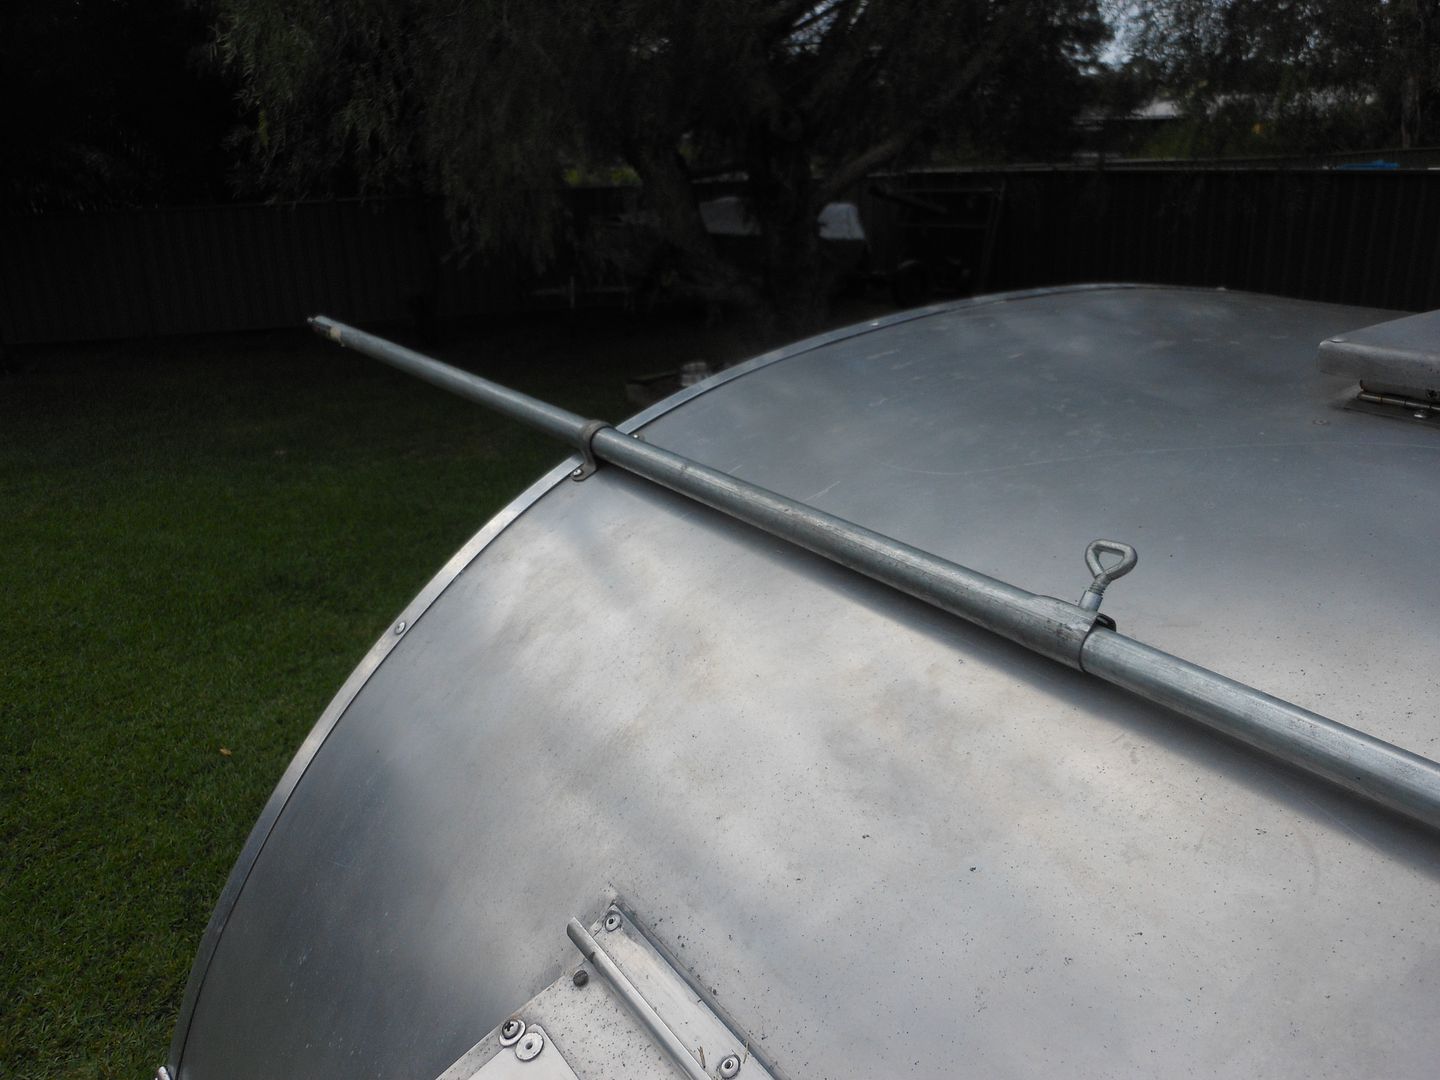 Enough to give a bit of side protection over the kitchen in bad weather... Anyone who has ever erected a Lean to - auto tent on their own will tell you its like teaching "Bamby" to walk.. get one corner set and move to the next .. and then the first corner falls over!! So.. with that issue in mind I came up with the extender poles at the front. This gives you the solid fixing to hold the front two corners without the need for poles.. Once they are done the rest is easy. 2 or 3 minutes spent trimming the sales and the job is done. I end up with more cover than most van annexes offer. 4 poles 4 ropes 4 pegs. add 2 more of everything if I want to support the front 2 corners... 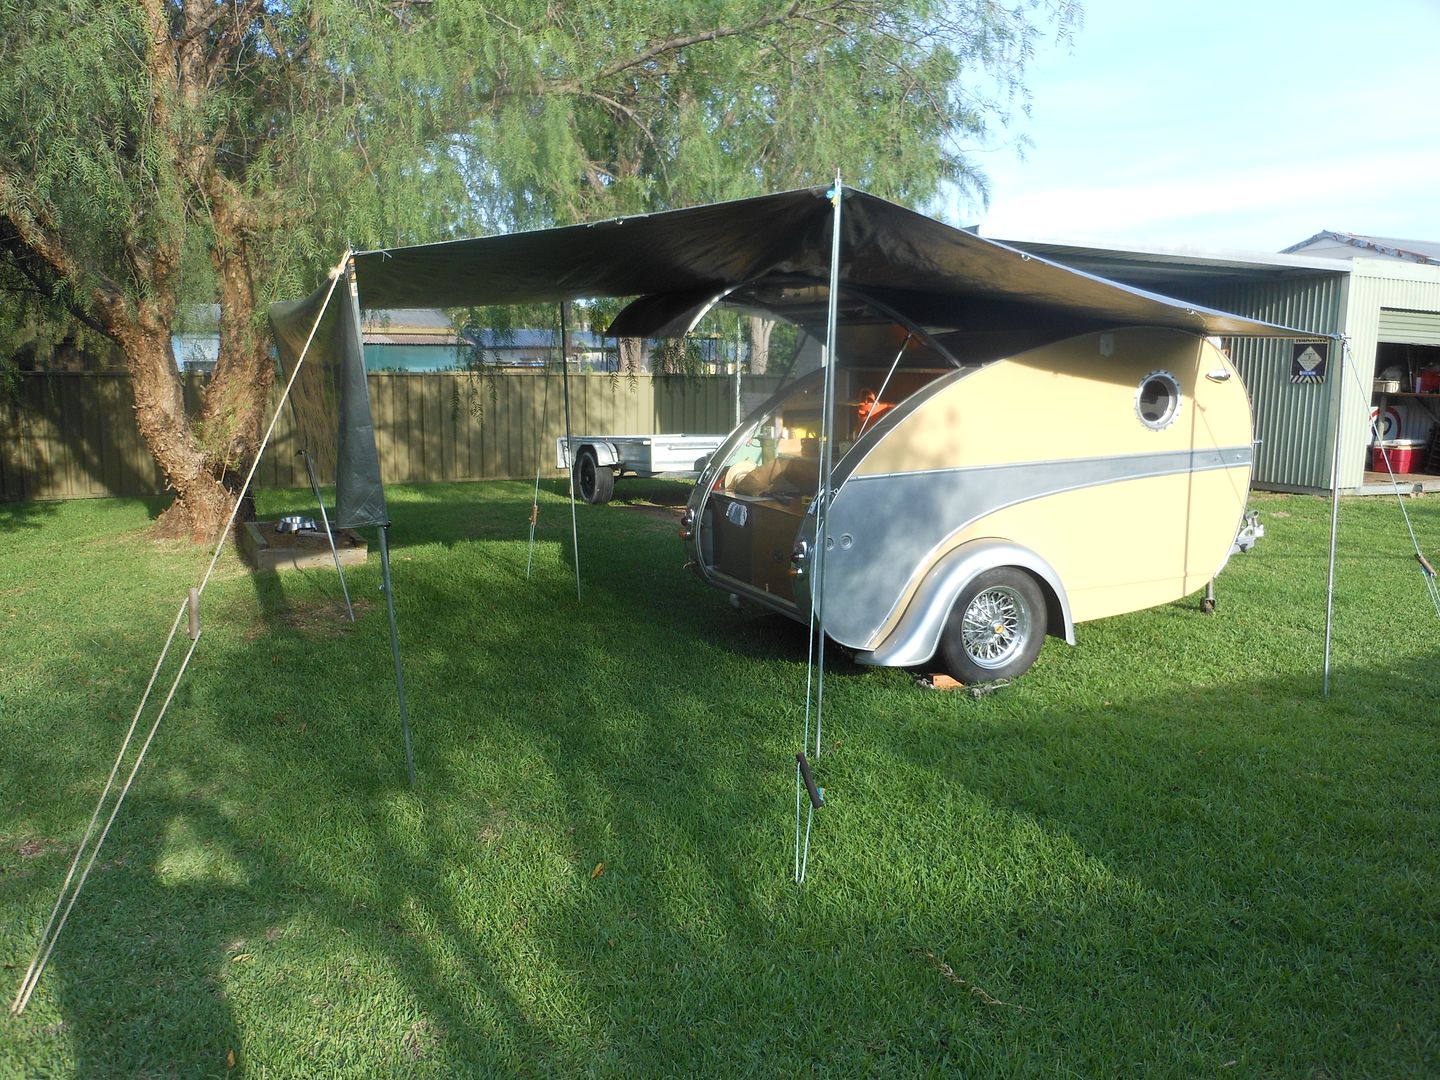 . All good. Not really. with all these poles etc I thought I would just toss em in the door and dig em out when I pull up to set up camp. 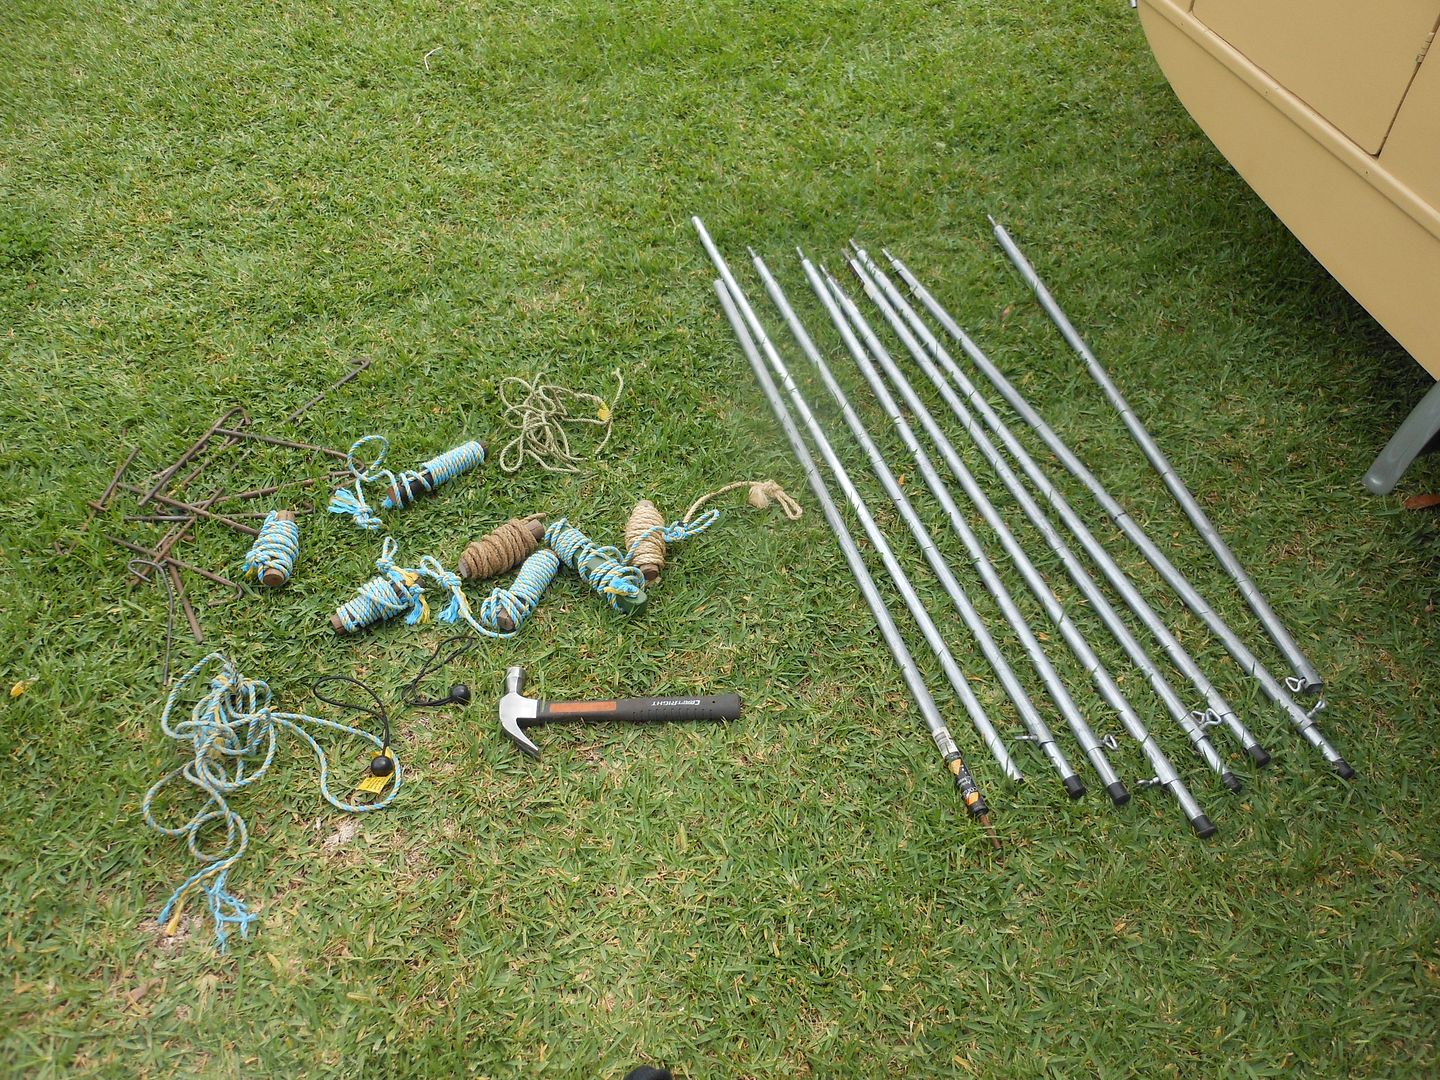 Problem?? adds a lot of extra weight to the tow ball and makes it heavier to steer around on the jockey wheel...What to do..Find somewhere behind the axle to stow poles ropes pegs etc. Hmm. Its already chockers with kitchen back there. So... decided on a storage spot under the rear.. needed to be easily accessed without rolling around on the ground... So.. I filled in the roll pan 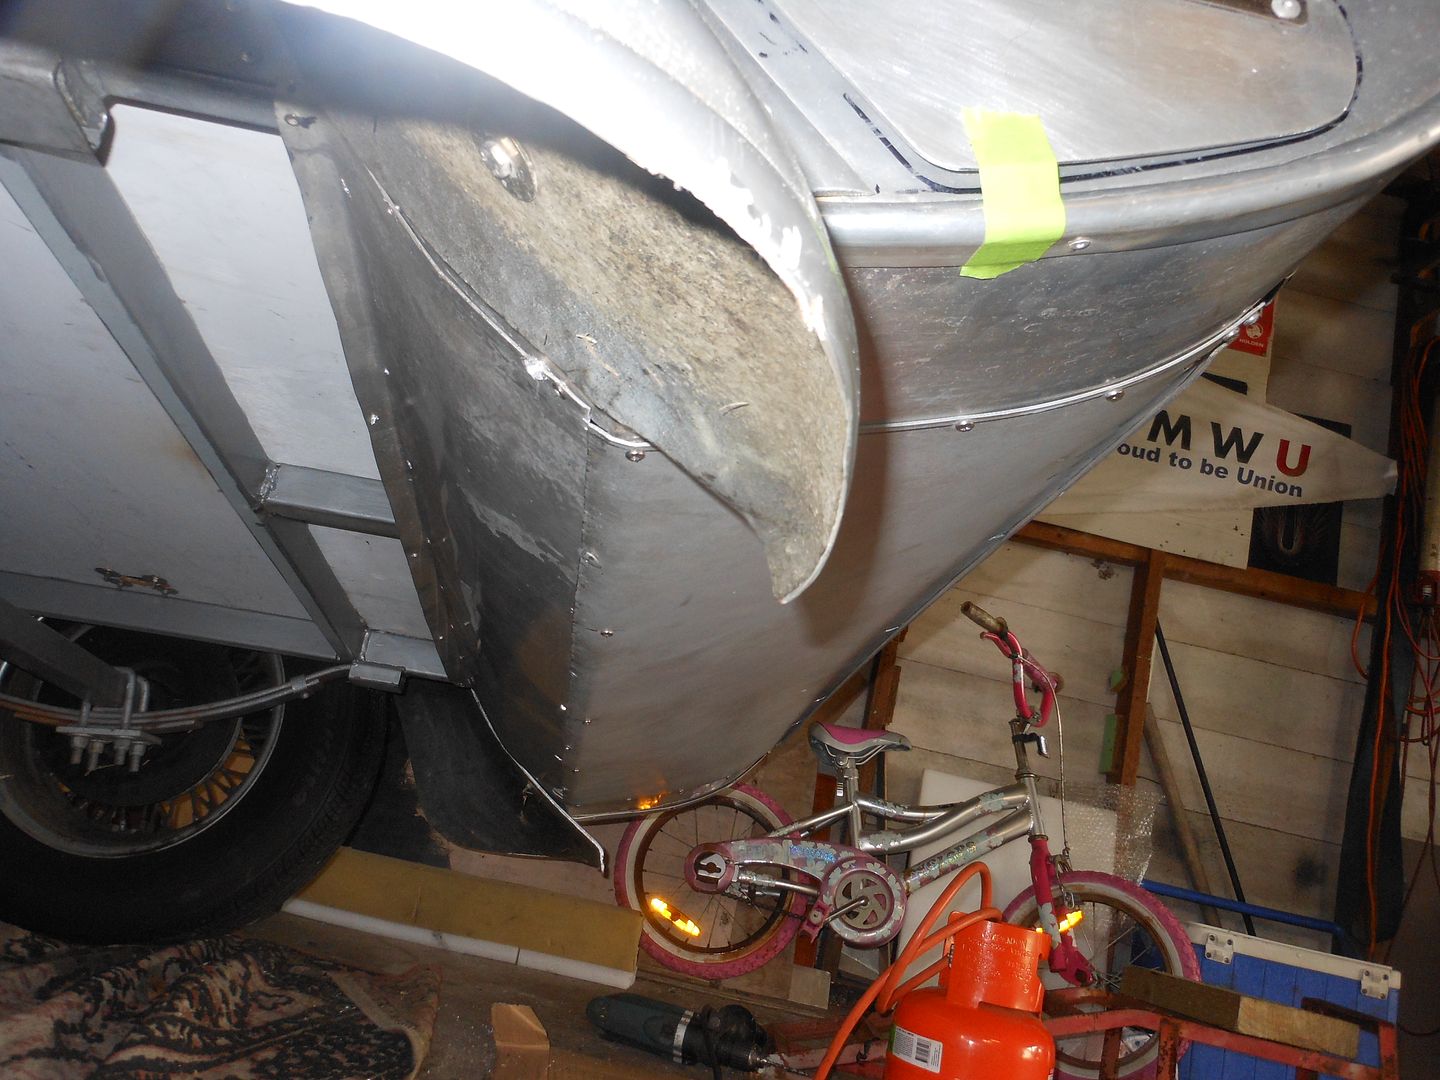 Cut out and fitted an access door in the left side...  Problem... if I check everything in there loose I will never reach the pegs and ropes if they jiggle across to the other side.. Solution..... 6 soxs. 1 pillow case. 1300mm length of plastic stormwater pipe with timber plug in end....  Slide poles in opening and stack up towards front of space. Slip each tent rope into sock (stops em coming unraveled and creating a bunch of knots) , slip pegs into pillow case , roll tightly and drop into tube. bounce tube to ensure pegs at far end of tube. drop socks in one after the other. bounce again to ensure compaction. slip hammer in end of tube. Slide tube in through door...  All snug and tucked away...  Shut and lock door. Annexe rolls up and sits in on the kitchen bench when travelling. All done.?/ Naa.... I went to a car boot sale on Saturday. bought one of those nylon tent thingos that fit to the back of the 4x4s. $5 because it was missing the suction caps that stick on the car.. Whole thing folds up to about a bundle about 450 long by 100mm round. Gunna fiddle with that and adapt it up to the TD and maybe use it for overnight stops. Just enough to keep the damp night air off the table and chairs at the rear of the van?? Reddo |
|
Deleted
Deleted Member
Posts: 0
|
Post by Deleted on Apr 8, 2014 8:41:20 GMT 10
Fantastic job Reddo,you will be the envy of all other rigs!
love your sock idea,will be stealing that myself.
Cheers
Hughdeani
|
|
|
|
Post by tooleyau on Apr 8, 2014 19:23:10 GMT 10
Reddo,
I'm impressed. That's what you get by thinking outside the square :-)
Mike
|
|
|
|
Post by DC3Td on Jul 12, 2014 14:11:51 GMT 10
Gday Reddo. So whats been happening with the NECOT? Any further mods? gordo
|
|
Deleted
Deleted Member
Posts: 0
|
Post by Deleted on Jul 12, 2014 19:28:34 GMT 10
Gday Reddo. So whats been happening with the NECOT? Any further mods? gordo Not a lot really DC3TD I have just bought a partially constructed Bondwood Teardrop body at an " afterebaysale".. I am looking forward to another unoriginal build,,, keeps the resto and innovation skills honed ... its what made the early vintage van builders "individuals by design" .. just take a look at Down History Lane...If they all had similar thought trains todays vintage caravan world would be a boring place aye??? Always good to stay motivated in case something that gives off sawdust comes along. I get satisfaction from "having a go" and ending up with something different ... rather than shell out big bucks for something original and not be happy with it. Plenty of life left in this old horse.. stay tuned to this station.. well..  ... Reddo |
|


 .
.


 ...for the first time in near on 10 years on the forum ... I...I...I... i'm lost for words.
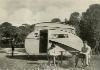


 ...
...