|
|
Post by Franklin1 on Jan 14, 2013 22:31:38 GMT 10
Bloody heck, reddo, I'm exhausted just trying to keep up with all the activities you've been involved in over the last couple of weeks or so. Poor ol' Trish must have windburn from you flitting from one thing to the next. You get more accomplished in a week than I would get done in a month!!  I must say that the teardrop is a darn good-looking effort. I know you've said in the past that you're just a "rough-and-ready" builder, but Jeez Louise, if that's what rough and ready looks like, I'll take it anyday.  I know you're trying to crack it for a deadline, but with Australia Day coming up, it's worth remembering that it's "unAustralian" to work so bloody hard. ;D ;D (remember the film "They're A Weird Mob"?  ) cheers, Al. |
|
Deleted
Deleted Member
Posts: 0
|
Post by Deleted on Jan 15, 2013 18:21:12 GMT 10
Hi Al
Is work.. is good mate.
Will be flat out on the car and van over Australia Day weekend.. No Motorfest this year.
Signed
Nino Calotta
|
|
Deleted
Deleted Member
Posts: 0
|
Post by Deleted on Jan 17, 2013 19:21:44 GMT 10
Hey DC3TD.. Tailight arrived Tuesday. Spent 10 mins with the belt sander upside down ( the sander was upside down ... not me ) in the vice and linished the fins at either end until it was near flat across then back.... but leaving the curve from top to bottom  Have made up 4 studs to hold it and test mounted it on the van.. near perfect . will get away with a thin gasket of insertion rubber to create a good seal... Photos to come later.. Will need to work out twin filament lamp holder mount.... Thanks heaps for the el cheapo deal and fast postage... much appreciated mate. Reddo |
|
|
|
Post by DC3Td on Jan 17, 2013 19:33:42 GMT 10
Howdo Reddo. Knew you`d come up with some way of sorting it out.Bit of the missus`nail polish varnish (we know you got some stashed) would probably seal fine lens cracks. gordo
|
|
Deleted
Deleted Member
Posts: 0
|
Post by Deleted on Jan 28, 2013 17:01:44 GMT 10
Howdy Vanaphiles... Been rainin in Barnsvages so domestic duties as directed have been cancelled... what a bloody shame aye.... ;D Been head down RRRRRRR up workin on the panno the past few stinking hot steamy days so i figured i would have a holiday....................................... in the other half or the shed Shoved a few things out in the wet and moved the TD into a spot where i could get a go at one side and swing a 4 metre length of cresent mould around... There is a Neil Diamond song that goes something along the lines of of..."Some days are Diamonds.. Some days are stone".. So.. today is guna be an aluminium day.... Stay with me while i attempt to do the imbercile......   ... ummm.. that should read .. the impossible... Went searchin for 16mm alloy d mould around Newy and they just dont stock it no more .. so i bought 4 lengths of what the people in the business call "Cresent Mould" comes in 4 Metre lengths and is 25.4mm wide... I looked at it when old mate the salesperson showed it to me and thought to myself ....This is gunna take some bending ?? After talking to Cruisindoug and Col Kaybee i figured i was mechanically apt enough to tackle bending the mould into a lazy "S"shape to suit the side of the van.. So.. armed with 2 arms i set forth to the shed... Measurements where taken and a chunka mould was cut leaving a little bit extra for stuff ups.... i am very familiar with this phenonamon... ;D Seems to happen everytime i pick up anything from a pencil to a powersaw. Managed to get the mould into roughly (I am good at roughlÿ too ) the right shape 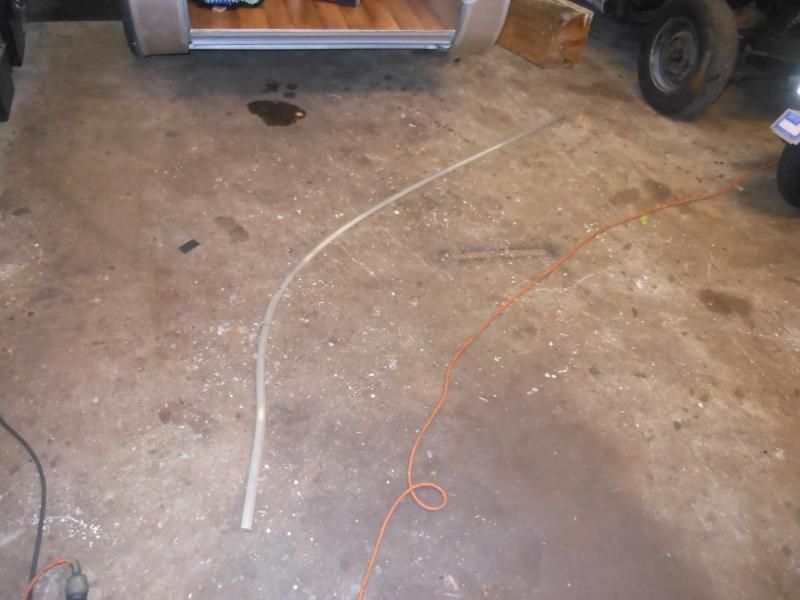 Using reference marks on the van and the mould and working with great skill ... patience.. expertise.. dexterity... and.. a gadget that the engineers have just invented in.. where else but... the shed of invention... Some people seem to think these guys are a buncha layabouts but i tell ya wot.. when the put their minds to it they can work wanders... Just have a look at what they came up with for bending Cresent mould 25 mm wide into just about any shape you care to mention.... Here ya's go.. . 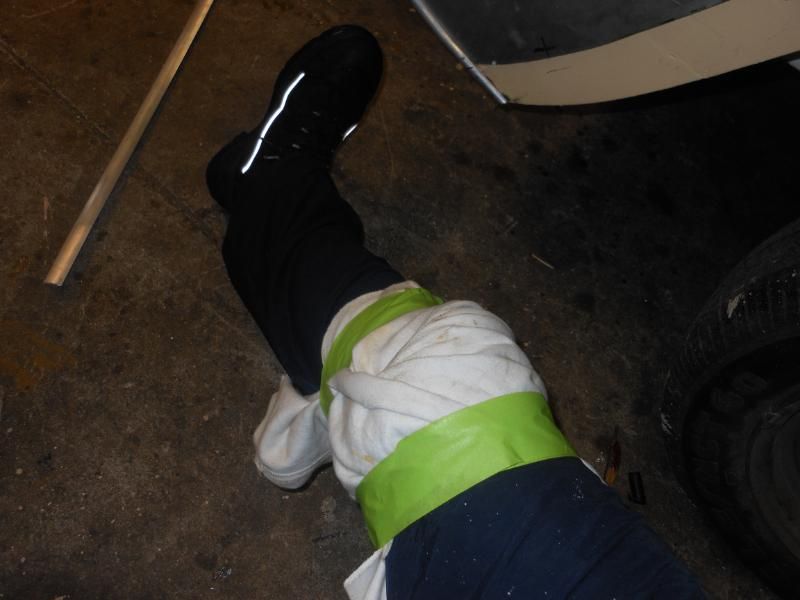 Its called a "Knee with rag attached". Dead set simple kiddies. .. Just take a firm hold of the mould in both hand ... place one hand to the right of the knee .. one hand to the left of the knee... grit the teeth. ;D. ( this helps relieve some of the pain as the metal buries inta ya kneecap) and heave firmly towards the body.... special note in directions for use of knee... says here in the destructions... " Please take every precauation to keep hands parallel at all times with incision in knee cap... Failure to do so will almost certainly cause metal to distort to "pretzel "shape and the operator could be come entangled in the whole kit and caboodle causing much pain and suffering .".. Handy hint number 2.. use blood secreting from knee along aluminium mould as "spirit level" .. Bloody hell.. Reddotel international really take safety seriuosly dont they... Anywho.... enough of the poofo safety stuff lets rest the right knee while they bung a few stitches in it and see owe we go bungin the mould on the van.... Only had 2 minor stuff ups .. they came about because i had drilled holes every 180 mm along the mould... ( dont ask me how i arrived at 180mm .. just seemed like a nice number at the time??).. turns out that 2 of the screw holes left when i removed the 8G screws that where holding the sheet alloy on lined up exactly with two of the mould holes.. couldnt do it again if i tried.... Anyway.. This was overcome with a bit of hard wood splinters and supagle to take up the hole so i could use the 6g cross head screws to hold the mould on....sorry Cobber... no timber .. No slot heads this time around  Only got one side done.. fairly happy with the end result.. 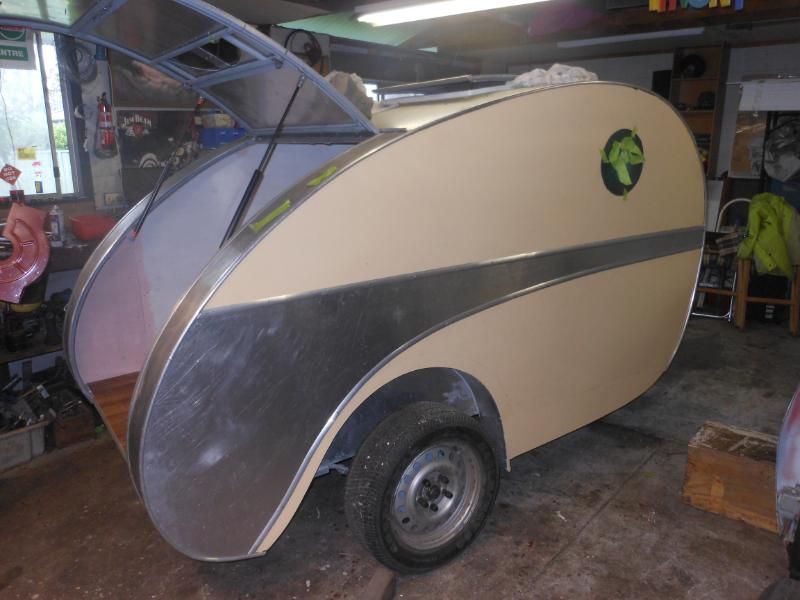 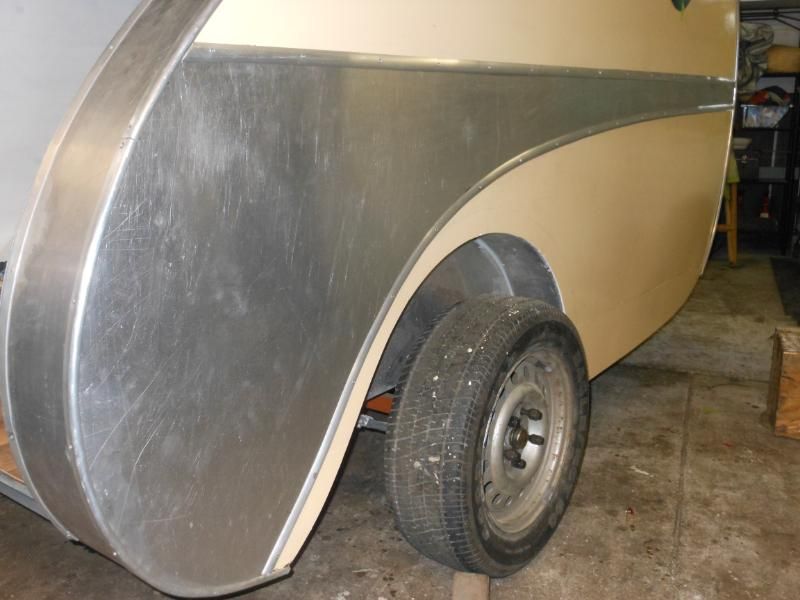 Painter tells me the gaurds will be ready middle of next week. Havin a ball here.. Cheers fa now Reddo |
|
|
|
Post by cruisindoug on Jan 28, 2013 17:16:27 GMT 10
Nice work Reddo looks the goods, that crescent mould doesn't look like it will bend does it??? Anyway, gotta pass on the credit for my knowledge of the subject .... John told me how to do it!
|
|
Deleted
Deleted Member
Posts: 0
|
Post by Deleted on Jan 28, 2013 18:22:09 GMT 10
"John told me how to do it! ".. What does Johns knees look like .. Ya wear out one pair per caravan side using my technique... ;D Reddo |
|
|
|
Post by cruisindoug on Jan 28, 2013 18:47:22 GMT 10
Its all good, skin grows back ... eventually! |
|
|
|
Post by seeshell on Jan 28, 2013 18:48:33 GMT 10
Hi Reddo
As usual an entertaining post - I'm enjoying the build story of the "Cuppa".
I see the knees are well padded but you still need two per side - does that mean She Who Must Be Obeyed will also be contributing her patellas to the cause?
The aluminum all over looks great - can't wait to see the guards on it.
Cheers
Seeshell
|
|
|
|
Post by Roehm3108 on Jan 28, 2013 18:50:01 GMT 10
|
|
|
|
Post by humpyboy on Jan 28, 2013 19:00:29 GMT 10
Reddo Reddo Reddo, a simple job of bendin some ali and still ya gotta inja yaself, welcome back to the fold ;D
|
|
|
|
Post by DC3Td on Jan 28, 2013 19:25:55 GMT 10
Great continuing pics & laughs Reddo. Only you could come up with 7 1/16" increments. gordo
|
|
Deleted
Deleted Member
Posts: 0
|
Post by Deleted on Feb 3, 2013 2:48:47 GMT 10
|
|
|
|
Post by Roehm3108 on Feb 3, 2013 20:19:50 GMT 10
Reddo asks "Why is 'bra' singular and 'panties' plural?"Only because we have been lazy and abused the English langauge. Correctly, the singular of "panties" is "pantie" ;D ;D ;D |
|
Deleted
Deleted Member
Posts: 0
|
Post by Deleted on Feb 4, 2013 19:26:38 GMT 10
Problem solved... Thanks to a lead from DC3TD the ebay bloodhound i managed to win these this arvo.. cgi.ebay.com.au/ws/eBayISAPI.dll?ViewItem&item=271146133087After lotsa questions to the seller about backset etc i took the plunge.. just need to fit 2 tyres . Mount one on the front for a spare and bung the other ones under the gaurds.. and ..pray they fit... 15"X 8 " Pick em up saturday arvo.. 1 1/2hr trip to Castle Hill Cheers Reddo |
|
|
|
Post by humpyboy on Feb 4, 2013 19:34:57 GMT 10
They look real kool reddo, should set it off nice.
|
|
|
|
Post by sutcac on Feb 4, 2013 20:38:06 GMT 10
|
|
Deleted
Deleted Member
Posts: 0
|
Post by Deleted on Feb 9, 2013 20:13:57 GMT 10
Hello Kiddies... It is with great pleasure that i bring to you a few photos and a continuation on the TD build. The story is the easy bit.... Wading knee deep through the new photobucket ofal takes a bit more doing. Managed to finish the left side cresent moulds on wednesday evening... Not as neat as the right side but will do for now...Knee cap just didnt wanna stabilse while i was burying the mould into it...I dnt think i will mass produce things this way in the future.  Set sail this morning for Cherrybrook Nth Sydney to collect the Chev wire wheels ( Thanks for the offer to collect them Maurie and Kate.. much appreciated.  . ) Called in at Gosford and picked up an ebay towbar for the Ford Ranger. Got back to Newy at 1.00pm and called at the sons place to help him and his mate slot 12 roof trusses up onto the roof .. 40 deg.. Got home knackered.. Quick swim in the pool to revive and then got stuck into the TD gaurds... keen to try the wheel with a tyre and see how she fits/looks... ooooooooooo...Bugga the tyre rubbed on the gaurd.....hung out about 50mm too far 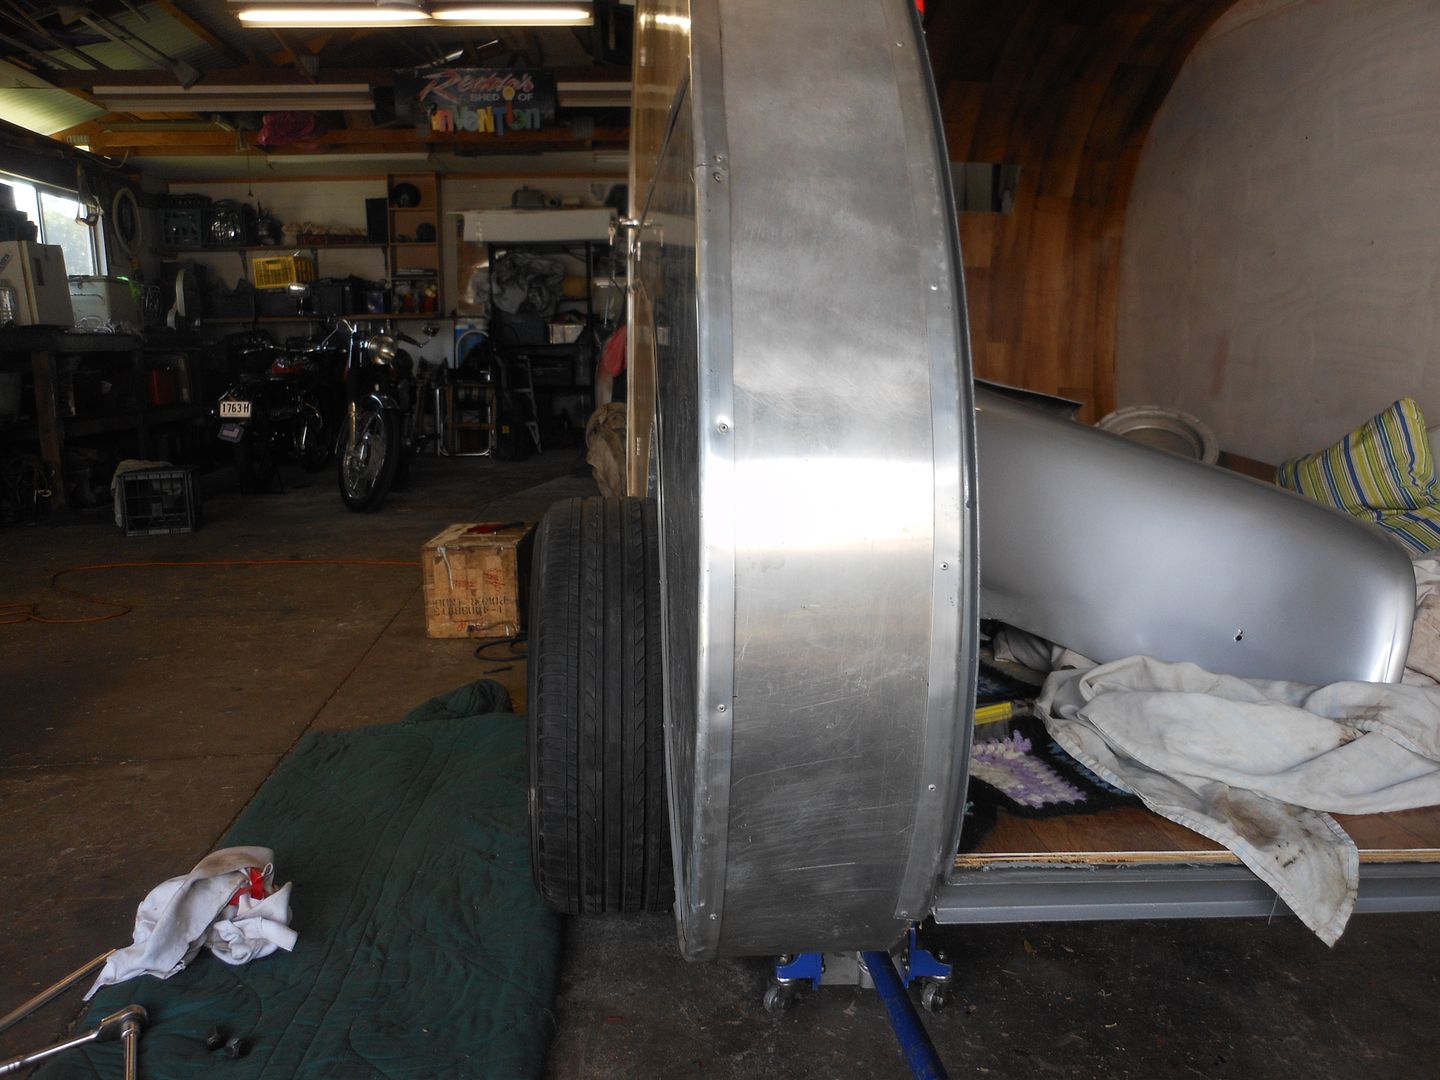 . what to do.. what to do...so...the solution is a whole lot simpler than narrowing diff housing etc just measure what ya need and go so the trailer parts guy... AGAIN!!! pulled the $100.00 ...1700mm axle out that suited the commy ute rims under the gaurds..and hadnt travelled more than 4 foot ....  ..... worked out what was needed to suit the 100mm backset on the corvette rims and shot down to the trailer joint before he shut.. come home with a 1575mm axle... drilled holes to suit the spring stack bolts. Bunged the axle in. fitted the left side gaurd.. refitted the hub.. and bolted up the rim with tyre to see how she looked..... 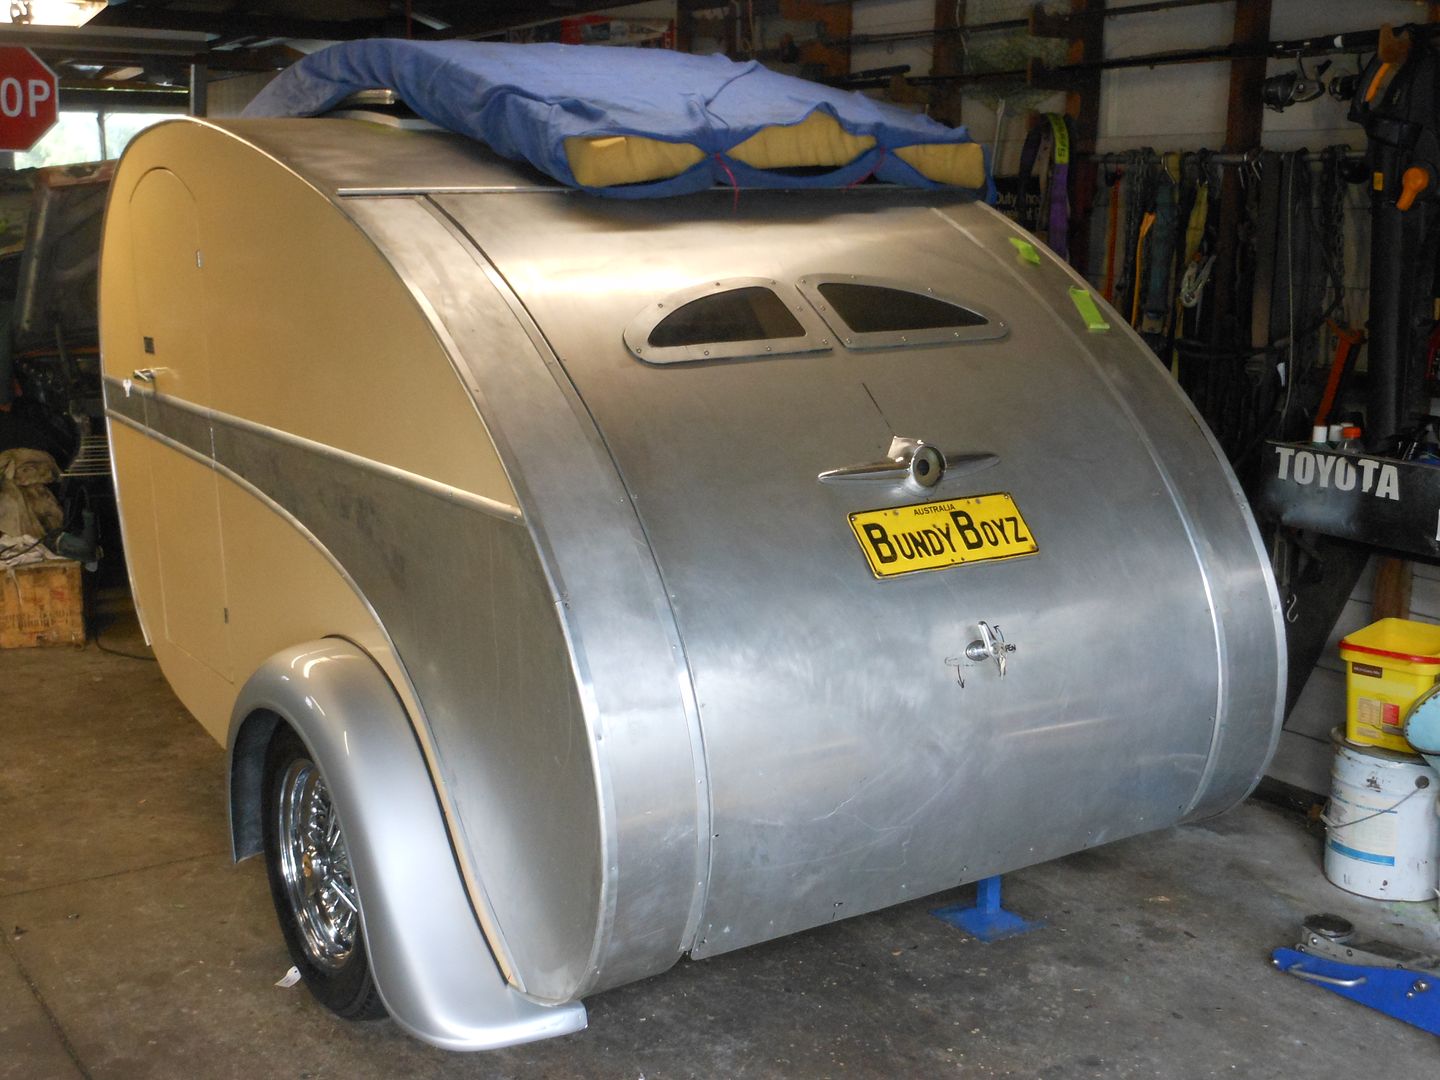 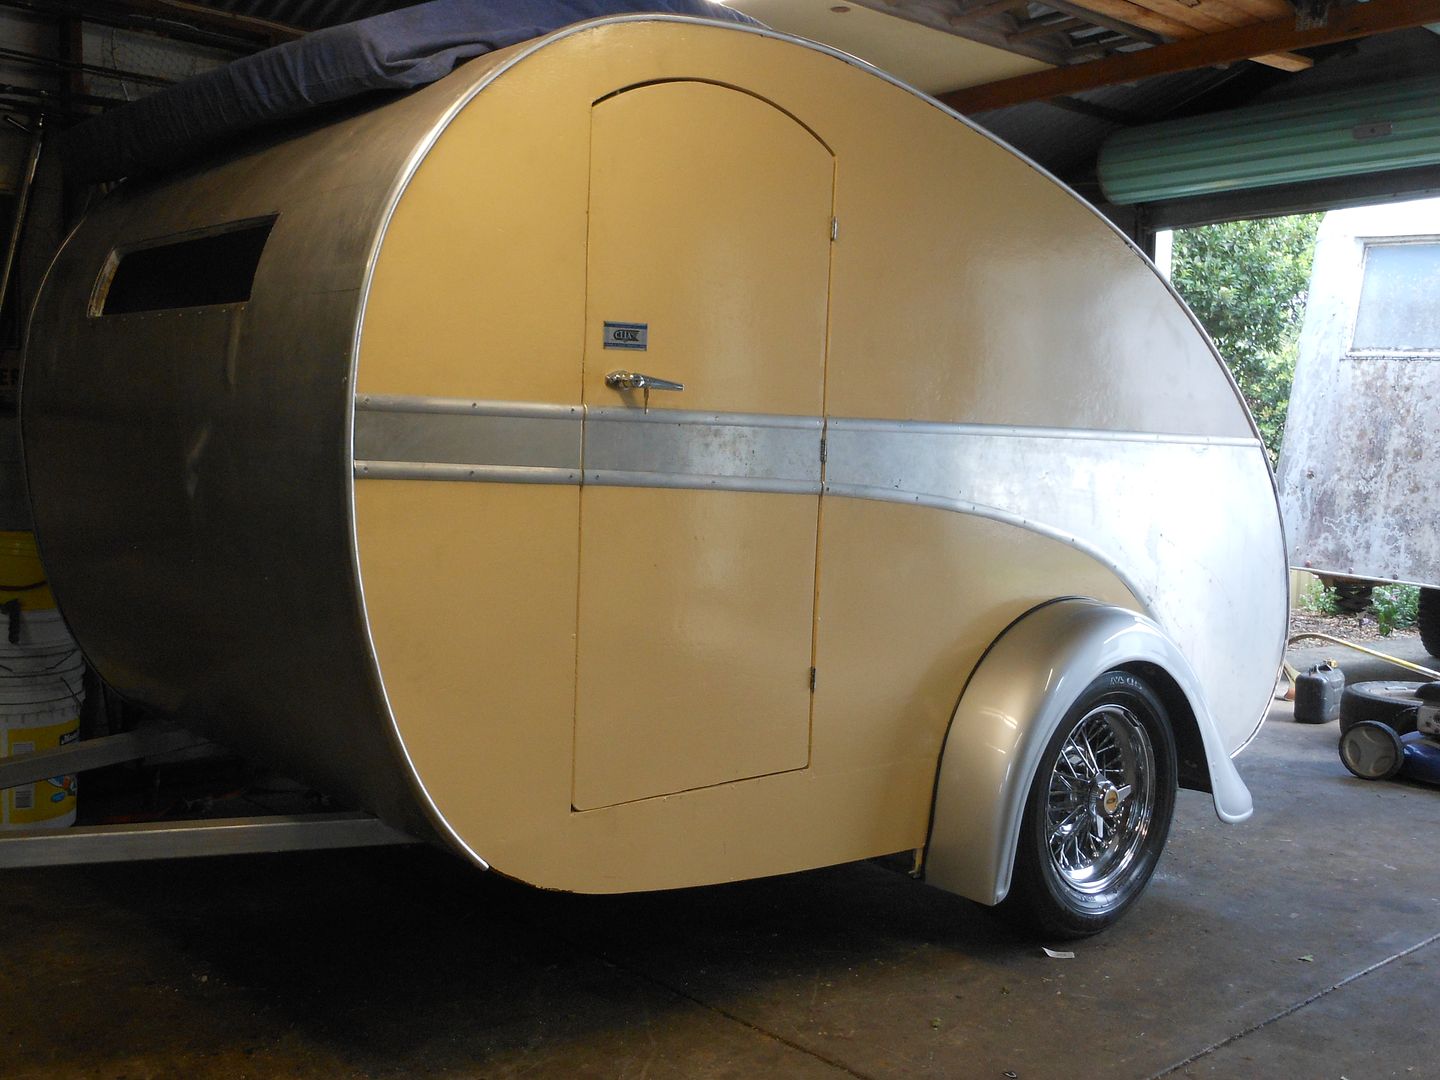  . I can gain another 10mm outwards if i use spacers.. but more inclined to leave the rims sit where they are and have 15mm clearance from the Fobbergross gaurds... too pretty to scuff up with fat wheels.. Will tackle the right side tomorrow Cheers fa now Reddontstartmeonphotobucket |
|
|
|
Post by sutcac on Feb 9, 2013 20:25:38 GMT 10
YESSSSSSSSSSSSSSSSSS...lookin the goods mate!!!!!!!!!!!!!
|
|
|
|
Post by seeshell on Feb 9, 2013 20:29:10 GMT 10
Wow Reddo! The NECOT looks absolutely amazing - all credit to you and your vision for it! I love how the stop light fits on the rear door, and how the triangle windows look like something off a submarine.  Those guards turned out lovely as well from the painter - matched very well with the wire wheels too (especially the knock on/off nuts). I know its done your knee in, and you've had your dramas with the axle (spent a bit of time on that green sleeping bag on the garage floor under it by the sounds), but from where I'm sitting I'd think you'd have to be happy with the outcome. Congratulations on what you've achieved - it's a wonder to watch it come together. Seeshell |
|
|
|
Post by humpyboy on Feb 9, 2013 20:40:42 GMT 10
Lookin good reddo, nearly there.
|
|
|
|
Post by Roehm3108 on Feb 9, 2013 20:49:17 GMT 10
What else can ya say except AWESOME REDDO!!!!!!
|
|
|
|
Post by DC3Td on Feb 9, 2013 22:57:41 GMT 10
Gday Reddo. It should be called Every ones cup of Tea.Bloody great job you`ve done. Hope you got some spectacular lighting to compliment the build. By the way,Landy stop/licence lens can be adapted to fit the fj housing. Just need to use retro rubber seal & long screws.Tried it before. gordo
|
|
|
|
Post by rupper on Feb 16, 2013 12:03:07 GMT 10
Wow, liking it alot, cool skills reddo. the "split" rear windows are perfect addition. I wouldn't have thought of that and would have done one window. THAT however is cool, different and perfect for that van!
Looking pretty classy. Yep, I like that tea your brewin there ;-)
|
|
Deleted
Deleted Member
Posts: 0
|
Post by Deleted on Feb 18, 2013 18:09:57 GMT 10
Yo...... Managed to get the Portholes in and finished... These "ëyes"where donated by poor old Cybill Kempsey Caravanpark. Old Cyb had thicker skin than the TD ..... the two halves of the porthole sat either side of a Cybills wall cavity about 2 inches thick.. so... i had to do a bit of modifying . I didnt use the inside ring ( The Macula?? ) as the outer recessed ring that holds the glass stuck through the inside skin by about 8mm. So... i used some 5 ply.... cut out 2 "donuts and fixed them in place using the screws that hold the outer retainer ring in place..... Oh bugger it... heres a couple of pics ta show ya what i am trying to explain... 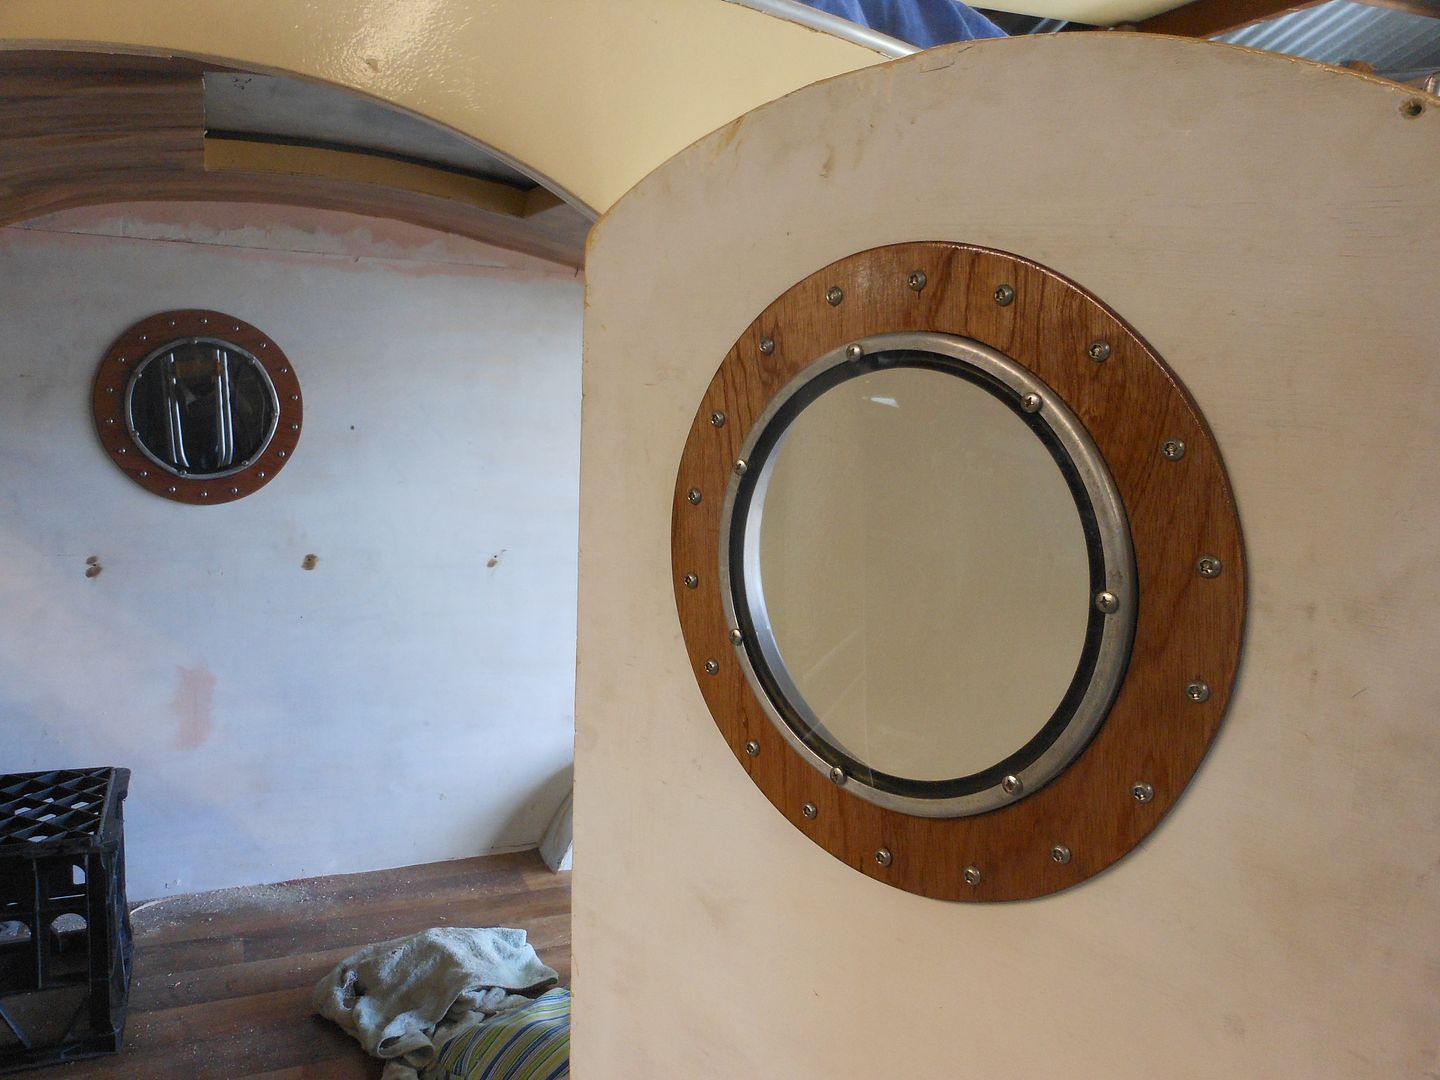 about 8 staino bolts with dome nuts holding the black smoked perspex centres in ... and.. about 18 staino 40mm X 6mm tamperproof bolts with dome nuts holding the whole simosal on the side of the van... 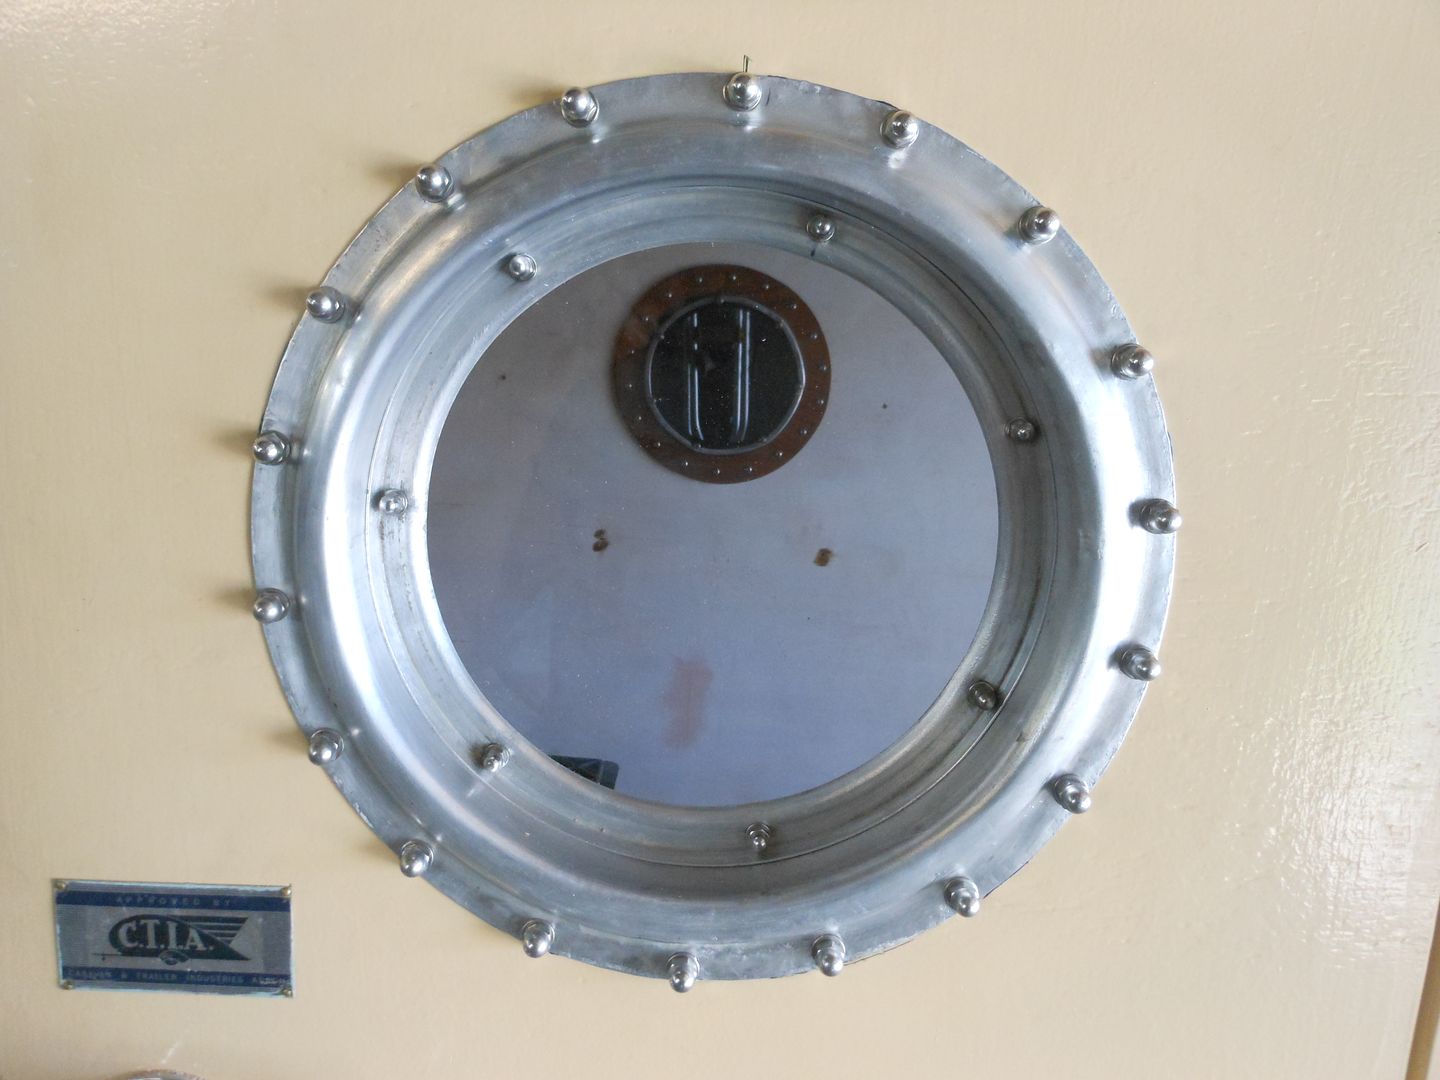 The portholes sorta "balance " the side on look now.  ... I'm happy with that I am gunna havta stop bungin odds and ends on the van... Get it wired up and then go weigh it before it gets up to a weight where i have to bung brakes on the little fat porker. Hmmmmm.. still got to get an opening front window in there yet?? Dont know what to do with that so that it compliments the back windows??? Maybe make it an oval window that is split down the centre and the two halves hinged through the middle so either side can be swung open outwards... .. Back to the drawing board fa now... Regards Reddo |
|


 ... ummm.. that should read .. the impossible...


 . )
. )

