|
|
Post by stephen&Julie on Aug 1, 2011 23:47:39 GMT 10
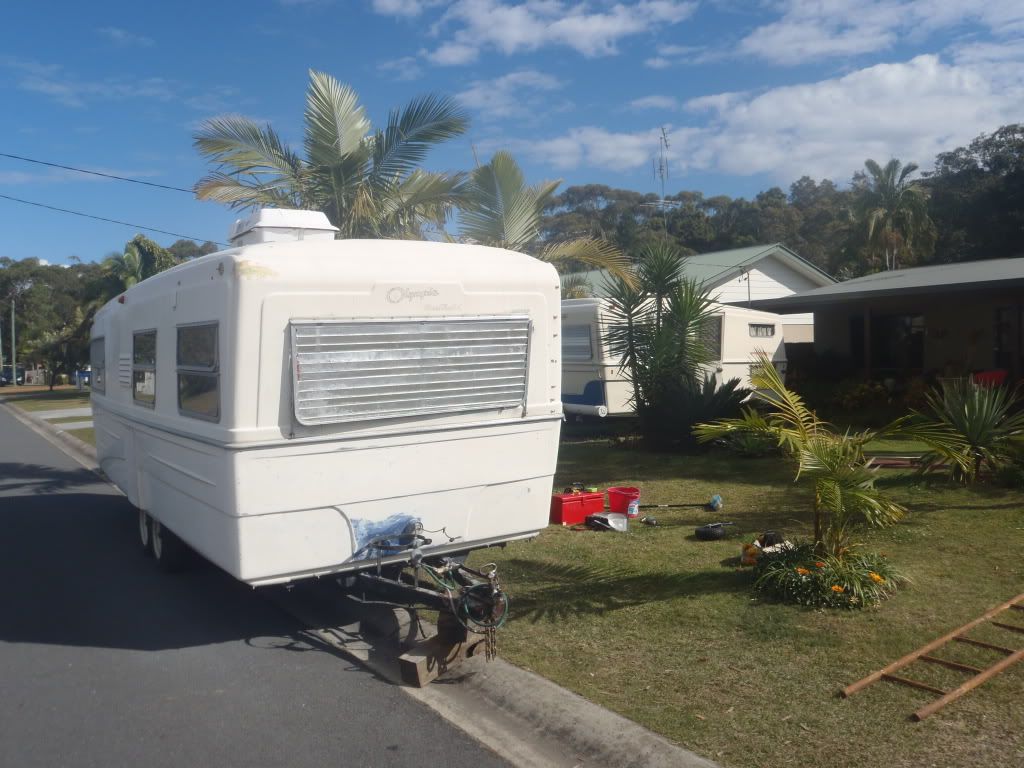
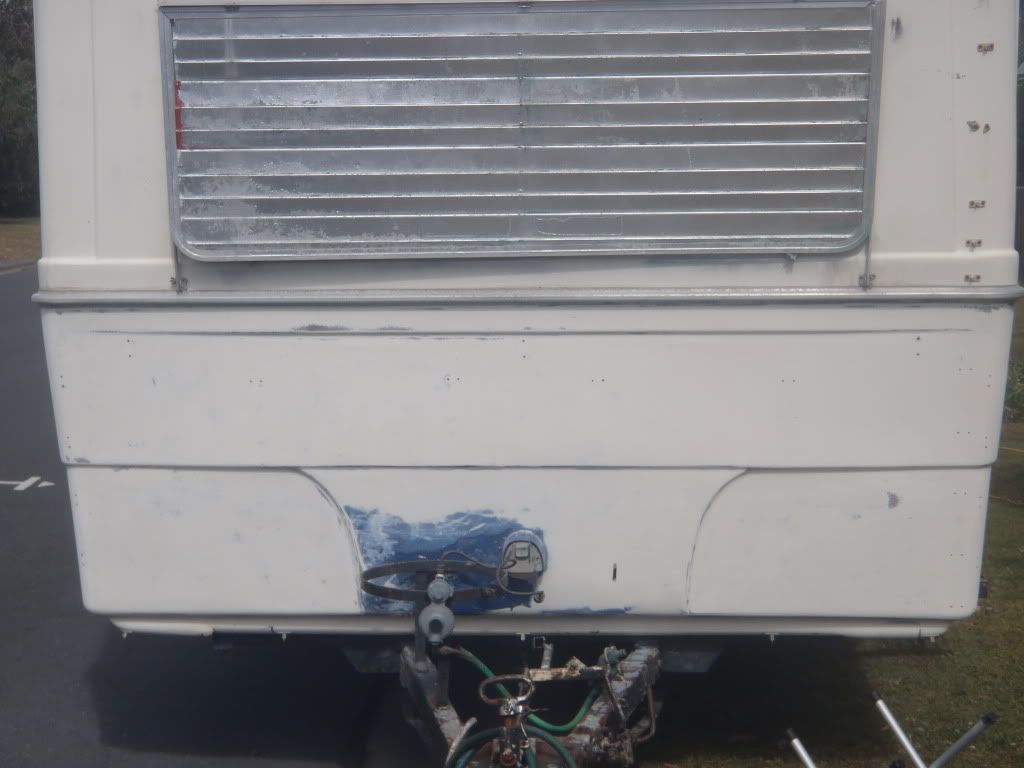
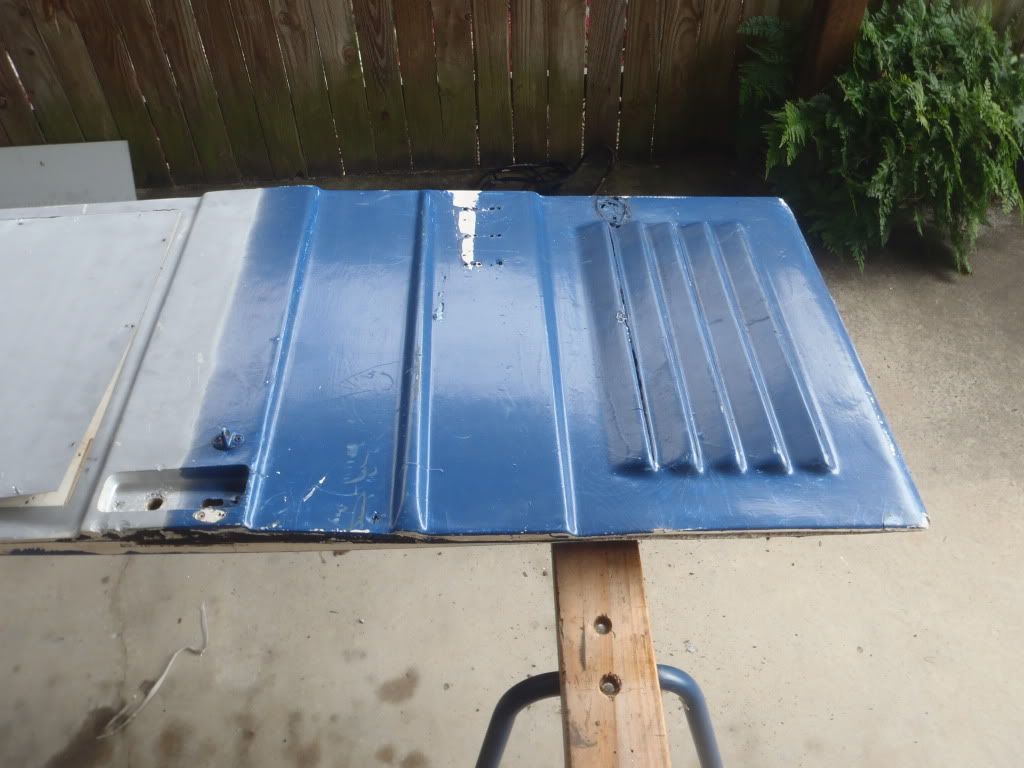
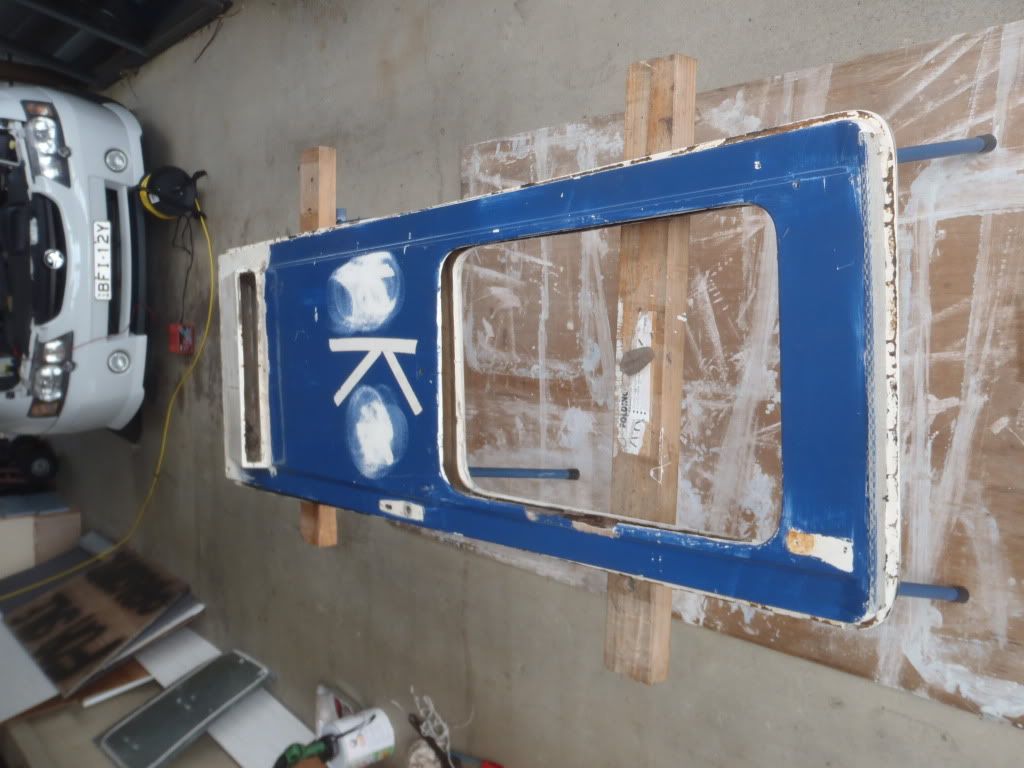
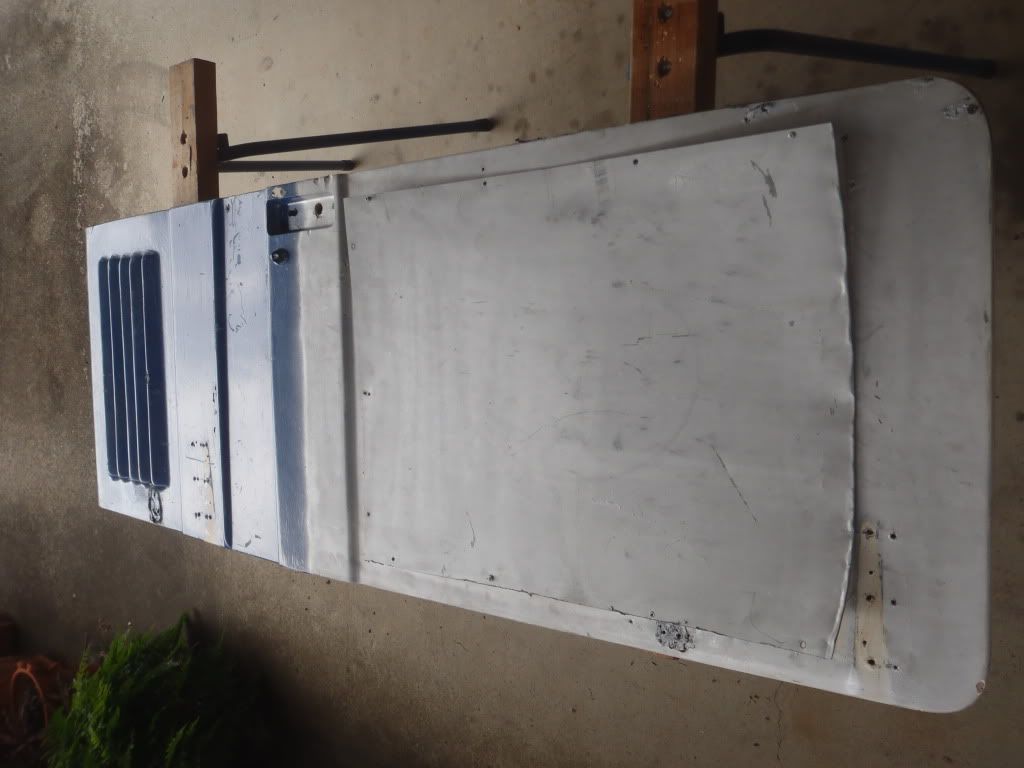
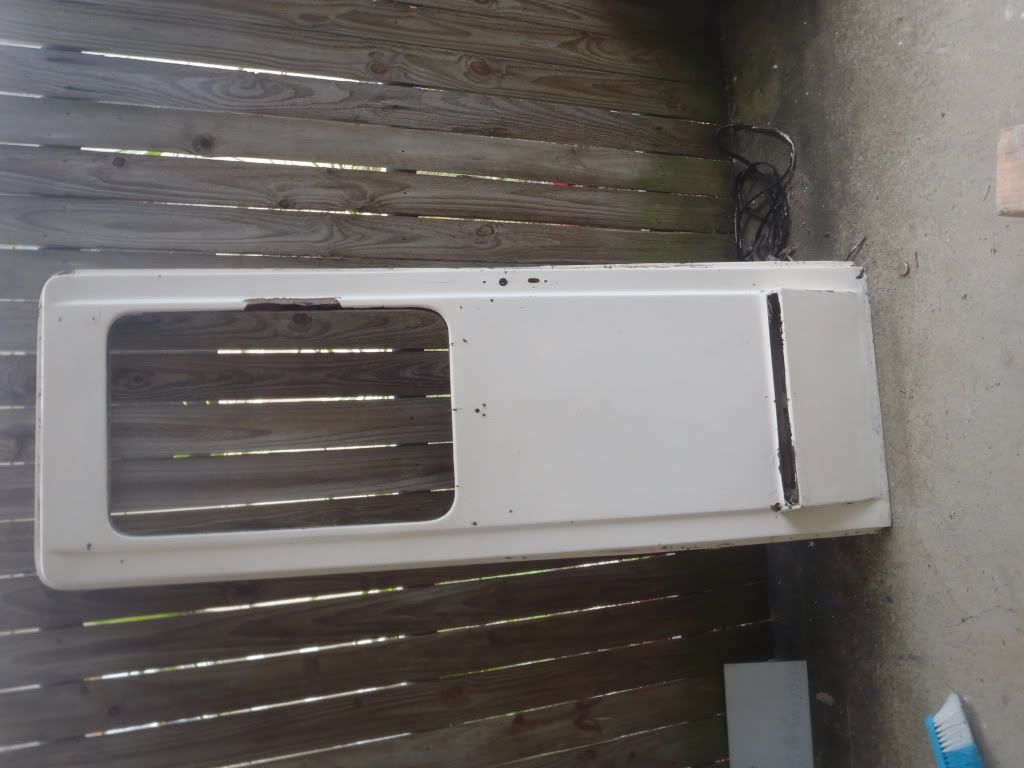
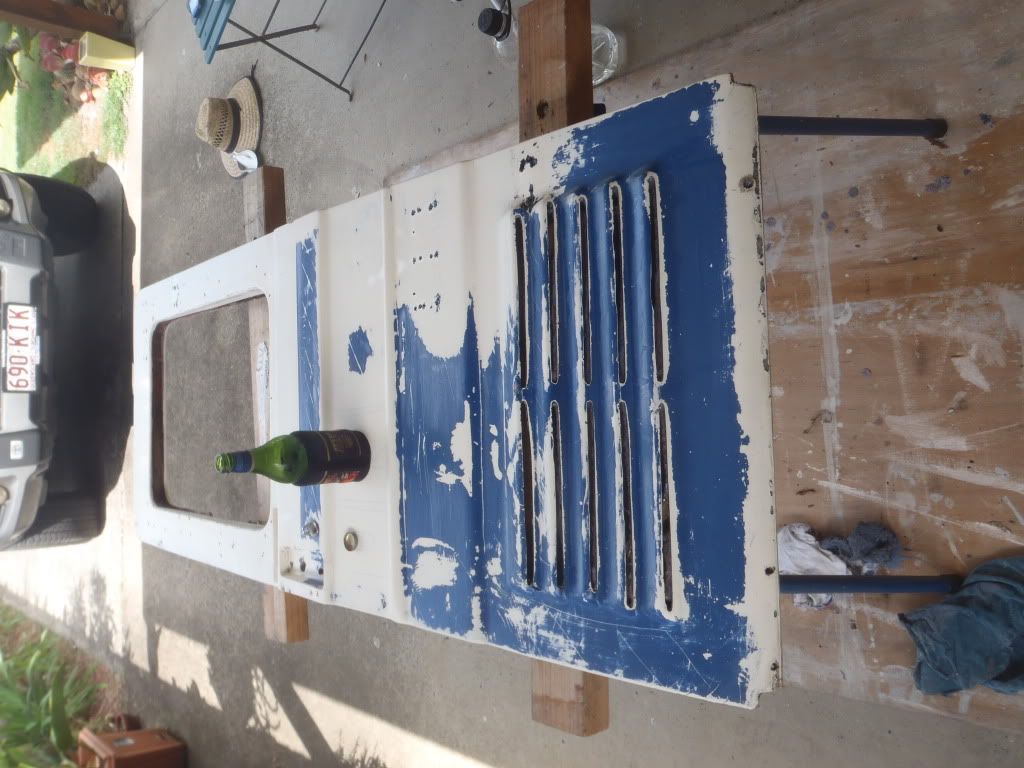
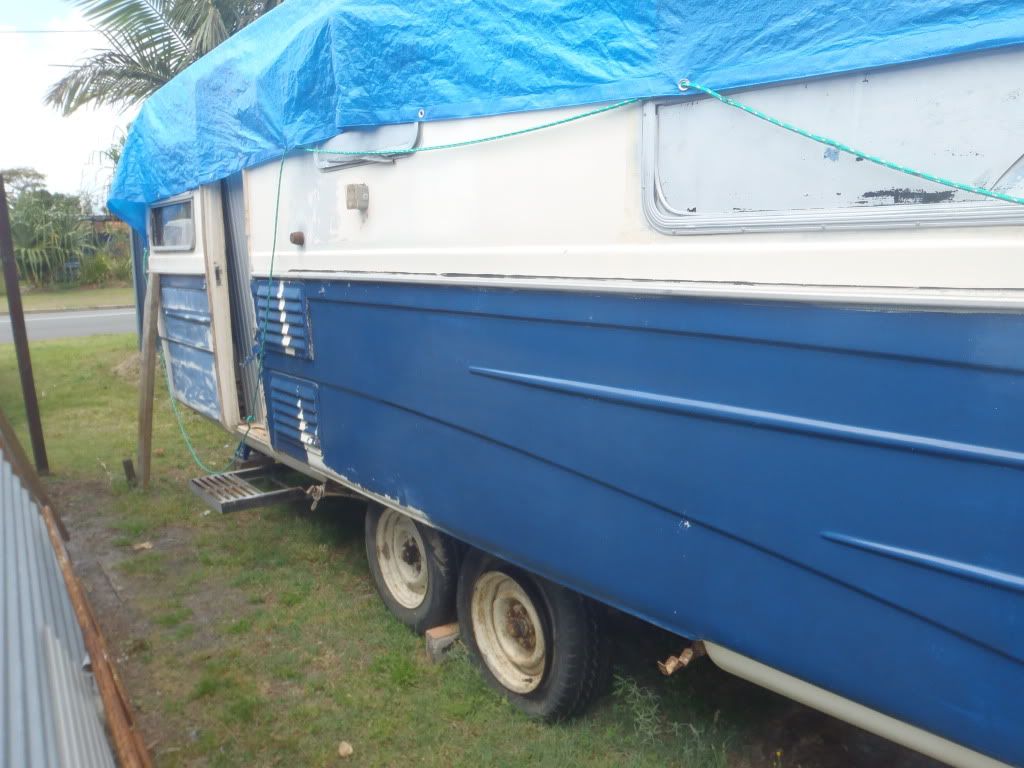
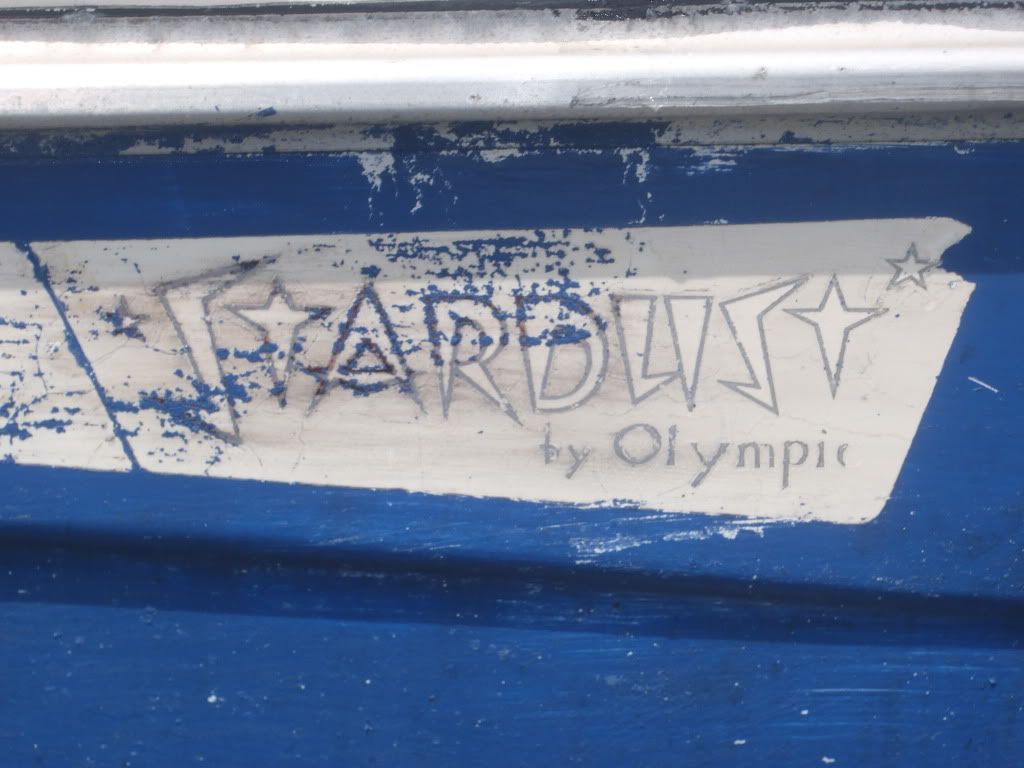
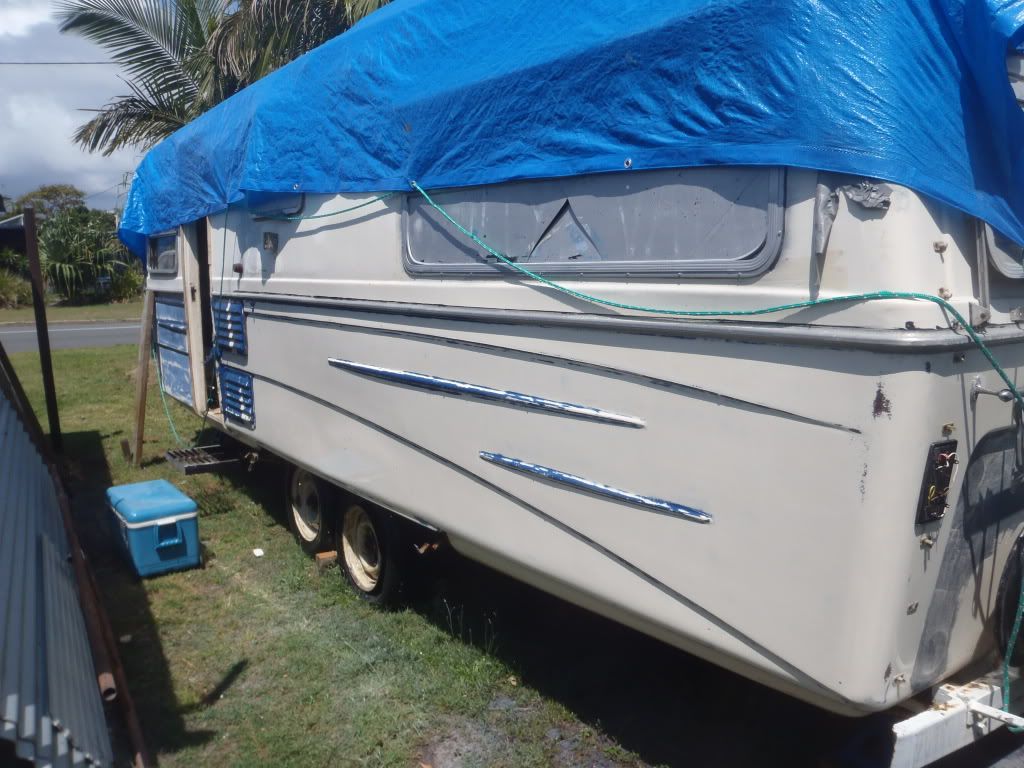
Hi All, Just a few pics of the 21’ Olympic Stardust Julie and I rescued on the weekend. It’s a shame she was guttered out but Julies happy with a clean slate. Some young blokes who lived in her decided that blue paint was a good thing (half outside and all inside…yuc) looks worse than it really is, should come up great. Chas Num: 1948,Boblor says it's a 1970 model. More pic’s as she recovers 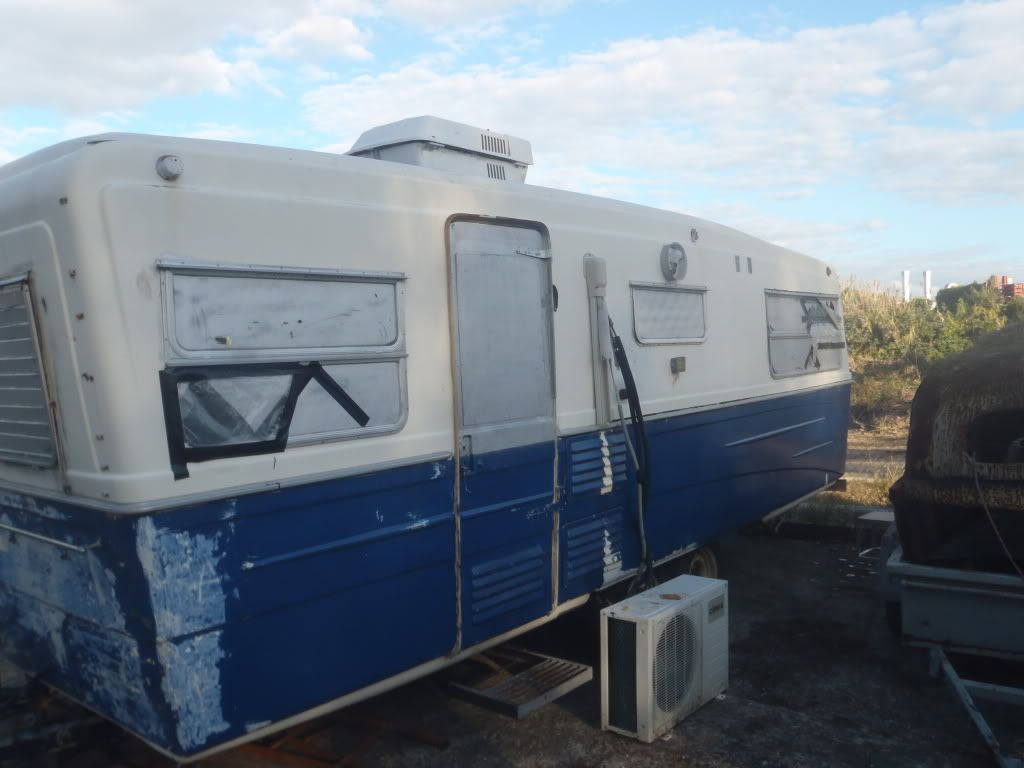 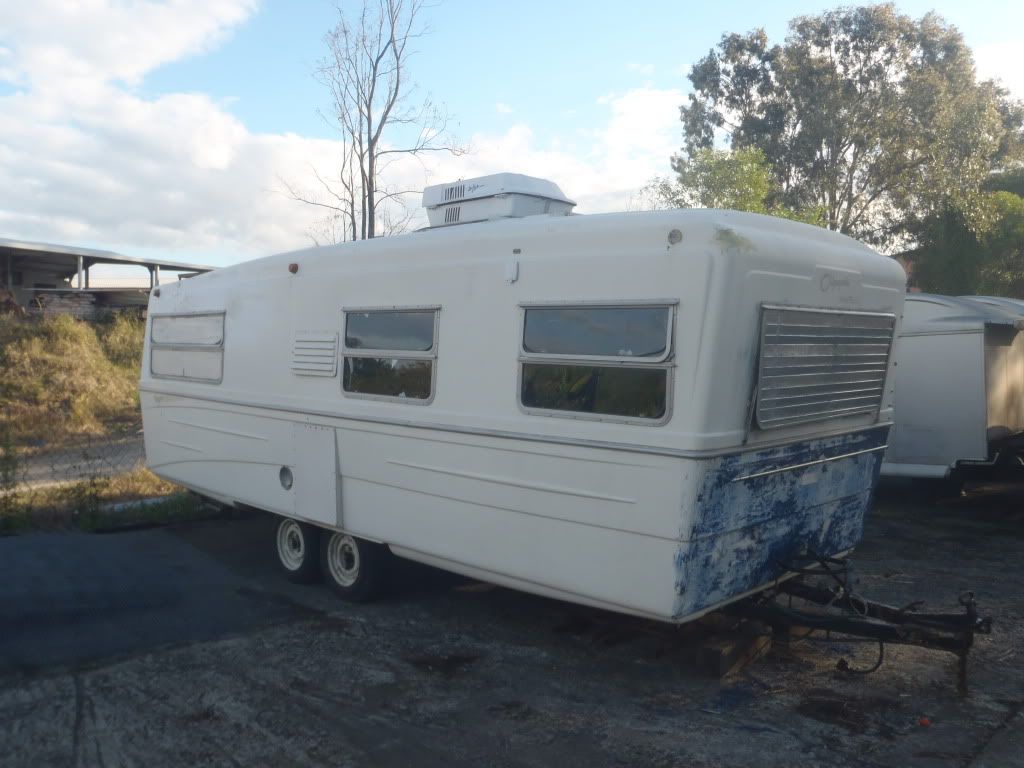 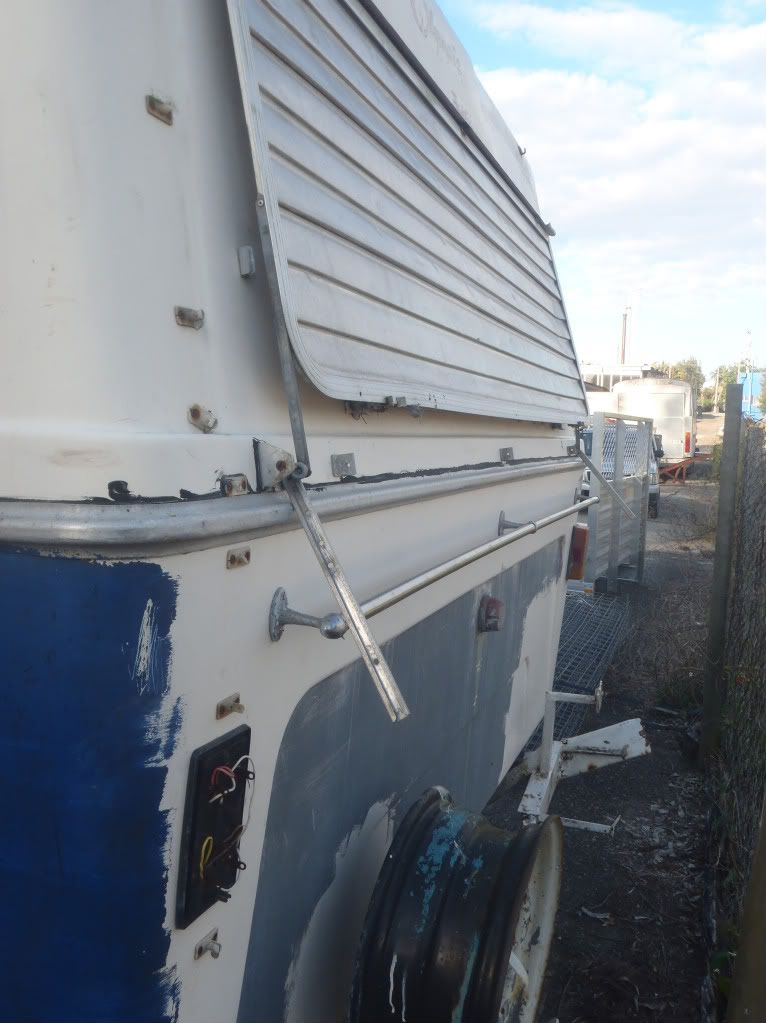 Cheers Stephen&Julie ;D ;D ;D ;D |
|
|
|
Post by bobandjacqui on Aug 2, 2011 5:16:48 GMT 10
G'day Stephen and Julie, Congratulations on a great pick up  their getting a bit thin on the ground those 21 footers so you were lucky to find one so close to home ;D ;D ;D We'll look forward to the progress pics. Cheers Bob and Jacqui |
|
|
|
Post by atouchofglass on Aug 2, 2011 6:15:38 GMT 10
Hey S&J Great to see one of these larger Olympics rescued. They are a bit like rocking horse...... you get the idea. For just a moment my heart sunk when looking at your photos. You see ... that van is veeeery similar to the one my parents had back in 1972/73. Oh no have I missed out and lost the chance to restore my families old van  The outside light is in the same position as theirs or so I thought until I checked the only two photos of the van I have. Phew... not the same position and one gas bottle not two -- so different van. ;D ;D ;D I'll keep searching for my family van and hope yours turns out to be as lovely as you intend. Keep the photos coming and looking forward to the interior shots both before and after. ;D ;D Cheers Atog |
|
|
|
Post by cruisindoug on Aug 2, 2011 9:03:52 GMT 10
Nice van Stephen and Julie that looks to be a great start and a clean slate too!  Cheers Doug |
|
|
|
Post by stephen&Julie on Aug 2, 2011 19:09:06 GMT 10
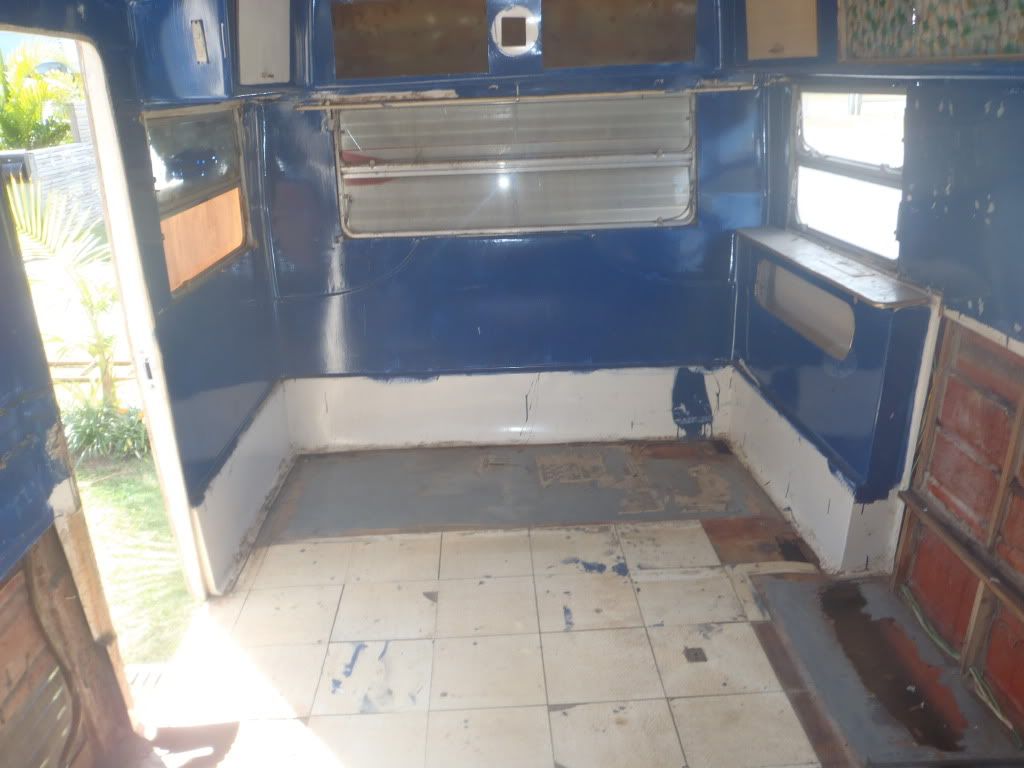
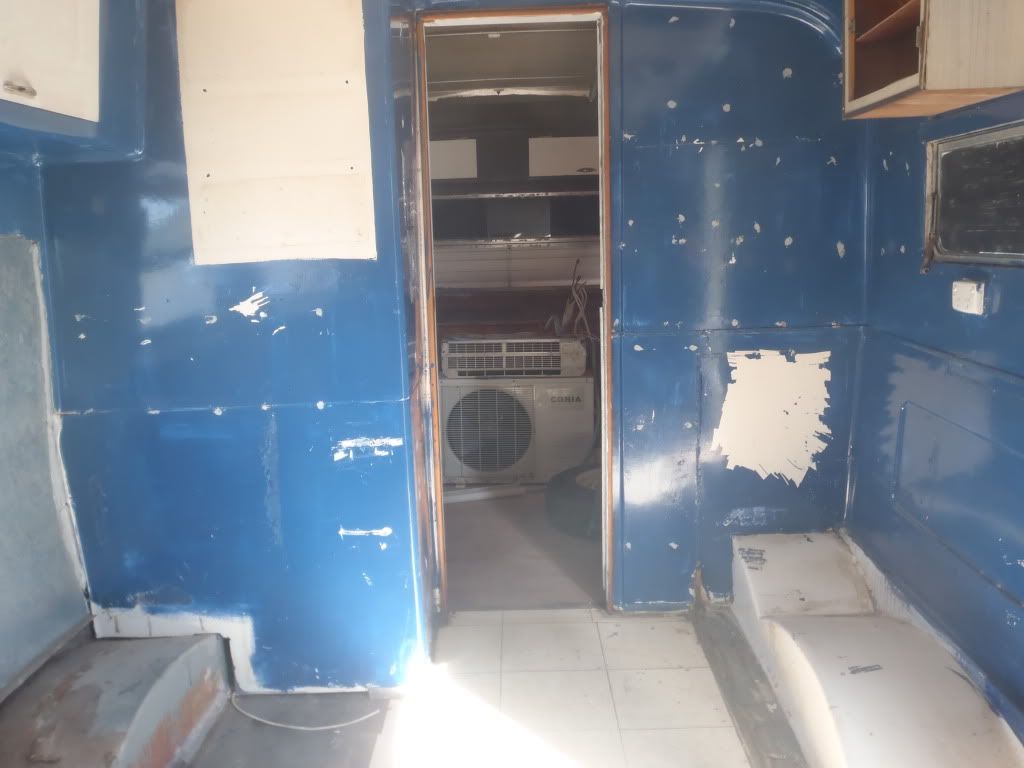
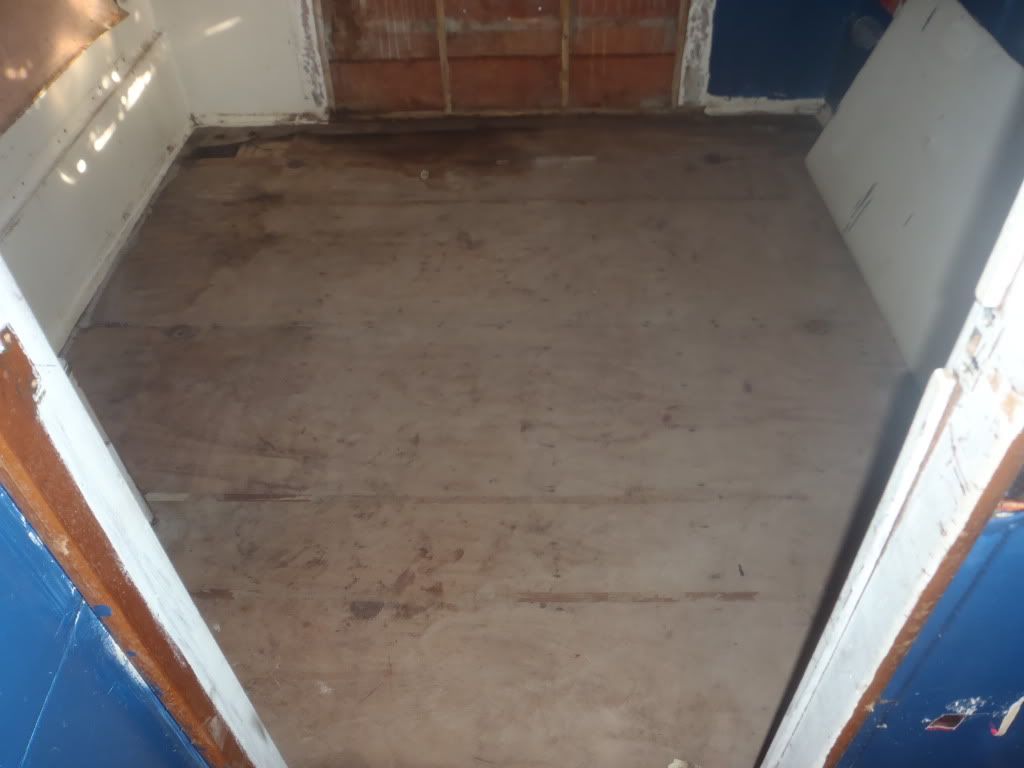
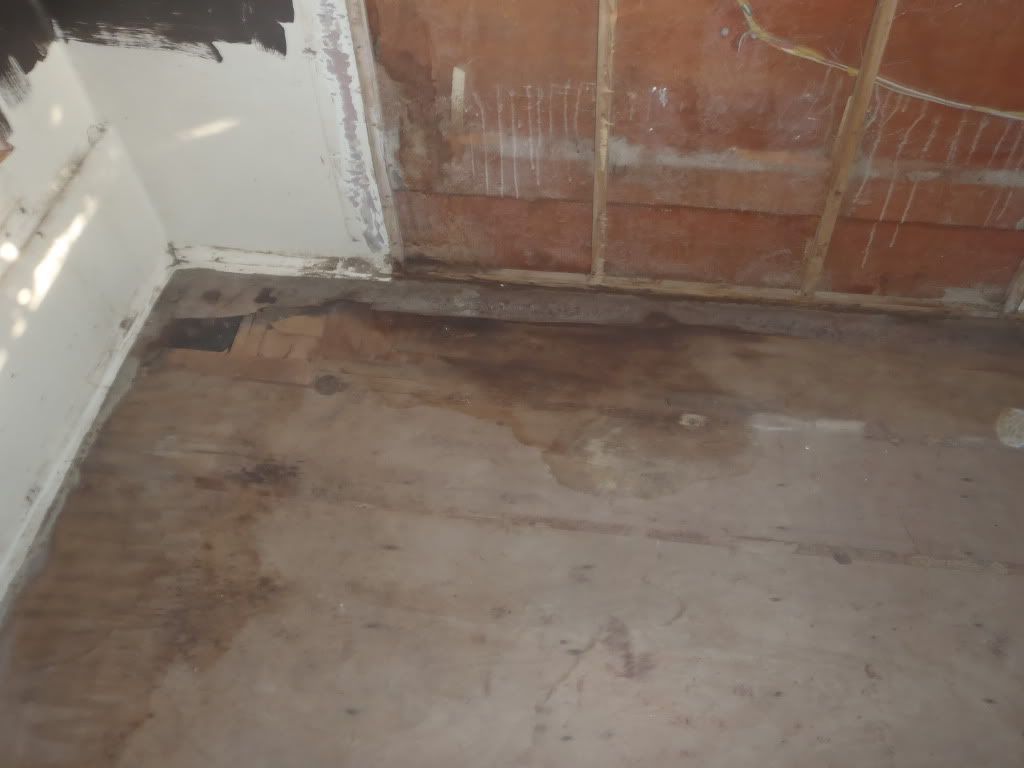
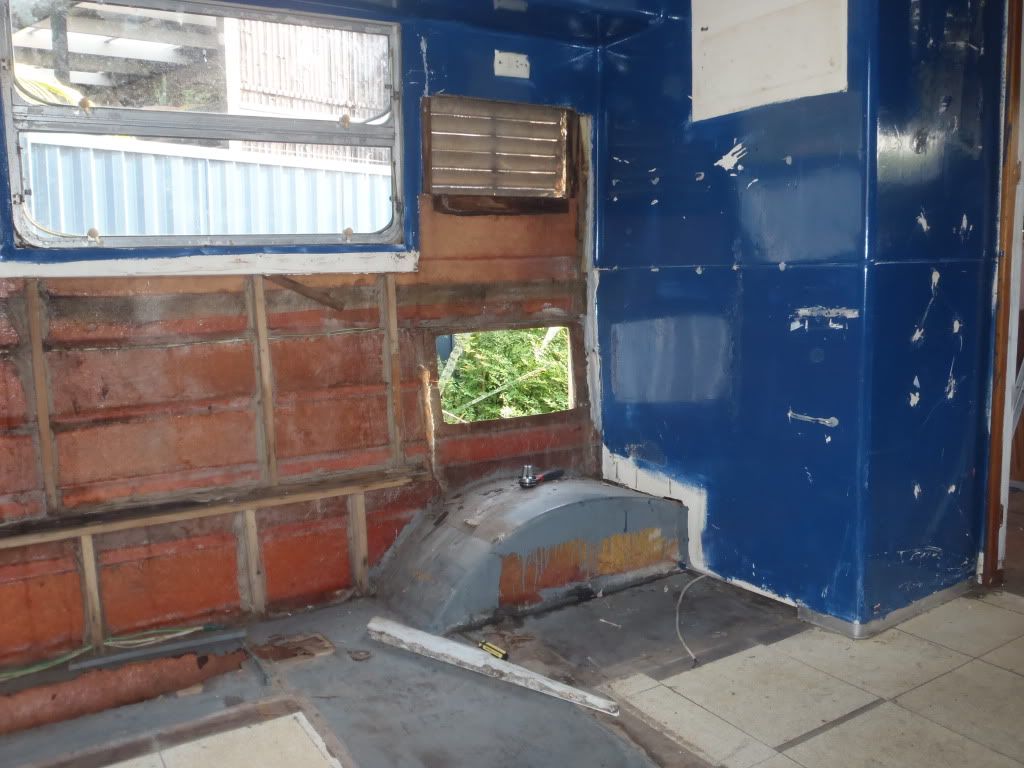
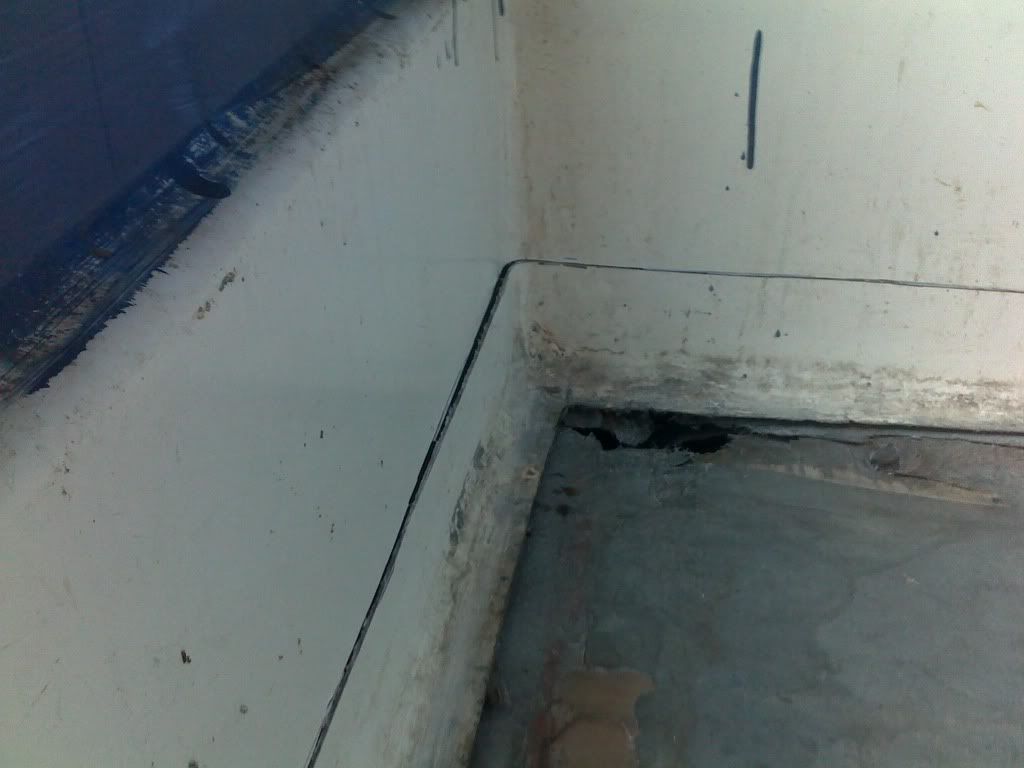
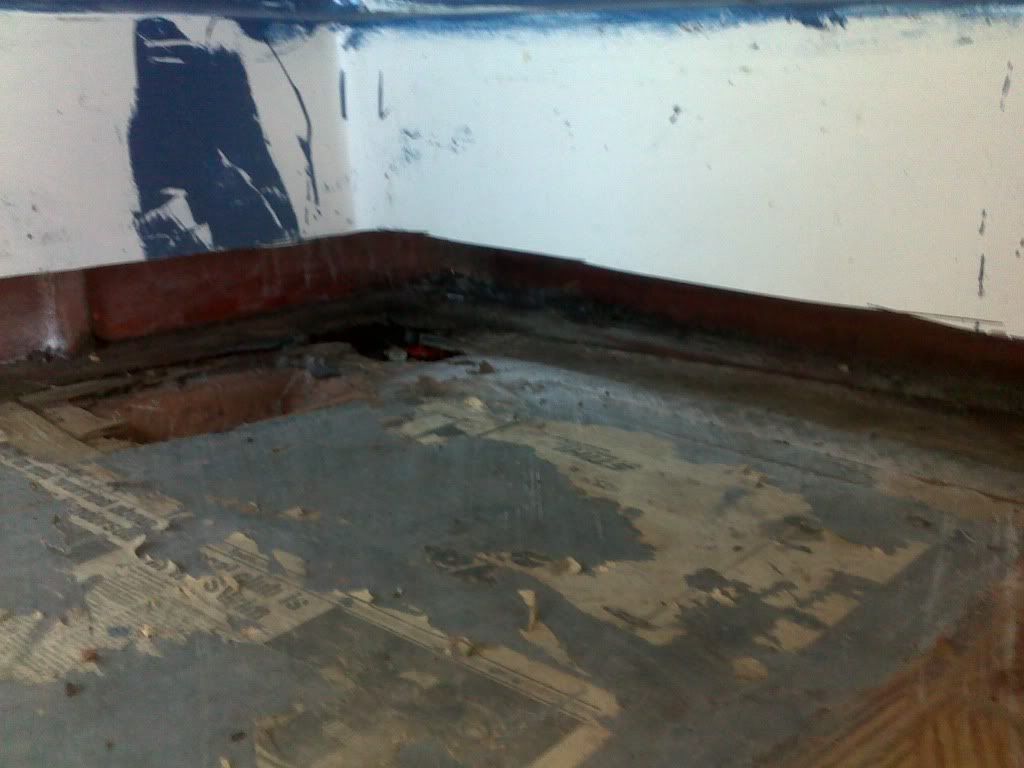
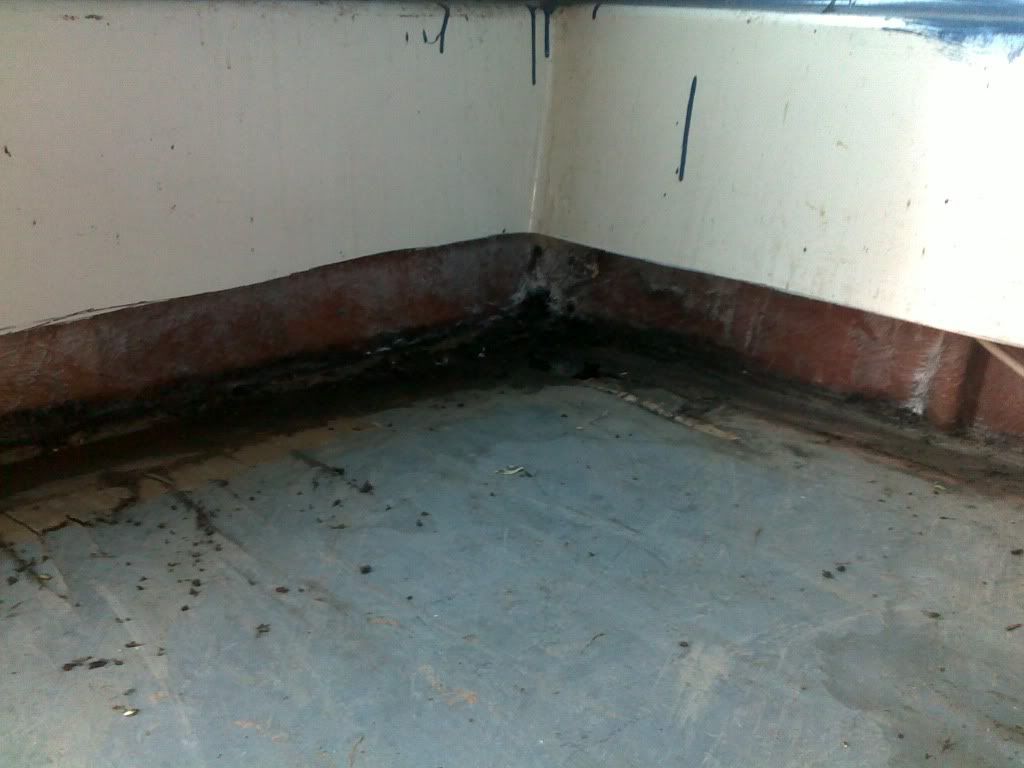
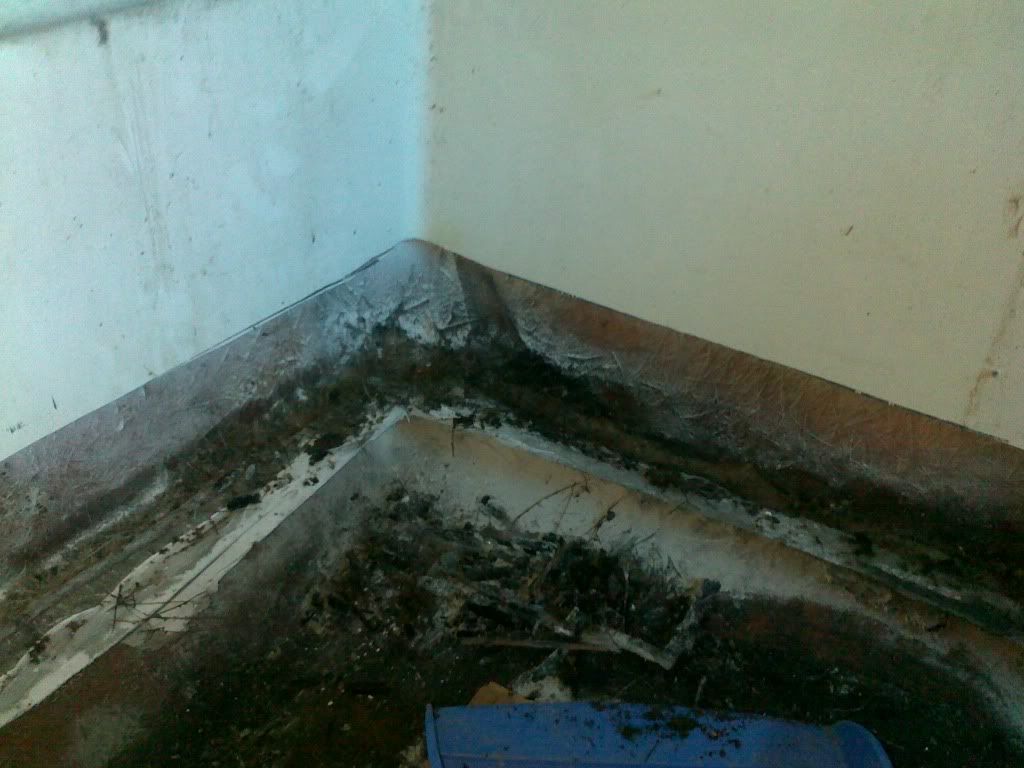
Hi fellow Vintage Vanners, well I’ve shown the good side now check the inside, very scary as they painted the bedroom in a spray can black and the rest in oil based house blue thinking I might wet and dry the walls and respray the whole lot also the windows need replacing and the wiring looks like they had a grew a crop in there ..ha 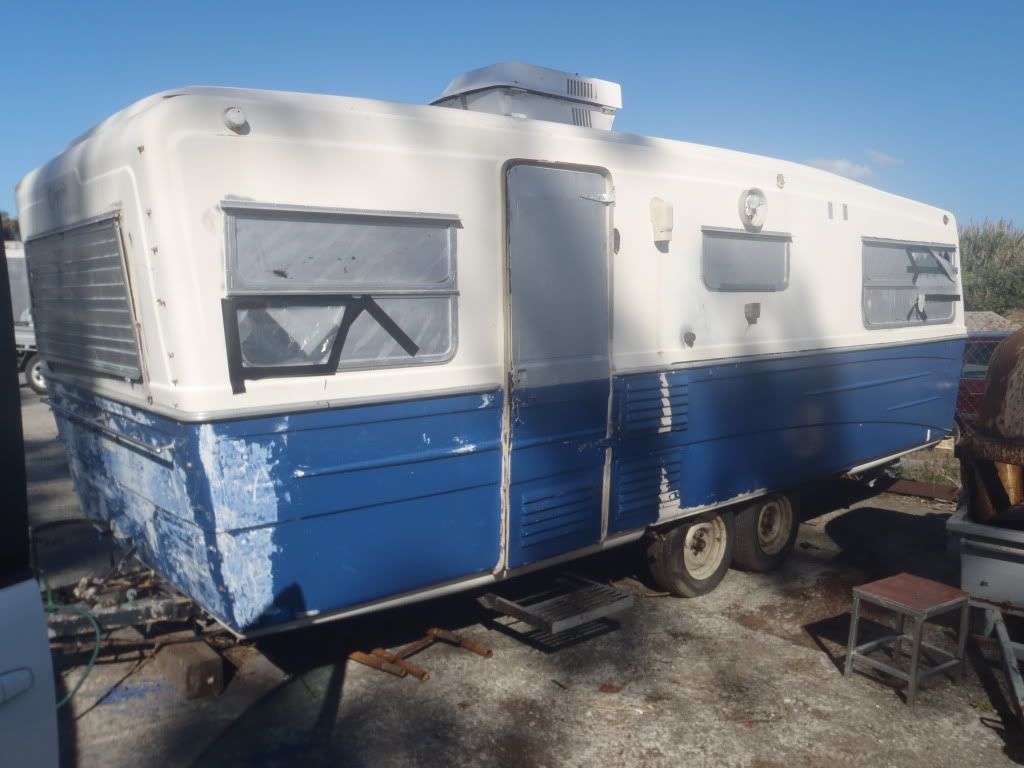 Removed air con  Towards bedroom,no kitchen 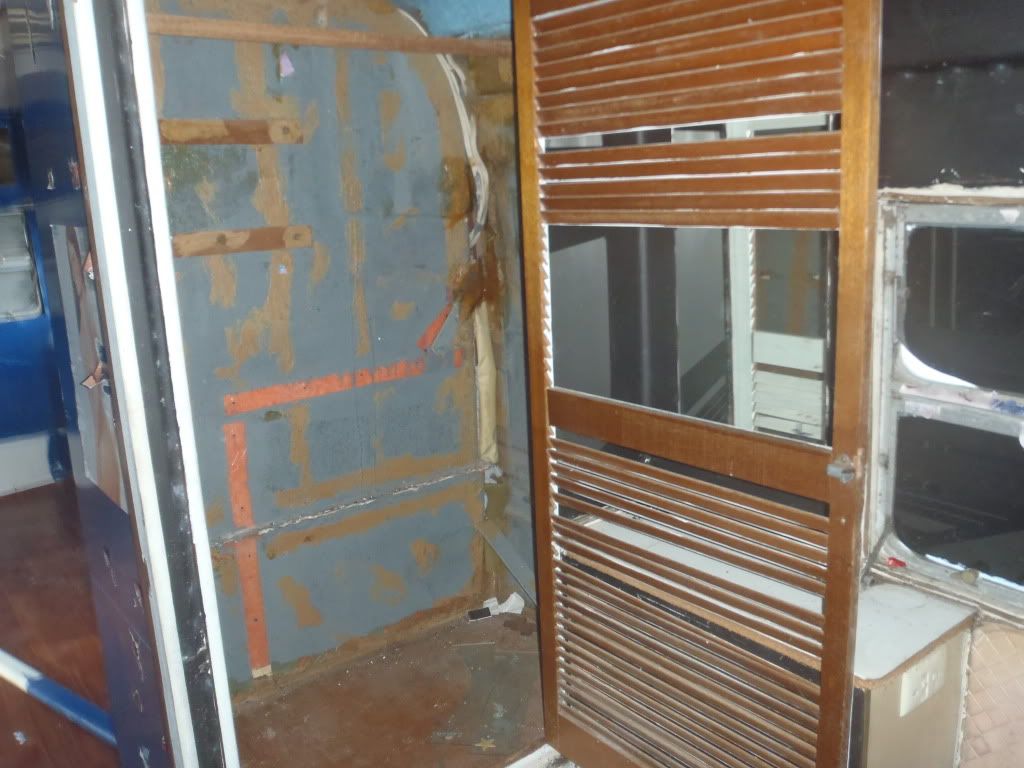 Wardrobe 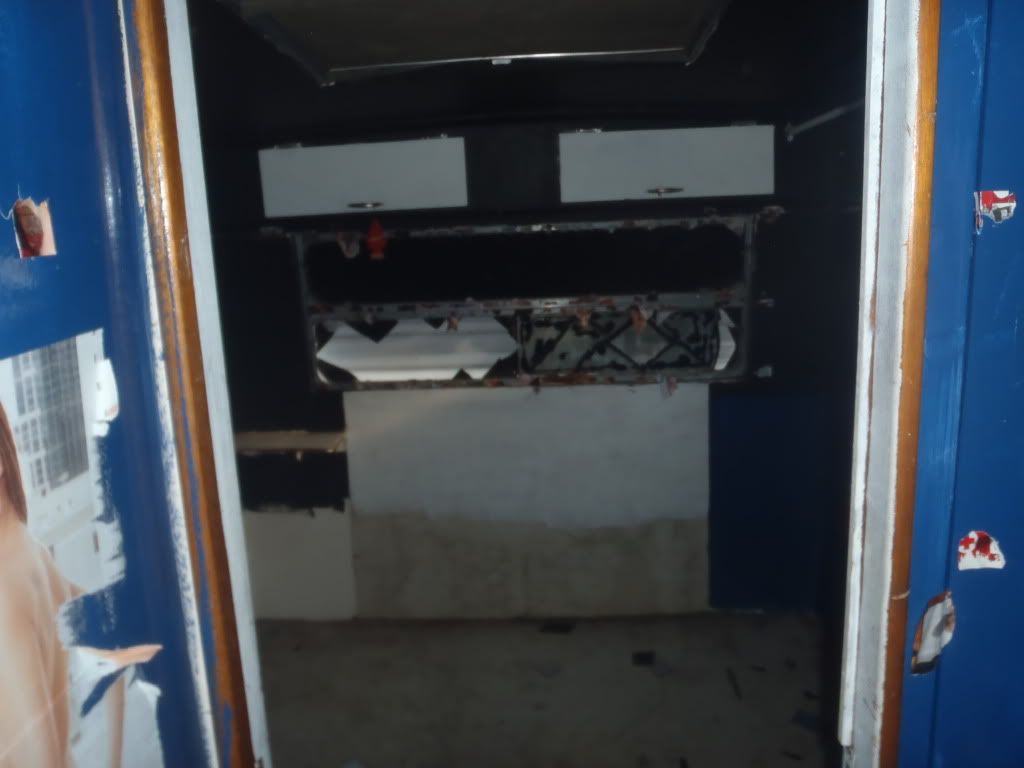 Bedroom 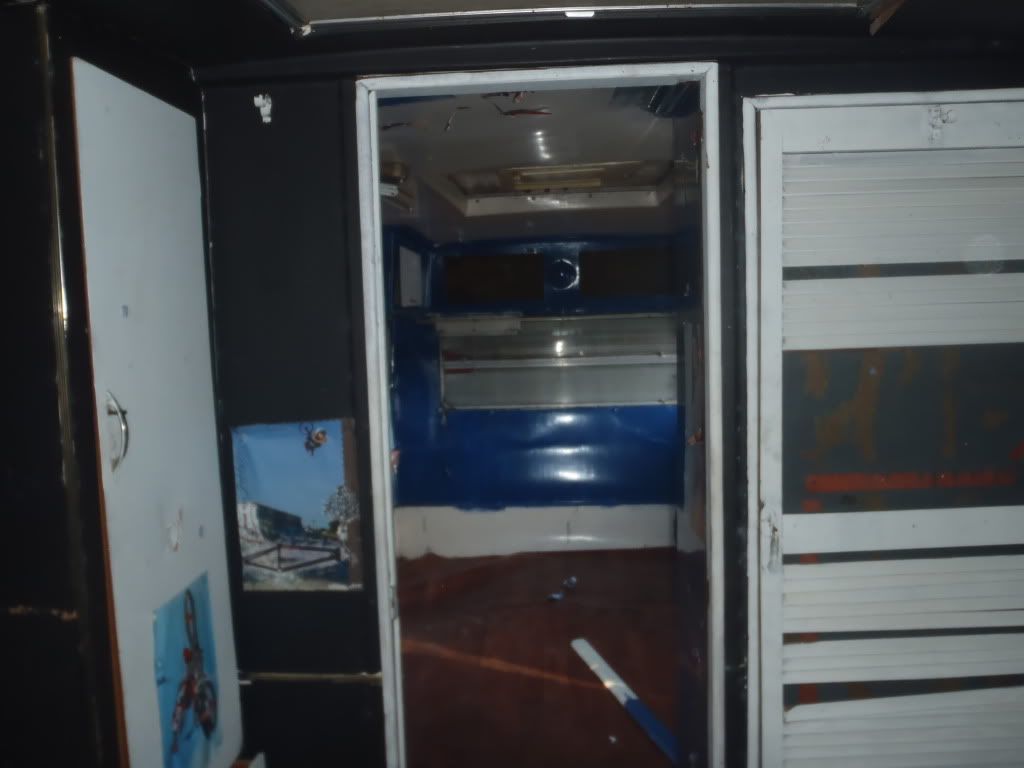 Towards dinning 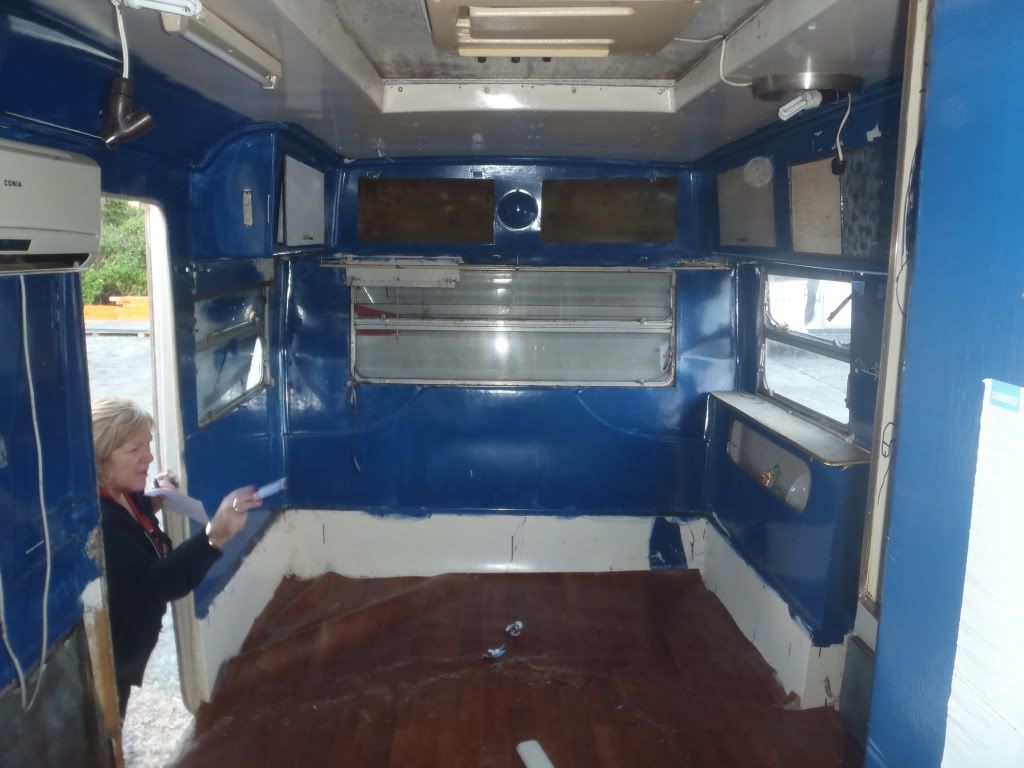 Dinning Well that’s it for now, better get some rest as I think where going to need it..yeeeHa Cheers for now Stephen&Julie |
|
|
|
Post by stephen&Julie on Aug 3, 2011 18:20:13 GMT 10
Big thanks to Kim and Graeme (Kimbo) scored a backload on there tilt tray from Bris to Cabarita for the Stardust at the right price
Cheers Stephen&Julie
|
|
|
|
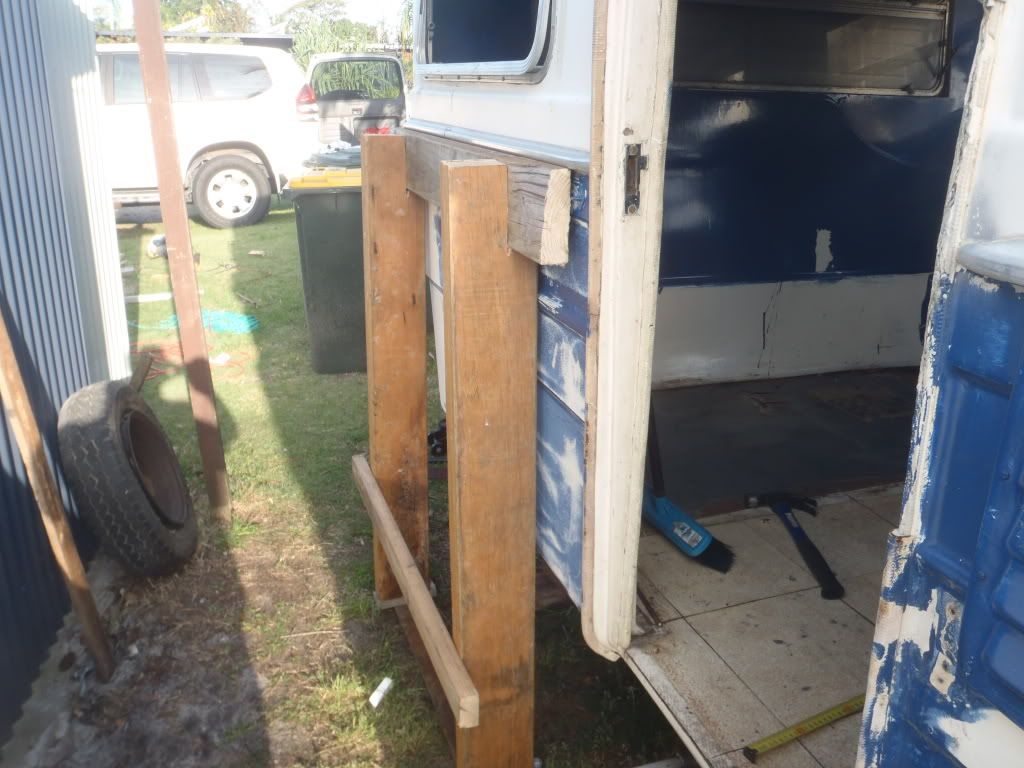
Post by stephen&Julie on Aug 4, 2011 18:05:09 GMT 10
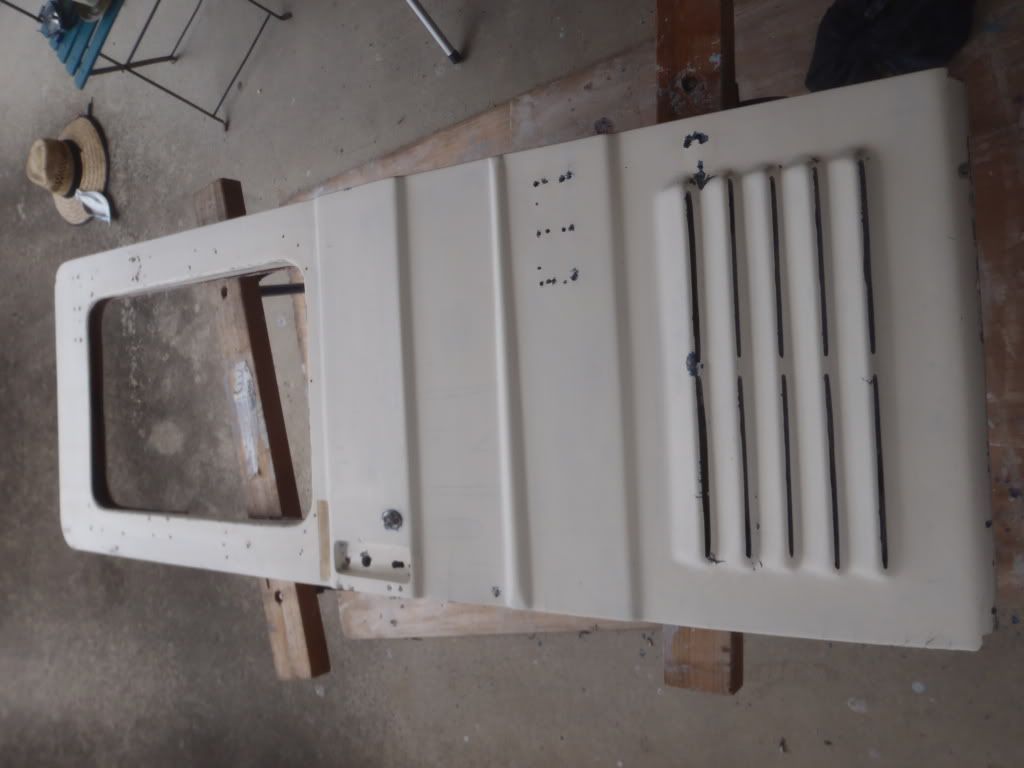
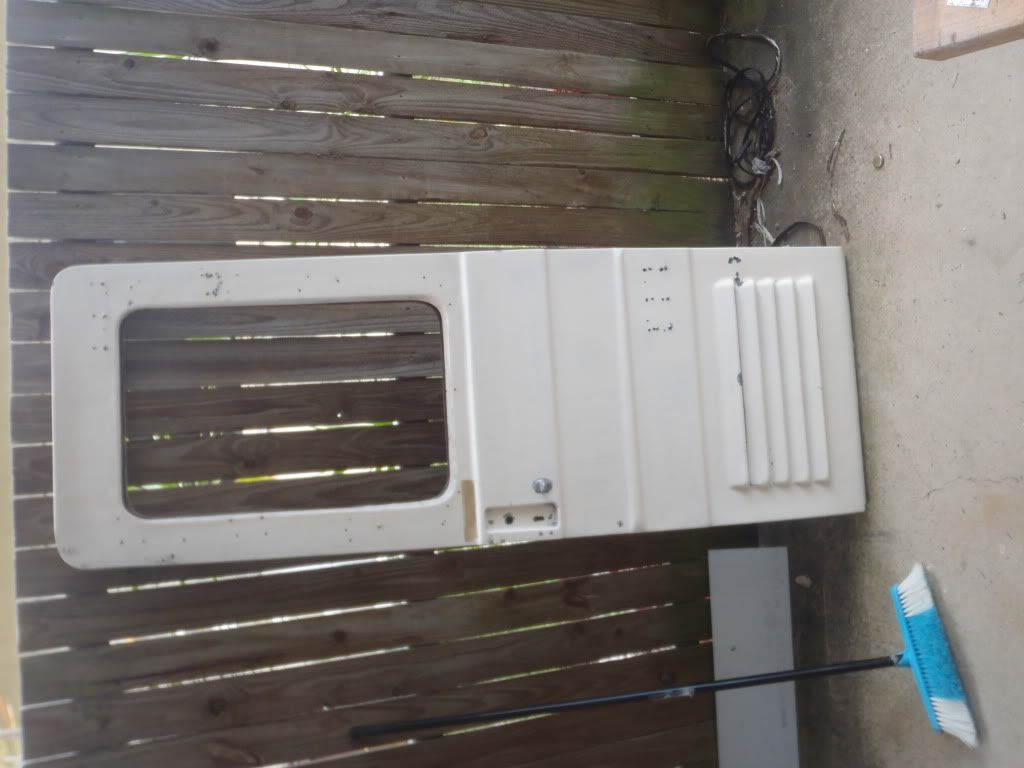
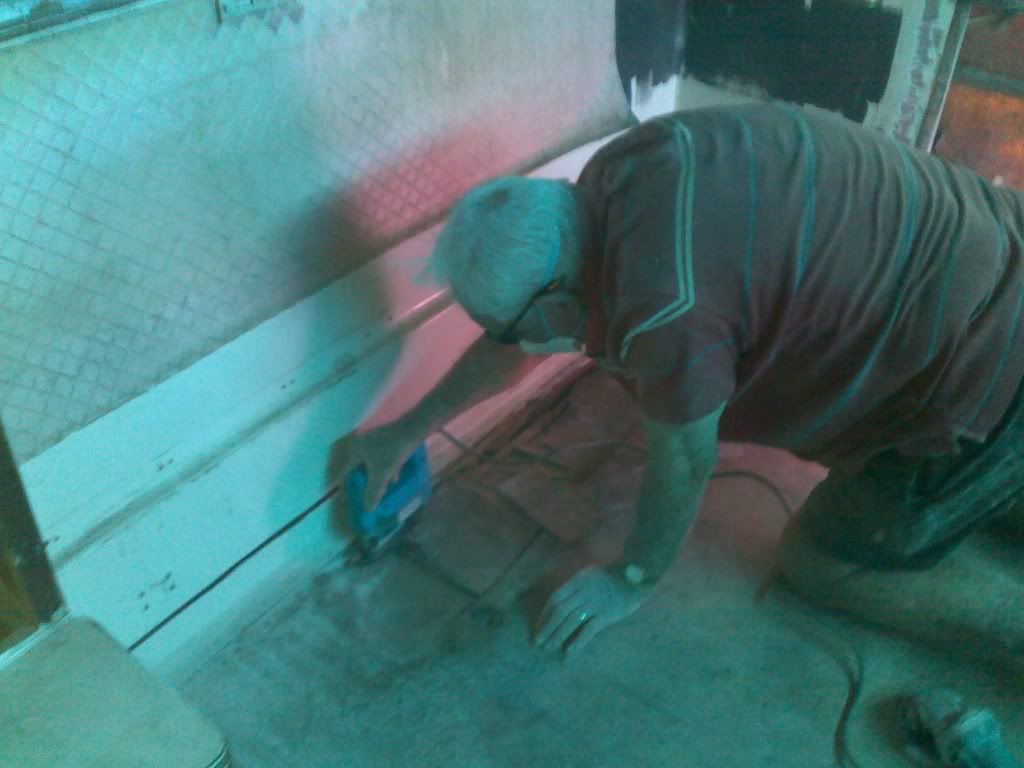
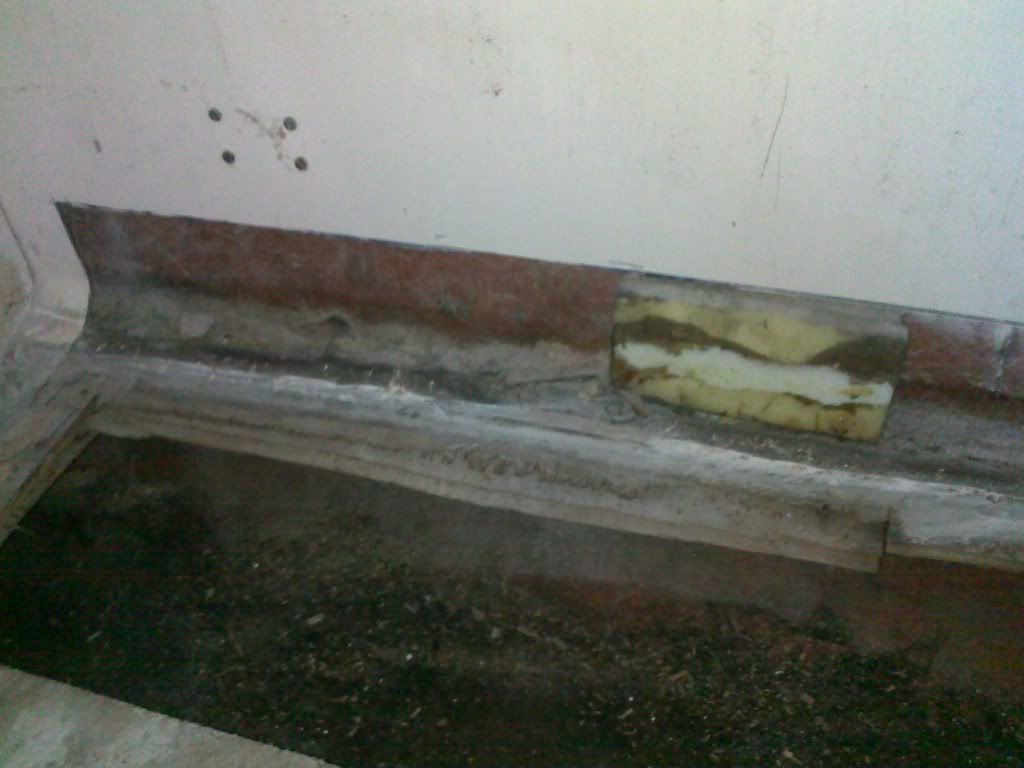
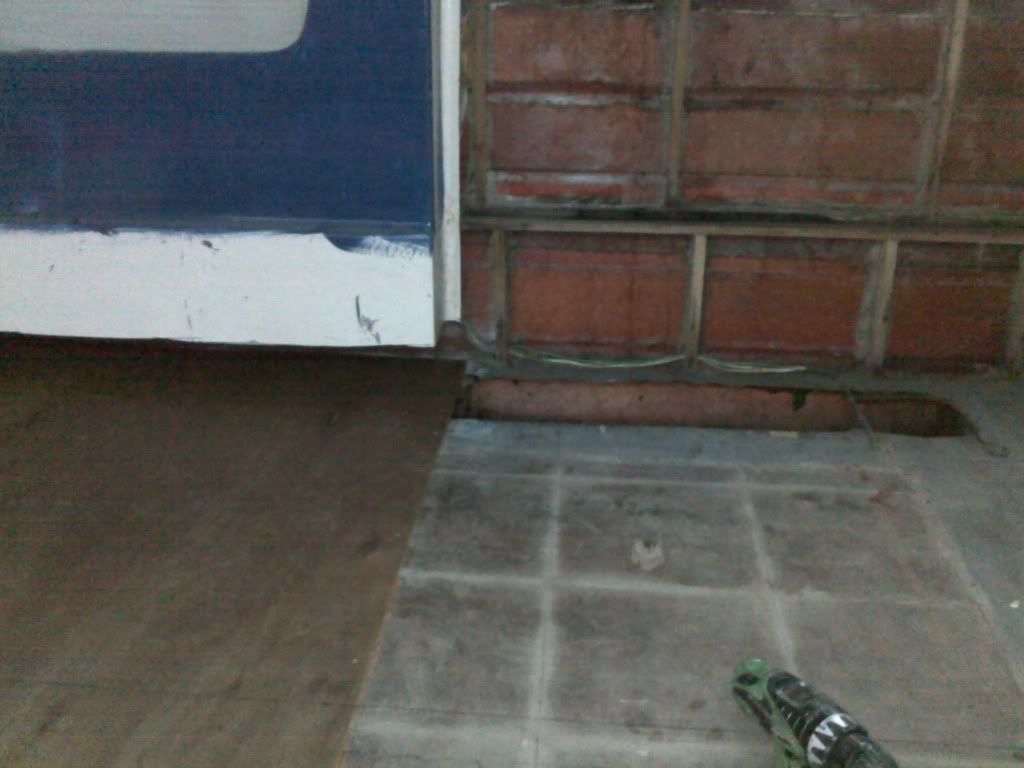
Hello again all Further progress today as the Stardust is loaded on to the tilt tray for the long trip home, looks in good condition underneath considering it hasn’t been on holidays for many a year. Does anyone know a good method for removing paint from fibreglass before I start testing? Cheers for now Stephen&Julie 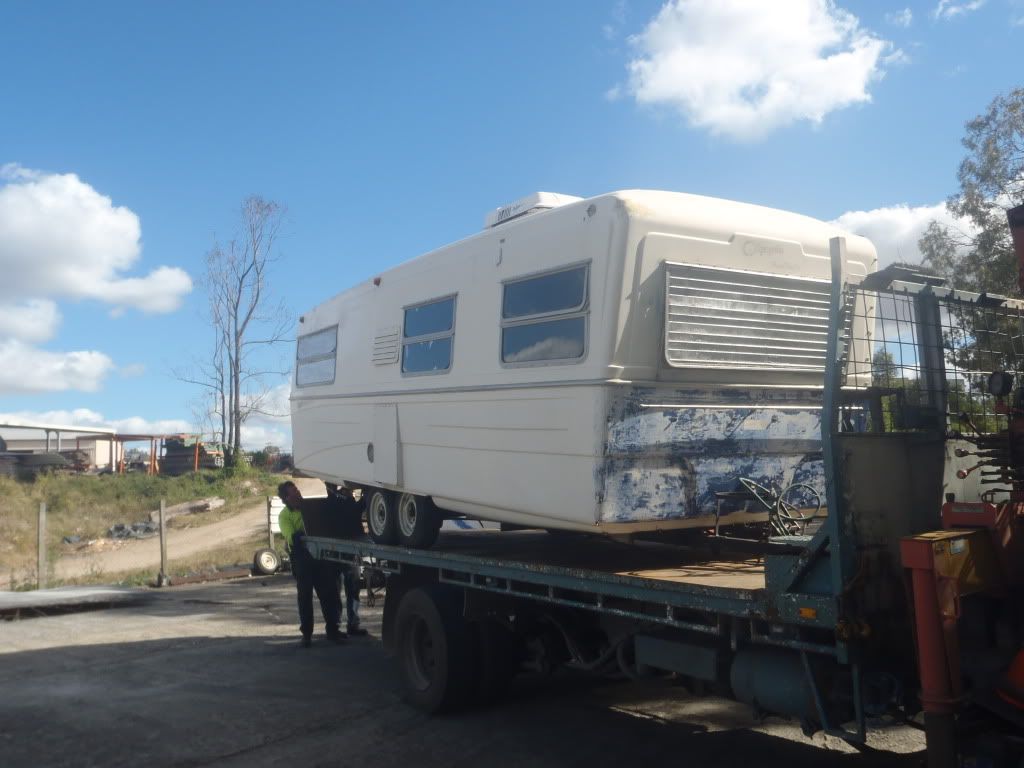 Going 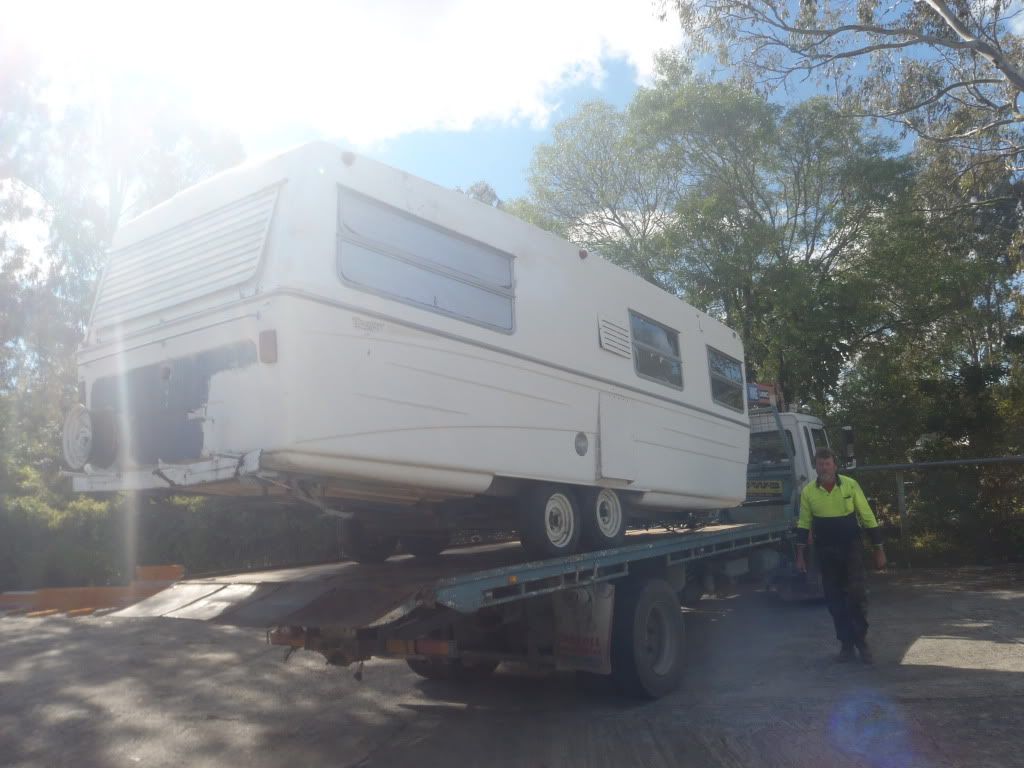 Going 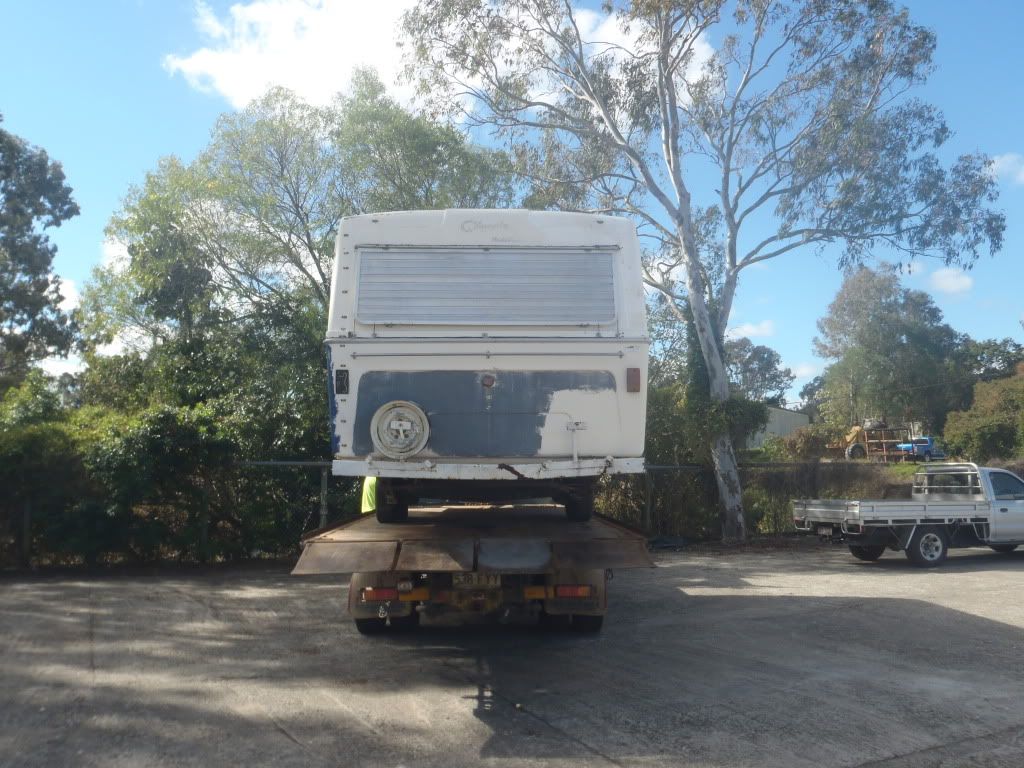 Going 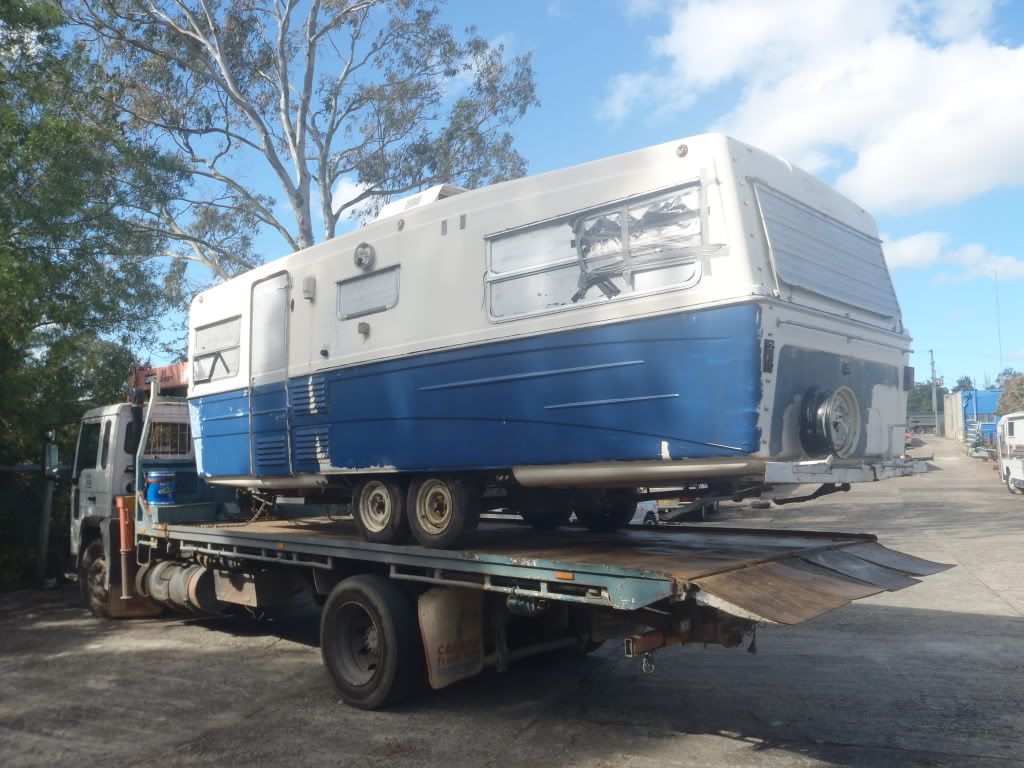 Going 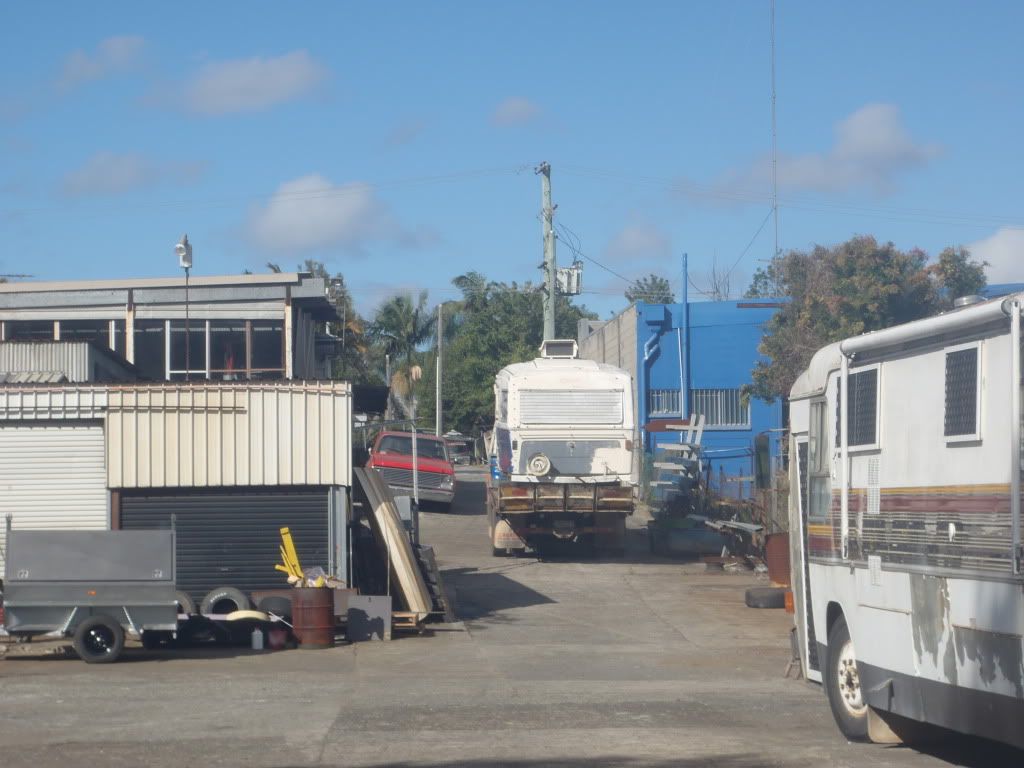 Gone |
|
|
|
Post by richard on Aug 4, 2011 22:24:17 GMT 10
Does anyone know a good method for removing paint from fibreglass before I start testing? Sandpaper, a dual-action sander and a lot of elbow grease appears to be the standard method. Paint-strippers are generally bad for fibreglass. |
|
|
|
Post by stephen&Julie on Aug 7, 2011 20:38:23 GMT 10
|
|
|
|
Post by stephen&Julie on Aug 13, 2011 16:43:49 GMT 10
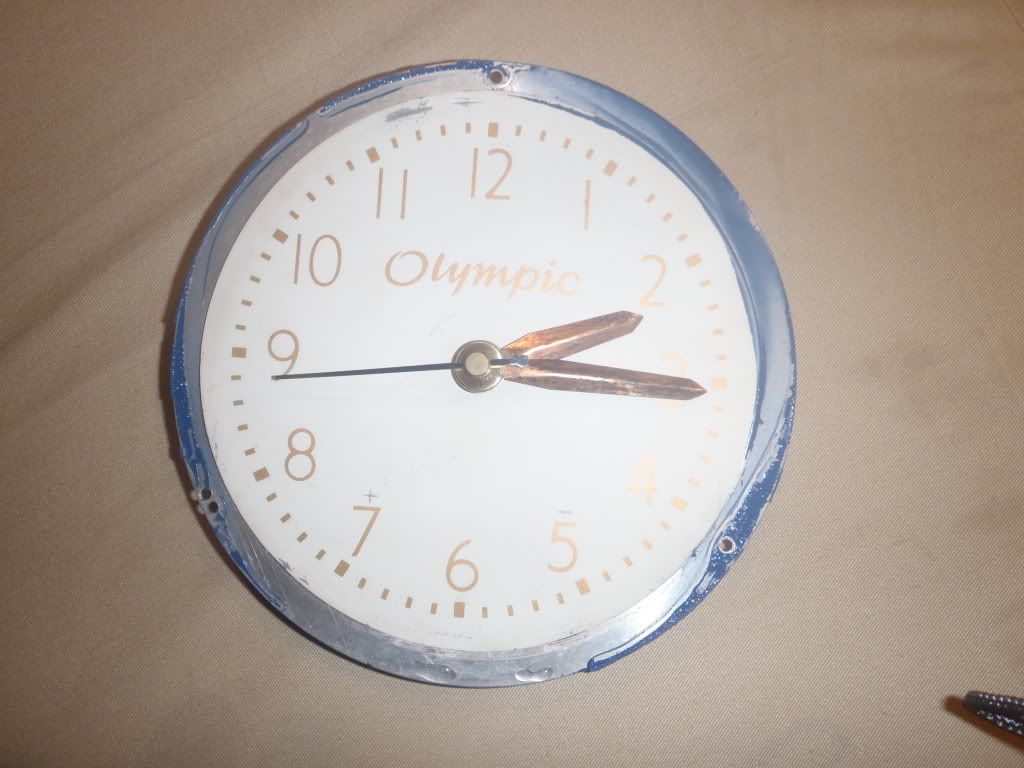
Greetings VVer’s Spent the afternoon playing with the painted Olympic Clock with a bit of patients and persistents have removed all the lovely paint added a battery and presto a ready to go clock 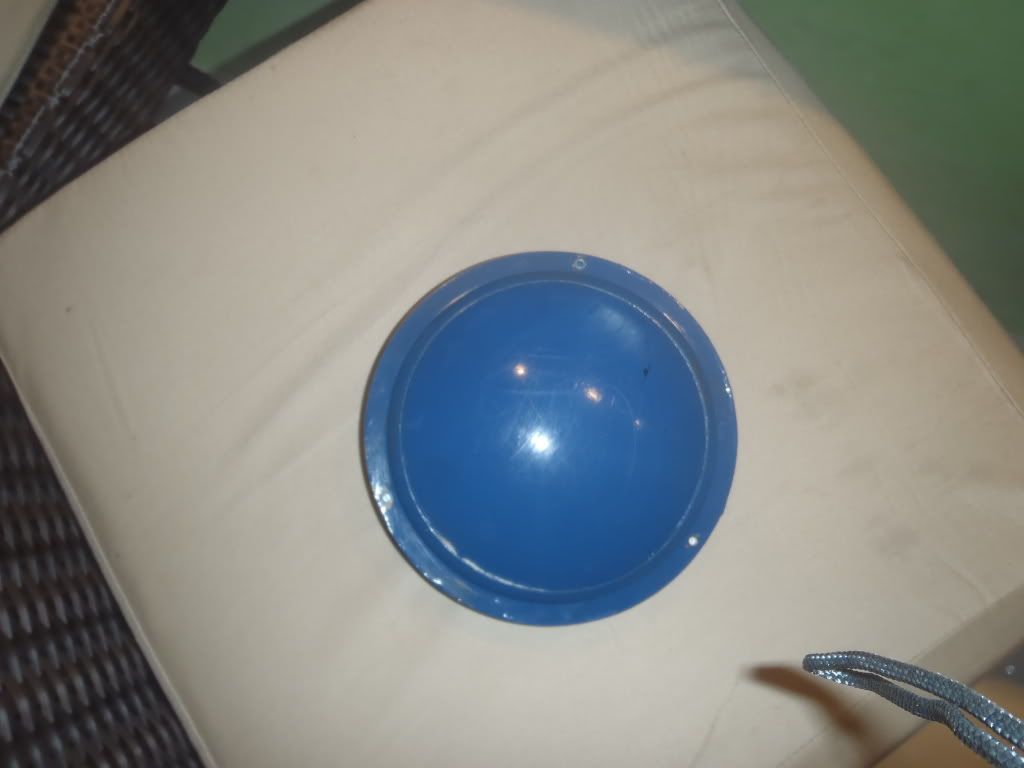 Wasn’t sure at first what this was on the wall 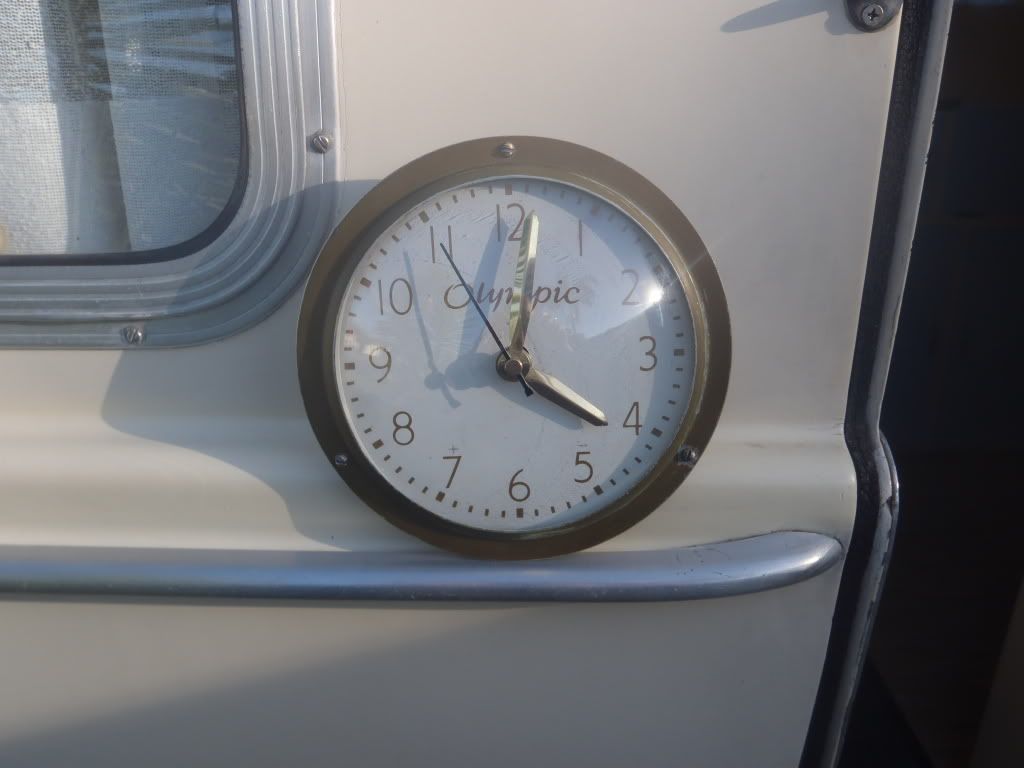 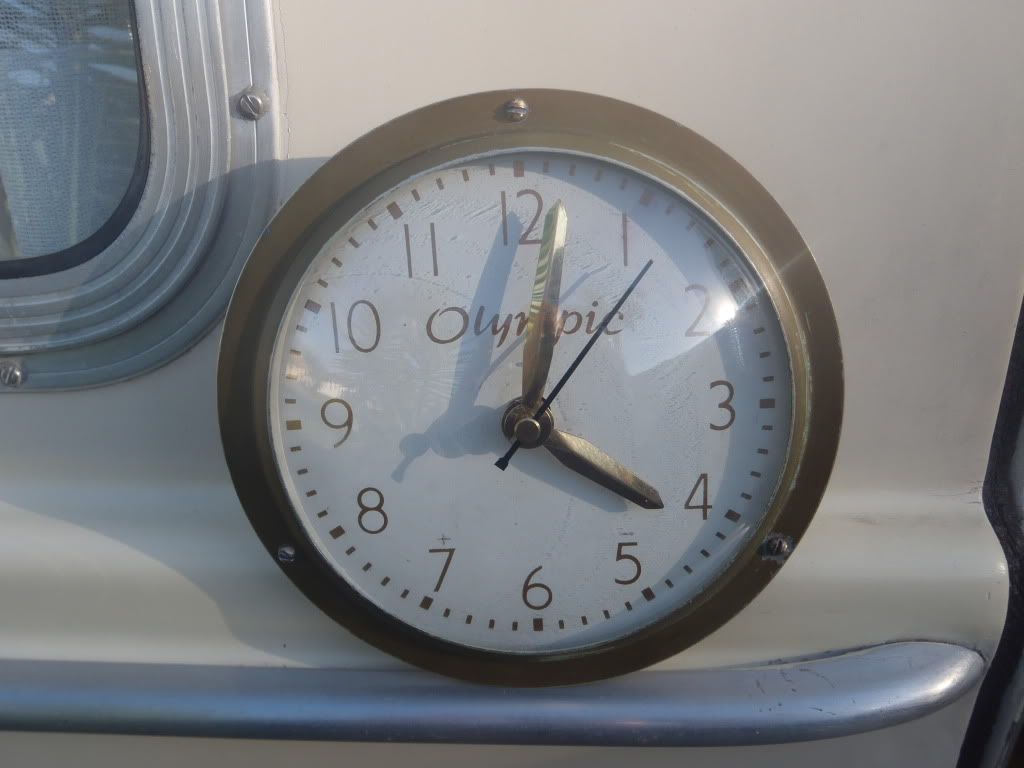 How goods that! Cheers Stephen&Julie |
|
|
|
Post by bobandjacqui on Aug 14, 2011 9:09:14 GMT 10
G'day Stephen and Julie, Love the clock ;D but you'll have to do something about those slot head screws before Slot Head Bob wakes up and logs on  ;D ;D ;D Cheers Bob |
|
|
|
Post by stephen&Julie on Aug 14, 2011 18:27:36 GMT 10
Hey Bob, would you believe i thought of that when i put it together....Ha...Ha
cheers Stephen
|
|
|
|
Post by boblor on Aug 14, 2011 21:11:35 GMT 10
Hi All
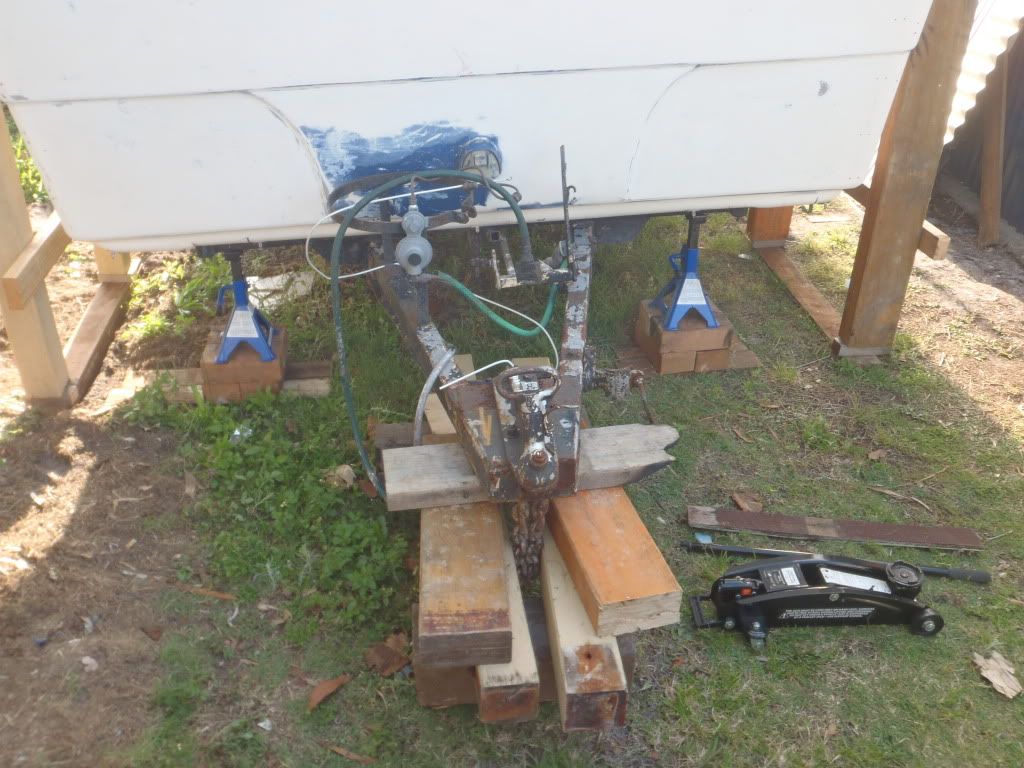
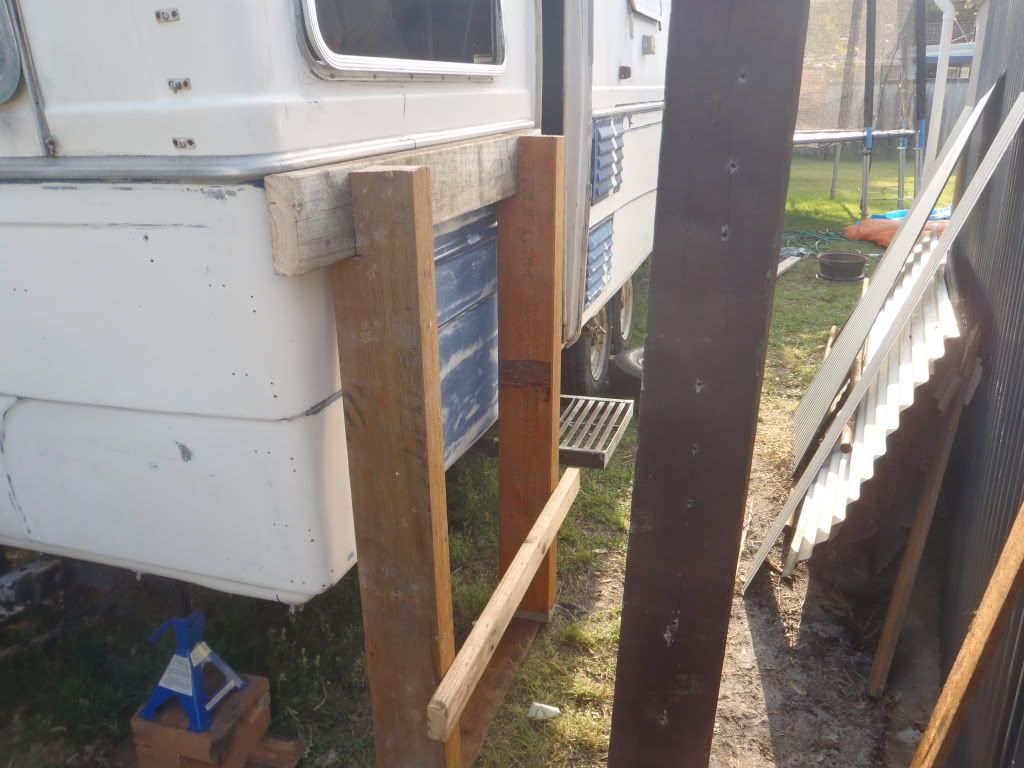
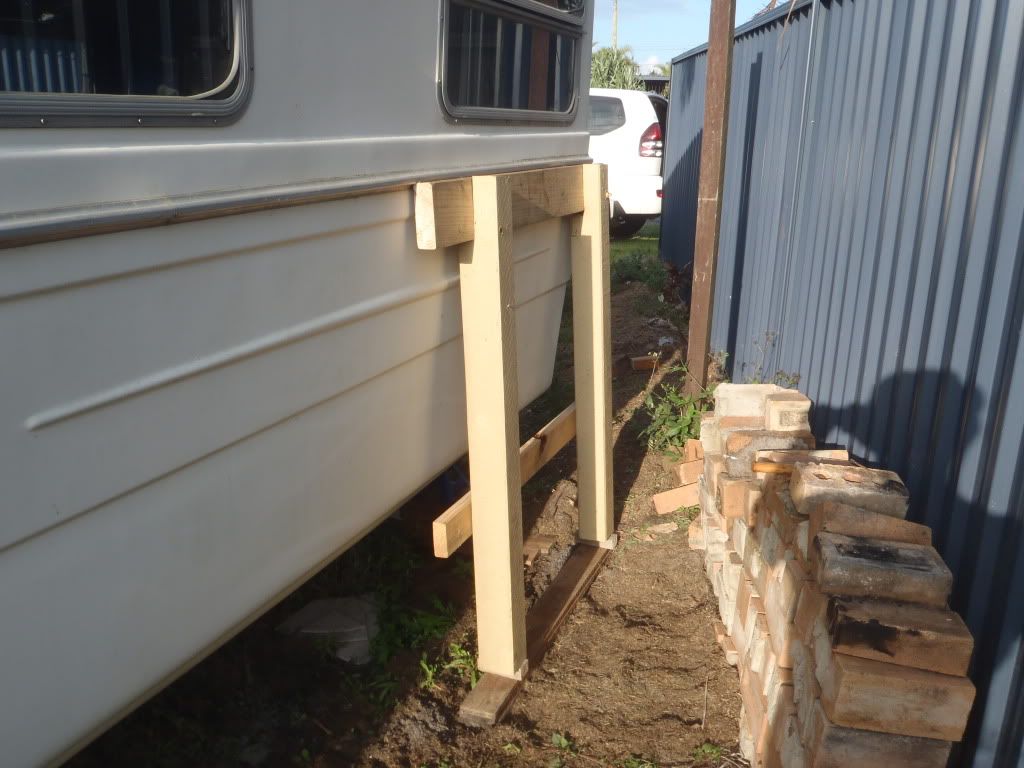
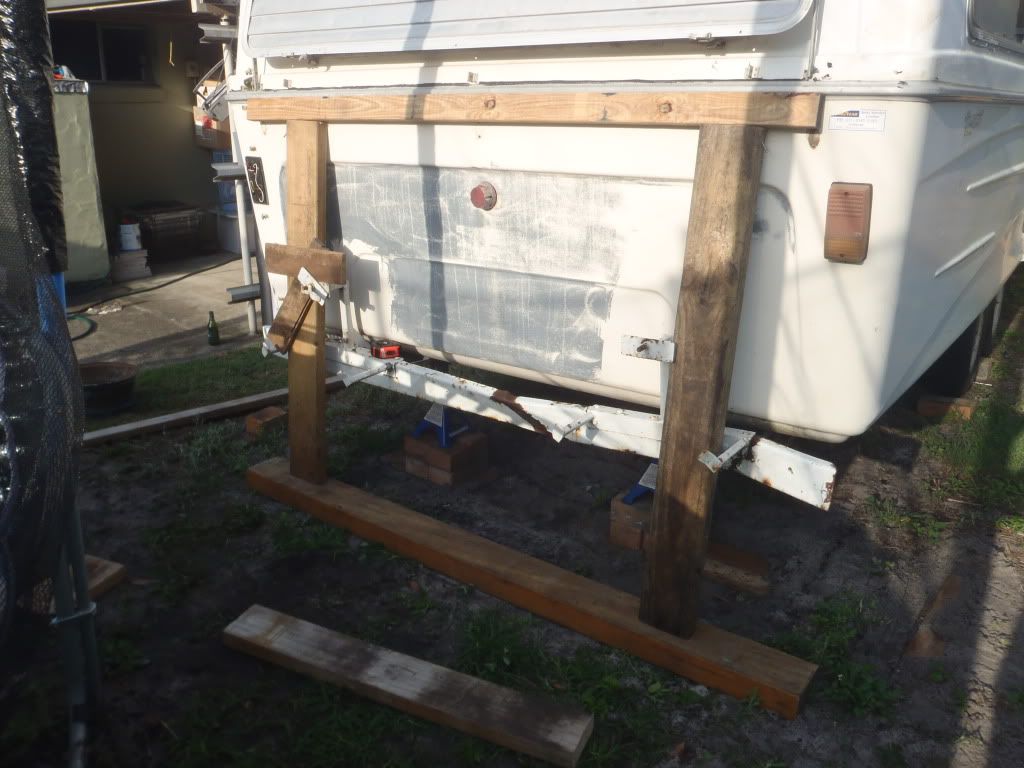
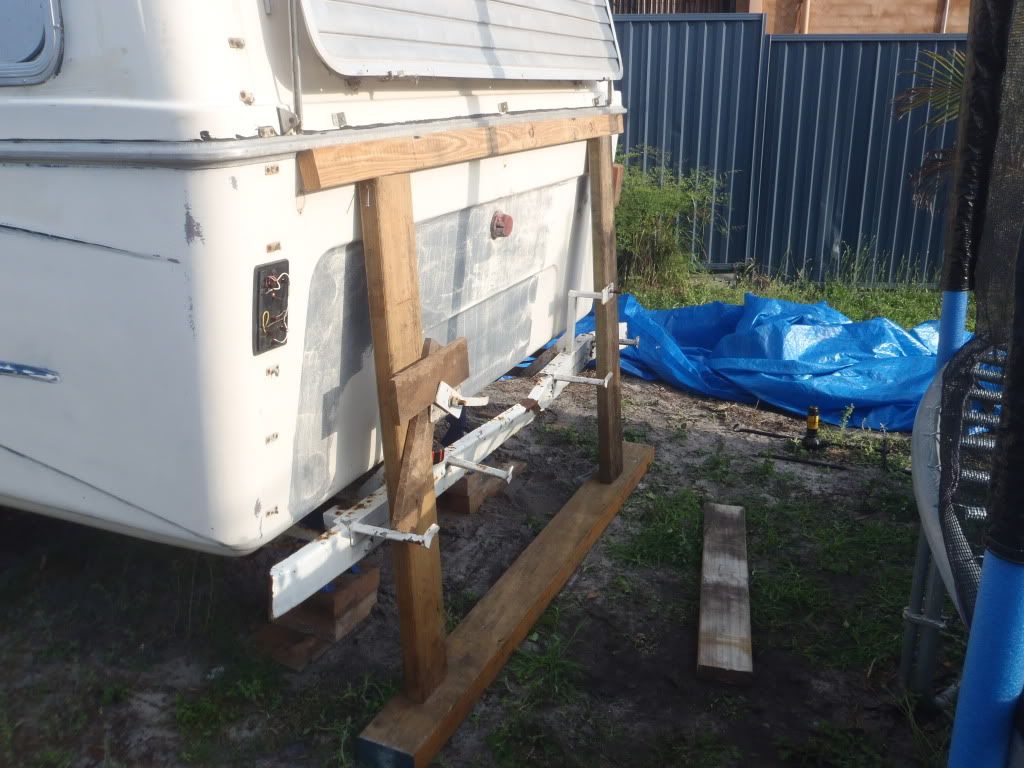
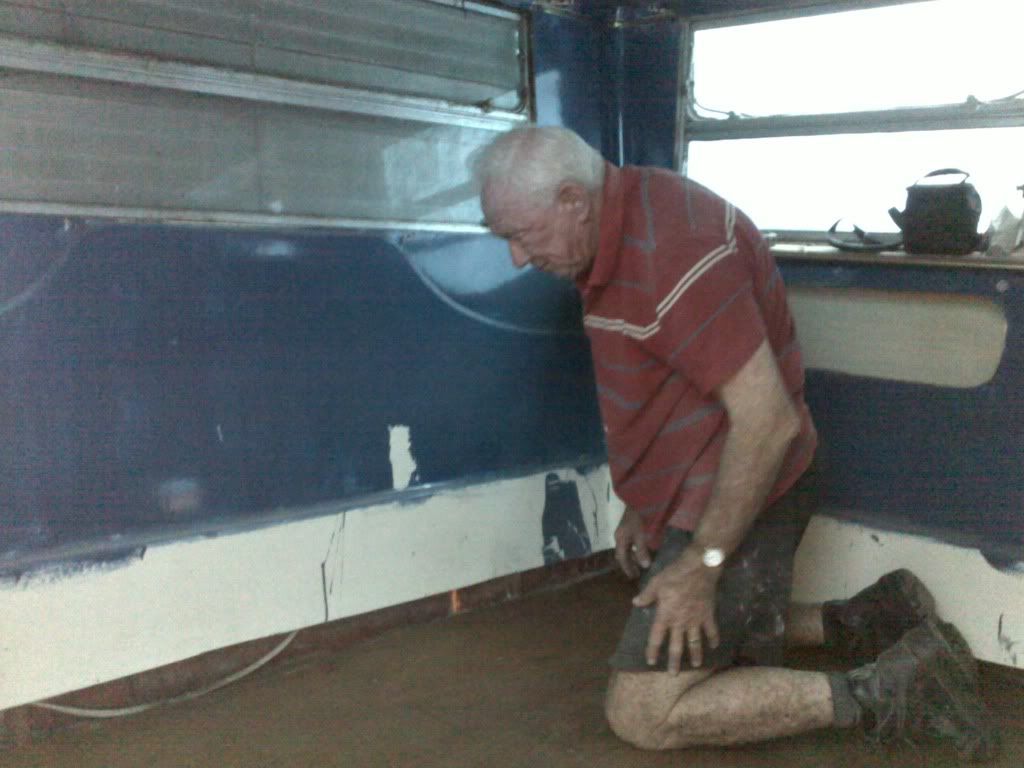
I spent a couple of hours with Stephen this afternoon checking out this latest edition to the fleet. They say you can alway learn something, well this van has an unusual suspension system compared to other Olympics and brake cable mechanism. The tandem wheels are placed very close together (50-75mm from memory), a single heavy duty spring each side, each end of the spring sits on the axles with radius rods attached to brackets above the axles back to the chassis. the chassis has been 'beefed up' considerably to take the load/shocks. I would think this van will tow very well on this suspension, the van is well balanced, when Stephen walked into the back of the van , we tipped it on its tail.
This van will look a treat in 2-3years time when restoration has been complete for retirement.
Congratulations Stephen and Julie on a good find, and are lucky to be living near Olympic HQ's and I look forward to helping where possible. You are doing well for some one , who only 12 mths ago found Olympic vans.
Cheers boblor
|
|
|
|
Post by stephen&Julie on Oct 12, 2011 16:44:03 GMT 10
|
|
|
|
Post by mgandwartz on Oct 12, 2011 19:30:28 GMT 10
She should come up a treat - love the clock. will look forward to the progress in pics. Don
|
|
|
|
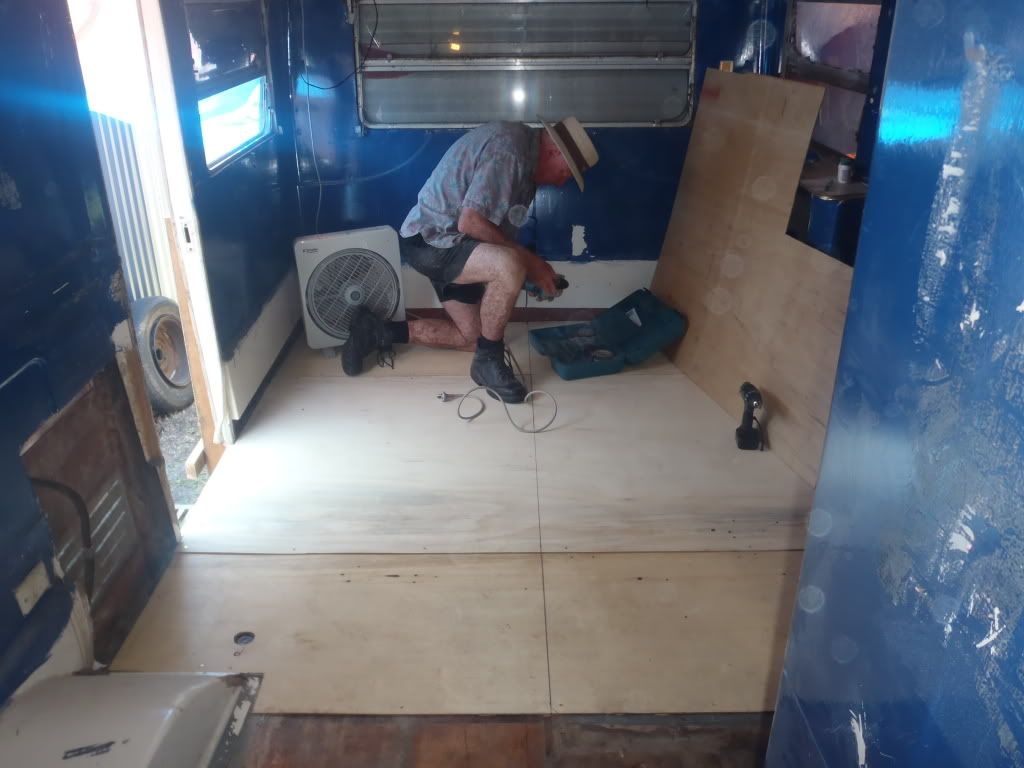
Post by stephen&Julie on Oct 14, 2011 19:14:56 GMT 10
|
|
|
|
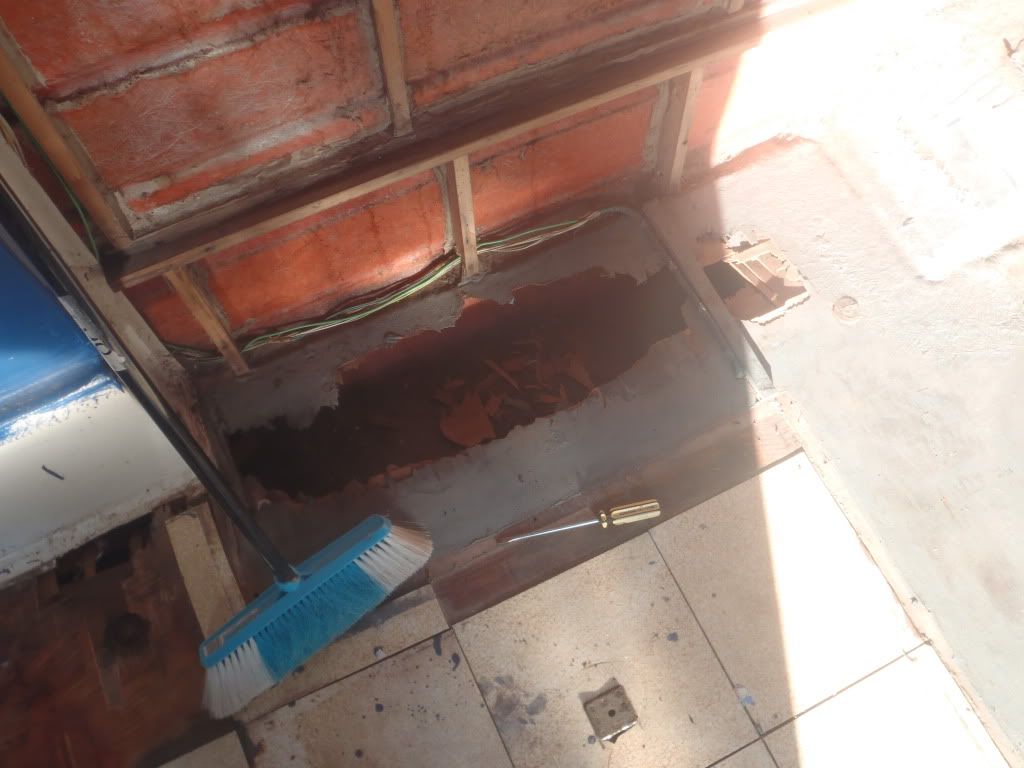
Post by atouchofglass on Oct 15, 2011 7:23:20 GMT 10
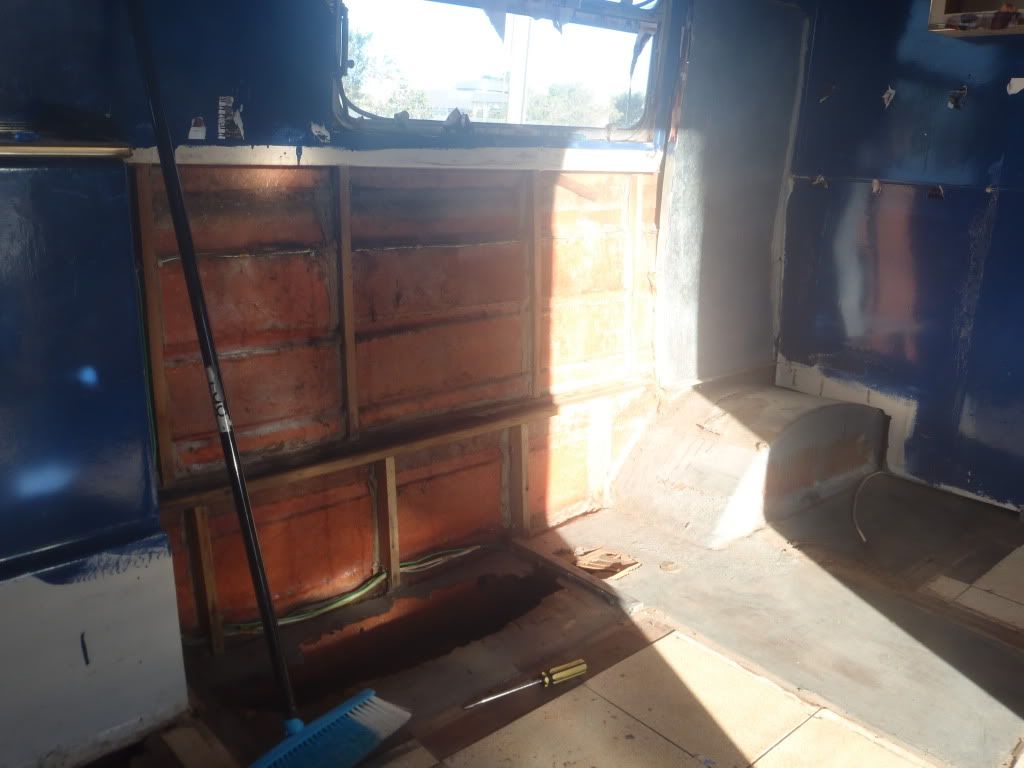
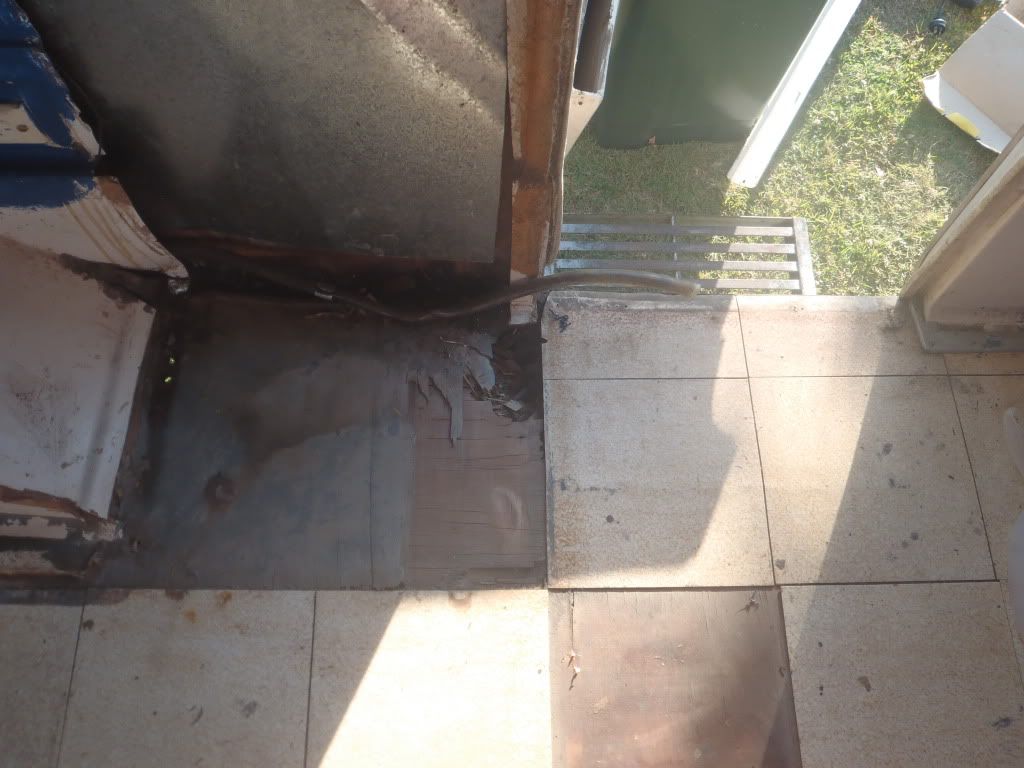
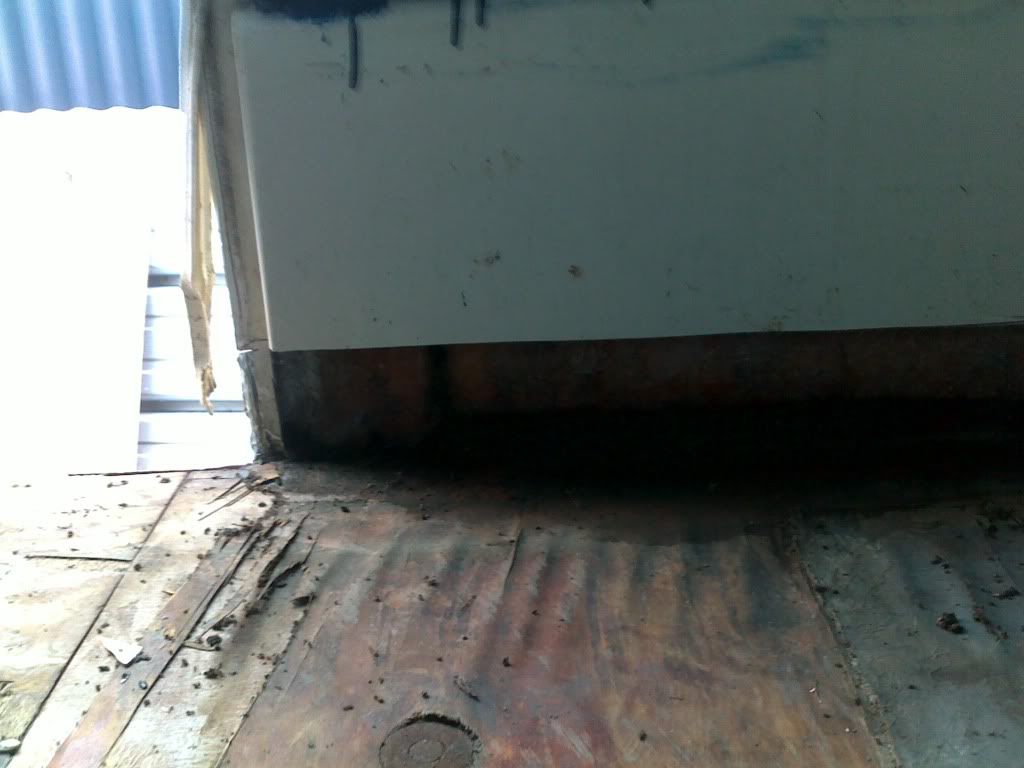
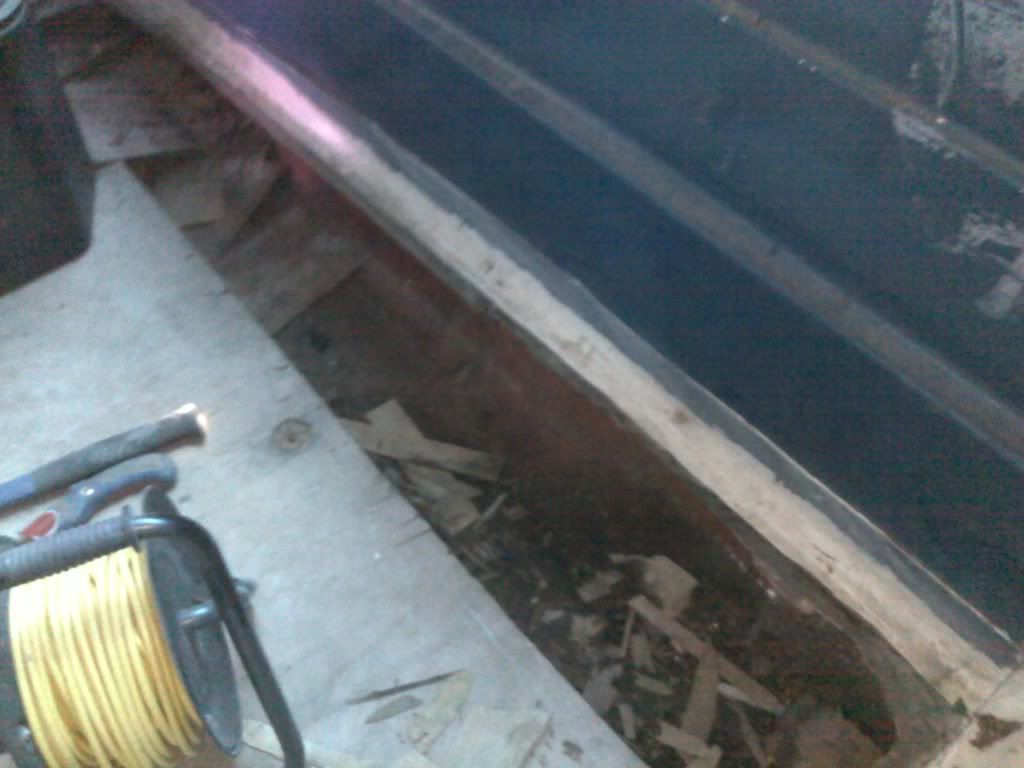
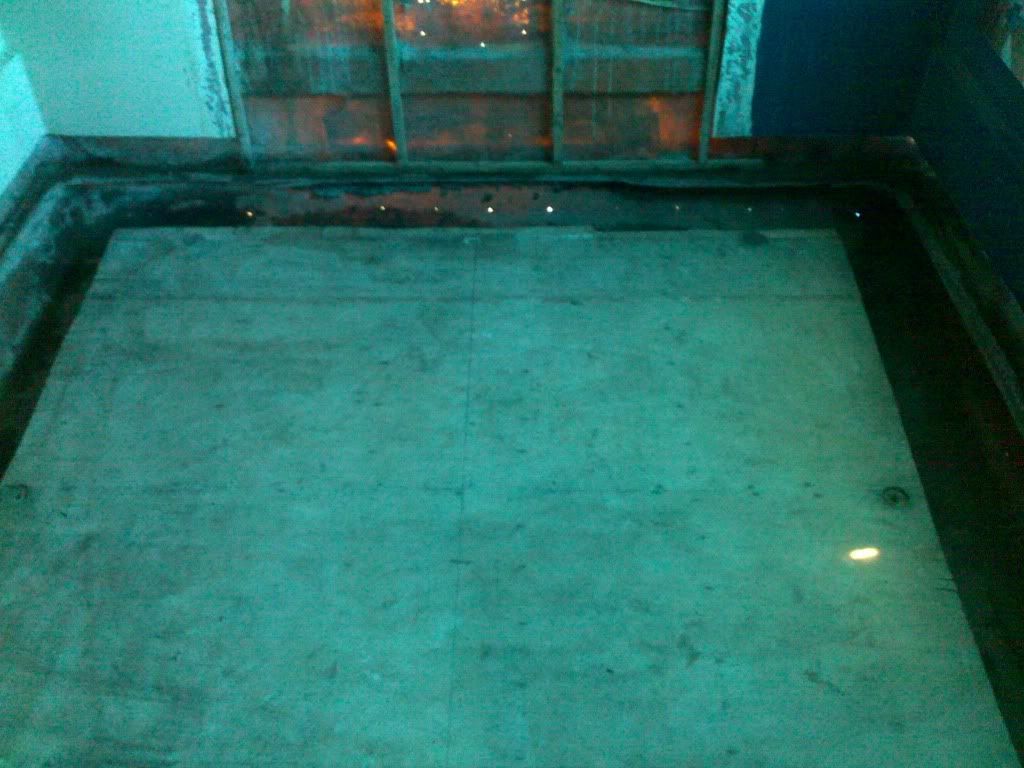
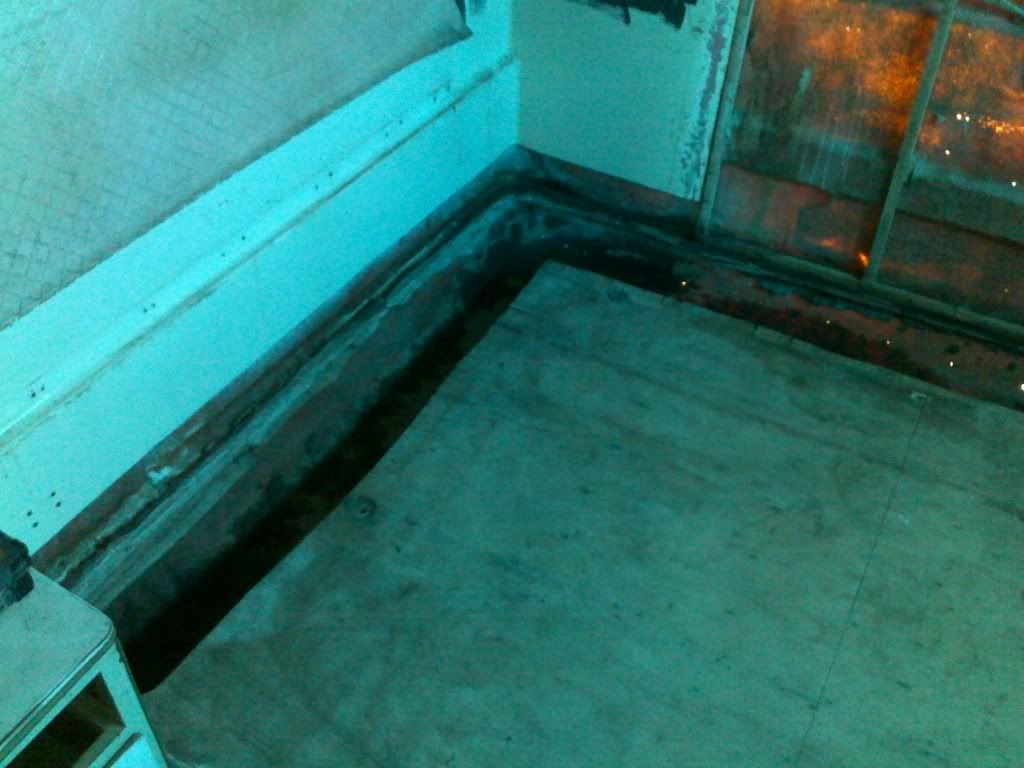
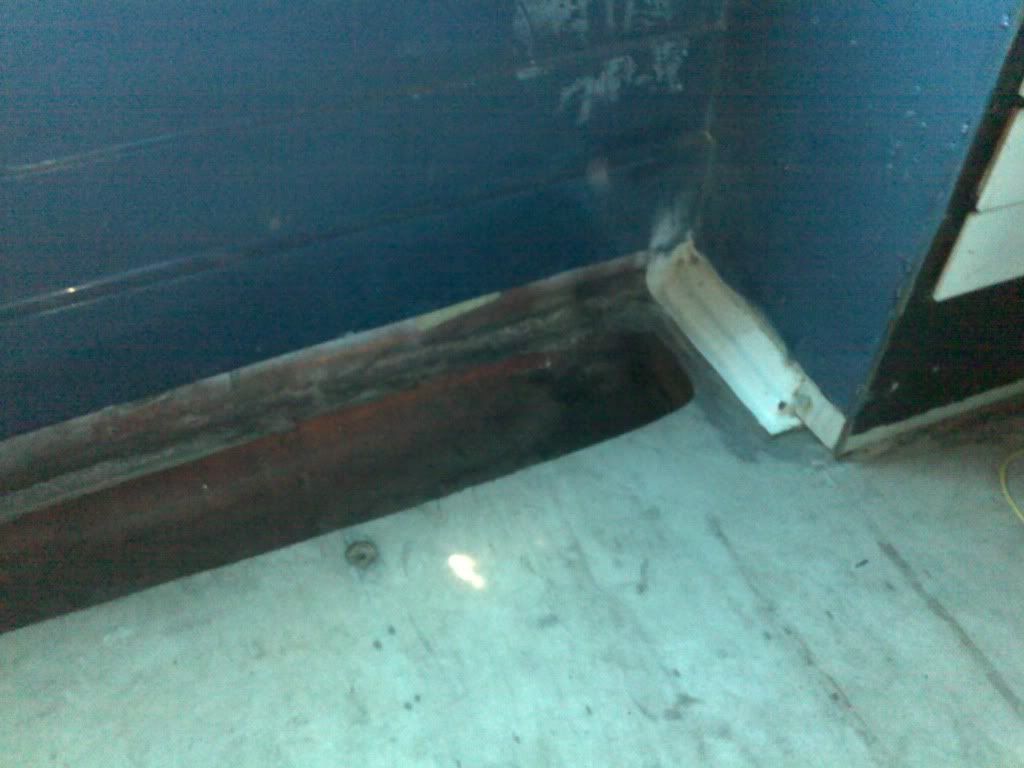
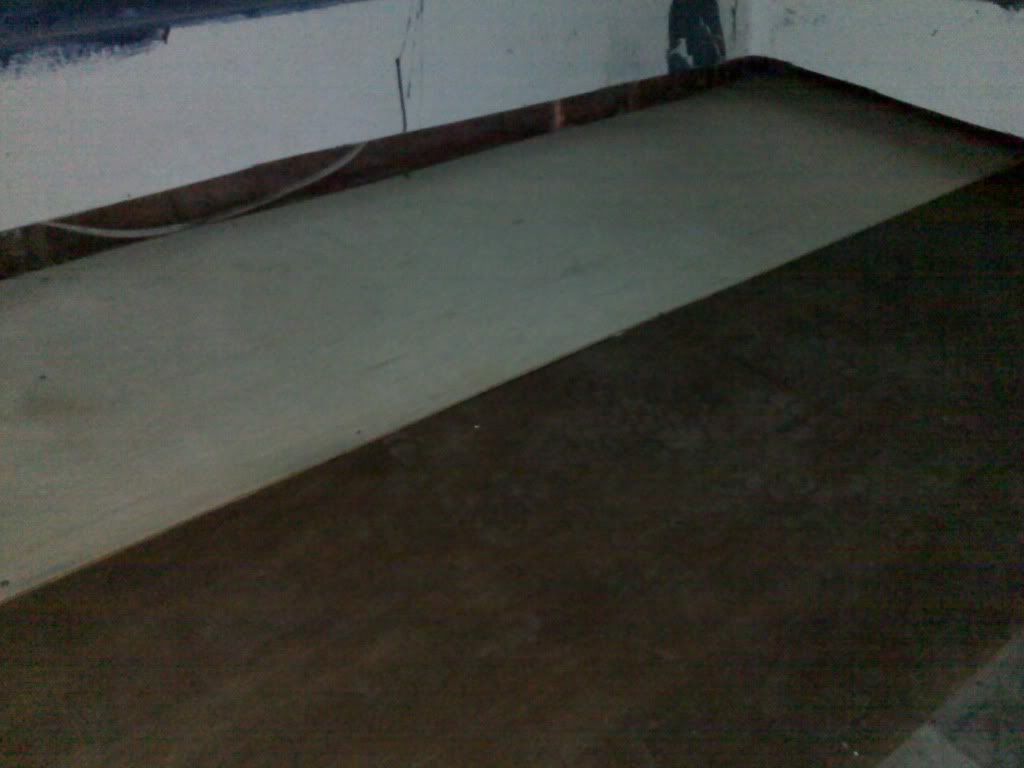
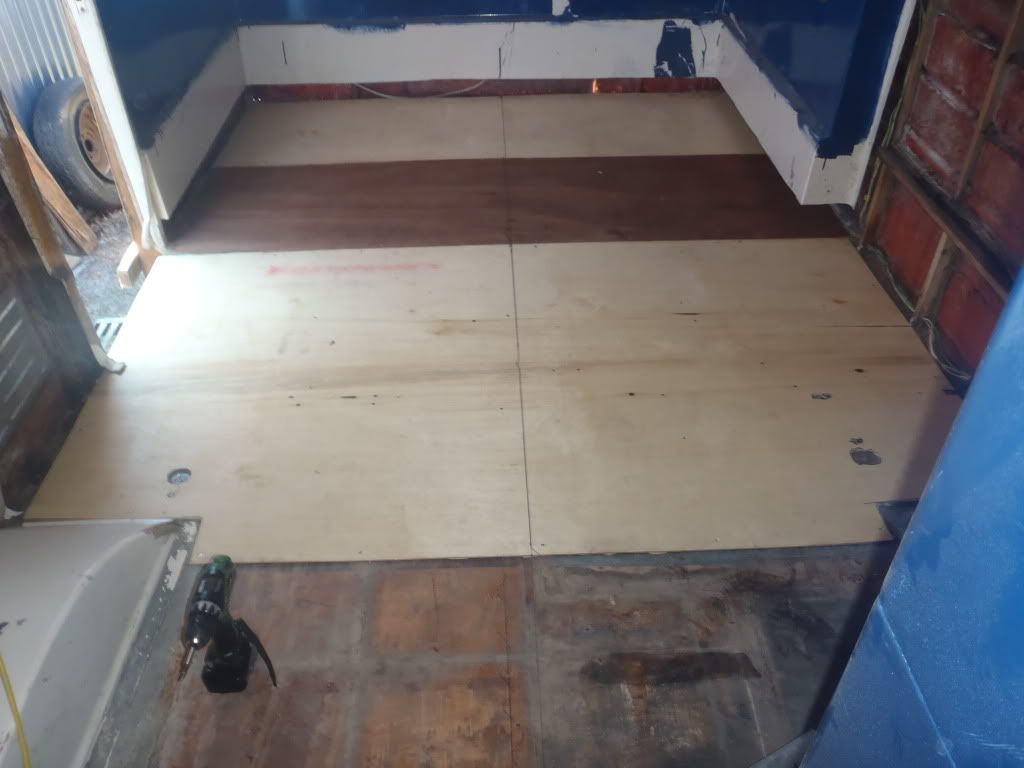
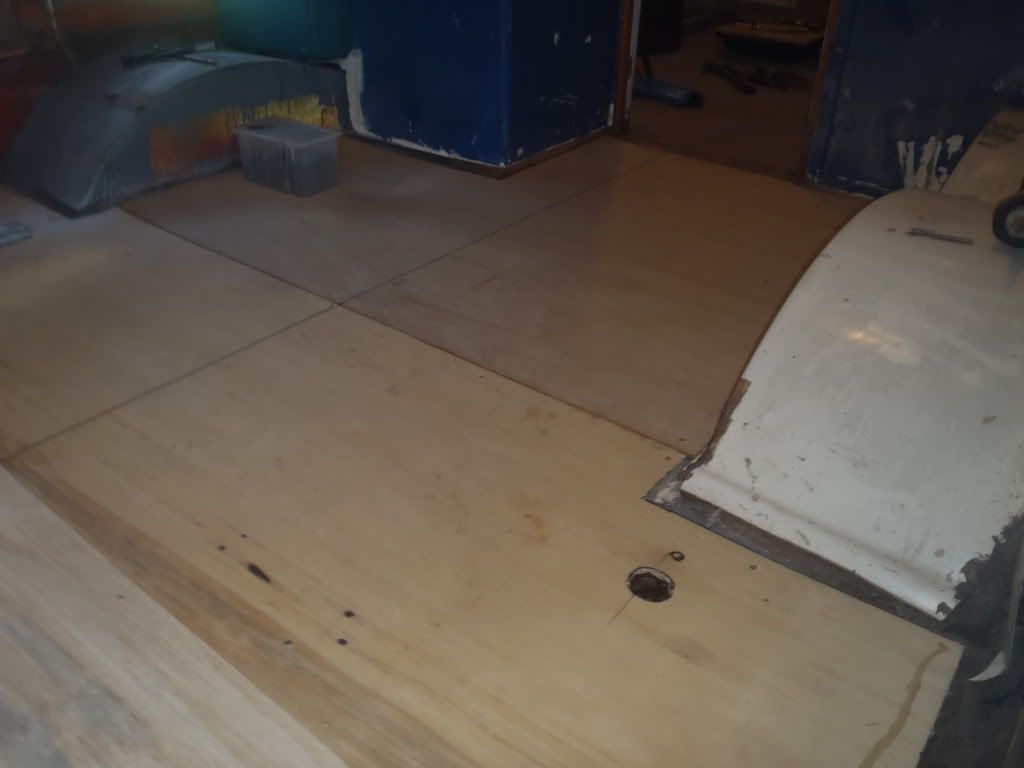
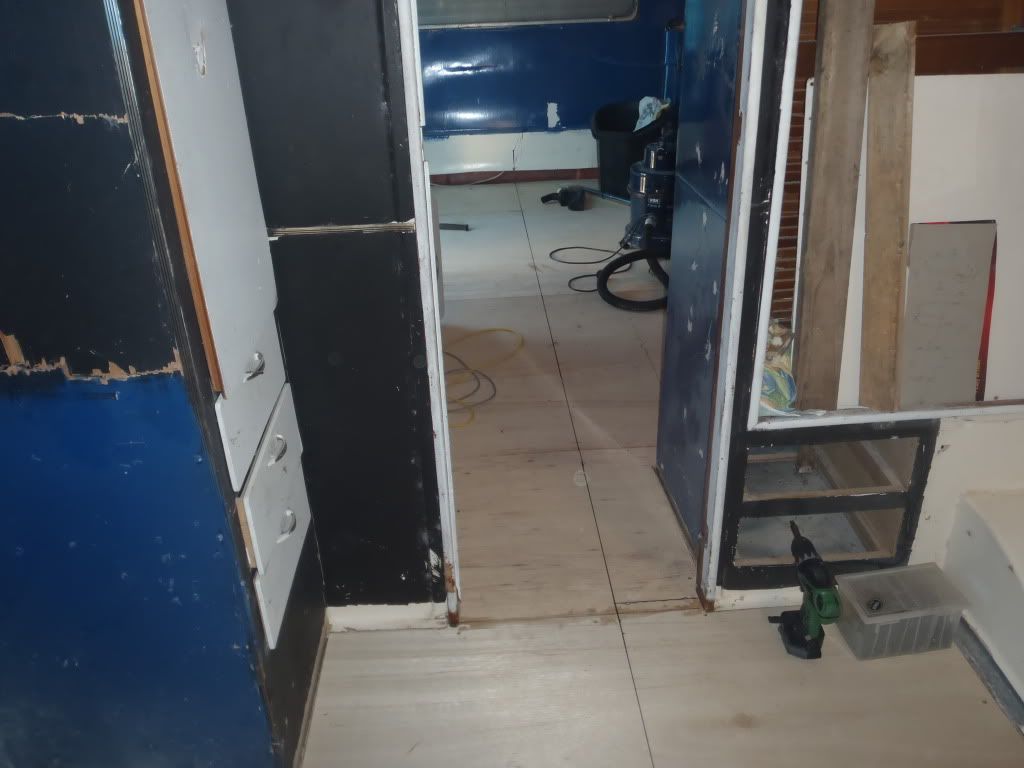
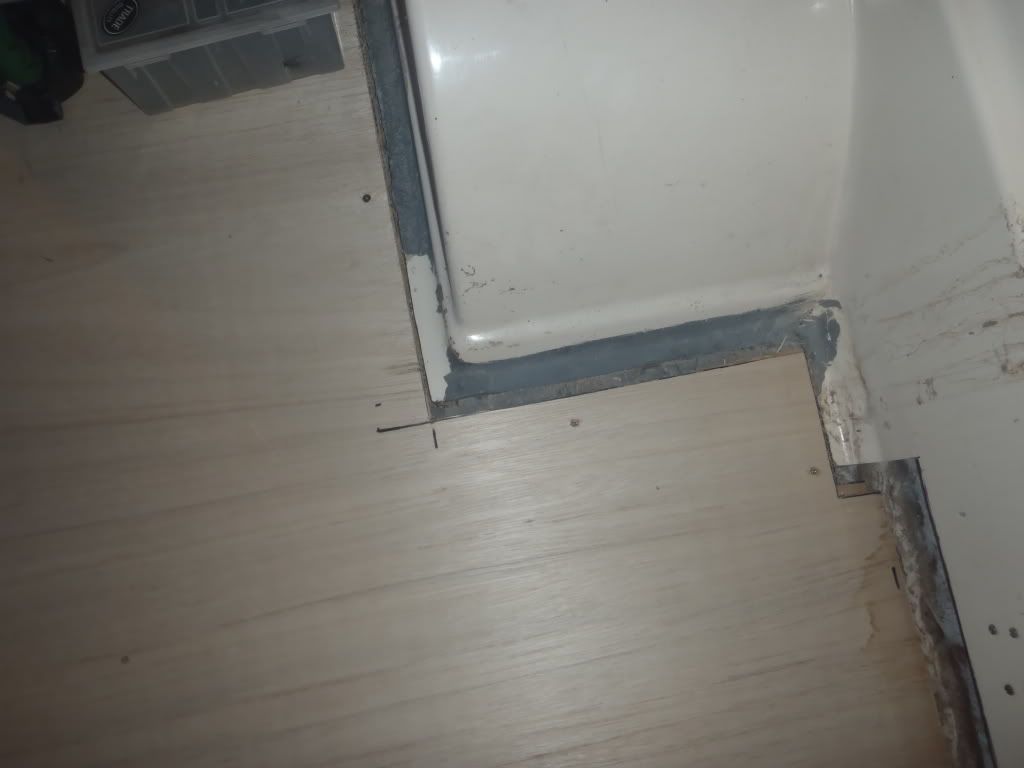
Hey Stephen&Julie Before you start on your floor replacement it is worth having a look at honeycomb and fibreglass. The honeycomb is made of plastic and if it is fibreglassed both sides forms a non-rotting  flooring Comes in various thicknesses. It's used in boats and you know how much water those cop. www.fgi.com.au/?q=honeycombEven the stringers can be replaced with resin and fibreglass coated foam instead of ply. Just depends on how bad the under floor is. Worth considering. Oh and one of the other things that could be used from boating is underfloor water tanks. If you use honeycomb and fibreglassed foam for stringers and flooring, then it is possible to build in your watertanks. They would be fibreglass tanks made to the sizes of the gaps between stringers and with baffles in them. Could put one in front and behind the axle cavity/gap in the underfloor. Have wanted to do that some time in the future with another Olympic. The one I rebuild didn't need the floor redoing so never did it. Cheers Atog |
|
|
|
Post by stephen&Julie on Oct 15, 2011 8:22:45 GMT 10
Thanks Atog, i will way up the ease of application and price compared to overlaying with wind brace ply
Cheers Stephen
|
|
|
|
Post by stephen&Julie on Oct 15, 2011 19:48:50 GMT 10
|
|
|
|
Post by 1954homemade on Oct 16, 2011 10:29:51 GMT 10
Hi all well hold me down another great day on the Stardust without the help of a truly top bloke Bob Taylor Hi Stephen, Looks like you are getting right into the Stardust and doing a fantastic job. Luv Di |
|
|
|
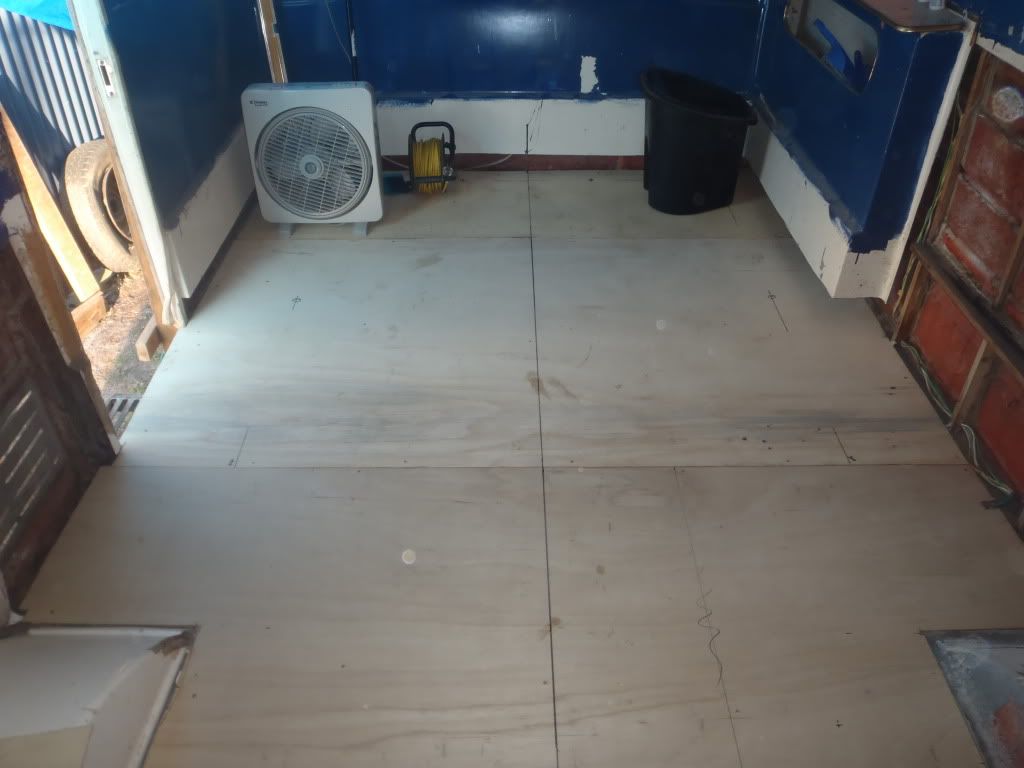
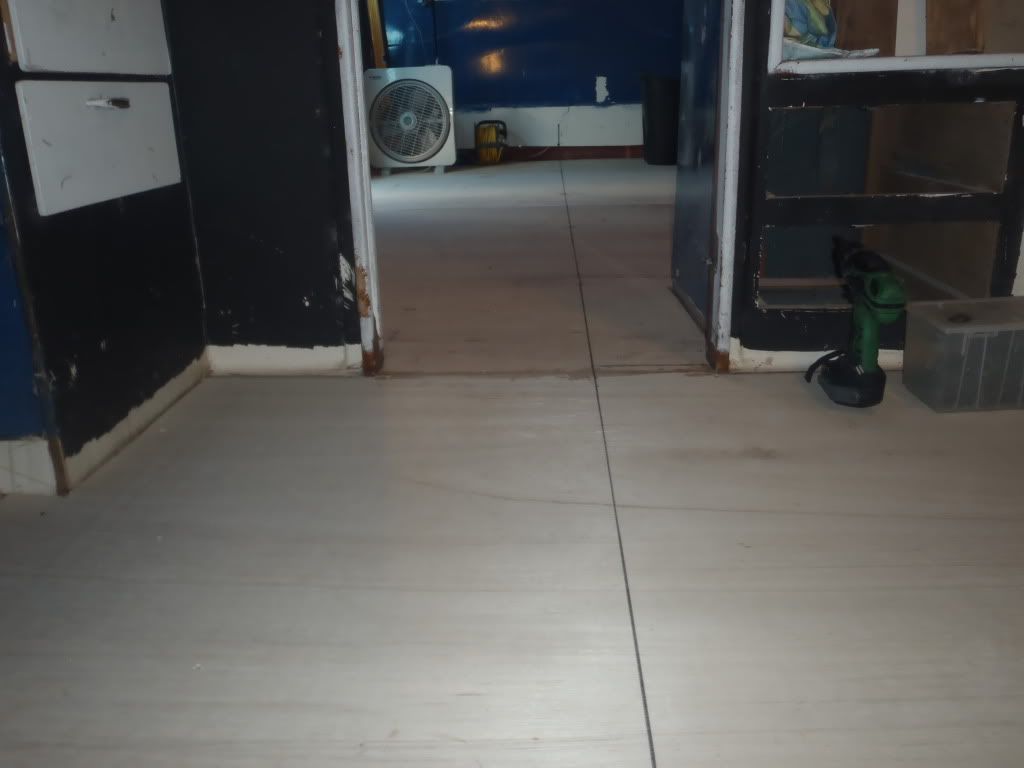
Post by stephen&Julie on Oct 16, 2011 18:30:38 GMT 10
|
|
|
|
Post by boblor on Oct 16, 2011 21:09:18 GMT 10
Hi All He had to hold me up to take the above photo,because he worked me so hard for an old bloke. Anyway we had an enjoyable and productive two days, and i found Stehen does not mine me dropping in to check the project out, -- but I must bring the tools. I wonder what will happen next week-end  . Cheers boblor |
|
dawso
Full Member

Posts: 141
|
Post by dawso on Oct 16, 2011 21:20:16 GMT 10
Hi All,
I have been watching your floor reno with great intrest, I take delivery of my Stardust on Wednesday and I know there is work to be done on the floor.Dawso
|
|
|
|
Post by olympicriviera on Jan 30, 2012 20:46:22 GMT 10
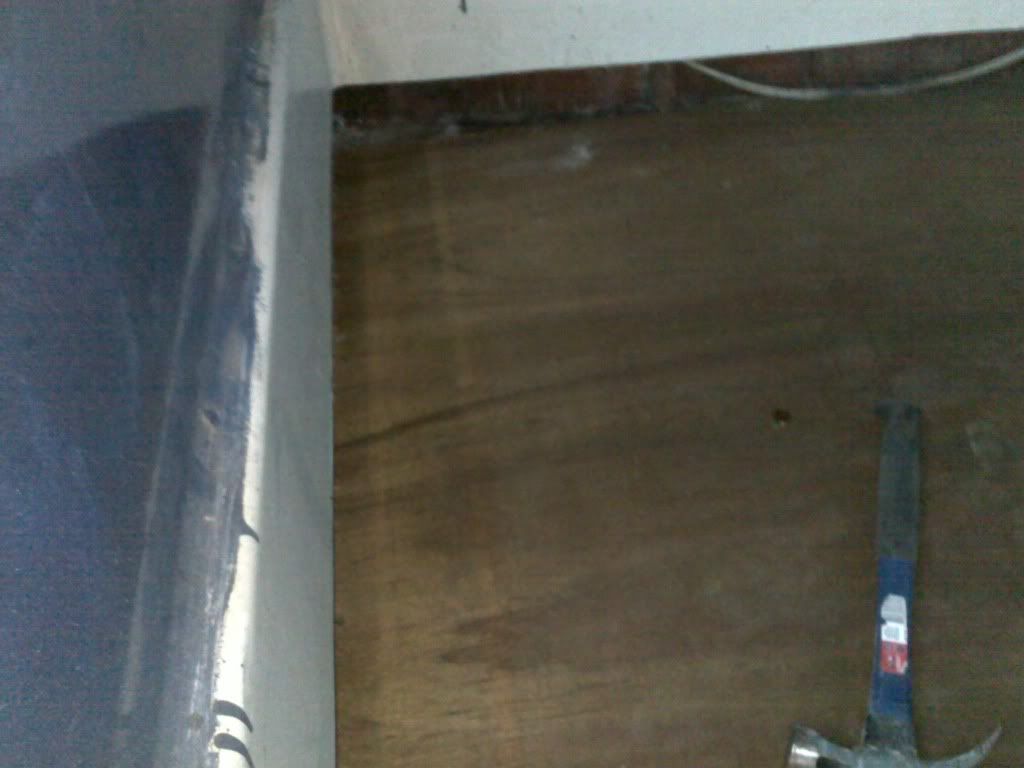
love the refit...........looking forward to the end result......... what thickness ply are you using on the floor? my floor although not rotten is soft and just want to brace it up a bit
|
|
|
|
Post by stephen&Julie on Jan 30, 2012 21:08:29 GMT 10
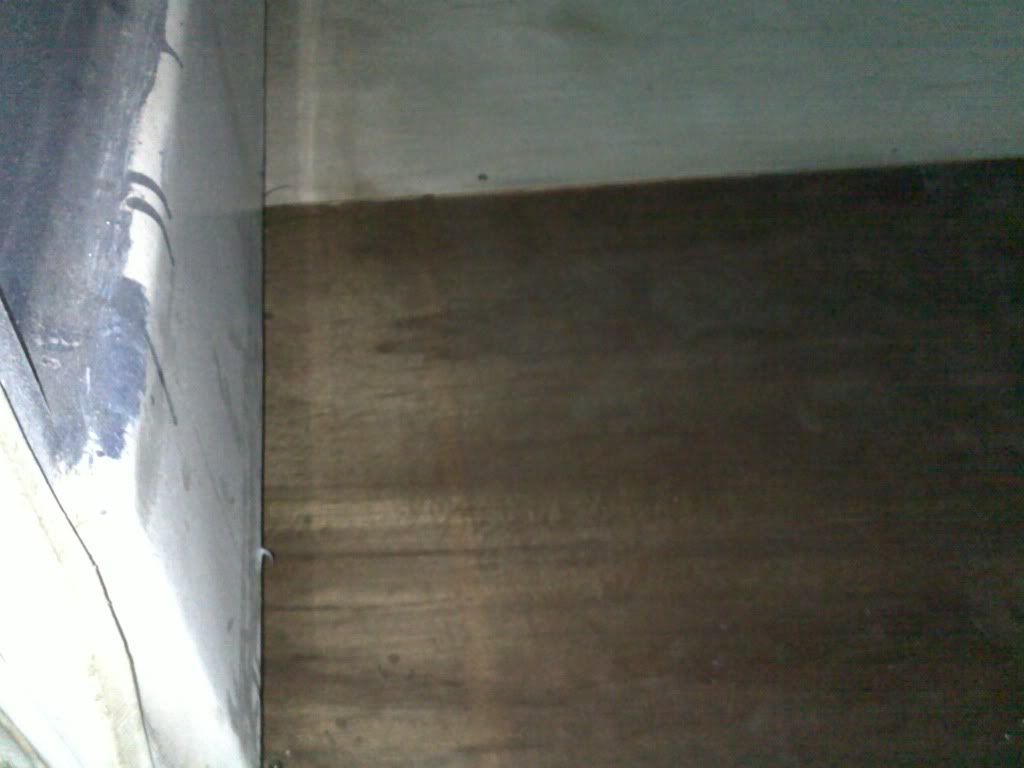
Hi, F27 brace ply about 4mm thick,added 2 layers for strength
Cheers Stephen&Julie
|
|


 their getting a bit thin on the ground those 21 footers so you were lucky to find one so close to home ;D ;D ;D


 ;D ;D ;D
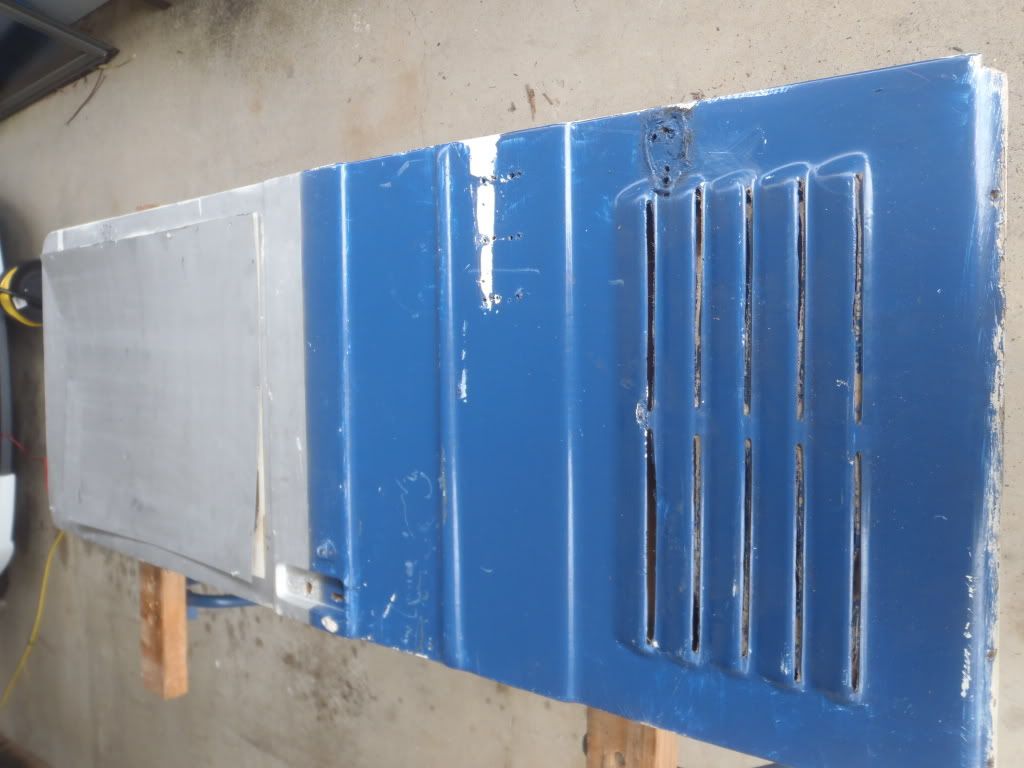


 flooring
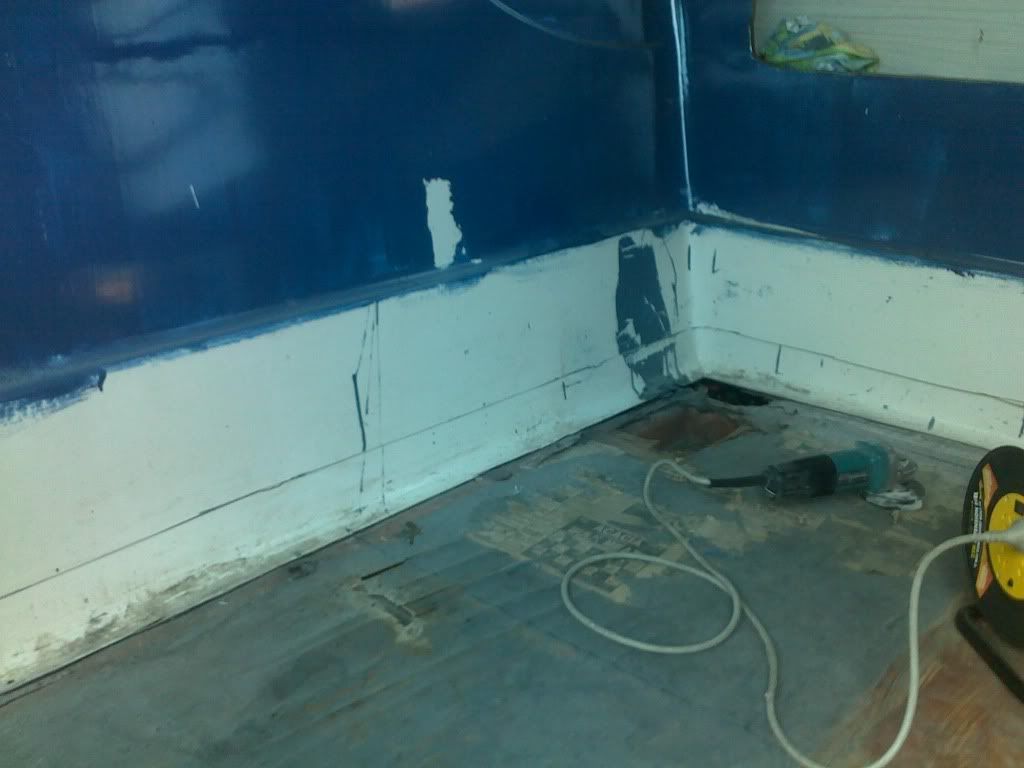


 .
.