|
|
Post by hilldweller on Nov 7, 2012 14:48:05 GMT 10
|
|
|
|
Post by Roehm3108 on Nov 7, 2012 15:12:26 GMT 10
Looking good HD - LUV the colours ;D ;D ;D Can't tell if you have done anything about the overhead doors dropping down fully and potentially eventually ripping the hinges out, but if you haven't already, perhaps it's worthwhile considering a light chain?? You're doing a great job and really love your snakey thing   Ray |
|
|
|
Post by hilldweller on Nov 23, 2012 17:03:02 GMT 10
|
|
|
|
Post by Roehm3108 on Nov 23, 2012 20:19:15 GMT 10
Hey HD, between your description of the tow hitch and now this latest thread, tell me you're pulling our proverbial chain ;D ;D ;D ;D ;D ;D I'll just say - lookin' good    |
|
|
|
Post by hilldweller on Dec 1, 2012 16:06:26 GMT 10
|
|
|
|
Post by DC3Td on Dec 1, 2012 16:42:13 GMT 10
Superb job HD.Lets hope you can fit the kitchen through the door! gordon
|
|
|
|
Post by Don Ricardo on Dec 1, 2012 23:22:23 GMT 10
I’m well out of my comfort zone with this ….    Hi Hilldweller, You're pulling our collective legs, right? First you tell us that you're out of your comfort zone, then you show us some work that I reckon a qualified carpenter or cabinet maker would be pretty pleased with!    Anyway, you're doing a great job on your van. I reckon it will be - already is - one of the best Caravelle's in the Land of the Long White Cloud. What you've achieved is fantastic and you should be justly proud of your work. Wish I had even a quarter of the skills you have! (But I'm pretty good at admiring others using their skills.    Don Ricardo |
|
|
|
Post by Miss Molly on Dec 2, 2012 9:02:22 GMT 10
WOW!!!  |
|
|
|
Post by hilldweller on Dec 6, 2012 17:50:55 GMT 10
You guys are very kind, and encouraging. Thank you  . It’s the angles that are supposed to be square but aren’t that are worrying me, and the drawers  . But if it all turns to custard the planned drawers can become cupboards! Cupboards will be easier I think. But, yes it fit through the door ;D And more or less fits the gap between the seats ;D. In earlier dubious workmanship neither seat end is quite vertical so there’s a bit of a gap at the top edges. Nothing I can do about that now, except perhaps camoflage. So anyway have done undercoat and one topcoat before moving it into the van. Couple more bits of framing still to do to cover the wheel arch. I will be very glad to see the back of that! 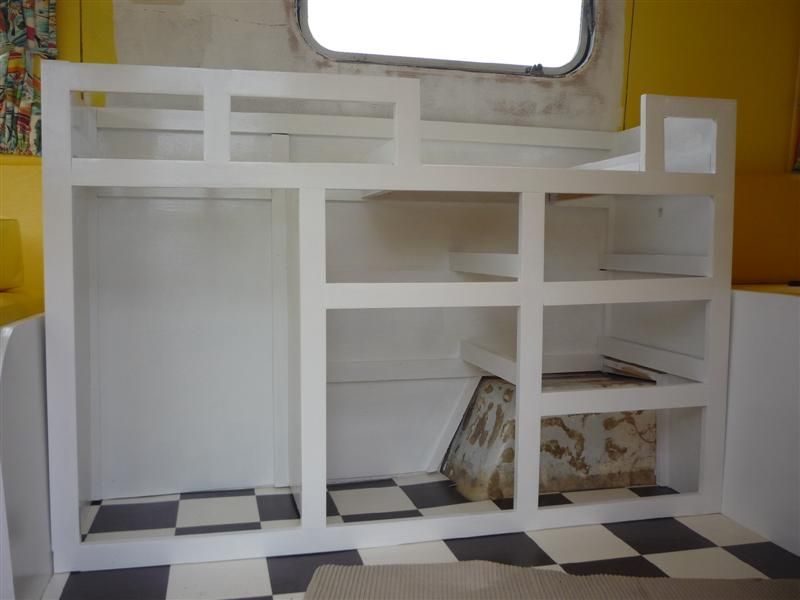 Sneak preview of the splashback wallpaper which went up this evening and needs edges etc sorted out  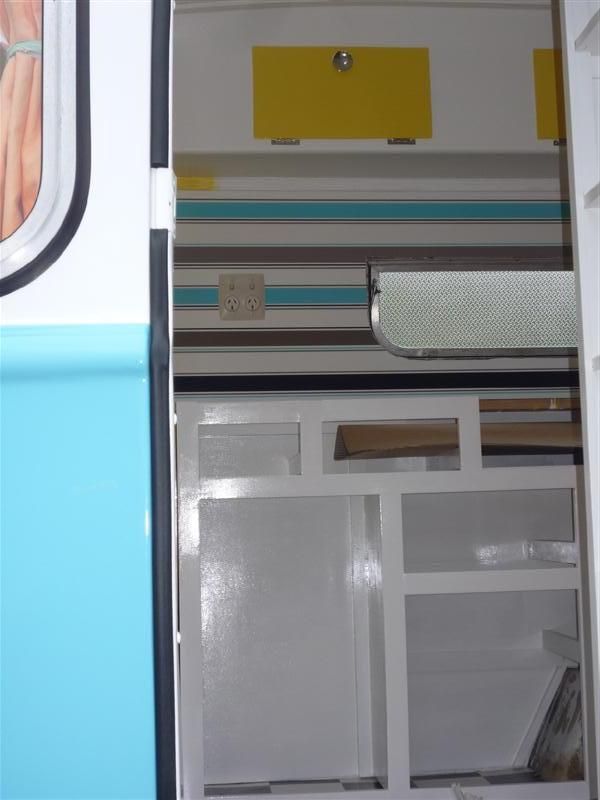 |
|
|
|
Post by DC3Td on Dec 6, 2012 19:38:14 GMT 10
Hi HD.Coming along very nicely.If it hasn`t been suggested before,when tackling something like cabinetry,once all the pieces are 'mock fitted' say on the floor or workshop bench you can check squareness by running out your tape on the diagonals.Once you`re happy that everything aligns clamp or screw together. As for the seat backs not meeting up to your cupboard perhaps a couple of sticks of quad timber or good old ali angles.Once painted we won`t tell anyone. gordon
|
|
|
|
Post by Surf Tragic on Dec 6, 2012 21:36:38 GMT 10
G'day hilldweller,
That kitchen construction looks very well done, the dowelling jig is the way to go ! I myself am about to do similar on the little Don 120. Try & persevere with making some drawers, I'm sure you can do it, & they are much more user friendly than all doors.
Cheers
ST
|
|
|
|
Post by humpyboy on Dec 6, 2012 21:44:14 GMT 10
I agree with ST HD give it a shot re the draws, what's the worst that can happen? make em a second time  you can then claim your first ones were just practice ;D |
|
|
|
Post by hilldweller on Dec 9, 2012 17:21:32 GMT 10
I can see myself in a year's time with ninety-seven ‘practice’ drawers….. But in the meantime, yay the top is on and I like how it looks  . Started with cardboard to see if I could use the original curved table edges without too much overhang or running out of formica, and that worked well. 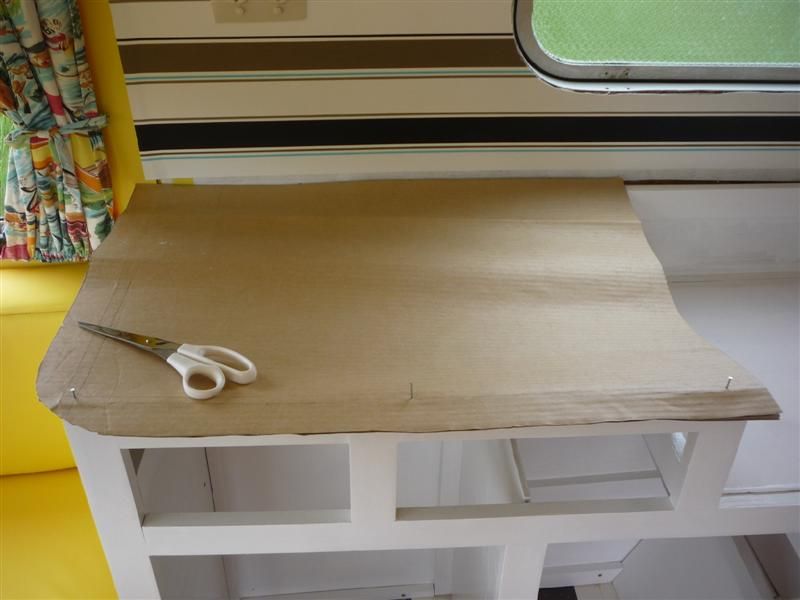 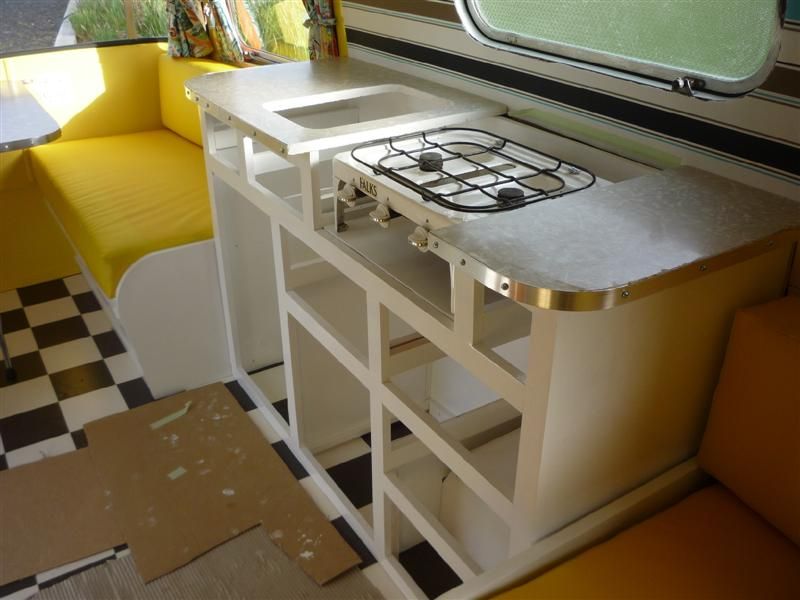 Had enough leftover aluminium strip from the table to do the edge to match ;D. 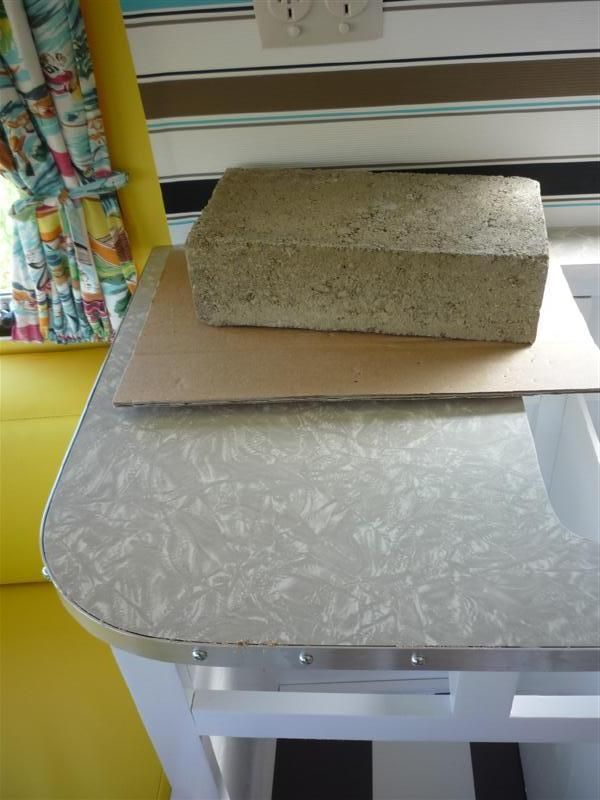 I’m not sure what to do with the stove area   . I’ve got some thin aluminium sheeting to line the area where the stove sits, but I’m not entirely sure how to proceed. There was never going to be enough formica for a lid so I’m thinking a hinged lid of ply covered with the aluminium. Not sure whether the aluminium should go right back to the wall or whether it would be better to have a small strip of formica behind the stove. I’ve got enough for that but it would mean there would be joins where it meets the main parts of the bench. Suggestions gratefully received! 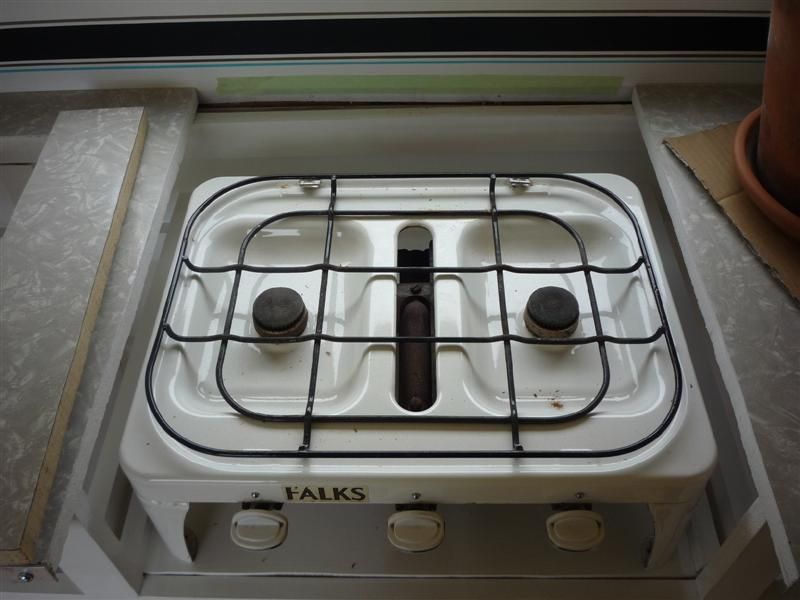 The framing inside the cabinet is all finished, unless I've forgotten something, and had another coat of paint before the top went on. |
|
|
|
Post by seeshell on Dec 9, 2012 17:45:09 GMT 10
Hi HD
You know what they say: "If you can't fix it, feature it!" I think that was Reddo's plan too for the J-mould and look how well it looked in the end.
I'd go with metal lining, so when the top was open it is all shielded.
Maybe where you are short of formica you could do something clever like make the hinged lid out of butcher's block with a metal backsplash?. Then it looks nice and is functional as well.
Looking super!
Seeshell
|
|
|
|
Post by hilldweller on Dec 10, 2012 17:08:49 GMT 10
Hmmm..... part cutting board, part fire protector... that's a very clever idea. I shall ponder that for a while.
|
|
|
|
Post by hilldweller on Dec 13, 2012 16:28:19 GMT 10
A bit more progess to report. Stove alcove now done except the lid, sink installed and a strip of plastic glass left over from the little cabinet added to the splashback to protect the wallpaper. I couldn't get a tidy edge on the aluminium with either hacksaw or jigsaw but ali angle is cheap and hides lots ;D 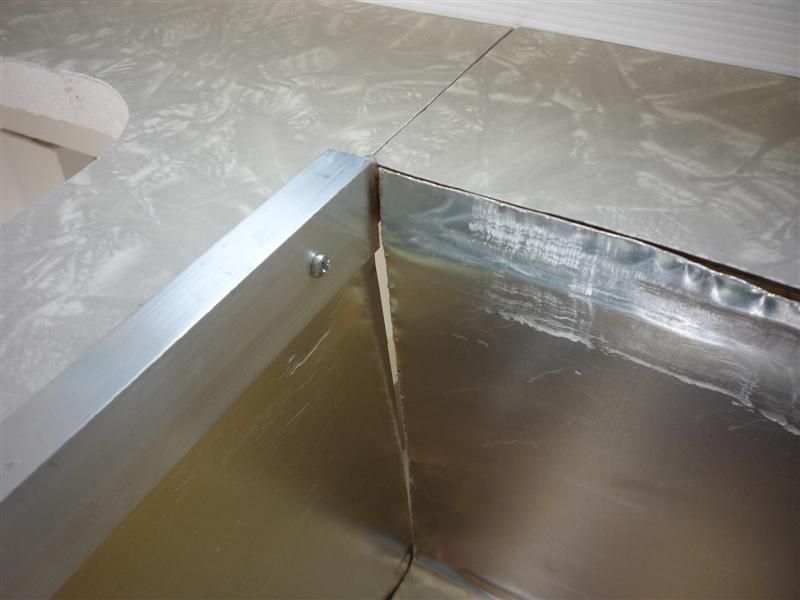 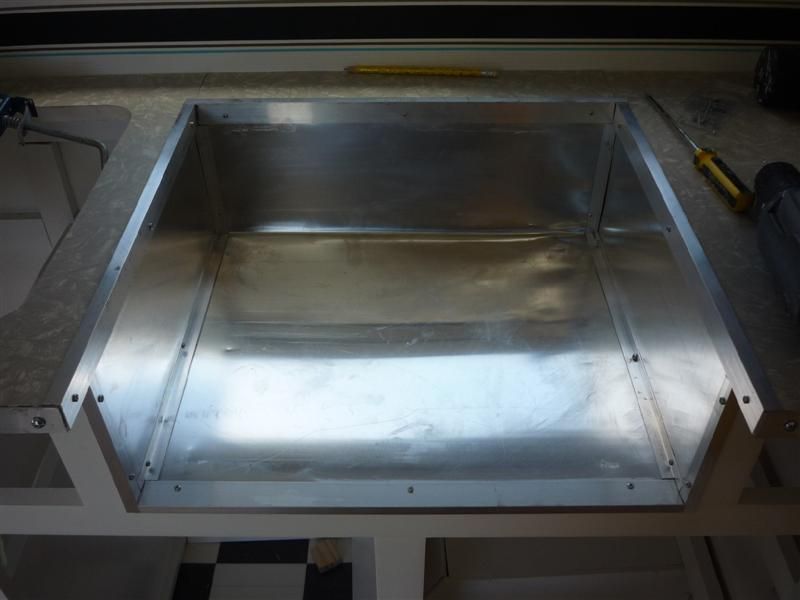 The benchtop has come up nicely with a good scrub and then a polish with shoe polish as recommended by someone on here whose name I can’t remember sorry. It's easy and it works really well ;D.  Have also cut the drawer/cupboard fronts as I really want to splash some more orange paint around  . There was just enough hardboard left after making the top cupboard and wardrobe doors. Haven't started making 'practice' drawers yet   I’m having glue issues with the plastic strips around the windows  . Thought I had avoided this by doing tests with various glues at the time, but that was a few months ago and warmer temps are causing problems. Never even thought of that. The kitchen one is the worst so I’ve cleaned off the sticky old glue and am experimenting with a test strip of a heat resistant alternative. Annoyingly, the test strip of the first product is still bonded firmly, but that’s in the garage, not the caravan. |
|
|
|
Post by Roehm3108 on Dec 13, 2012 16:44:16 GMT 10
Hi HD Watching in wonderment at your perseverance. You're doing a great job    Are you putting any sort of sealant between the benchtop edging and the formica? Just wonder if "gunK" would get in there?   As an alternative to seeshell's suggestion re the stove cover, what about a toughened glass lid with spring hinges, like on the newer vans? Then you can admire/display your stove as well as have extra preparation area ;D ;D ;D You're really cutting your teeth on this project for your next "real" one    Ray |
|
|
|
Post by hilldweller on Dec 18, 2012 17:20:15 GMT 10
|
|
|
|
Post by hilldweller on Dec 19, 2012 18:28:58 GMT 10
Today's lessons: 1. Think about the location of pipes for water and gas BEFORE putting the top on the kitchen cabinet so you can cut any necessary holes/slots while you still have reasonable access  2. If a hose is attached to the stove at one end and a regulator at the other it will not pass through carefully drilled holes in the cabinet  Got the first topcoat on the cupboards and drawers though  |
|
|
|
Post by hilldweller on Dec 22, 2012 19:10:34 GMT 10
Spent pretty much all day on the van and my head is spinning (oil based paint may have something to do with that) and still nothing seems to be finished. Much of the time was spent fixing problems. The best bit was reassembling the tap and getting a better flow of water than last time (used vaseline on all the leather bits as suggested on here thanks) but it's not yet in place because I need a washer and hose which means a trip to the shops. The worst bit was the drawers. At one point they really were all going to be cupboards! And the beautiful glossy orange paint had collected a lot of dust and a moth with a deathwish so had to be sanded and re-coated  Moan over  Tomorrow hopefully some of these things will be finished. |
|
|
|
Post by Miss Molly on Dec 22, 2012 19:50:52 GMT 10
YOU of all people HD deserve a good moan! Keep up the good work!  MMx |
|
|
|
Post by hilldweller on Dec 23, 2012 19:19:55 GMT 10
Thanks Miss Molly. I shouldn’t complain at all really as I’ve been very lucky recently to have time to work on the caravan. Life is not always like that! Anyway made some progress today. Not as much as I’d hoped, of course, but that's only to be expected LOL. Still got moth issues with the paint but I’m going with what I’ve got for now as there’s no time for another sand and coat pre Christmas. Will sort it out later. So the cupboard doors went on ;D and have had the handles added since this pic but still need the catches fitted. 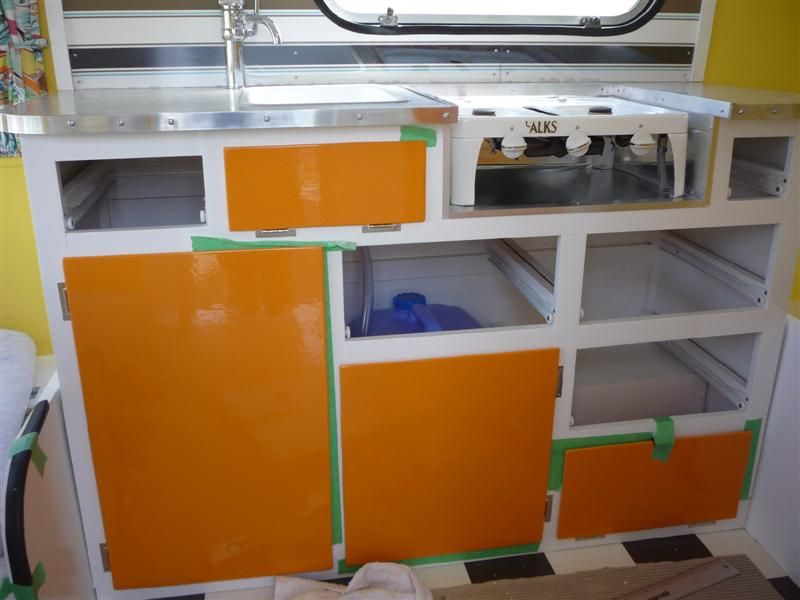 And then there were the drawers  I didn’t think about the amount of clearance needed at the top to get them in and out of the metal slides so they all had to be cut down, and four of the five are a millimeter or two wider than they should be so don’t slide as easily as they should. It would have been better to have erred on the too narrow side and added a packer if need be. However they do slide, given a bit of encouragement, and I’ve think I’ve worked out where the fronts need to sit. Took them all out after this pic and glued the fronts on this evening. Will do the handles in the morning once I see how they line up when the glue is dry. 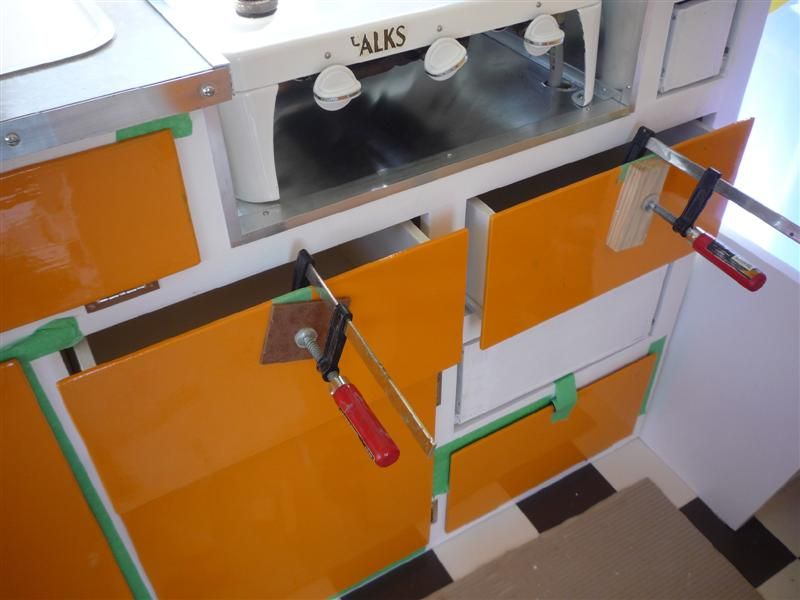 The tap is in and hopefully never has to come out as it took about an hour with two spanners and the pipe wrench to get the nut all the way up the thread underneath. 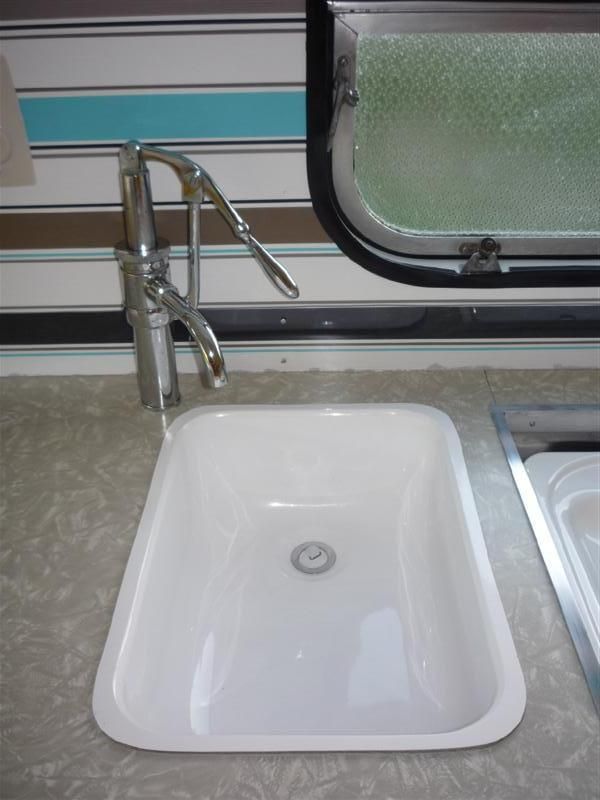 Have also added towel rails (two for $5 that just needed a bit of paint stripper) and a couple of cuphooks for teatowels as I’ve been unable to find a suitable teatowel rail  . |
|
|
|
Post by DC3Td on Dec 23, 2012 19:48:54 GMT 10
Great build story of yours so far HD. Who needs lights with such bright paint! You can run candle wax/dry soap along the base of drawers to ease movement too. gordon
|
|
|
|
Post by hilldweller on Dec 24, 2012 19:35:09 GMT 10
Hey look what I got for Christmas! Someone’s put a kitchen in my van ;D ;D ;D 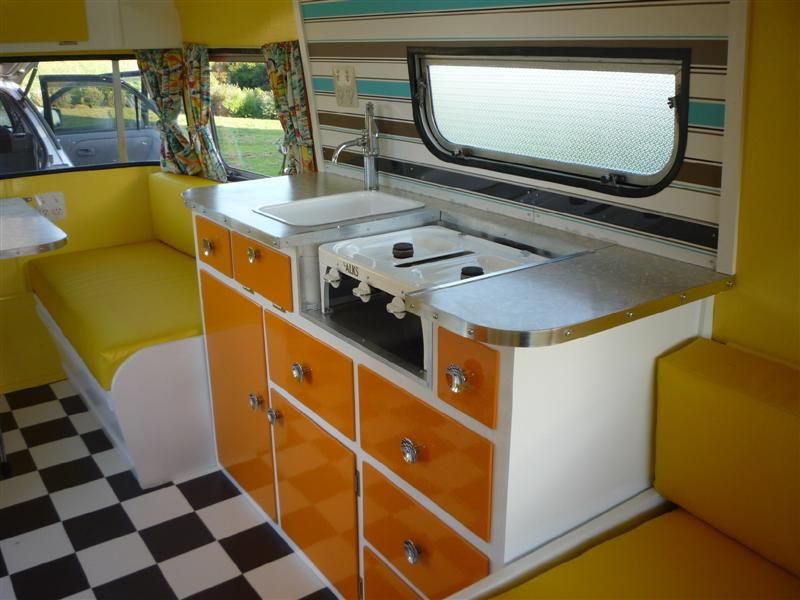 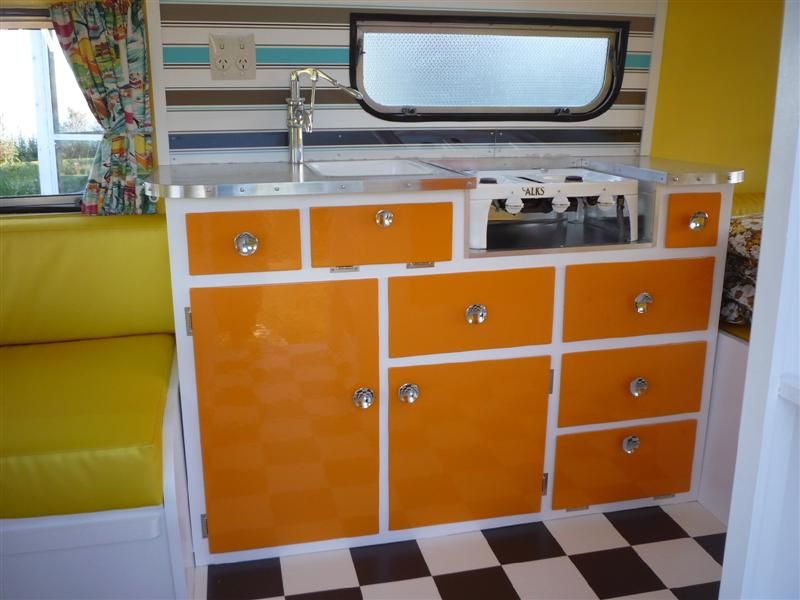 It is such a novelty to look in the doorway and not see a big ugly vacant space staring back. 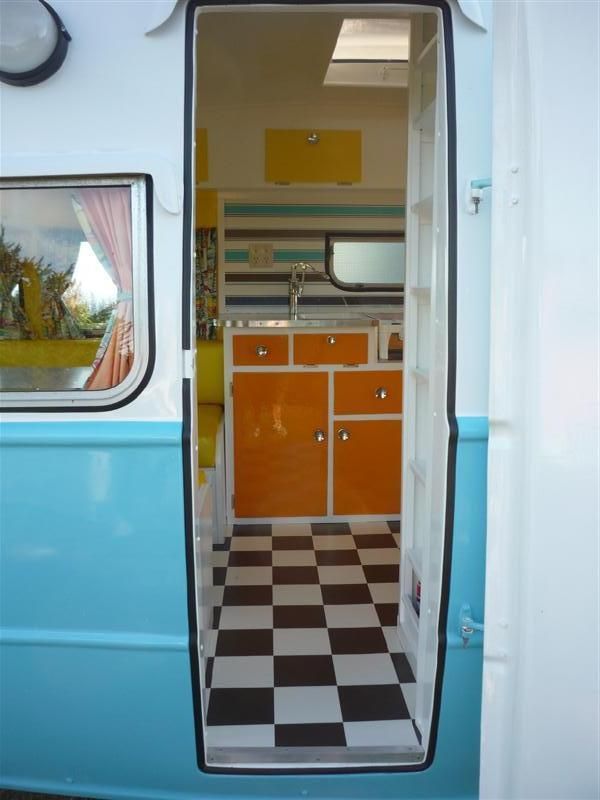 And I fixed the drawers so they slide easily – just needed a tiny sliver off a bottom edge but a bit of wax might help with some fine-tuning thanks Gordon. There’s still quite a list of things to do, to the kitchen and elsewhere, but they’re all relatively small jobs and can wait for a while as I think I need to do some road-testing ;D. Thanks heaps to those who have offered advice, moral support and encouragement over the past year (or is that two  ). Wouldn’t have got this far without you  . Merry Christmas and all the best for a wonderful year and some more great vintage van finds in 2013. |
|
|
|
Post by barkpaint on Dec 24, 2012 21:09:48 GMT 10
Oh Hilldweller, your van is just beautiful. Wish I could just sit in it and admire. I would be too scared to cook in it, it would get dirty or worse still, damaged. And you have conquered drawers.... magnifico.
I even question putting a cover on the beautiful griller. What a shame you are over there, I work in an opp shop and see lots of suitable accessories. So we do not have to ask if you have been naughty or nice, he must come, you have earnt it. cheers, Heather
|
|