|
|
Post by Don Ricardo on Aug 18, 2010 22:48:49 GMT 10
MIAMI CARAVANSManufactured by Frank McDonnell 93 Mullers Road, Hampstead Gardens, South Australia Prior to establishing Miami Caravans, Frank McDonnell worked as manager of King Caravans and built Midlander Caravans for Midland Motors. (Source: T Gill, Still Swinging the Billy, 2012, pages 82-83)
Miami Princess spotted by Winterwood in Moonta, SA, and posted on 17 March 2008: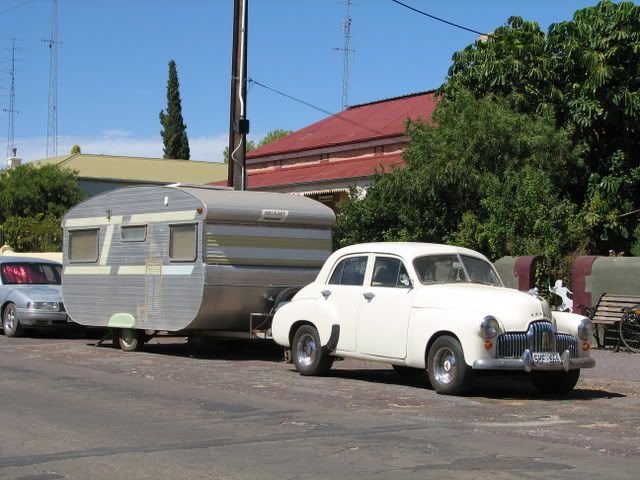
Miami Princess purchased in Queensland by Peteandtrish in September 2009. Photos posted by Dosse on 6 September 2009: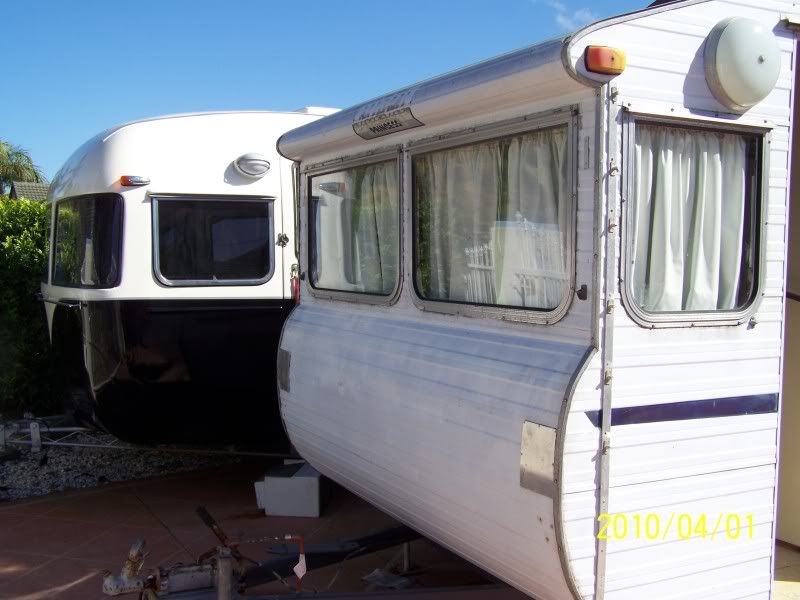 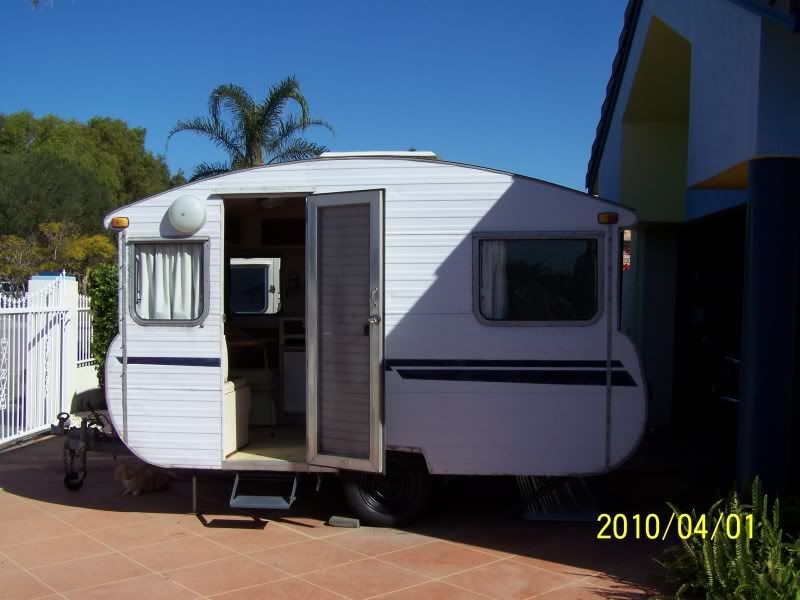 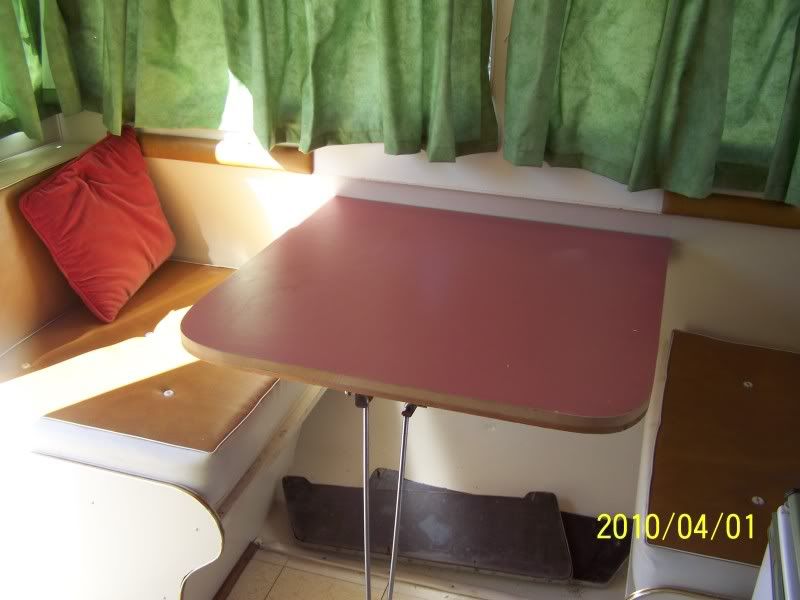 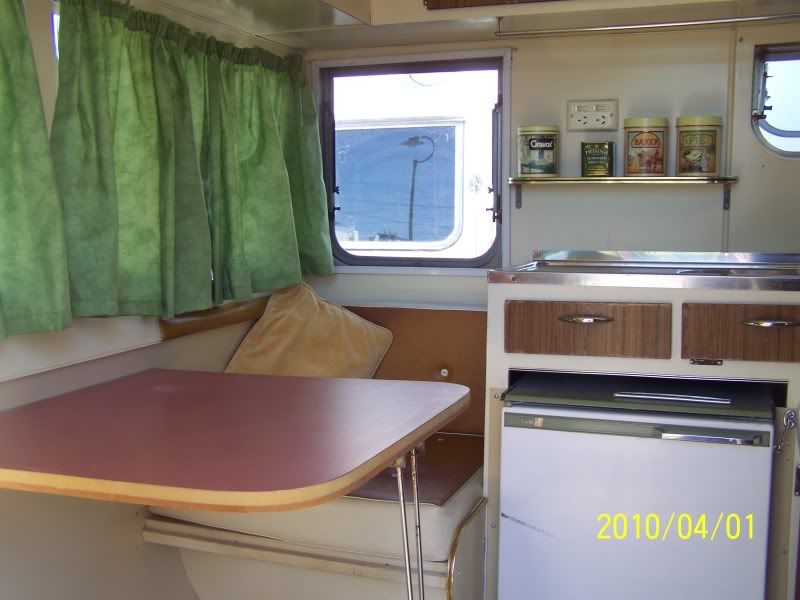 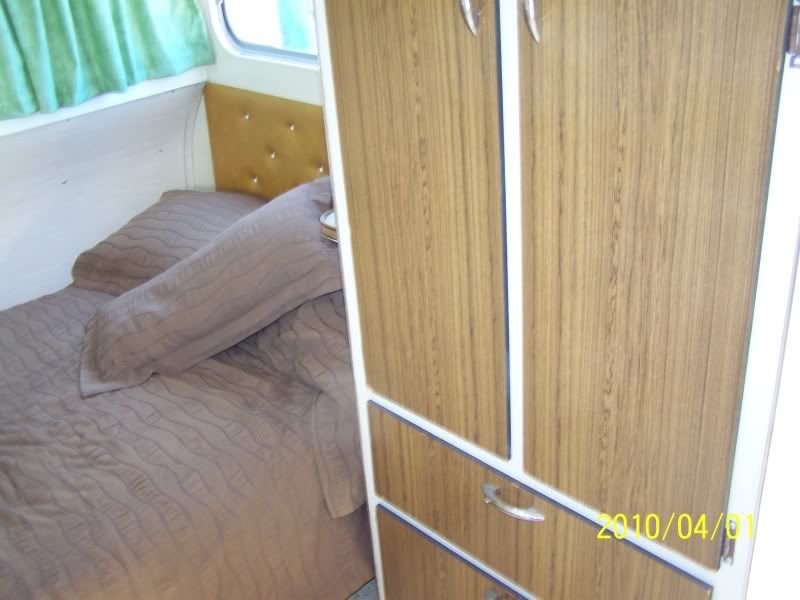 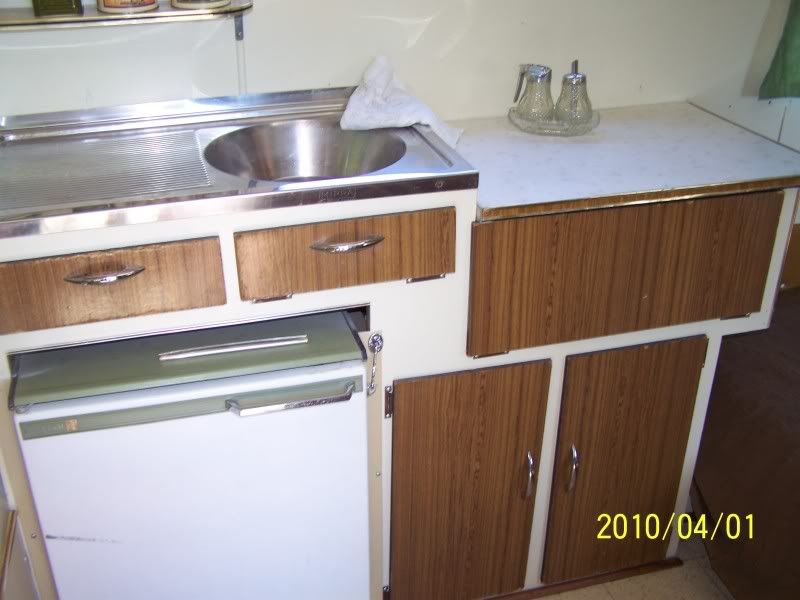 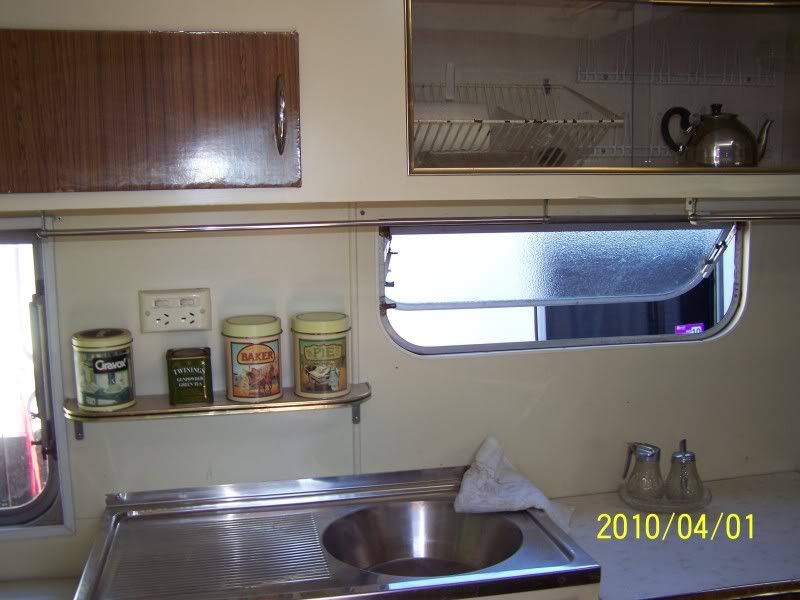 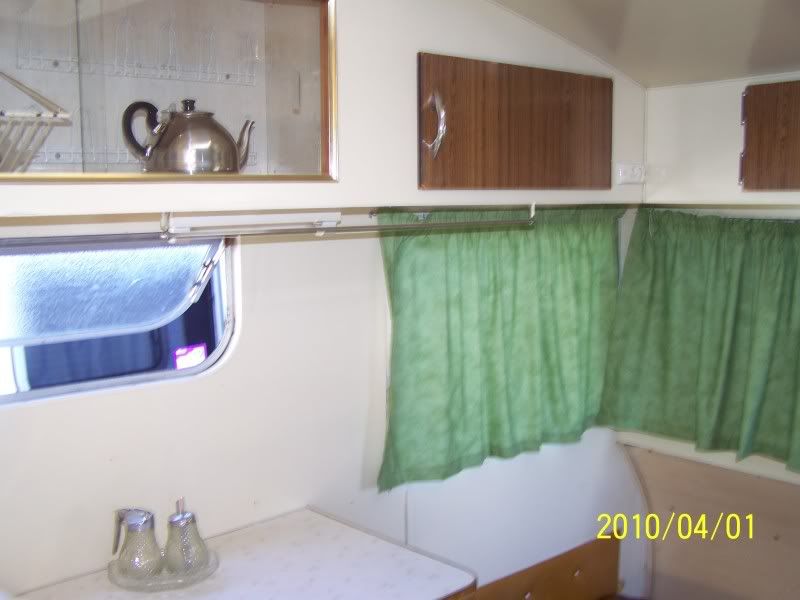
On 6 September 2009 Peteandtrish posted:...The van is 11ft 6in long and 7ft wide. She is a Miami Princess, I have no idea as to the make. I think she would be about a 1964-1968 I am only guessing. Was sold out of Ipswich CaravanCentre at some point in her life. If anyone can update us we would appreciate it...
Later the same day Franklin1 posted:...If the white exterior cladding is original, it would suggest the van was built some time from 1967 onwards. The major manufacturers were variously changing from plain aluminium cladding to the white painted stuff, starting from mid-1967 through to mid-1969...
On 7 September 2009, Hughdeani commented:Hi all, nice little van you found there,I recall Miami came from SA,have seen a photo on here a few years ago and I have seen a couple myself on my travels around SA,very similar to Telstar that were made in Ballarat or thereabouts... Cheers hughdeani
|
|
|
|
Post by Don Ricardo on Feb 18, 2011 21:38:32 GMT 10
1966 Miami Contessa offered for sale on the forum by Mandy in February 2011: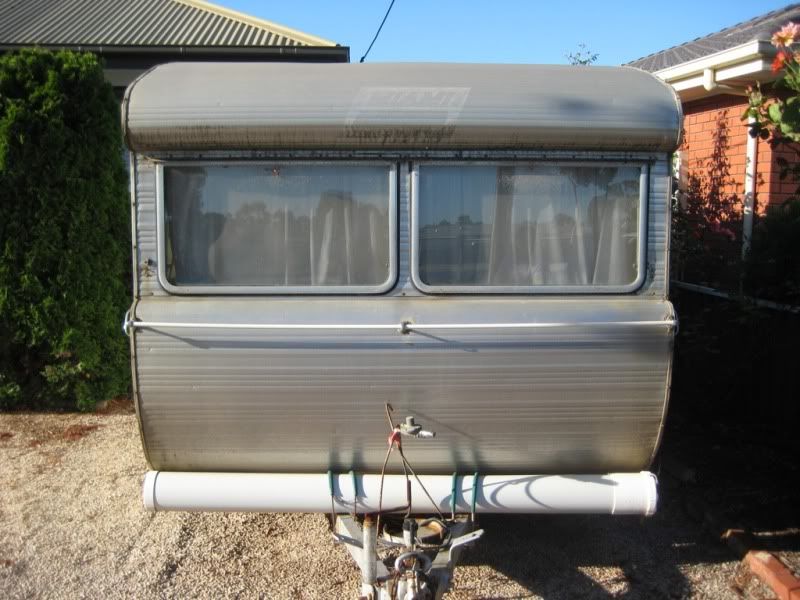 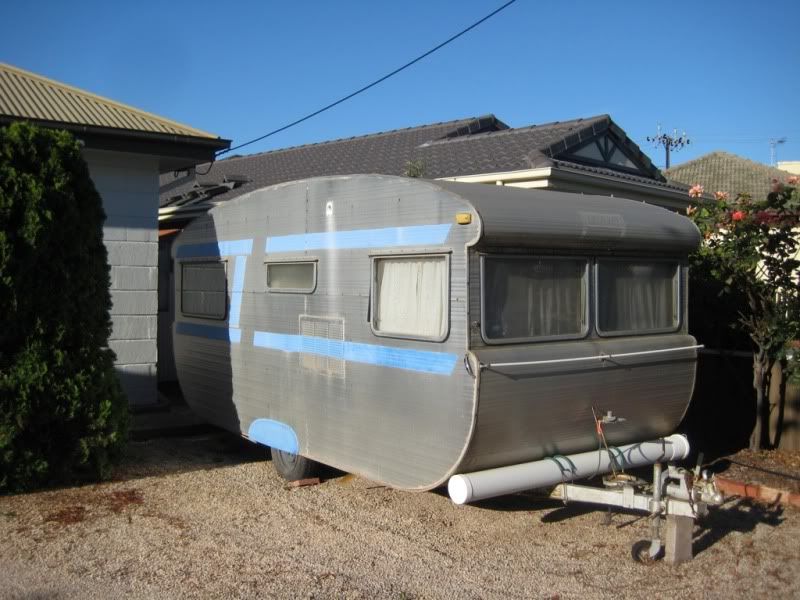 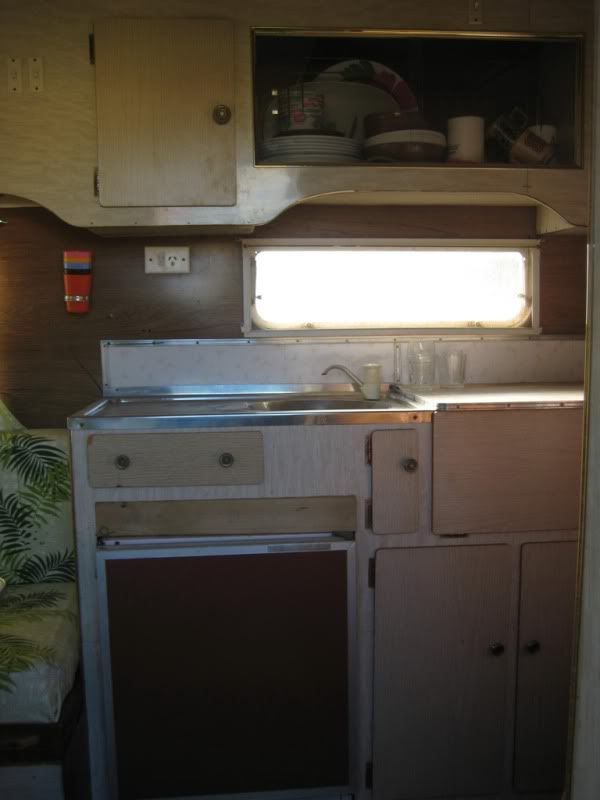 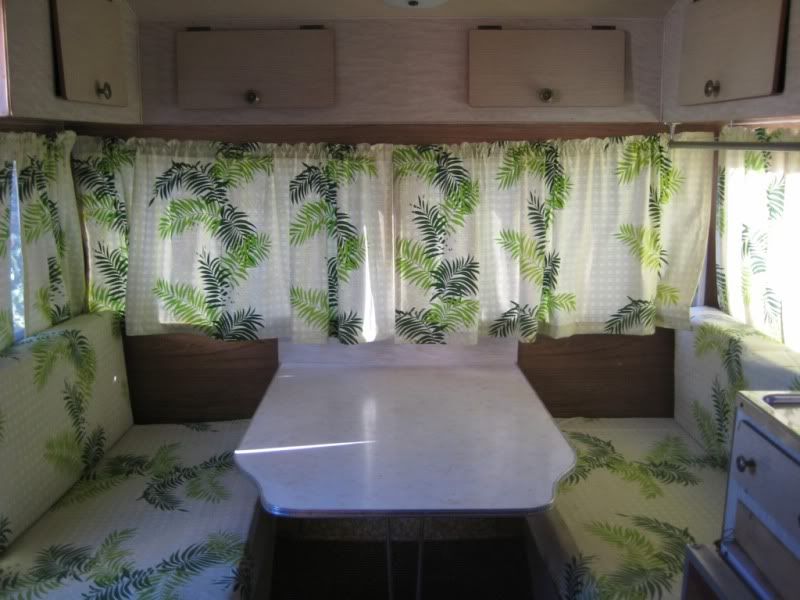 This caravan appears to be almost identical to the Miami Princess sighted by Winterwood in 2008 (see first post in this thread). Maybe one is longer than the other, but if so the difference isn't obvious (at least to my eye). Don Ricardo
|
|
|
|
Post by Trev Clark on Mar 26, 2011 20:24:49 GMT 10
Miami Caravans were built in Hampstead Gardens (at several locations) in the north eastern suburbs of Adelaide. Production was essentially hand built, with around 7 or 8 staff during the peak between 1968 and 1971 or '72. The factory was really just two large sheds in a side street. Vans not built to specific customer order were sold mainly through Harris Caravans at Clearview.
All production from 1968 was clad with white aluminium. Timber framing was standard, along with aluminium wind-out windows. Customers were able to select from a range of interior colours and designs, and indeed, because of the vast range of options, there were not too many identical versions built.
Sizes ranged from a couple of 12 footers up to a number of 24 footers and I recall one of around 30 foot being built. Most were in the size range of 15 or 16 feet or 18 - 20 feet long. The caravans tended to have the latest items, stoves, refrigerators, doors and hatches, for example, fitted as soon as new versions became available. As a result, the vans always looked to be at the leading edge of design and style. Early production featured wrap around corner windows at the front, but these were dropped when it became apparant that not only did the perspex fade and deteriate quite quickly, the windows were also a constant source of water leaks.
Miami caravans soon adopted a classic design which featured a roll above and below the rear windows. This design was highly popular and contributed to the sucess of the brand during the late 60's and early 760's
The company started to dwindle away from around 1972 and finally closed around 1976.
From memory, the owner of the company took all his jigs and equipment from the closed factory and built a small number of caravans from his home.
I was employed by Miami Caravans from 1968 until 1974. All the above memories are 35 odd years old, but I believe they are accurate memories.
Trev
|
|
|
|
Post by Don Ricardo on Mar 26, 2011 20:38:17 GMT 10
G'day Trevjclark,
Welcome to the forum, and thanks for telling us a bit about what was involved in building Miami caravans, as well as the dates you mentioned.
The kind of information somebody like you, who was intimately involved in building vans, is invaluable for the rest of us. Do you have any idea when Miami started?
What was your particular job with the vans?
Don Ricardo
|
|
|
|
Post by Trev Clark on Mar 28, 2011 7:10:36 GMT 10
Hi guys,
I am unsure of the start date of Miami Caravans - I joined straight from scool at age 17. It looked well established when I started, so at a guess, a few years earlier than 1968.
My very first job was to unload and stack (1 piece of timber at a time - no forklifts in that operation) a full truckload of timber used in making the frames. I eventually ended up doing just about all parts of the manufacturing process.
If the manufacturing process is of any interest to the group, I am sure I could probably put an essay together.
By the way, the 2 silver clad caravans shown here are the definitive Miami Caravans, - style, paint stripe, wheel spats are exactly representative of Miami caravans. The only major change from these two models is white aluminium. This change happened during 1967.
The white version looks quite unfamiliar to me. I do not recall this style although I am far from expert and my memory is getting on a bit these days
Trev
|
|
Deleted
Deleted Member
Posts: 0
|
Post by Deleted on Mar 28, 2011 7:35:47 GMT 10
Hi Trev,
thanks for sharing info with us,fantastic to hear how it was done in days gone by!
I agree with you about the white ali van,I think it could be an Escort or a Telstar.
Cheers
hughdeani
|
|
|
|
Post by Trev Clark on Apr 10, 2011 12:21:46 GMT 10
BUILDING A MIAMI CARAVAN
Miami caravans were timber framed, with silver or white aluminium skin. I believe a few very early examples were built with bondwood outer, but I cannot confirm this. The switch from silver to white aluminium occurred sometime late in 1967.
The factory was little more than two large galvanised sheds in Elm St Hampstead gardens in SA, and later, a much larger factory on North East Rd Hampstead gardens. During my time, there were usually 3-4 caravans in various stages of construction, at any one time. The owner of the company was quick to utilise the latest innovations, such as aluminium wind-out windows, 4 way roof hatches, and even stoves with ovens.
Stage 1 of building process began with the caravan sides.
Jigs were placed on the floor and 2 replicas of the jig were made, one for each side of the van. Frames were constructed with 25mm x 25mm Meranti (or sometimes Phillipine Mahogany) and featured two full length horizontal beams and a number of vertical beams. A lap joint, glued and nailed, was utilised at the junction of each vertical and horizontal beam. Bottom rail was 50mm x 25mm, top rail was nailed to the verticals, once these had been trimmed to give a distinctive curve to the roof line. The front and rear curve below the window line was also formed in the same manner. Each frame was carefully squared, and then pre-finished plywood was glued, (and stapled, using compressed air operated staple guns) in place, to produce the inner wall. Window, and door openings were routered from the frames.
This part of the job was done by one man, and took around 4-5 hours.
While the frames were being made, a second man was constructing the interior cupboards, beds, wardrobes and overhead lockers – also from jigs, for the cupboard fronts – using pinus timber, and glueing pre-finished ply to the visible parts of the cupboards and plain 3 ply for the portions not visible. This job also took around 4 -5 hours. The two men, together, then screwed the completed cupboards etc to the side frames in their appropriate position. The two completed sides were put aside, and the chassis wheeled in.
The steel chassis was built by a nearby trailer manufacturer, and was a bare frame with axle(s), wheels and tyres, stabilising corner jacks and over-ride coupling. Water tanks, mud guards, and wiring for the rear and side lights had to be added to the under side. Tanks and mud guards were originally galvanised iron, but were switched to plastic items sometime around 1970 Marine grade 5 ply was used for the floor, and a heavy coat of protective paint was applied to the under side. The interior floor was originally a vinyl tile, but soon became a single piece vinyl sheet, once this product became readily available, The finished floor was covered with cardboard to give a measure of protection during the rest of the building process.
With the chassis / floor complete, the two sides, complete with the cupboards, were lifted onto the chassis and carefully positioned. On one occasion we got to this point when we realised we had fitted the cupboards to the wrong side frames, with the result the interior layout was facing the wrong direction. Needless to say we made sure we didn’t do this again, and it was a funny mistake, but only funny in retrospect. Once the sides were in place, the front and rear frames were manufactured and bolted into position. The entire frame was now very carefully squared and the bolted to the chassis. The roof was a single frame, also covered with pre finished plywood. This was lifted into place, (by hand - no cranes or other labour saving devices in those days, and some times 7-8 metres long) and then screwed to the sides and ends. Final job at this stage was the fit the curved inner plywood walls at the front and rear, below the windows. This was a mongrel job, as the ply never wanted to bend, and occasionally split along its length, rendering it useless. It took a fair amount of effort to get a nice, even curve across the width of the van. Several vans got passed with an uneven shape to a front or rear lower wall. Final job was the addition of shaped timber blocks at each corner, front and rear, of the side walls, above and below the windows, so that the distinctive bulges would be formed when the aluminium cladding was added. Apart from creating the shape, these tight curves gave an added extra strength to the thin aluminium sheeting.
The caravan was now a shell comprising sides, front and rear, and roof, sitting on its chassis, and with most of the interior furniture in place Most noticeably absent were beds, if they were to be the sprung base type. It took 2 men, two days to get to this point.
Stage 2 began with the electrical wiring being run through the framework. Unlike a house, just one circuit was run for both light and power. For safety reasons, all switches and power points had to be ”double pole” – both active and neutral circuits were broken by the flip of the switch. The earth wire ran to all metal components, such as light bases, and was grounded to the chassis.
Copper pipe for the gas stove and refrigerator had to be installed and hoses for the tank, and sink drain were added. Fibreglass batts were added, if the specs called for insulation. This was an unpopular job – no protective gear in those days so you just had to put up with the itchies until you got home and had a shower.
Aluminium cladding needed all staff to help, and was probably the least popular task of all. It was a hot and demanding task. Aluminium expands a lot when heated. If fitted to the sides, even on a hot day, it would at some stage later expand further and buckle along the length of the van. To overcome this problem, the sheeting was heated prior to installation. We used LPG feeding into a tube around 1 metre long with about 10-12 nozzles along its length. These nozzles were ignited and produced a “soft” or ”lazy” flame, about 50 cm long from each nozzle.
Two men applied the heat to the back of the alum along its entire length and width, until very hot to the touch, and now expanded to its maximum length. Two more men lifted the hot sheet into place against the sides and held it while two more screwed the aluminium tightly against the frame, before it had a chance to cool. This all ensured the aluminium was always fitted at its maximum expanded size, could not shrink as it cooled, if the screws were tight enough and (hopefully) never again get hot enough to need to expand further than it already had. As I said, a hot and demanding part of the construction. Once the sides were done, fitting the ends and roof sheeting was a relatively straightforward, simple job. It took most of a day to do the cladding, even on a relatively small van.
Once the cladding was on, the van was sent to the final stage of its journey – a short shove out into the street, and then back into the second of the two workshops.
One team went to work fitting the exterior door, windows, hatches, refrigeration vents, electrical input socket, water filler, etc. These were all fitted using a caulk to prevent water (and dust) getting into the vans frame. Caulk, in those days was just as messy as it is today, and had to be used to excess to ensure a complete seal. Excess had to cleaned of – we used a small wedge of timber for the initial clean – with mineral turps, and lots of rags. I often wished for a miracle cleaner for this task, but never got one. Next job was to add the corner flashing, which was also liberally coated with caulk to ensure the corners did not leak. Last exterior job was application of the side stripes and the stickers that identified the make and model of the van, and the manufacturers ID badge.
While this was happening, a second team was at work inside. Cupboard doors and drawers had to be fitted, sink, pump, stove (and sometimes an oven) all had to be installed. Electrical switches and power points had to be wired. Gas lines had to be flared and connected to the appropriate appliance. The table had to be made and fitted so that it could fold down and form another bed. Cupboard tops had to be cut to size and covered with laminex sheeting. Curtains, blinds, upholstery and mattresses were pre ordered from an outside source and had to be fitted.
Final task was to thoroughly clean the van inside and out and then deliver it to either to the customers home or to the selling dealers yard. Total time from start to finish took a full team around 4-5 days. Time frame to build did not vary all that much between a 12 footer and a 25 footer – maybe a half a day longer for the larger vans. One man, on his own, could build a van in around three weeks, but he would still need a team of men for cladding the sides.
During the sixties and seventies, there were very few labour saving tools. Bench saws and drills were, of course, electric, and we had various sized air staple guns, but every thing else was done by hand.
Timber had to be unloaded from the delivery trucks by hand, 1 or 2 lengths at a time. A large order could take 4 hours to unload and stack.
All short lengths of timber were cut by hand.
Plywood and aluminium sheeting was also unloaded by hand
Screws were all inserted with hand drivers – a pump action screwdriver was available (where a spiral mechanism rotated as pressure was applied to the handle) but these not often used when installing the aluminium sides, especially by an inexperienced user as it was too easy for the blade to slip from the slotted head of the screw. This always resulted in a hole being punched through the aluminium.
All screw holes had to be pre-drilled – none of these fancy type self – drilling screws that are around these days
Decorative stripes on the outside had to be masked and hand painted.
The timber floor was drilled and then riveted in place using a hand operated rivet gun.
Cleaning the excess caulk was an absolutely horrible messy job, with no easy short cuts or time saving tools.
Favourite task – Building the side frames from the various jigs
Least favourite task – Holding the hot aluminium sheet while it was being screwed in to place.
I hope this article has been as interesting for you as it has been enjoyable for me in writing it. Working at Miami Caravans was my first job after leaving school, and despite being at times a difficult and demanding job, it was also a period of time many of us recall with fondness. Stretching the memory back to recall the various building procedures has been an exercise that has also bought to mind many other interesting aspects of my life at that time.
Thanks for taking the time to read this far. If you have any questions feel free to ask.
TREV
|
|
|
|
Post by Jennison on Apr 10, 2011 13:57:06 GMT 10
A most informative read Trev, thanks for taking the trouble. Interesting about having to preheat the alum sheeting to stop warping too!
regards
jennison
|
|
|
|
Post by cruisindoug on Apr 10, 2011 19:06:18 GMT 10
Thanks Trev, very enjoyable read.    Sounds like you enjoyed your trip down memory lane too. Thanks for taking the time, cheers, Doug. |
|
jula
New Member

Posts: 10
|
Post by jula on Jan 27, 2012 15:14:38 GMT 10
Hello Trev
I was so interested to hear exactly how my van was built from someone who was actually there! You described it all so very well. I have a 16 ' x 8', 6-berth Miami Contessa 1969 van which was custom made for my father who was also in the building trade at the time. You may even remember it! There is not only the table which folds down to make a double bed, but a separate double bedroom for the parents at the back of the van separated by a timber louvre sliding door !!
It is in need of some exterior restoration work with aluminium corner flushing and window caulk- that stuff you hate so much. The large back window now leaks unfortunately at one side and is damaging that piece of ply you had so much trouble bending into place inside under the window..so much so, that someone else will have to battle with a new piece. That is the only damage inside.
I would like to replace the aluminium windows with wind-out mechanisms as at present there are two extending supports either side of each window...not the best. Is that possible or would I have to replace with the same?
Although there are no roof leaks at present, the 2, 4-way hatches and roof desperately need a coat or two of protective paint ?? What is on the roof exactly? Is it just paint that's needed ? There is also exterior repainting.
It is in NSW at present, but I come from Sth Australia and could tow it back there if necessary.
I am in a bind in fact. I would like to resore it, but where do I go? I am just a carpenter's daughter and couldn't undertake the work myself. Did you continue to make caravans? Does your son now undertake renovations? Wishful thinking on my behalf.
I have just signed up to the Forum and can see I will enjoy it.
You certainly did a wonderful job on the van.. it is still a gem inside and out considering its age and the fact that it has spent the last 20+ years outside.
Hoping to hear from you. Jula
|
|
|
|
Post by Trev Clark on Feb 12, 2012 22:07:31 GMT 10
Hi Jula, I have just logged in for the first time in some months.
I have read your post, and I am pleased your Miami van is still going strong.
Please give me a day or so to find the time for a full response to your enquiries.
I see the Fire fighter has sent you my Email address. please feel free to contact me through here if you want any extar info
regards
TREV
|
|
|
|
Post by Trev Clark on Feb 20, 2012 21:36:02 GMT 10
Hi Jula
Unfortunately, it is just wishful thinking about a son to carry on the trade. I have two grown daughters, both forging careers and families of their own.
Now, about your van – I’m pleased to hear it is still going strong. I have often wondered about their durability.
Caravans of the age of yours were a pretty basic and uncomplicated affair, so I would guess any reasonably competent caravan repair business in NSW could handle the repairs needed. There certainly is no real benefit in returning it to SA for repairs.
As a suggestion, a local caravan park owner or manager could probably put you in touch with a reliable repair business in your area.
It sounds like most of the work required is in relation to deterioration due to weather over the years. A very light “cut and polish” may be enough to restore the shine to the exterior aluminium, but, yeah, that panel under the window is definitely one for the experts.
Depending on sizes available, replacing the original windows with wind-out windows should be very straight forward. Windows were manufactured by Starlight Windows, somewhere in Queensland. The roof hatch sounds like a “four seasons hatch” and was also supplied by the Starlight Company. This may need to be replaced altogether if it is in poor condition.
The roof is the same aluminium as the sides and also may only need a light cut and polish.
Please bear in mind that has been over 30 years since I have had any contact with the caravan industry, but my guess is that not too much effort would be needed to restore your caravan to a reasonable condition. A full restoration is likely to be an expensive exercise, so that caravan park manager may be able to put you in touch with a good handyperson who could do the work, and possibly save you some money. Someone on this forum, and living in NSW may also be able to link you up with repairers.
Good luck with the repairs, and I would love to see some photos of your caravan – the more the better.
Regards
TREV
|
|
|
|
Post by peter54 on Mar 17, 2012 20:05:59 GMT 10
Hello Don and all,
I was surfing through the internet and came across this forum by chance, and to my surpise saw the photo's, questions and stories about MIAMI Caravans. It brought back wonderful memories of my childhood as the founder and owner of MIAMI Caravans is my father (Frank).
I remember Tony well and he was part of a great team who made MIAMI a quality and innovative caravan of it's time. Miami caravans were based and built at 93 Mullers Rd Hampstead Gardens SA. I remember as Tony describes the two factories side by side, caravans being moved from one area to another, sort of a mini production line. The factory was well located as Kessner trailers (chassis) and Halls towbars were located directly across the road.
MIAMI had three models, the Regal, mid range, the Princess and the deluxe was the Contessa. Tony mentions the size variations that were built and notes the 30ft Contessa. I cannot remember whether this was the one or if it was even bigger than 30ft, but when delivering the biggest van MIAMI had built to the customer, my father detoured via our home. I will never forgot this moment as the whole district came out to witness, view this huge beautiful caravan. It had every available modern convenience of it's time. To this day, I still have numerous original Miami decals.
This year my father will be 80 and still extremely active. Almost daily he is working 8 to 9 hours on improvements and extensions to the family home and over the past years has built homes for my sister and completed major extensions to another sister home. He might even be capable of building one more MIAMI.
In closing, my father has been informed of this forum and will be in contact shortly. Regards peter
|
|
jula
New Member

Posts: 10
|
Post by jula on Mar 19, 2012 18:52:04 GMT 10
I really appreciate everything in your replies Trev and Peter and I have well and truly caught the restoration bug now (thanks to this forum) Have found some "locals" in NSW/Victoria to help out. Going to the vintage nationals in Cowra too. Will make a big effort to get my photos uploaded for you both right now, but I am not gifted in that area either!! When it's renovated I will tow it back to SA and show you !!
Fabulous to hear from Peter too...about his dad Frank
|
|
jula
New Member

Posts: 10
|
Post by jula on Mar 19, 2012 20:34:46 GMT 10
|
|
|
|
Post by Trev Clark on Mar 20, 2012 17:53:42 GMT 10
Hey Peter, really great to hear Your dad Frank is still going strong. Please say hello to him for me. And jula, pleased to see you will restore your van. If you do get it back to Adelaide please, please, let me have a look at it
TREV
|
|
jula
New Member

Posts: 10
|
Post by jula on Apr 30, 2012 21:00:56 GMT 10
  Hello Peter Did you receive my pm re any Miami furnishings, edge strip etc you may have in the corner of a shed? I am particularly interested in having 2 new Miami stickers made for the new roof!! I know of someone who could do it but don't have a good model or photo of the contessa sticker to copy. Would we be breaching some law since the business is no longer registered? I hope not. Would love to hear from you or your dad in regards to this. Jula
|
|
jula
New Member

Posts: 10
|
Post by jula on Jan 12, 2013 18:02:37 GMT 10
|
|
|
|
Post by Don Ricardo on Dec 31, 2016 21:37:54 GMT 10
A smaller version of the Miami Contessa seen at the 2014 Vintage Caravan Nationals in Broken Hill: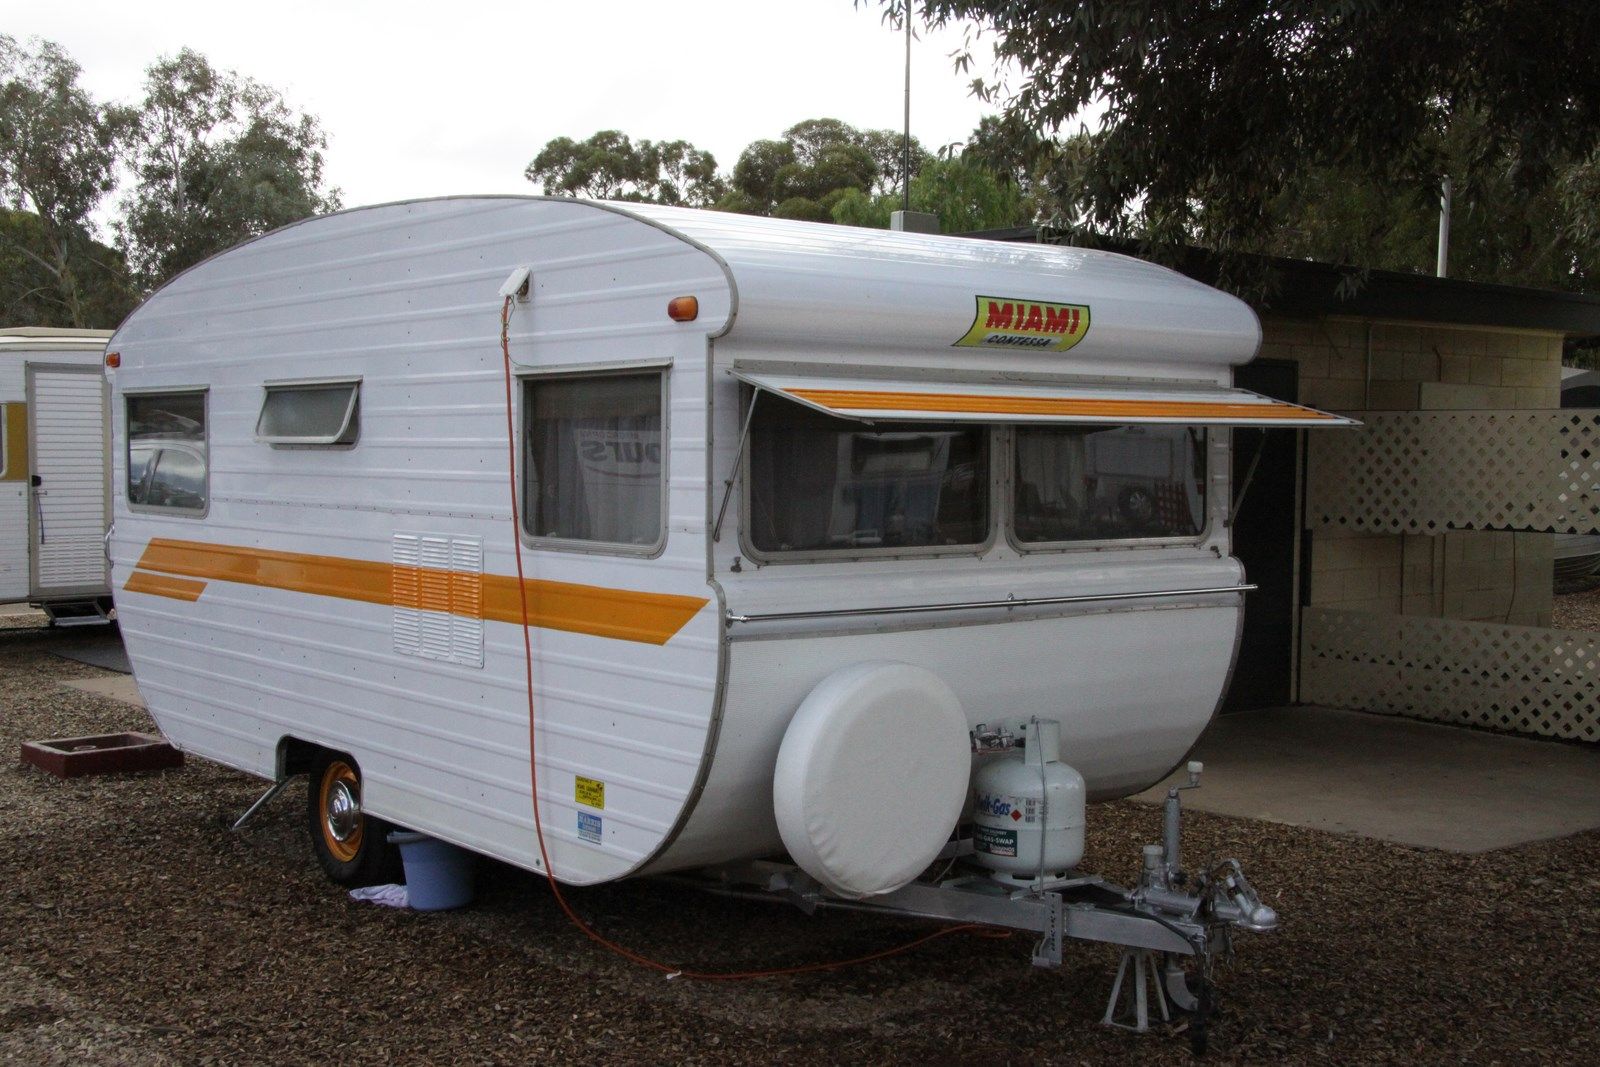
|
|
firey
New Member

Posts: 3 
|
Post by firey on May 17, 2017 12:50:56 GMT 10
Hi oh people with great wisdom. I've ventured into buying an old van. It was advertised as a Miami Cobtessa. 12' long. Well it travelled from Ballarat Vic to Hervey Bay QLD yesterday. No problems except for a wiring issue which we sorted. Towed very well at 100-120klm. Very stoked. Anyway I started cleaning it today and when I was hiding the stripes started coming off. So I got pressure washer out and started taking the painted stripe off to reveal a different colour underneath (green). Anyway. I wanted the van clean so I can polish it and redo new stripes. When I went over the Miami Contessa sign at rear of van it came off. Underneath the sticker was another sticker with Regal? I hopefully can add pics for further reference. Any info would be great. 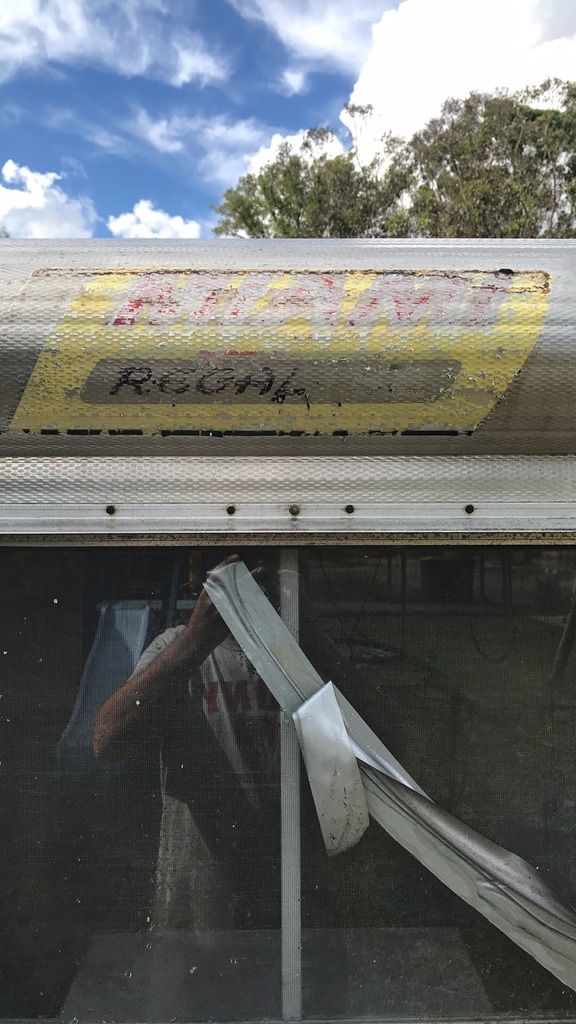 |
|
|
|
Post by Don Ricardo on May 17, 2017 15:59:46 GMT 10
Hi Firey,
That's a really interesting discovery. We'll look forward to hearing more about your van and seeing some more pics. Does it look like the Contessa's on this thread?
Don Ricardo
|
|
firey
New Member

Posts: 3 
|
Post by firey on May 18, 2017 19:12:23 GMT 10
My van has all the stripes with horizontal and one almost vertical stripe. My van below front and back windows goes straight down. I have more pictures. I will try to post.
|
|
firey
New Member

Posts: 3 
|
Post by firey on May 18, 2017 19:15:48 GMT 10
Here is another pic of van. 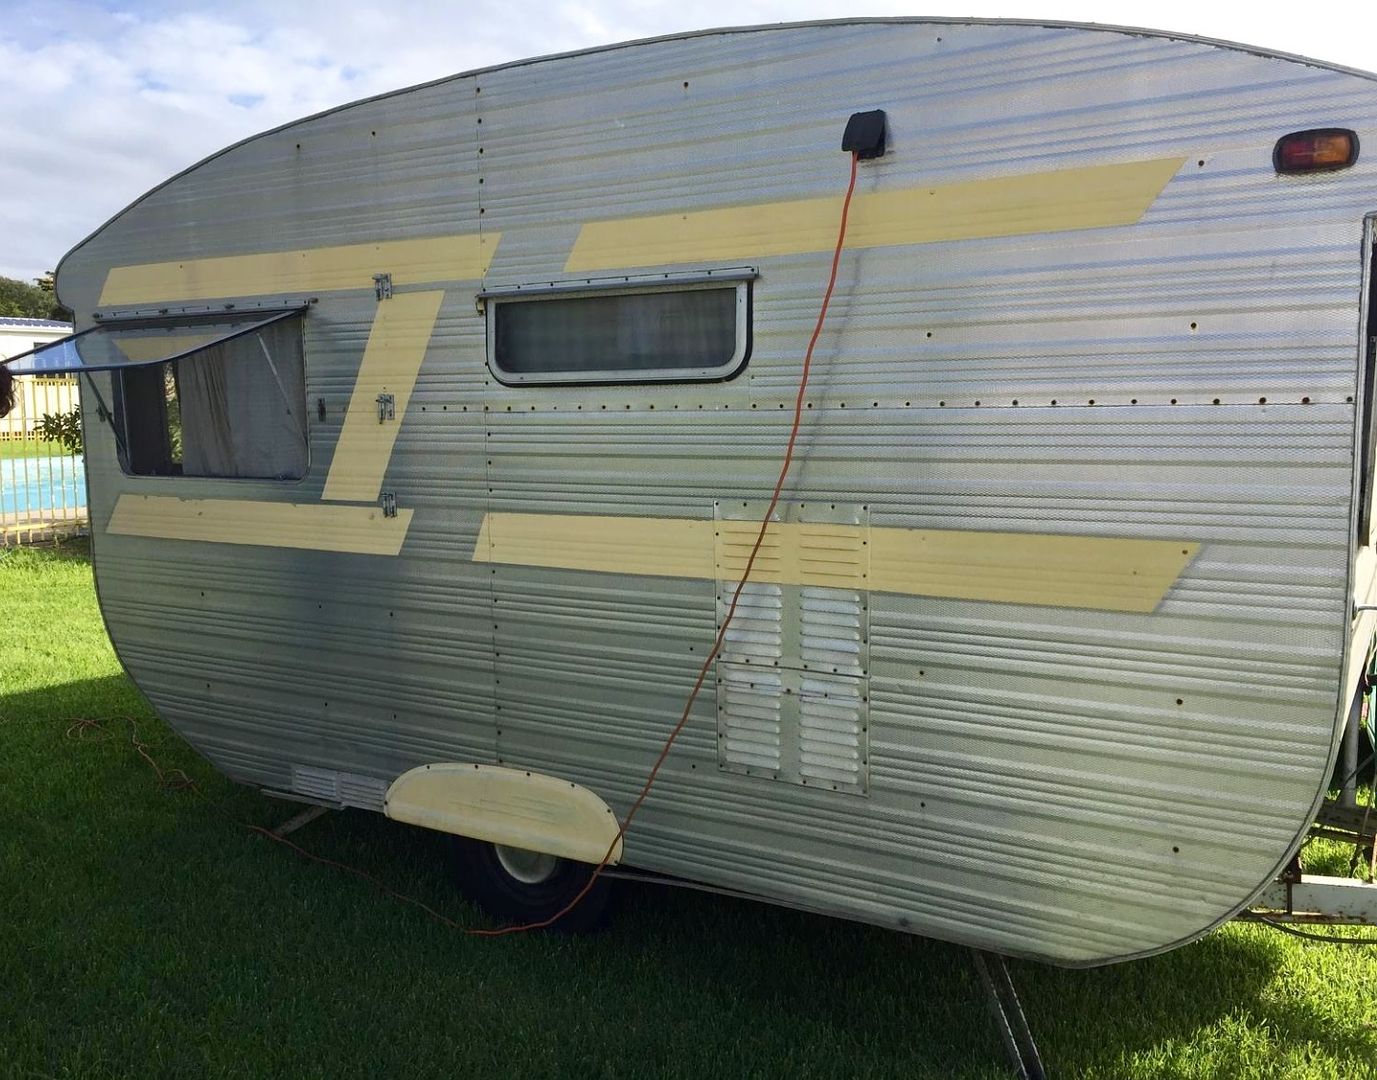 |
|
xav92
New Member

Posts: 4
|
Post by xav92 on Jan 23, 2021 7:09:26 GMT 10
Hi,
I’ve recently picked up a Miami Regal-68 that I am fixing up with the hopes of registering soon. Only problem is I can’t find a chassis number anywhere! Can anyone shed some light on a location? I’ve checked every inch on the drawbar and have had a decent look around underneath. Is there a particular spot it should be hiding?
The guy I got it off has just had it sitting in his shed for 5 years and has no paperwork and no way of contacting the guy he got it off. Any help would be much appreciated.
Thanks!
|
|
|
|
Post by shesgotthelook on Jan 23, 2021 10:55:24 GMT 10
Hello & welcome. You don't say what state you are in. I can only speak from Victorian experience. If van has no drawbar weld (which is unusual for a 68 model) then you can ring VicRoads & request a new number. Are there any old rego labels in the windows or does it have a number plate that VicRoads or whoever your motor authority is may be able to search the archives for?
SGTL
|
|