|
|
Post by winterwood on May 27, 2010 8:07:38 GMT 10
Derk,
Great work you are doing ... keep the photos coming.
Max
|
|
|
|
Post by humpyboy on May 28, 2010 18:15:31 GMT 10
Thanks Max, Plan for this weekend is to laminate some new bows for the rear, rather than waste my time trying to patch up the old bits I think it will be quicker and give me a better result if I make new complete sections to run from the top where the hatch mounts right round to the bottom, one piece has got to be stronger than a bunch of short bits joined together aye, I've found a nice piece of Oregon with no knots which I'll run through the saw and cut down to say 4-5mm thick and layup 5 or 6 pieces and may even put some glue between them if I can be bothered ;D, more photos to come after the weekend has passed.
Derk.
|
|
John
Full Member

Posts: 267
|
Post by John on May 28, 2010 18:32:00 GMT 10
G'day Derk,
When I laminated the bent frame of my van, I used a two part resin marine glue. Awesome stuff, had to work quickly but once it went off its tough as. As an experiment, I tried pulling two pieces apart and ripped the wood apart around where it had been glued.
I can't for the life of me remember what it was called, sorry. But it might be worth looking into?
Cheers,
John
|
|
|
|
Post by humpyboy on May 28, 2010 19:19:42 GMT 10
I still need to have a look as to what I have left out in the shed but I used to have something called Resorcinol Resin glue which is used in boat building, if I have enough of this left I'll probably use it, it's a two part thing one is a powder and you mix it with a liquid.
|
|
|
|
Post by humpyboy on May 30, 2010 16:57:31 GMT 10
Another weekend over and another update, two rear bows completed almost, Slats cut from a piece of knot free Oregon and ready. 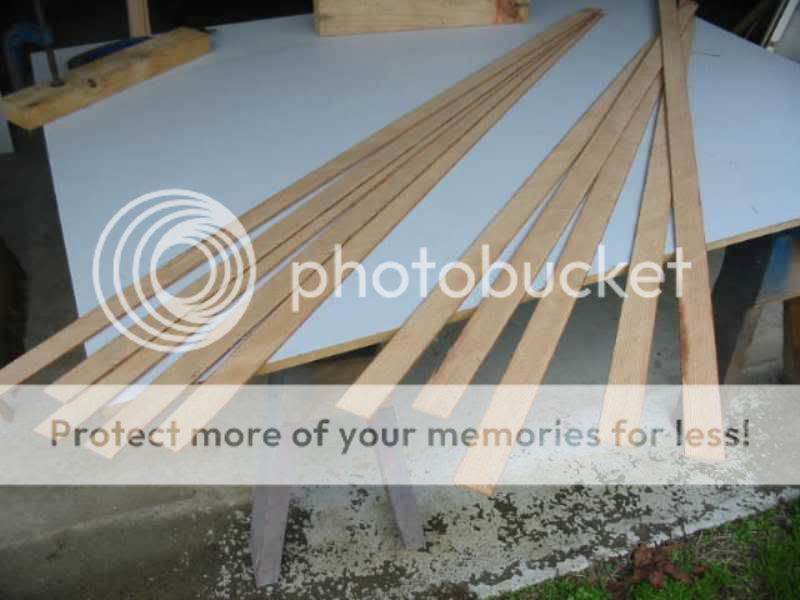 Number 1 clamped up, 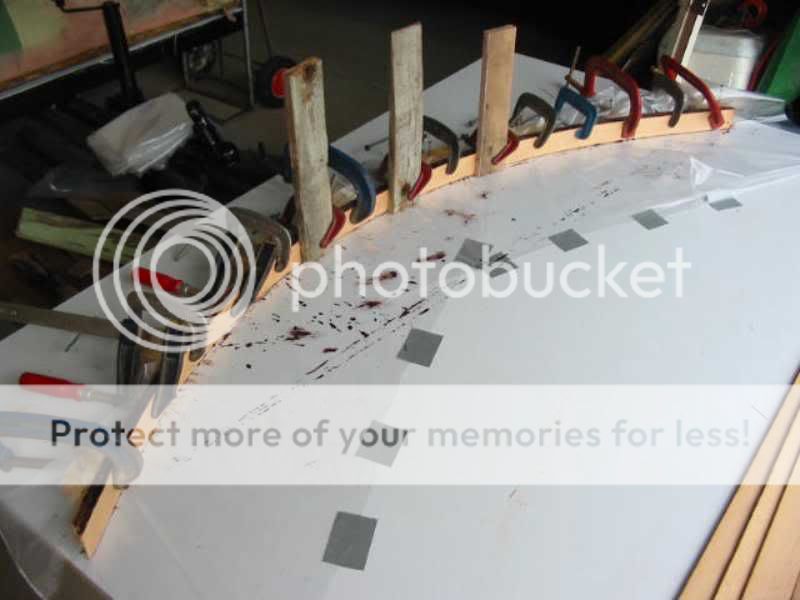 Number 1 out with number 2 clamped up,  I have a full week ahead of me now so I don't plan to have anything more done soon so next update will be a while off, I intend to keep the setup I have for these bows so that I can make new bows for the new hatch, that way they will all have the same profile or at least I hope they will  |
|
|
|
Post by Surf Tragic on May 30, 2010 20:21:21 GMT 10
G'day humpyboy You're into some real interesting stuff there, when are you going to start building a boat, ;D ;D looks like it wouldn't be any bother to you.  "Botecote" have a great site with epoxy glues/resins, they mix them themselves, are easy to use, & are better on you health than some. Great work. ST |
|
|
|
Post by humpyboy on May 30, 2010 20:53:10 GMT 10
Thanks ST, boats? have already done 2 both out of that glassy fibrey stuff, you know itchy scratchy with every thing you touch sticking to you for hours until it's cured enough to break the bond permanently, but who knows may try again one day with wood.
|
|
|
|
Post by humpyboy on May 30, 2010 21:37:18 GMT 10
Just been to the BOAT COTE web site, looks like an interesting product and I have a re-seller just round the corner from work to boot WOO HOO !! if the laminated bows work well on the teardrop then I may very well employ the same idea when and if I ever get round to the DON for the new roof bows in it, I've never tried laminated timber like this but have always wanted to but never really had the need till now, who knows where it may lead to.
|
|
|
|
Post by Surf Tragic on May 31, 2010 10:33:28 GMT 10
Great stuff , I just sheathed my wooden boat with 7oz fibreglass cloth & 3 coats of resin from those blokes, by the last coat I was keeping reasonably clean, the 1st coat with the cloth was panic  all the way, having never done anything like it before, wife was mixing for me. Still plenty of itchy stuff when sanding, got a full face mask, very comfortable & effective, covering up is wothwhile. I wouldn't think twice about sheathing the top of my next Don 140 with fibreglass cloth, it would beat any other type of protective paint, it is undetectable, the finish is superb too . ST |
|
|
|
Post by humpyboy on Jun 6, 2010 19:42:40 GMT 10
Well here I am with an update, didn't think I'd have anything but had a good run this week end with some headway made, first up the bows after cutting to width.  In the next two pics you can see how much of the old frame I removed and will be replacing due to rot and damaged wood. 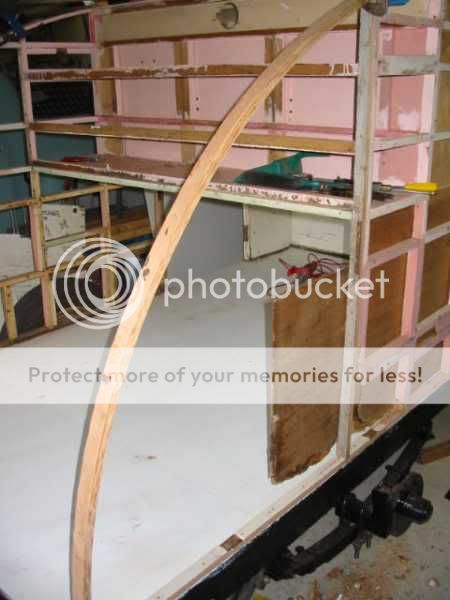  And also I removed the entire Kitchen.  I was going to leave it and work around it but the more I looked and the more I removed it became quite clear that at some stage a repair or two had been undertaken so the decision was made to rip it out and start with a blank canvas. I then moved on to fitting the Air Conditioner ;D ;D ;D. 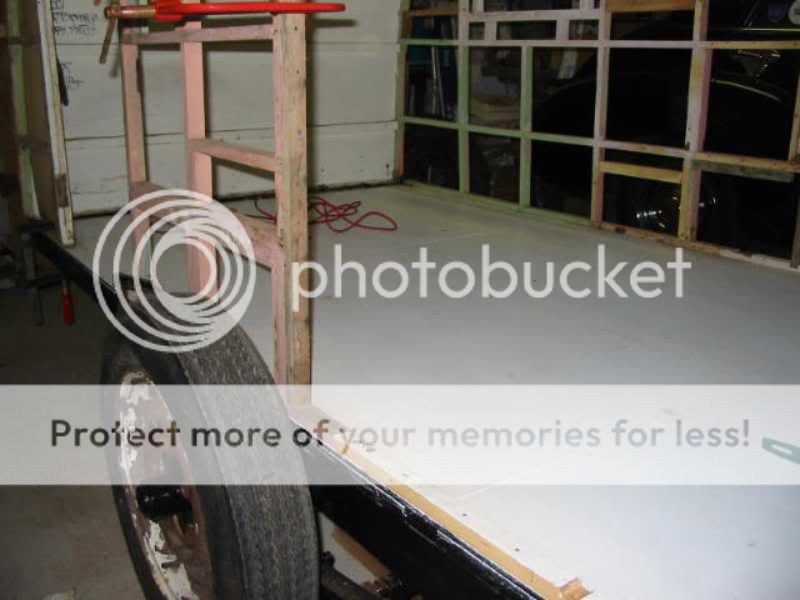 As you can see no cladding inside or out, makes for a chilly night Brrrrrrrrr. I was lucky enough to score an extra day off with the upcoming long weekend so I now have four days to make some progress, am hoping to have all frame work put back with the other bits repaired where needed and my other access door in place, wish me luck. |
|
|
|
Post by humpyboy on Jun 11, 2010 22:09:09 GMT 10
Day one of my Looooong weekend and I've got all the framework replaced at the rear along with mounting tabs welded to my new guards, at the rate I went today I'm looking forward to making some real headway over the next three days, will keep working and upload more pics later.
|
|
|
|
Post by don257 on Jun 12, 2010 12:43:35 GMT 10
hi derk, well done mate having done a couple of full resto's my self, i know the amount of work that you have put in to this project so far and what you have ahead. doing a great job will try to catch up over the next few days and have a look. keep up the good work. ;D ;D ;D ;D ;D
|
|
|
|
Post by humpyboy on Jun 13, 2010 20:36:24 GMT 10
Day two of my weekend was not as productive as my first but did manage one or two things to move me forward along with a little more De-construction, I also had a visit from Doug (don257) and Graehme, sorry Graehme but forgot to ask your forum ID, both had very favorable comments which gave me a boost and on day three I've gone ahead leaps and bounds (or at least I feel I have) I now have almost the entire interior re-clad, by the time I had finished today it was to dark and late to take any photos so I'll do that in the morning and upload all my shots tomorrow night for you all to see plus an update on day four which may not be to great as I'm planning to do some work on my FJ Ute also.
|
|
|
|
Post by humpyboy on Jun 13, 2010 21:37:55 GMT 10
How dumb am I, forgot to ask two questions, 1/ should I fit insulation before I fit the outer skin? if so what should I use and 2/ The safetee minor was fitted with 240 volts, I'm thinking of having a 12 volt power supply fitted also, this would allow me to run 12 volts for lighting etc plus I can then use the car if 240 is not available, what is the general consensus on this.
|
|
|
|
Post by DC3Td on Jun 13, 2010 21:53:37 GMT 10
Howdy Derk.If you scour around you can pick up cheap freezer sandwich panels. Various thicknesses. Thin ali skin each side of a polystyrene filler.Cut to sizes they could fit inside your framework. If you go this way,once you`ve cut the pieces to size, brush around the poly with a swab of tar paint. Lot of car makers today have reverted to using poly as sound deadener under the carpet. You can of course go the usual pink batt way but its a pretty itchy process. 12/240 would obviously be the best way. Don`t forget to connect a PRD switch. Here though is a simple 12V wiring diagram:  cheers gordon |
|
dbar2
New Member

Posts: 1
|
Post by dbar2 on Jun 13, 2010 22:07:04 GMT 10
gday humpyboy
for my two cents worth i would put both in and mount a battery and a small charger that way you can run 12 volt lights any time and use 240 when its available for the toaster and jug etc.
dbar2
|
|
|
|
Post by JBJ on Jun 14, 2010 13:52:45 GMT 10
Hi Humptyboy,
When I rebuilt Lucille, I fitted a big deep cycle battery & set up a 2400 watt inverter, as well as a good Seatech charger/battery tender.
I had a 12/240 fridge that wasnt much use on 12 volt as it wouldnt cool real well. It was temperamental on 240 volt, & we decided to replace it with a straight 240 volt bar fridge.
Surprisingly it runs well off the inverter, & we get about 2 days to a fully charged battery on 240 volt supply to the fridge.
Thats longer than it stayed charged working the old 12 volt frig.
We also have enough power to run the microwave, but I think I would need to turn the fridge off to use the microwave.
I'm going to fit a second deep cycle battery, & that way we should sufficient 12 volt storage to go several days easily away from 240 volt power.
All my lights are 12 volt, & my TV also.
It costs a bit to set up but seems a cheaper way & more efficient than a 12 volt fridge.
JBJ
|
|
|
|
Post by sharpie on Jun 14, 2010 19:48:27 GMT 10
Hi Humpyboy. I used pink bats in the ceiling of our Viscount. I installed it with inside clading finished so it was not to itchy, just kept it clear of light fittings. For the walls i used polystyrene boxes from local supermarkets which you get for free they are about 25mm thick, cut them with a sharp knife as its a lot less messy. Hope this is of some help. Cheers Sharpie.
|
|
|
|
Post by humpyboy on Jun 14, 2010 20:25:41 GMT 10
Firstly thank you to those that have replied to my questions, all food for thought, I will look around for styrene pieces that I can use and I need to have a good think about if I really need 240 or not, now for long awaited pictures. Day one. Repaired frame work. 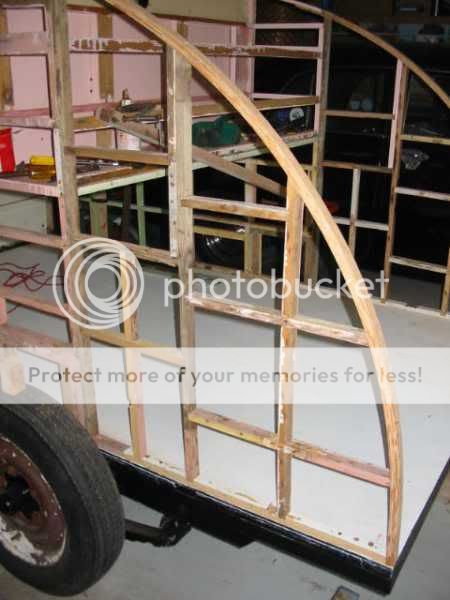  Day two. Fitted my mounting points for the guards and some more De- construction.  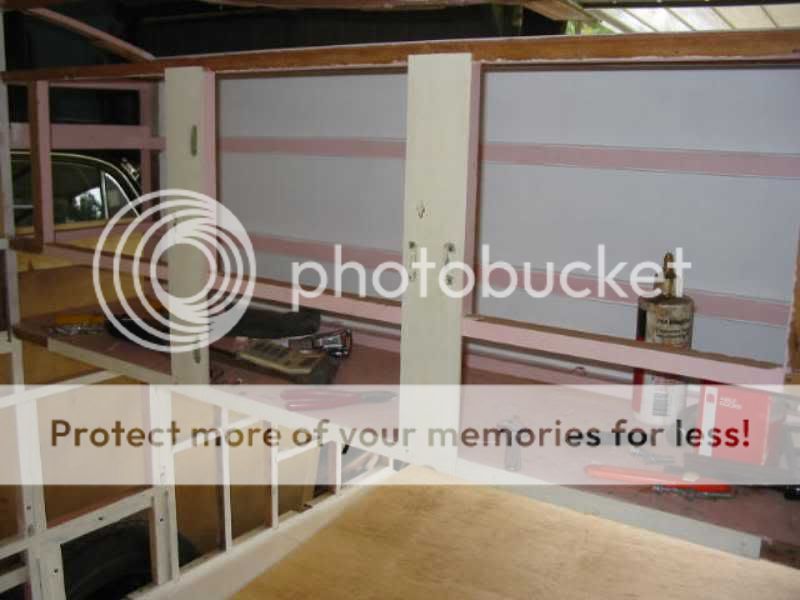 Day three. Internal cladding.  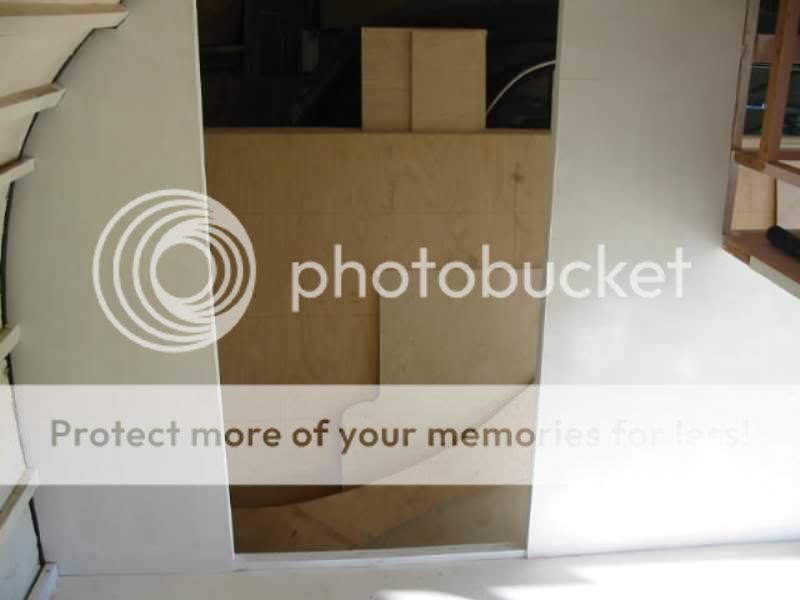 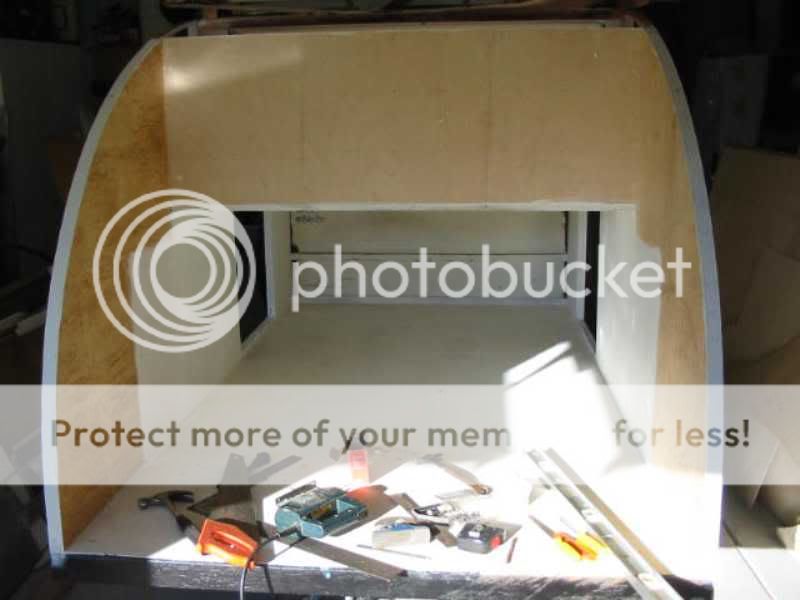 Day four. Spent most of the day working on my Ute so not a lot of time left for the teardrop but I did manage to make a start on the frame work for the kitchen. |
|
|
|
Post by sportsman 1 on Jun 15, 2010 13:32:45 GMT 10
I know where you can get polystyrene sheets in various sizes/thicknesses for free.
I did the Clipper with these and it seems like it will work well.
Let me know if you need some.
Also I have both 12v and 240v in the Sportsman. Fairly simple to do in a teardrop.
Cheers, Leigh.
|
|
|
|
Post by humpyboy on Jun 15, 2010 20:21:32 GMT 10
Thanks Leigh that would be great, an offer of free anything is always welcome, on the 240/12 volt thing, do you run straight from your car or do you have a seperate battery setup in the teardrop?
|
|
|
|
Post by sportsman 1 on Jun 16, 2010 10:25:57 GMT 10
I don't have a 12v battery mounted permanently, I carry a 12v jumper pack (with a compressor) either on the floor of the TD, or in the car so it can be recharged while travelling. I put this on the inside shelf of the TD when camping. This feeds the 2 original 12v lights via a cigarette lighter plug which plugs into the side of the jumper pack. I can also connect an inverter to this to provide some 240v power from the jumper pack if needed.
I also have a 240v power socket on the side of the TD which provides 240v power to a power point inside the TD and 2 power points in the kitchen area.
Not exactly original but it works for me. We can either bush camp or stay in parks as desired and as long as I recharge the jumper pack either while driving or when power is available there is no problem. We survived the 8 week run to Darwin and back with this setup.
The other advantage is that if needed I can use the jumper pack to jump start a car, etc as well as having the compressor for tyre inflation if needed.
If you want to come have a look at mine let me know.
Regards the styrene foam there is a BBQ retailer in Mitcham who has a large bin with foam packing out the back which he was happy to let me take whatever I wanted. Lots of different sized pieces, some large and some small, and some glue was used but at the end of the day my frame was filled and although it looked like a patchwork quilt now the sides are on you cant see it anyway. Perhaps there is a similar supply near you, if not let me know. It was a matter of what was in the bin at any given time but the price was right!
Cheers, Leigh.
|
|
|
|
Post by humpyboy on Jun 16, 2010 22:10:20 GMT 10
Had a delivery at work today, large box that required some empty space to be filled, 6 nice large sheets of styrene around 350mm x 1200 mm and 50 mm thick, how lucky am I ;D
Now back to my power, may still fit 240 volts as this is what the Safetee Minor was built with, then may go with the Deep Cycle battery option plus a C-Tech charger to keep it topped up, my reckoning? when or should that be if the Don gets finished I can move battery between both also later if I think I really need one I can get an inverter also, comments welcome.
|
|
|
|
Post by beetlesbailey on Jun 17, 2010 15:00:52 GMT 10
Gee this brings back memories of the 3 teardrops I have worked on. What a lot of work. but it is all worth it in the end.
My first was a sportsman deluxe that I basically did what you are doing but it had no springs or wheels. I later traded it for help restoring / 'retro ing' my home made one but not before starting a sportsman (not deluxe). This I replaced the bad timber as you have then sold it to get on with the real nice shaped home made one.
The more I deconstructed the more rot I found so I used the old sides as a pattern and made a jig on chipboard and laminated recycled (stable) oregon hoops with new (recycled) studs.
These sides were then joined with new "rafters' before being screwed to a new floor of braceboard (6/8mm masonite) mounted on recycled jarrah frame.
All this is a bit of overkill and probably 50 kg heavier than neccessary. However I am confident out will outlast me.
The most important thing I did was to use Bote cote exclusively for all gluing and then coated the new ply with bote cote and fibreglass matt of a thin /light weight. All this technique was learned from "DUCK FLAT WOODEN BOATS' at Mt. Barker S.A.
To date we have done 6 vans including the Highway Palace in bote cote and f/glass.
There is no way this van will ever rot. but it weighs 480 kg fully loaded as I weighed it in N.S.W. on a trip when I spotted a weighbridge.
Every time I finished a gluing job I brushed the remaining bote cote on any untreated surface, especially ALL the underside.
I hope this is of use to you and others.
|
|
|
|
Post by humpyboy on Jun 20, 2010 21:17:58 GMT 10
Damn, had a post written and the speaker fell onto the keyboard and you guessed it, so now I have to start again. Only had today because I spent Saturday over at my mates shed working on the engine for my Ute, so today I finished off the section of wall between Kitchen and Sleeping area filling the frame work with insulation and paneling it over as well as inserting a piece of flex for power.  I also did some more DE-construction so I can finish off the internal lining. 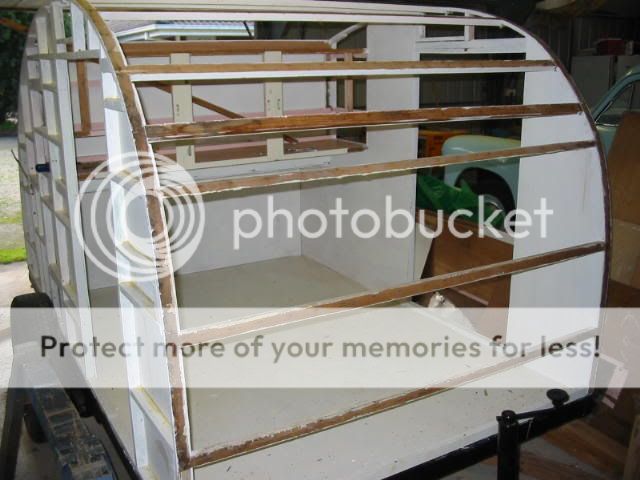  |
|