|
|
Post by minicamper on Apr 15, 2009 10:55:28 GMT 10
Hey guys,
Looking for some info, not actually for caravans, so forgive me, but this is the only place I've come across people with obvious high level of fibreglass skills...
I have a loaner bike at the moment, a 1971 Honda 500 4, it has the original plastic/fibreglass paniers fitted that are rapidly degrading.
Is it possible to use them as a mold and recreate them in new fibreglass? If so, how is this done?
Cheers
Chris
|
|
|
|
Post by atouchofglass on Apr 15, 2009 12:33:14 GMT 10
Hey Chris It is possible to recreate the paniers in fibreglass Let me say from the beginning I'm no expert....
Possibly not even a talented amateur ;D ;D ;D
But here goes anyway You will need A metre each of fibreglass matt.... 225gm and 600gm If the 600 is too thick..... it can be carefully split into 2 x 300 by peeling it apart 100ml of a medium speed catalyst squeeze measurement bottle for the catalyst A couple of litres of resin Mold release A couple of litres of Acetone for clean up a few 25mm cheap paint brushes (natural hair) Larger brushes for larger jobs  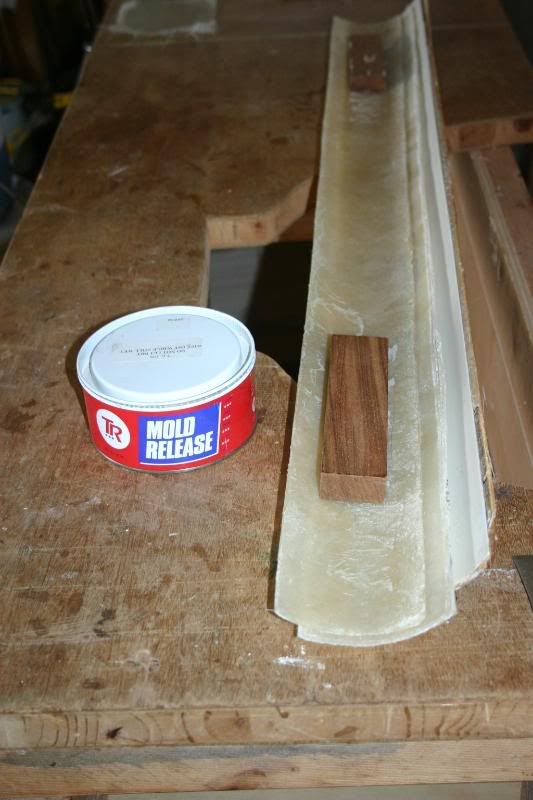 All of this will be available at your fibreglass supplier, we use Nuplex, (formerly F.G.I) they will be in the major cities. The PlugFirst of all fix up the originals by bogging or glassing or whatever means you have They have to look (be the shape) as you want before taking the mold. This is the "Plug" If you make the plug as smooth and shiney as possible the mold will copy this. Of course any defects will also be copied... so spend some time getting the plug to your satisfaction Once that is done coat the plug with several layers/coats of mould release. This is available at your local fibreglass supplier The plug is now ready to use Fibreglass/resin and catalyst You will now need some fibreglass, resin and catalyst The resin comes in a couple of types.... I'm not up with all the tech stuff so just ask for a resin to suit what you are doing buy a couple of litres A catalyst that is not too fast There are several speeds of catalyst available About a 100ml should be plenty The fibreglass chopped strand matt comes in many thicknesses Buy a metres of thin and of thick ...... Again not up on the technical data bit As I remember it.... 225gm/mtre and 600gm/mtre should do you well That should be plenty of fibreglass to practice with Making The Mold Put some of the resin in a plastic container of some sort I use old clean cordial bottles or 2 ltre milk bottles with one side cut out The instructions on how much catalyst to use will say 1% This is not easy to work out If you use a set of kitchen scales it will be easy to work out You can safely use more, remembering that the more you use the faster it goes off Don't go above 3% Using a stick stir the catalyst and resin..... they resin will start to change colour Using a paint brush apply the resin to the plug It is wise to make sure the plug is well covered with resin as this will form the skin that will be copied when making what you want Then use a piece or pieces of 225 fibreglass to cover the plug completely and leave a small amount over the edges With more resin on the brush make sure the fibreglass is well soaked It will change from the white to clear/resin colour in a few minutes Then a piece of 600 as a way of thickening the mould As you get use to working the fibreglass you will see that not a lot of resin is needed... it binds the glass... the glass gives the strength When you see the resin in the container start to gel... stop using it Be careful not to mistake the glass that gets into the resin as geling Place some acetone in an open container to clean up your hands and brush If you cover the container the acetone will last longer Next post will discuss more of what to do Cheers Atog |
|
|
|
Post by minicamper on Apr 15, 2009 12:45:03 GMT 10
ATOG, that's absolute gold, thanks heaps! (and in advance too)
Cheers
Chris
|
|
|
|
Post by atouchofglass on Apr 15, 2009 13:10:59 GMT 10
Chris It's a long winded post to say just a little Give me a bit of time and I will try for some photos You know the old saying A picture is worth a thousand words  One the right hand side is the plug..... a couple of pieces of pvc pipe bodgied up and glassed together In the middle Is the mold ..... upside down .... with a couple of bits of wood to hold it while putting resin and glass on the other side On the left side is A finished piece Have cut off the excess glass from the edges. (that's the itchy work everyone hates) For what you want this is the method used Cheers Atog |
|
|
|
Post by atouchofglass on Apr 15, 2009 14:02:04 GMT 10
Once the mold is madeclean up the edges Attach something to the back so it is stable when you are laying fibreglass into it I used timber sikaflexed or Matrixed to the back If the mold has any imperfections they could be filled if need be or left and removed after the finished piece is removed from the mold. Before using the mold Coat the mold several times with mold release Prepare your fibreglass by making sure it will conform to the mold If it seems to bunch up.... rip it into smaller pieces Ripping is better than cutting as cutting will leave a visible edge ThenMix up some resin and catalyst Coat the mold with mixed resin using your brush Lay the fibreglass into the mold and press in using the brush Always leave some of the fibreglass extending outside the mold About 40mm is plenty... too much will mean the glass will want to sag and pull away from the mold This will be cut off later Use several layers if you want it strong or if you just want the shape just a layer of each There should be enough resin between each layer to make it wet out.... the fibreglass will go clear/colour of the resin Let it harden To get it out of the mold may take a bit of brute strength Hit it with a rubber mallet or similar to loosen the bond between mold and the piece If it is too hard timber wedges may need to be forced into the edges to start the separation Give it a go Let us know what problems you come up with and how you went. Fibreglass is a great medium to work with You can create all sorts of sh.... eerr stuff      This was glassed but using a different method .... no mold This was glassed but using a different method .... no moldCheers Atog
|
|
|
|
Post by minicamper on Apr 16, 2009 7:47:24 GMT 10
Thanks again ATOG...
Tell me, where does (and what is) gel coat come into things?
The release may prove to be the hard part, as I need to make effectively a tub... if this is fitted into the mould, getting it out could be interesting, especially as the mould would be around 200mm deep..
Cheers
Chris
|
|
|
|
Post by atouchofglass on Apr 16, 2009 8:37:57 GMT 10
Hey Chris Gelcoat is used instead of paint So on the Olympics you would see the gelcoat nice and shiny as the final finish It has to be laid down first in the mold, so it comes out on top. Then the resin and fibreglass is laid over it. That's why you see the colour of the fibreglass inside the vans.... no finish just glass Gelcoat remains a little tacky... I'm told (have never used it myself) so that the resin and fibreglass bonds well with it No need to grind it to get the fibreglass/resin to bond Once the resin and glass are added it hardens up and becomes what you see on Boats, caravans, water tanks and any other professionally made glass product..... Not bad considering that it stands out in the weather for 40 plus years Flowcoat is like a very thick paint It is applied after the item has been made or repaired Both gelcoat and flowcoat have to have catalyst added to make them go off  Before repair Before repair 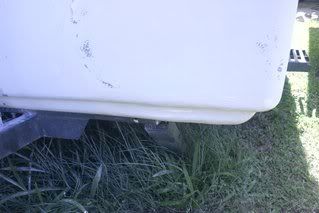 After repair and flowcoating After repair and flowcoating This photo is after cleaning up, undercoating and spraypainting This photo is after cleaning up, undercoating and spraypainting Being applied with a brush it isn't as smooth as gelcoat which conforms to the mold So there can be a bit of work sanding and polishing it up Mostly it is just left with the brush finish I sanded it smooth using it like a bog over some of the repairs. Then painted over it as seen in the above photos The photo of my chair is flowcoated and left The chair is very slippery because of it Should you want to flowcoat or add extra fibreglass after the first batch has gone offYou will need to sand the area being flowcoated or glassed This will give the resin something to bite into.... just like painting As for removing your fibreglass piece from the moldIf it looks like it may be a real chore.... Some put a hole in the bottom of the mold and attach an air hose to it after the glass has gone off This is done while making the mold By pumping air through this hole it assists in releasing the piece from the mold The hole is generally quite small, just the size of the inside of the airhose male fitting Brute strength often comes in handy along with a big rubber mallet. This is also why you don't grind the piece clean while still in the mold All that extra glass around the edges gives you something to grip or an edge to wedge timber between Cut wedges in any softwood or hardwood Use your mallet to belt them in between the mold and piece all around the edges You will see where they have seperated if it is just glass and not gelcoated The glass is incredibly strong and will take a fair pounding Good for getting rid of the frustrations of life ;D ;D ;D ;D       Once you start on this stuff you get addicted It has so many uses and is very versatile Word of warning to everyone using fibreglassAlways wear a dust mask when grinding and you will itch..... So cover up with paper overalls if you are doing a lot of grinding Some use talcum powder on their hands and joints to reduce the itch..... but if you grind.... you will itch It is a small price to pay for such a great result when finished It is worth it. If you use a large industrial fan and angle it so it blows the dust away from you it will help immensely Hope this helps Any questions ..... please ask Cheers Atog |
|
|
|
Post by atouchofglass on Apr 16, 2009 8:59:15 GMT 10
A little extra informationWhile the resin is going off the fibreglass is pliable So when it has reached a stage that it is stiff and still warm An indication it is still hardening Cut excess off with a stanley knife This saves a lot of grinding and you won't itch as much Yes I know I said don't remove the extra fibreglass sticking out of the mold But ..... sometimes you end up with way too much sticking out of the mold.... This can be removed by the above method and not right down to the mold Remember to clean up your tools with acetone before the resin goes off A useful tool for getting bubbles out of the fibreglass is a metal roller (aluminium) It is used to run over the fibreglass after the resin has been applied Squeezing the bubbles out This is useful for larger pieces For small stuff it can be a bit fiddly 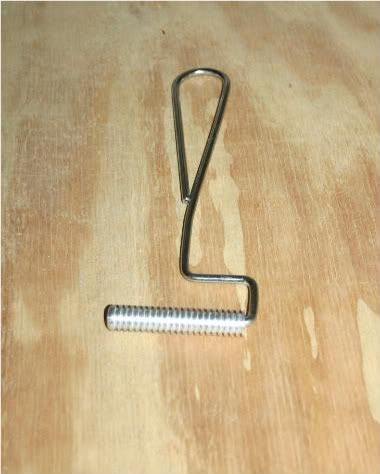 Comes in several sizes Wash the roller out well it needs to move with ease or it won't work properly the next time. Cheers Atog
|
|
|
|
Post by davenq on Apr 21, 2009 20:30:29 GMT 10
Fibreglass is a great medium to work with
You can create all sorts of sh.... eerr stuff
that looks like a teenage mutant ninja turtle shell.....lol
|
|
|
|
Post by atouchofglass on Apr 24, 2009 7:18:16 GMT 10
Hey Chris Thinking about having difficulty with getting a piece out of a mold There is another method Make a two piece moldThese are either bolted together and the item being made is glassed up, then the molds are removed one at a time OrThe two halves are glassed up separately and the two pieces are glassed together after removing from the mold Either way it easier to use for compound curves or difficult pieces Have a look at the way the Olympics are made..... compound curves .... two halves ..... glassed together after removing from their respective molds The Sunliners appear to have been two molds The van was glassed up in one hit and the molds removed to reveal the finished product Found this site that explains it more technically fibreglass mold info Youtube has some great stuff on it as well A lot more information available on this thread on CC our sister website ditzygypsy.proboards.com/index.cgi?board=techno&action=display&thread=400&page=2Cheers Atog |
|
|
|
Post by atouchofglass on Oct 30, 2009 6:50:16 GMT 10
Hey Gents and Ladies Just a bit of an update on f/glassing stuff you may have noticed this photo on my Olympic thread 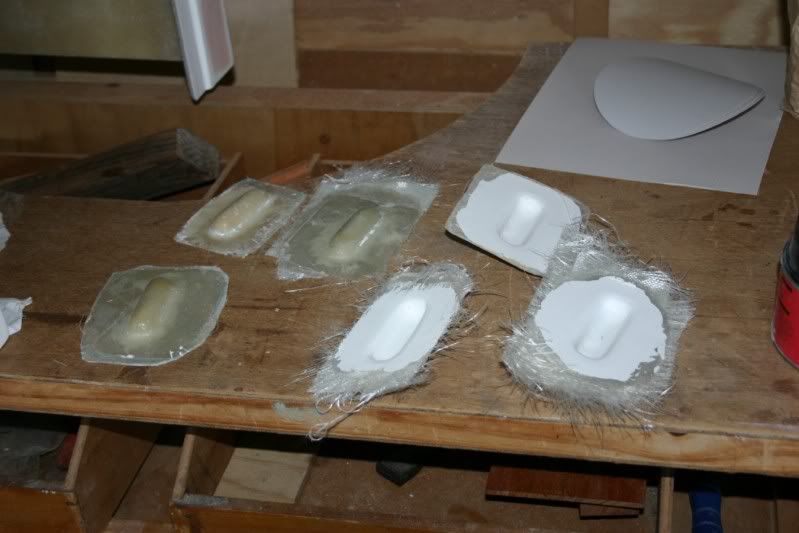 To explain what is possible a bit more regarding mould making Needed to make a specific shape and after much chasing around Bunnings and similar shops for something close Finally decided I would have to make it myself So formed the shape out of hard foam and car bog to create the white shape at the top right hand of the photo That was used to make the moulds (the none white ones) And they are used to make the two white pieces at the lower right hand side It all takes time But if you need something that isn't readily available ...... fibreglass can help There's lots of little bits and pieces that can be made or copied for any caravan or car Try something small first It isn't as hard as it looks Cheers Atog |
|
Hillbilly
Full Member
   "Fun in the Sun ..."
Posts: 105
|
Post by Hillbilly on Oct 30, 2009 10:31:09 GMT 10
Great thread, thanks ATOG  I never knew it was so easy.....well, the way you explained it, it doesn't look as difficult as I thought. I've only got one spat for my Sunliner and need to make another fibrelgass mould so will give it a go. Your step by step process was excellent and looks a treat. Cheers, Hillbilly ;D |
|
|
|
Post by JBJ on Oct 30, 2009 11:56:51 GMT 10
Hi Hillbilly,
I have moulds for the standard Sunliner spats.
I could probably get one professionly made from my mould for less than you would spend on a mould & a copy.
Let me know if you want me to get a price to get one made from my mould.
JBJ
|
|
|
|
Post by Surf Tragic on Oct 30, 2009 14:42:26 GMT 10
Hey Atog that would have to be one of the best threads I have read, I think I'm ready to try something with all that instruction, have all the gear here to try it    except the mold release  'they' say the resin has many years shelf life, thank goodness or I would have done me dough ;D ;D Excellent stuff to read. ;D ST |
|
|
|
Post by atouchofglass on Oct 30, 2009 19:04:14 GMT 10
Hey Hillbilly JBJ is right The cost of making a mould (remember some are left and right moulds) could well and trully blow out If you plaster him with kindness and appropriate amounts of alcohol he just might get you a spat. ;D ;D ;D ;D The exercise of making moulds is a great learning curve but if it is just for one item.....    The mould for the upper tailgate was made cause a mate lead me to believe he had a couple of people that could use a fibreglass tailgate Sadly that didn't eventuate Two weeks to make one upper tailgate..... Lot of time and money 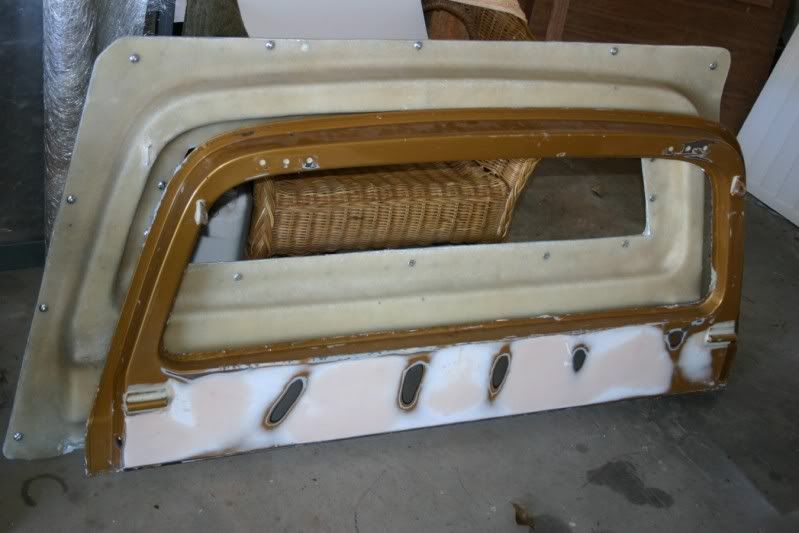 It was worth it for me only because I learnt a lot about making a three piece mould Hey Surftragic Mate give it a go The mould release is very important if you want the two bits to part company Start with little things and perhaps flat sheet bent to shape It is great fun and addictive once you realise just how much stuff you can make The thread on CC is more detailed and updated as I made a couple of changes to the various posts As JBJ would say It's all fun ;D ;D ;D    Cheers Atog |
|
|
|
Post by atouchofglass on Oct 30, 2009 19:21:02 GMT 10
Problems you may strike Painting resin on timberWood acts as a retardant to the resin going off So when painting resin straight over timber use 3% catalyst If you need to use fibreglass over timberPaint the timber with resin and allow it to go off before fibreglassing The reason is that the timber will allow bubbles between the glass and the timber Doing this will stop that Any curves should be gentle enough for the fibreglass to conform to without leaving bubbles behind the glass Use thin glass first to stop this Should you end out having bubbles even after using thin glass Wait for the resin to go off Cut the bubble out and when you put the next layer of glass over ... fill the gap with resin If you have other problems just post them and I'll see if I can help Expect to have a few problems ...... it is a new talent you are gaining after all         Cheers Atog |
|
|
|
Post by chev51 on Oct 30, 2009 20:54:15 GMT 10
Hi I can add a couple of tips here If your making a pattern or "plug" finish it off to the best finish you can get. After the mould is made the better the finish on the pattern , the better the finished product will be. You can also make a mould out of timber, paint it, wax it up and fibreglass straight off it. Good for a one off part. Dont ever paint anything you want to mould off in Acrylic paint, it needs to be 2k otherwise the heat from the resin will more often than not react with the paint. 2k paint will withstand it no problem Also best to use gelcoat as it seals off the resin and mat properly, the finished product will last a lot longer, gelcoat can be brushed/sprayed on afterwards as well just like paint but it bonds to the resin better than paint ever will Another good tip is to use PVA release as well as a quality wax as an extra safeguard. We had a guy at work destroy the mould for the carbon fibre super cars parts today.... used the wrong wax These few photos show some of the things that can be made The jims dogwash pattern I built in the shed at home, forgot to measure the carport on the way out  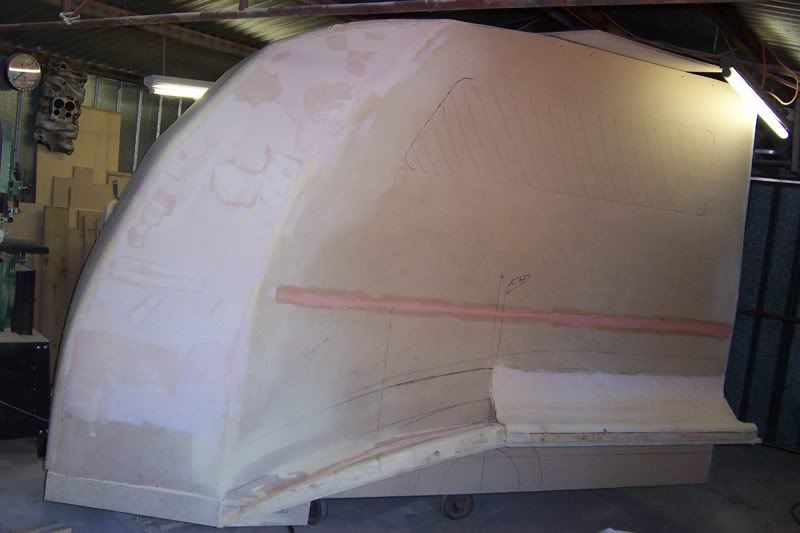 off to the booth to get painted  ready to make the mould 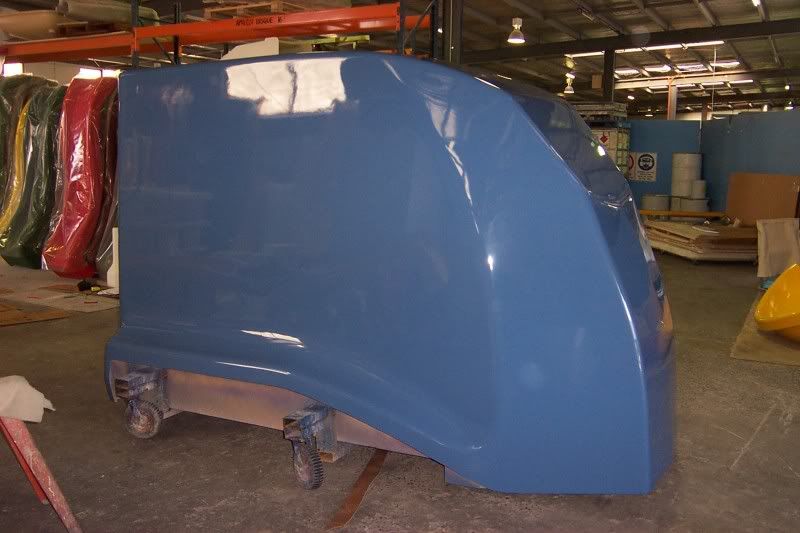 Finished product  Hard cover for a ute, made out of an old lid cut and joined, new side in timber and bolts in the corner to pull down and make a curve.. =lots of sanding 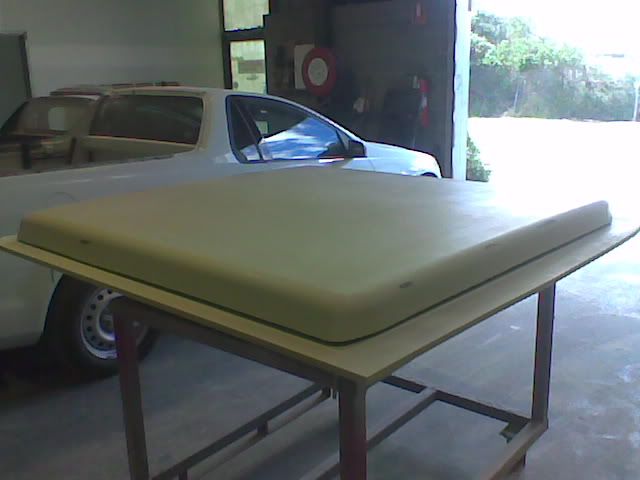 Painted black to show any imperfections, mould was made off it today  Ski boat seat pattern 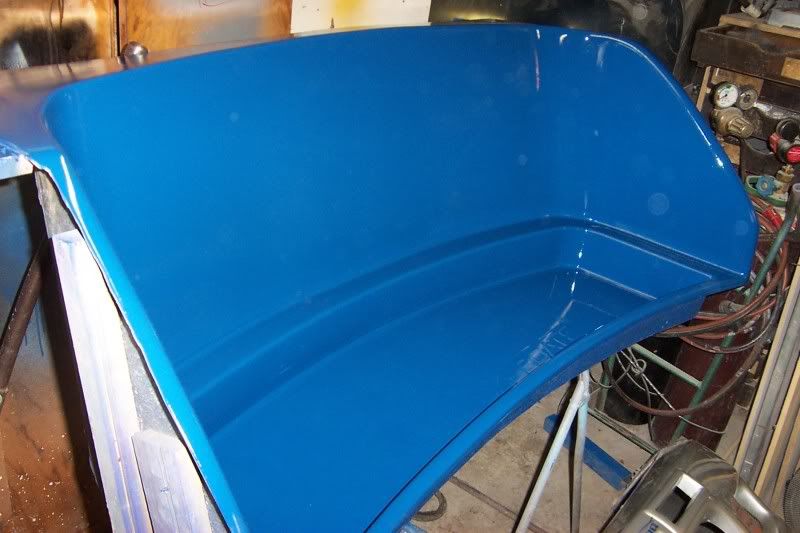 Bike fairings for a mates race bike  Marbletrend spa bath pattern 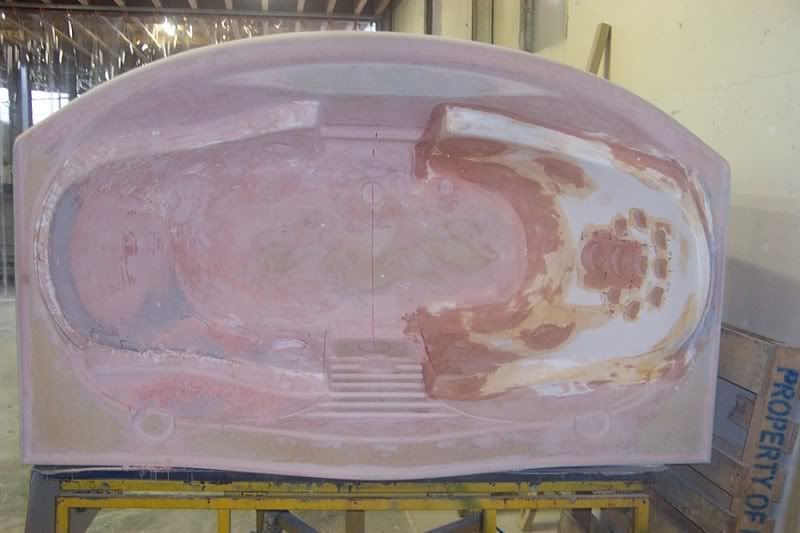 This was a quick roof made for a mates car, he used masking tape/cardboard to make the shape and we glassed over it. He later covered it in fabric  This was a project I was involved in at HSV as the hard modeller(patternmaker) Its all fibreglass, shows how good the end result can be, there is no filler work done on the fibreglass panels, they are moulded, primed and painted. This was the first show car we did, thats me on the left on the day it left to be released at Sydney motor show..  Latest job has been the new police van, soon to be seen on the roads ;D If anyone has any questions regarding patterns, ask away..Or if you need anything made ask away.. Cheers |
|
|
|
Post by atouchofglass on Oct 31, 2009 6:43:31 GMT 10
Hey Chev51
Very nice work
Please keep posting more about fibreglass techniques
While I have some experience it isn't in mould making to the degree you have done
As you have worked on the Elfin you must know Malcolm?
Cheers
Atog
|
|
|
|
Post by chev51 on Oct 31, 2009 6:55:00 GMT 10
Hey Chev51 Very nice work Please keep posting more about fibreglass techniques While I have some experience it isn't in mould making to the degree you have done As you have worked on the Elfin you must know Malcolm? Cheers Atog Yep, certainly do, we had to get FTP (where he worked) to lay up some of our quick parts for the prototype cars. Time was tight while we were getting all the master patterns done. He actually started at the company I work for for a few days recently. |
|
|
|
Post by atouchofglass on Oct 31, 2009 7:34:48 GMT 10
Hey Chev51
Have you thought of starting a thread that explains making a plug - mould - product?
A proper explaination would be better than my ramblings
Having recently been working with skiboats I learnt a lot.
Looking at my posts regarding fibreglassing it isn't complete or easy to read
Would think it is far better coming from someone with more experience
Just a thought
Cheers
Atog
|
|
|
|
Post by atouchofglass on Nov 1, 2009 8:21:54 GMT 10
Hi I can add a couple of tips here You can also make a mould out of timber, paint it, wax it up and fibreglass straight off it. Good for a one off part. If anyone has any questions regarding patterns, ask away..Or if you need anything made ask away.. Cheers Just to add to this part of Chev51's post Built a box by making a mould out of timber and laminate All the screw holes where filled with modelling clay as were the corners edges so the fibreglass could follow the edges without leaving bubbles. Waxed it with mould release several times then sprayed it with blue PVA Here it is after pulling the product out of it 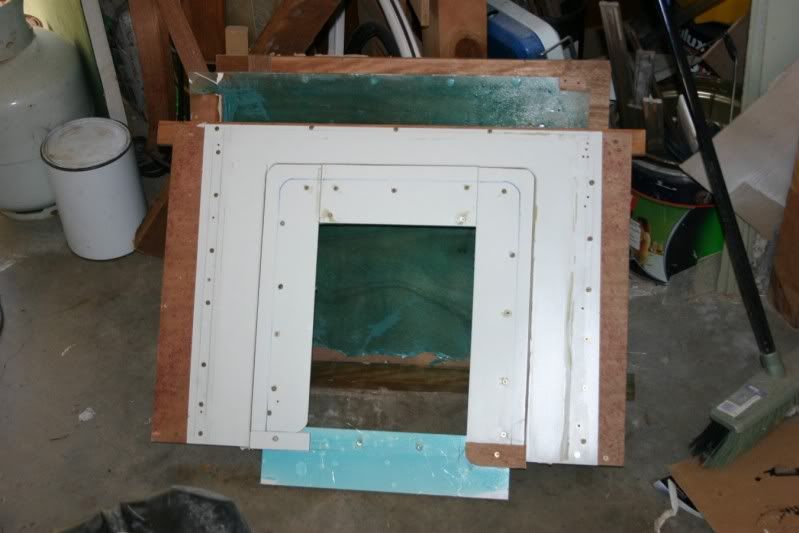 Sorry I didn't take a photo of when it was all together Brushed in white gelcoat When it went off layed up a tie layer of 225 chopped strand matt Rolled that in with a consolidator  When that went off -quick light sand with 24grit sandpaper To get rid of any spikes or bits sticking out that might interfere with the next layer of glass Followed by a layer of 600 Corners, front opening and edges were strengthened with more layers of 600 and consolidated. The product came out OK but with this sort of mould unless the timber is covered with a gloss laminate it won't be perfectly smooth So some filling will be needed Didn't want a gloss finish anyway as it wouldn't match in with the rest of the van 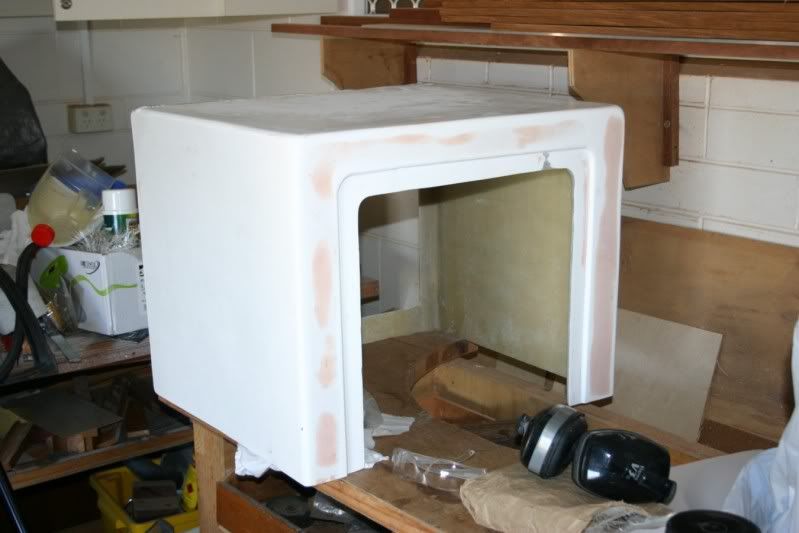 Added supporting pieces to the back as it is a seat Then it was primer filler sprayed and topcoated 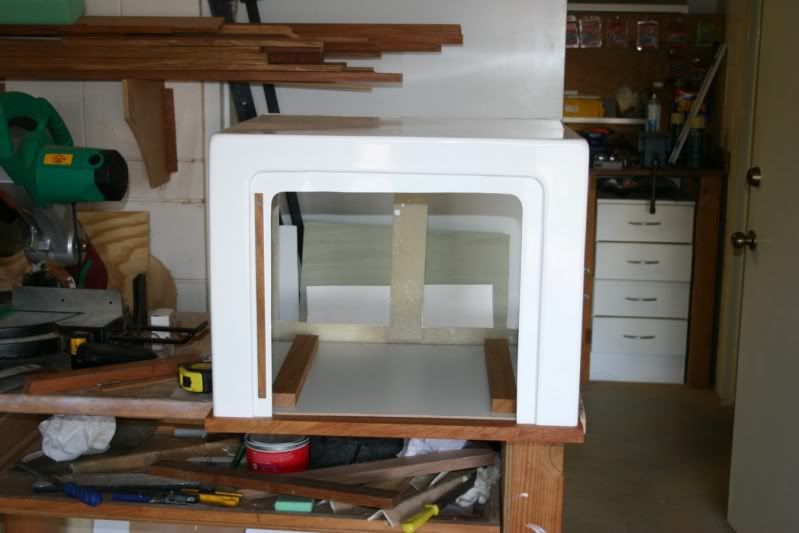 Had to make a floor for it with ply covered in laminate, a base in timber as well as a door The door was timber framed and the panel was gelcoated fibreglass 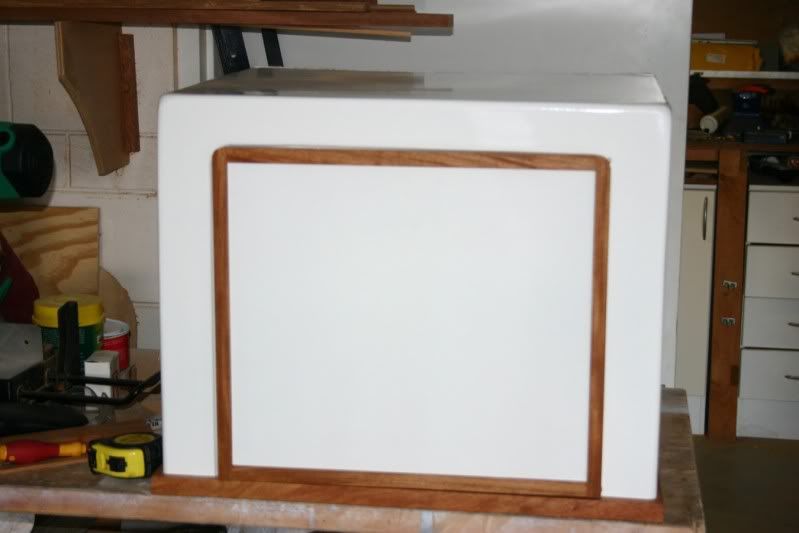 Where does it go? HERE 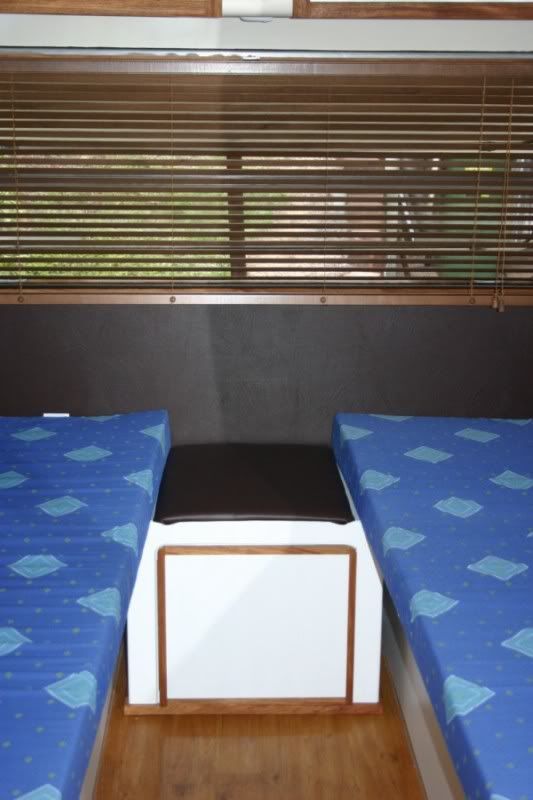 Added a little seat for the top and can be used as a night stand Cheers Atog |
|
Hillbilly
Full Member
   "Fun in the Sun ..."
Posts: 105
|
Post by Hillbilly on Nov 1, 2009 15:11:23 GMT 10
Hey thanks JBJ and Atog,
Have sent you a PM JB, cheers guys.
Hillbilly ;D
|
|
|
|
Post by humpty2 on Nov 1, 2009 19:12:19 GMT 10
My quick question.........Is there a book available that could help me when I go to make fibreglass bits instead of having to refer back to these threads?
|
|
|
|
Post by atouchofglass on Nov 1, 2009 19:37:22 GMT 10
Hey Humpty
If you find a good book on fibreglassing .... post it up here
Cause I too would like one
The only way I have learnt is by doing and through the blokes I worked with over the past year or so
Even if you don't find a book - give fibreglassing a go
Necessity and practice will make you better at fibreglassing
Cheers
Atog
|
|
|
|
Post by humpty2 on Nov 1, 2009 19:43:10 GMT 10
In my dreams I want to build my own car    Love to find the right book though, just so I can sit, read and learn........ then put it all into practice. |
|