|
|
Post by atouchofglass on Mar 30, 2008 14:57:19 GMT 10
Preface:
Since starting this thread some of the posts have been deleted over time.
Members have come and gone as happens in all forums.
So if it seems I am answering questions that were not asked, that's the reason. 
Sadly many of the Olympics that have been started haven't (to my knowledge) been finished.
This needs to be thought about seriously before starting such a large project as a caravan rebuild.
I hope this thread is useful to all that read it and your project goes well.
Cheers
Atog March 2013
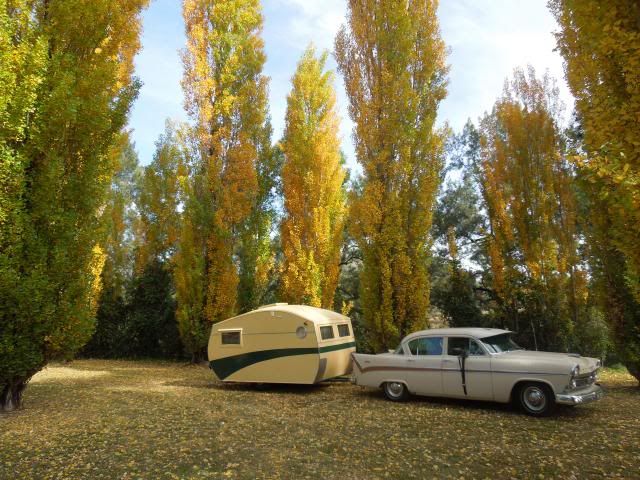
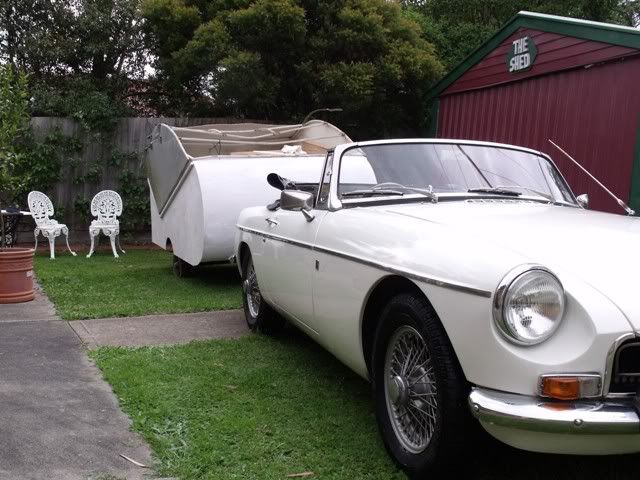
Thought I'd add this photo to show what the van looked like at the beginning The photo was taken before buying the Olympic This is what I started with 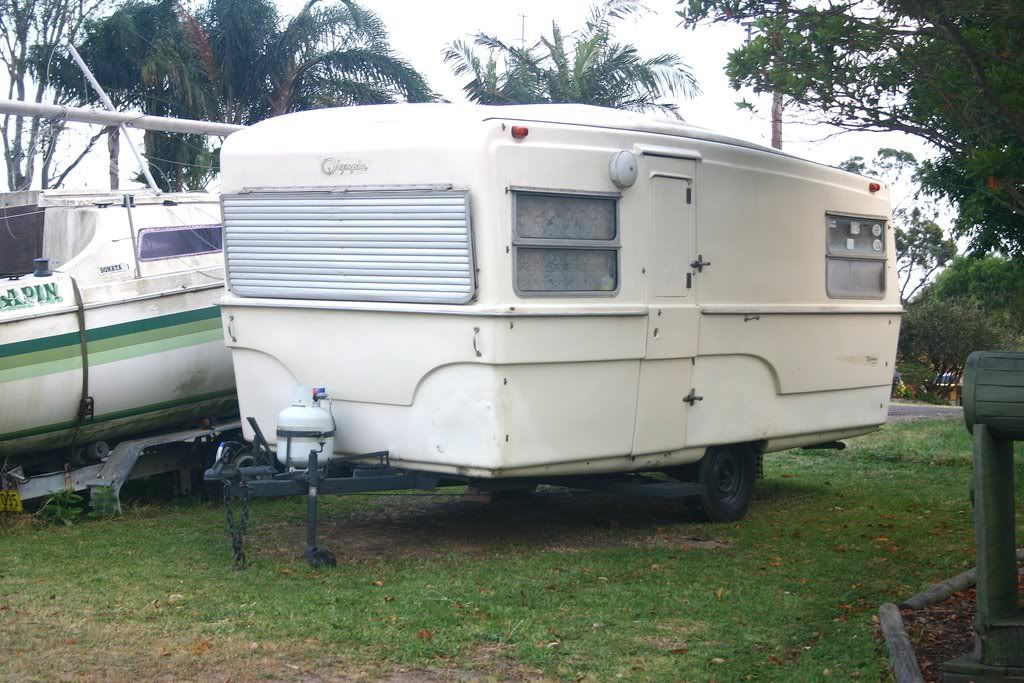 Cheers Atog May 09 Cheers Atog May 09Greetings Everyone Thought it was time to share my project with you all Picked up the Olympic from Newcastle in Sept 07 a one week round trip to Cairns... Got back in the worst tropical storm I had seen in years The van leaked like a sieve. 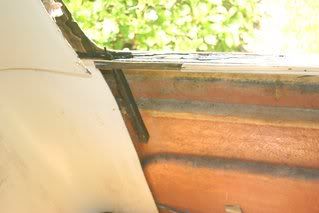  So sealing the back window and roof became the priority  This is the front roof  And after glassing... the green is foam shaped to keep the glass in place All the windows need removing and resealing so I am slowly getting them done.   The front was also damaged on both sides so that was done over the next few weeks 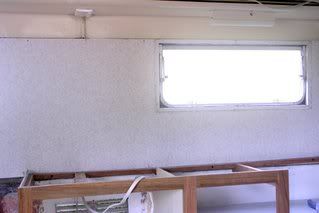 The kitchen window has been resealed and spashback has been replaced with new Laminex. 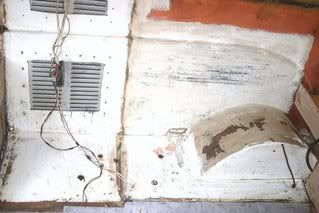 Removed the old kitchen and made the bits for the new kitchen over the next few months 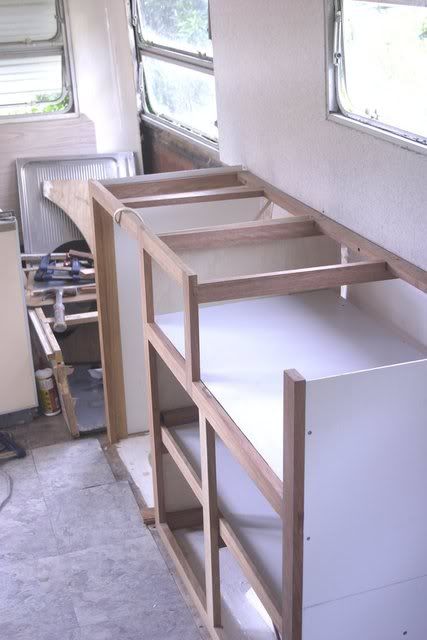  Over the Easter weekend I sealed the kitchen window and fitted the Kitchen carcass. Still going the next weekend as well  Sealed over the window frame and fibreglass body to make sure no water creeps in Since originally doing this the black matrix was removed It leaves streak marks on the aluminium Perhaps white would work better Have had good results with just making sure the seal from ally to fibreglass is very good The beds had rotted because of the water leaks 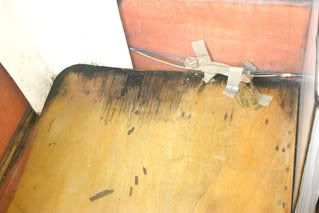  The single bed behind the kitchen has been removed and a new higher bed will be made soon. There will be access to the space under the bed from the side and from above. We will be fitting a porta pottie under there. Progress is slow but steady Atog
|
|
|
|
Post by Geoff & Jude on Mar 30, 2008 15:02:06 GMT 10
hi atog
looks like you've got your work cut out for you.
keep it up, the end result will be worth the effort.
geoff 'n jude
|
|
|
|
Post by atouchofglass on Mar 30, 2008 15:14:06 GMT 10
Thanks Geoff & Jude I enjoy the challenge of resurrecting the pitiful  The work on the van is good fun ....really.... it keeps me out of the pub ;D ;D  The rear of the van had a few problems in the roof as well 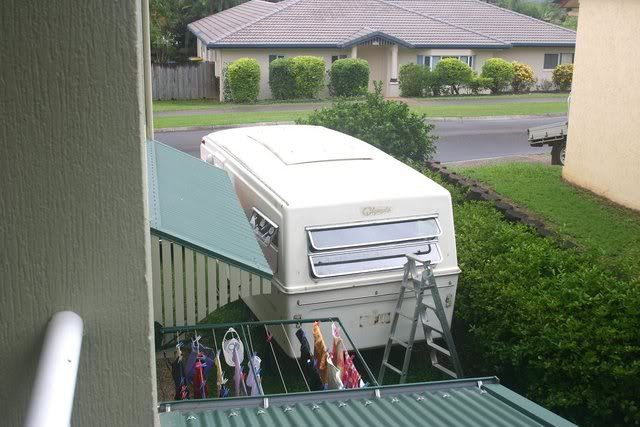 The area that I have to work in is a little tight but such is life Atog |
|
|
|
Post by atouchofglass on Mar 30, 2008 15:24:30 GMT 10
Then there is the doorway The dry rot was making a mess of it sooooo I thinned down some resin and painted it on like varnish. It took forever to go off but the results were worth waiting for. ;D 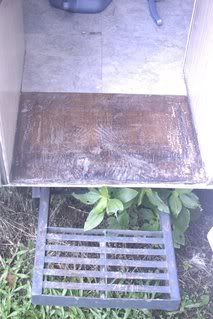 Previous owner had screwed a kick on the edge..... right through the glass shell  The resin fixed that problem too ;D Atog |
|
|
|
Post by boblor on Mar 30, 2008 17:56:05 GMT 10
Hi atog
Great photos of the restoration and will be a great van when finish. We can assist with stickers when you reach that stage. A local company I have been dealing with has placed on their computer system with my assistance Olympic signage in correct font/style and in any colour. Cheers boblor
|
|
|
|
Post by firefighter on Mar 30, 2008 19:57:02 GMT 10
|
|
|
|
Post by Franklin1 on Mar 30, 2008 21:54:27 GMT 10
Hey atog, don't worry about reserving any lawn for me if I come up your way. I'll go over to that mansion across the road from you...they look like they've got PLENTY of rooms for visitors!! ;D ;D You're doing a damn fine job on that Olympic, and I'm particularly impressed with your workmanship on the kitchen cupboards. (As a matter of fact, I need some cupboards for my Franklin. Might bring my trailer up with me...plaster you with "special" tropical juice... ) Keep at it, atog. It's gonna be a beauty!! cheers, Al. |
|
|
|
Post by atouchofglass on Mar 31, 2008 6:40:02 GMT 10
Greetings All Thanks to all for the encouragement Hey Franklin 1 You might be comfortable over there they have a pool!!!!  Yeah no problems with helping you with kitchen cupboards... it only took me six months to get that one done. Why in a year and a half we should be able to knock one up for you easy... ;D ;D ;D Back to the van:I forgot to mention about the window framing I used. Instead of replacing the rotted timber with more timber that eventually may have the same problems, I used 19mm square aluminium tube. It works a treat. Matrixed the ally onto the glass wall, clamp and waited an hour bingo...new framing.!!!!!! In the photo of the Kitchen splashback the ally top rail is just visible. Using aluminium also means that cleaning the top rail is easier and there is no need to put a cover strip across it. There is still a need to cover the exposed edge of the spashback though. Off the subject of my van but onto van repairs in general I posted a thread on Fibreglass HoneycombCheck it out the stuff is amazing If the kitchen wasn't already made it would have been out of this stuff. It would have taken less than half the time and be just as strong. Should you need a timber front like the rosewood front I made,.... it could have been stuck onto the honeycomb as a facing!!!! For the Fibreglass Fraternity it is a godsend... if the internals are fibreglassed to the shell it strengthens the whole body and makes it more rigid Had the '68 not already been started in timber framing this new medium would have been the go. In fact any van could be helped with the stuff... it is light, strong and quick to use. When the ply either side of the entrance is replaced it will be with F/honeycomb and gelcoat. Can you tell I'm sold on this stuff??? ;D ;D Atog |
|
|
|
Post by atouchofglass on Apr 6, 2008 7:16:43 GMT 10
Last post for a while folks Got the single bed up to ply stage and now have to laminate the side and end before fixing then to the framework In the photo there is aluminium tube added for extra strength at the height of the old bed.... far too low and not enough storage.. 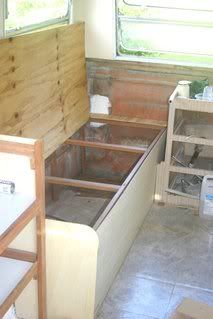 The top will hinge so access to the storage will be from the top.. See you all when I'm back online ;D Atog |
|
|
|
Post by atouchofglass on Apr 30, 2008 6:46:51 GMT 10
Greetings All
Quick note on the age of the Olympic
On the inside of the facing of the cupboard was written "Rob Oct 68"
so there you go Boblor your van was most likely made in Nov or Dec of 68
Atog
|
|
|
|
Post by atouchofglass on Jun 28, 2008 20:03:54 GMT 10
A quick update on the slooowwww progress of the van decided to further waterproof the doorway by making a tray out of fibreglass Hopefully it won't be too difficult to fit 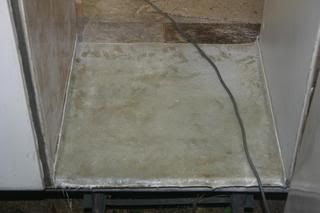 It's flexible enough to press into the front edge of the doorway and glass to the outer shell 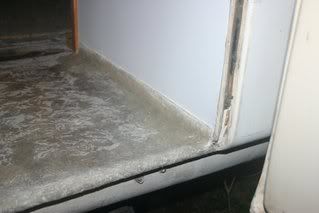 The floor covering will go over the tray and it will be virtually invisible Took about two hours to make Used one layer of 600 chopped strand Atog |
|
|
|
Post by atouchofglass on Jul 28, 2008 6:56:13 GMT 10
The new pantry and wardrobe shell have been installed. The fittings are from bunnings as it was about $225 Vs $480 if using normal cabinet wholesalers hardware 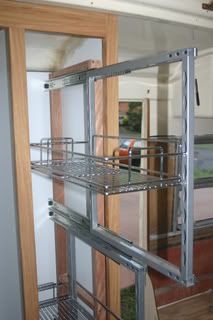 The top of the pantry/wardrobe are yet to have the ceiling fitted that's why you can see the fibreglass strengthening Atog |
|
lulu
New Member

Posts: 4
|
Post by lulu on Jul 28, 2008 13:31:28 GMT 10
Excellent job there Atog...Well Done! Lulu |
|
|
|
Post by atouchofglass on Aug 31, 2008 17:46:51 GMT 10
Hi Lulu thanks for the encouragement we all need it from time to time Well the electrics are starting to go in and should be finished next weekend 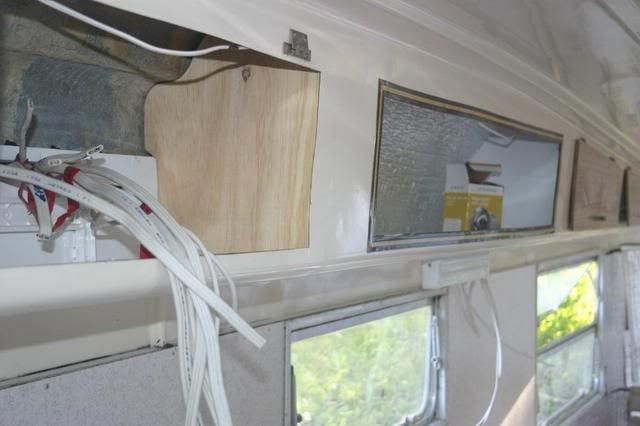 Painted the beds inside and out  And the water tank has been removed 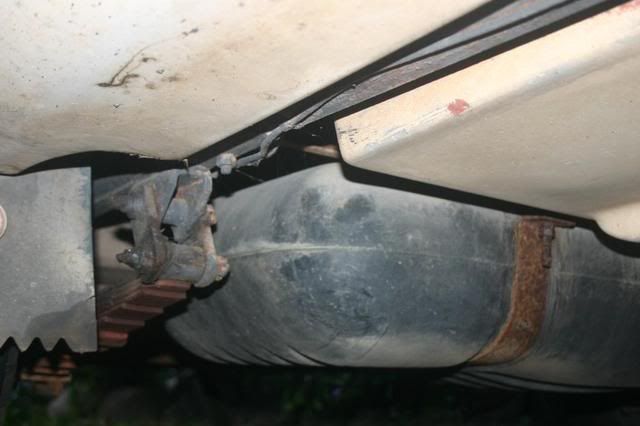 The list of jobs seems to keep getting longer the more that is done..... Maybe if I do nothing the list will get shorter   Atog |
|
|
|
Post by yellowuki on Aug 31, 2008 18:17:19 GMT 10
Personally, I don't like Fibreglass van  But, to redeem myself for making that comment I know where there is one exactly the same as this one in a backyard in central Victoria. If anyone is at all interested just let me know and I will happily approach the owner and ask (Can never hurt to ask, that's how i got my VV for $350! ;D ;D? Yellowuki |
|
|
|
Post by atouchofglass on Aug 31, 2008 18:27:52 GMT 10
Yellowuki
You're allowed to not like fibreglass..
Just as long as you keep an eye out for those terrible fibreglass vans....
So those nutters like myself can reclaim and repair them ;D ;D ;D
Atog
|
|
|
|
Post by yellowuki on Sept 1, 2008 7:39:21 GMT 10
Are fibreglass vans heavy? ;D ;D |
|
|
|
Post by atouchofglass on Sept 1, 2008 17:58:32 GMT 10
yellowuki
Reddo is sort of right
The fibreglass vans are light and easily repaired to make them water tight
Cheers
Atog
Fibreglass to the fore
|
|
|
|
Post by atouchofglass on Sept 6, 2008 17:52:03 GMT 10
So here is a couple of update photos The drivers side rear of the wheel arch had a nasty hole in it from before I had bought the van 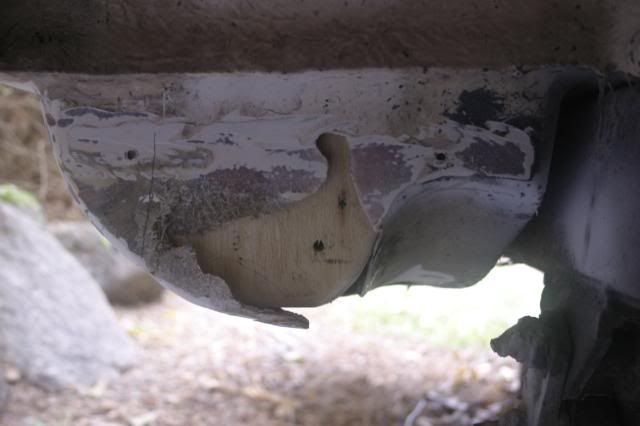 So by shaping a piece of plywood and glassing it in the problem was solved Total time ..... less than two hours 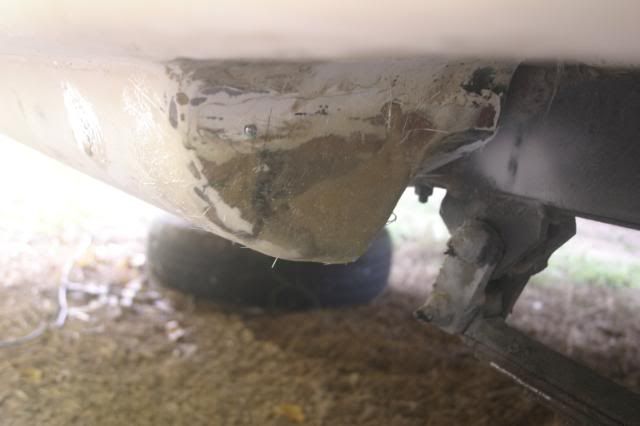 Notice the screw that held the plywood to the existing glass They are removed after glassing and the area glassed over again Fibreglass .... easy to repair .... easy to make strong.... can't beat it.... Cheers Atog Though to do it right will take some sanding and flowcoating.. Another 2 hours |
|
neilncheryl
Full Member
 Make God laugh, tell Him your plans.
Posts: 324
|
Post by neilncheryl on Sept 6, 2008 19:05:07 GMT 10
Hi Atog
Good job you are doing there and all coming along nicely.
Looking forward to seeing the next episode.
Be ready for Coledale next year maybe?
Keep up the good work
Neil
|
|
|
|
Post by atouchofglass on Sept 10, 2008 8:01:50 GMT 10
Hey Neilncheryl Thanks for the encouragement Mostly the chassis is on my hit list this week Sadly it is raining in Cairns so the chassis is taking far longer than expected Have wire-brushed and rust converted the chassis and am in the process of priming it ..... High humidity means it is taking it's time drying and I'm taking my time crawling under the van in the wet.... As far as Coledale goes..... After the van ..... there is the little matter of a tow car..... Possibly a panel van..... As always money is the issue there  We'll see cheers Atog |
|
|
|
Post by atouchofglass on Sept 12, 2008 18:40:25 GMT 10
Well so much for a week working on the van The chassis is now done .... finally Water tank not in yet.... Thursday was a total washout.... the rain won.... sooooo Decided to wash the van OK not just wash the van but clean the entire outside and remove all the silicon around the aluminium strip that runs all around the middle of the van I'm not saying it gets wet up here but the roof hatch had lichen growing on it.... no joke it didthat was Thursday..... 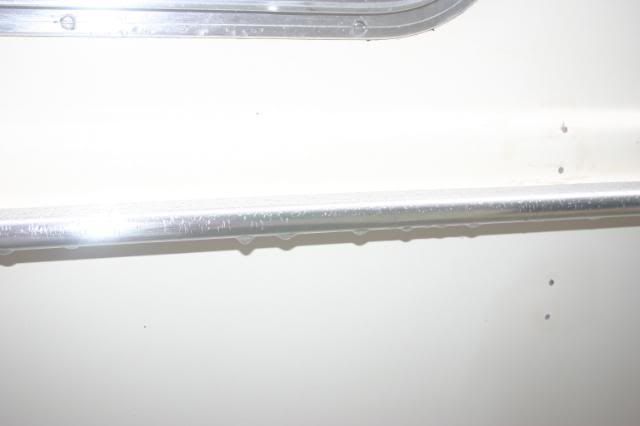 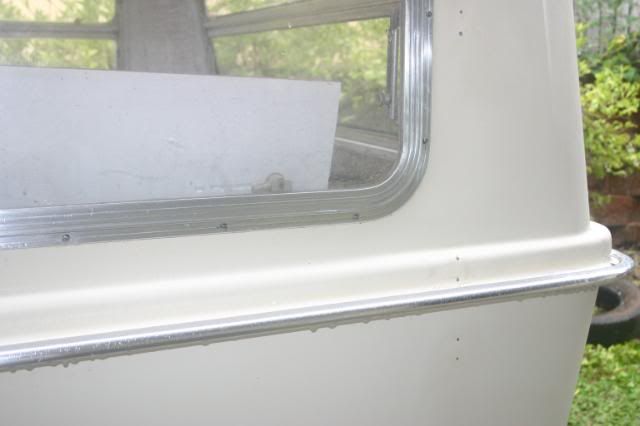 Managed to finish the painting of the chassis this morning and flowcoating the fibreglass areas that needed it. Fixed/fibreglassed the side behind the other wheel as well.. A week and not a lot finished.... such is life in the sunshine state.... eeerr liquid sunshine state...
My apologies to those with little or no rain ..... it's a feast or famine thing going on....Cheers All Atog |
|
|
|
Post by atouchofglass on Sept 17, 2008 6:36:27 GMT 10
Little addition to the outside 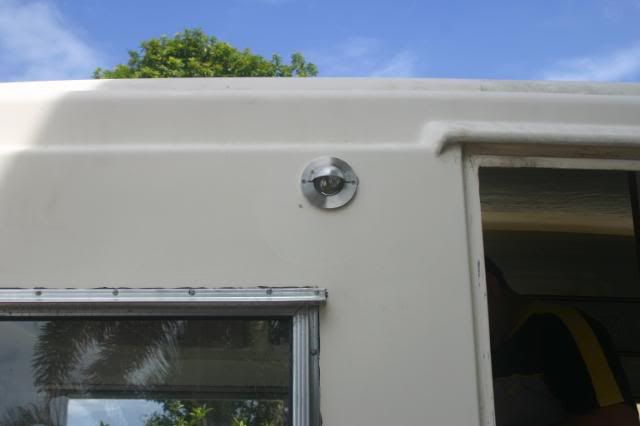 Not yet hooked up so am not sure just how much light it will give The light is a 5 watt LED |
|
|
|
Post by atouchofglass on Oct 8, 2008 6:52:21 GMT 10
Talk about a cheap option for quality product bought 4 of these on caravansplus a week or so ago cost per clip.... $11.45 plus postage Try and make these in stainless steel for that!!!!! 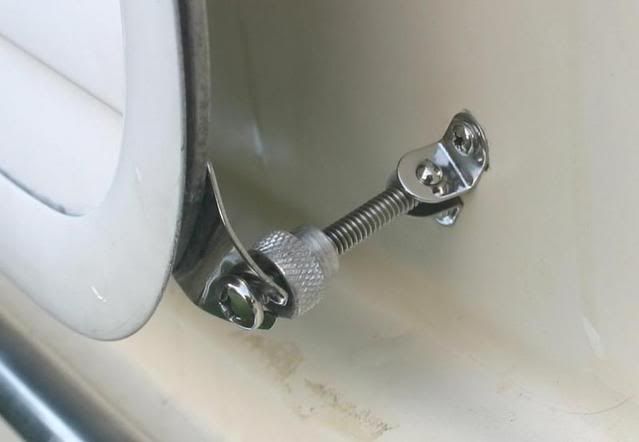 admittedly they didn't come polished..... That was about ten minutes extra work. Cheers Atog |
|
bobt
Full Member
"Ugly as Sin"
Posts: 455
|
Post by bobt on Oct 8, 2008 21:08:04 GMT 10
aaah nothing nicer then polished stainless
They certainly were a good buy..
|
|