Deleted
Deleted Member
Posts: 0
|
Post by Deleted on Jun 3, 2008 13:31:10 GMT 10
 Thanks dudes Just occured to me....  "Rosie"..stands for......... R ecycling O ld S oftWOOD ........other "S" words come to mind here  I s E asy ;D Reddo
|
|
Deleted
Deleted Member
Posts: 0
|
Post by Deleted on Jun 3, 2008 19:11:42 GMT 10
|
|
Deleted
Deleted Member
Posts: 0
|
Post by Deleted on Jun 5, 2008 8:51:07 GMT 10
Hi Vanaphiles Well... I never thought i'd see the day .... Was down the shed last night and heard this Flappin' noise  . looked around and couldn't see anything so continued fiddling with cupboard hinges etc.... Then there was that flapping noise again  ........ i stopped work and took a good look around the shed...... I know old trees develop hollow logs after about 50 years but i didnt thing WOODen Vans WOOD. Anyway i swung around the corner of Old Rosie and blow me down here is this parrot trying ta get into an old hollow that had appeared in the van overnight.... 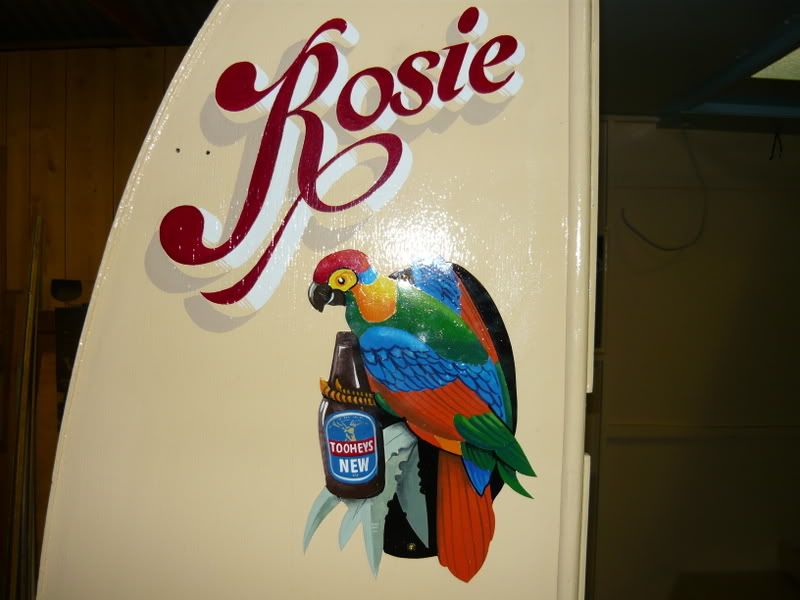 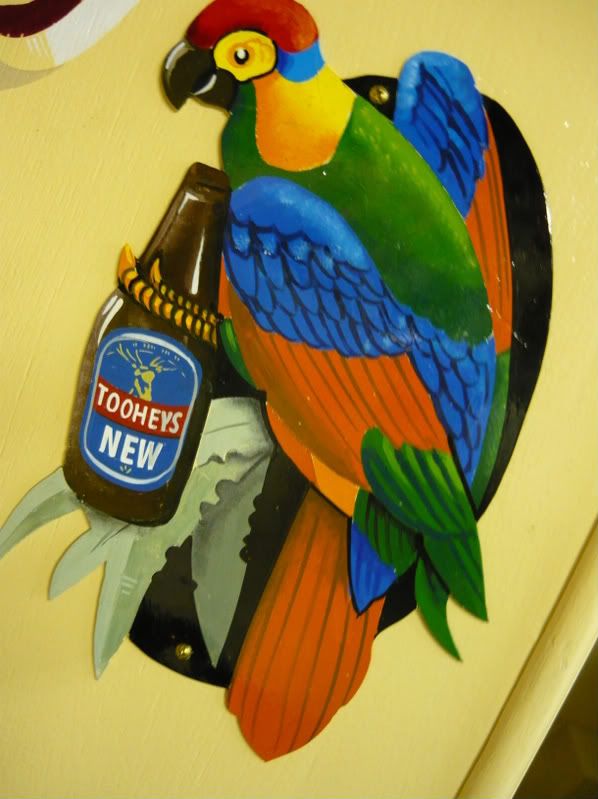 Just one of the joys of owning a bondwood timber van.......   Not everyday ya get a good lookin' bird turn up at the door of ya van wanting to come in for a drink. ;D Once again Thanks heaps to bro Jeff for the effort. We are currently discussing Cobbers idea of a "fake Don style " leadlight rear window on the back. Bye for now.... Bird Brain Reddo |
|
|
|
Post by minicamper on Jun 5, 2008 9:45:52 GMT 10
Hi Birdbrain,
I like! Great addition. Lucky its not an ally van, people would think you were living in a biscuit tin!
MC
|
|
Deleted
Deleted Member
Posts: 0
|
Post by Deleted on Jun 5, 2008 10:09:06 GMT 10
|
|
|
|
Post by firefighter on Jun 5, 2008 10:27:56 GMT 10
 Hey Reddo one of my sons is a rep for..... TOOHEYS... do you mind if I e,mail the piss pot parot to him .....you never know rosie could end up famous f/f ;D ;D ;D ;D ;D
|
|
Deleted
Deleted Member
Posts: 0
|
Post by Deleted on Jun 5, 2008 10:52:17 GMT 10
Hi F/F No worries with emailing "Piss Pot Polly Parrot" to the son at the Toohey factory Design copywright is mine.. weelllll actually i found the parrot on a google images search. ( waddya mean Arnotts thought of it first?? wot would ya rather in ya hand a stale bikky or a bottle of beer ) Artwork and painting copywright is Bros.. $500, 000 each and tooheys can use the logo in thier booze promotions....... Its either that or a free carton of Tooheys each per week until the day we die ............. mmmmmmmmm ..........beeeerrrrrr Homer J. reddo |
|
Trish_M
Full Member
 1950's Home Made Bondwood "Bettie Moonya"
Posts: 275
|
Post by Trish_M on Jun 5, 2008 16:37:04 GMT 10
|
|
|
|
Post by minicamper on Jun 6, 2008 7:22:02 GMT 10
Reddo, the bikky tin was more in reference to the "similarity" to the Arnotts logo.... Relax all you Ally lovers, i have no predjudice against any van (old that is) Oh, oooh Oh, reddo, you forgot, what about, wait for it... Reddo Royals! They're like you aren't they? Soft in the middle? ;D 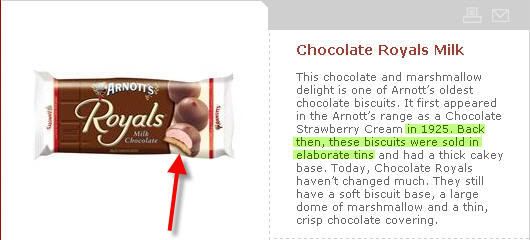 See what the text says! ELABORATE tins, not boxes! ;D ;D Irrespective, I'm just hoping you can keep Rosie out of that damn creek water! Any news? Cheers Chris |
|
Deleted
Deleted Member
Posts: 0
|
Post by Deleted on Jun 22, 2008 17:07:26 GMT 10
Evening all Managed to find some time to fiddle with old Rosie during the weekend. I said some time back when i was building the pretend Td that more than haldf your time can be spent on fiddly bits inside.... Now i am convinced. Try a full day fabricating and fitting hinges, locks, latches to fly screens and windows .... only three of em but they never had latches or locks or handles originally so i had to rat through the Steptoe junk piles for bits left over from other vans. Then i had to sort them so i had enough to have identical fittings on all three windows. Once i had everything polished and cleaned up ( all fittings are brass) i had to sort through a tub full of brass slot head screws... ( I can hear Cobber yahooing already... yep Cobber.. everything in the van is held together with slothead brass screws... outside is a different story ) to fix the bits n pieces to the van. End result after a full day and a half is three windows and fly screens that actually lock shut. bare in mind that these windows had no latches to hold them open and no locks to hold em shut when i got it. The windows swung open going around corners and the fly screen flapped about doing whatever they wanted. It doesnt sound like a big deal but it can take up hours when ya start fiddling. 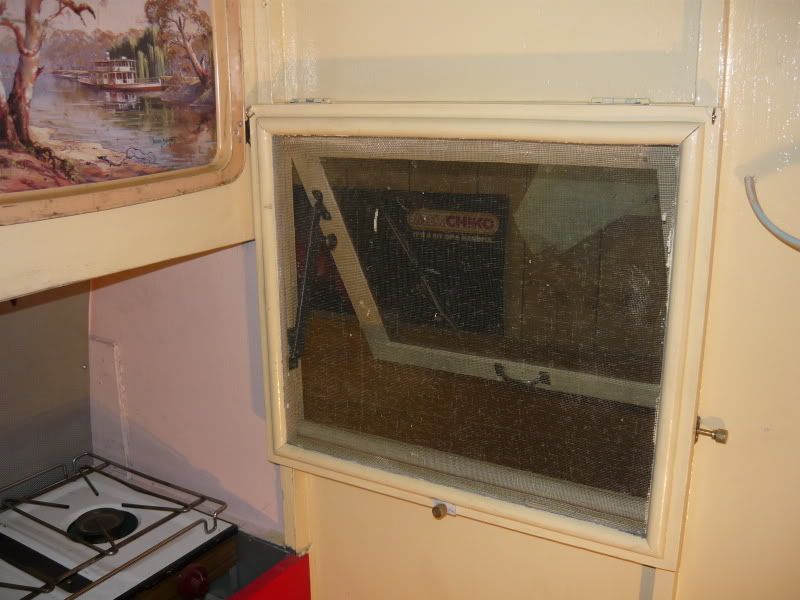 It doesnt look much but anyone that has been through this exercise will know what i mean. its a lot easier if ya are simply removing/polishing and refitting existing bits... I am happy that this job is out the way and i can progress on with other bits. I had fitted all the new /old brass door handles and hinges back on the red doors and hung them earlier in the week as well as the hatch flyscreen. With a few hours up my sleeve before "happy hour in the Shed of invention" my mind turned back to that old problem about no ice chest and "What to do" 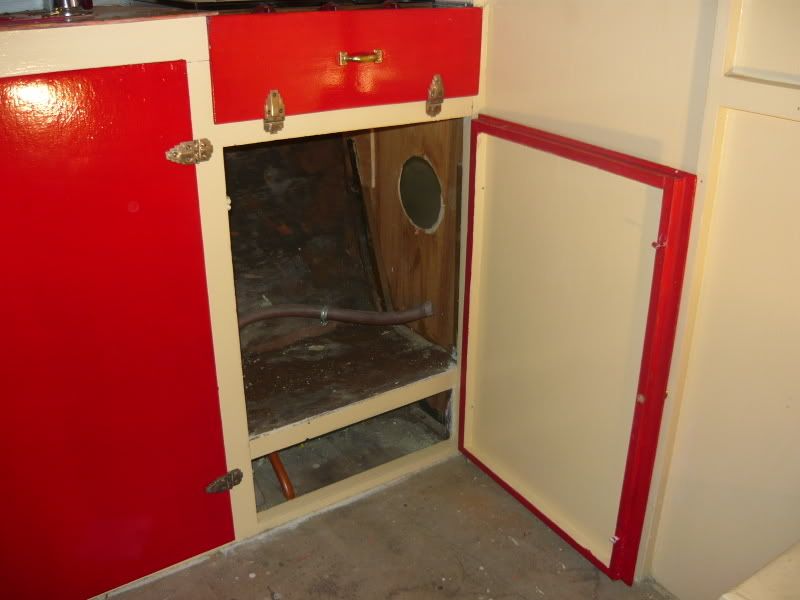 Here is where the ice chest use to live......  .. only 300mm deep at the base and gets deeper as the van gets higher at the front..... the ice chest must have been a "D" Shape... . Other alternative is the wardrobe... 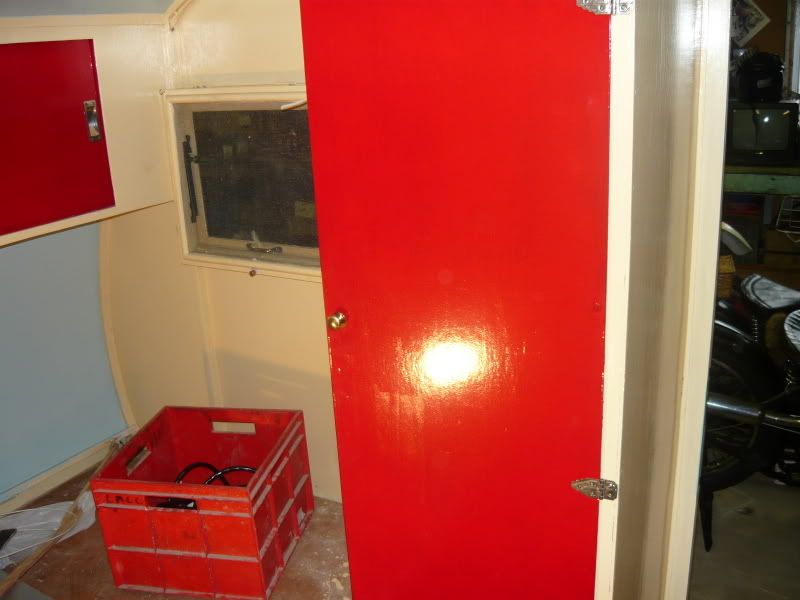 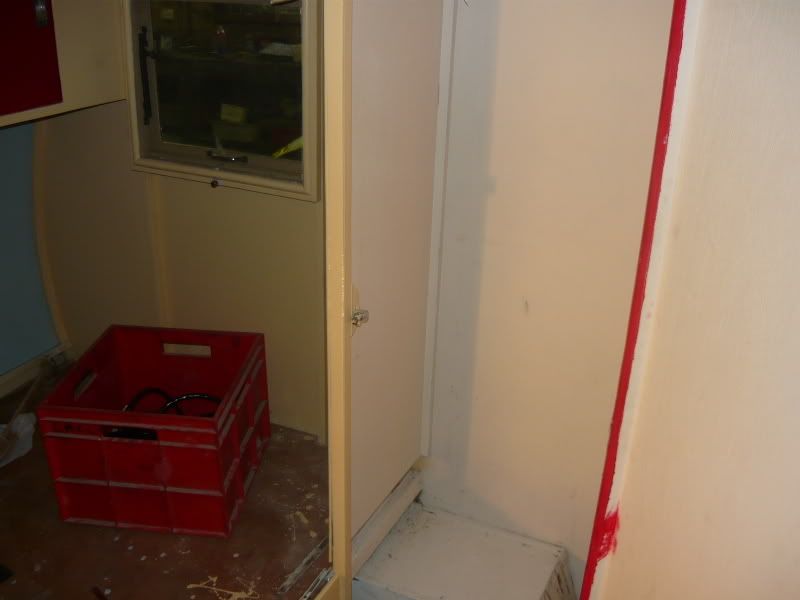 Not much room in there for a fridge and my Tuxedo.... or is that clown suit ;D. Woe is me .. what ta do .... I Know.. brilliant idea Reddo... I'll have a beer. Better go get one outta the back fridge. So while i am scrounging up refreshments i spotted this....  Its an old army esky that my very bestest Fobbergrosser mate "Spyder " gave me some time back. Lovely people those Fobbergrossers.... ... I cant believe i just said that...  Better come back later and edit that bit... So i dragged the old tin insulated esky up the yard and around to meet Rosie. .. Bewdy mate .. she fits through the van door and... 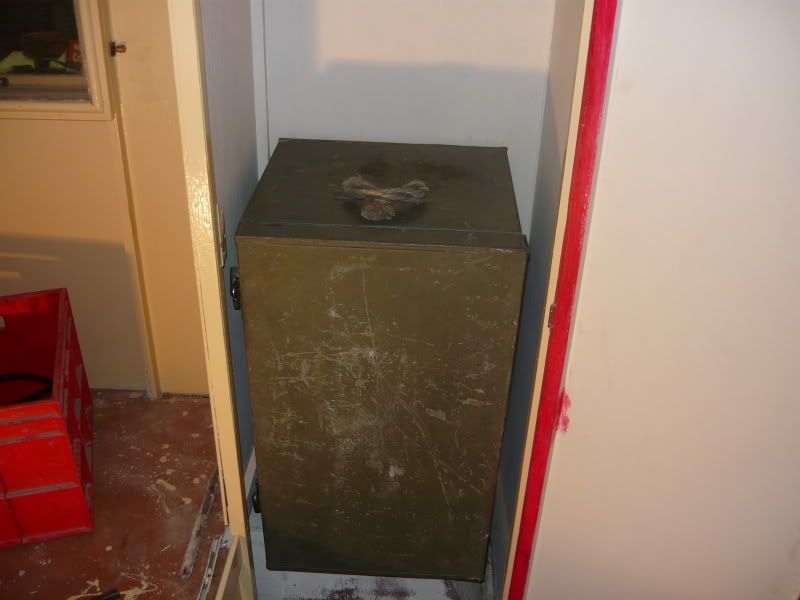 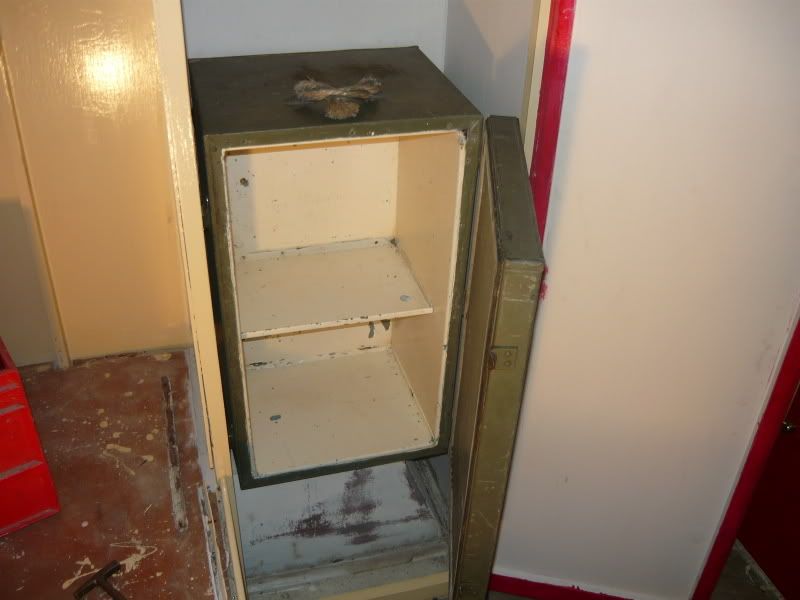 Straight into the wardrobe on its end. Even got enough room to get the 40mm thick double insulated door open. Out with the angle grinder and drill. whip the handles off . Screw in a couple of rails to hold a wire rack . Steal the rack out of the beer fridge and we are starting to look like an ice chest... 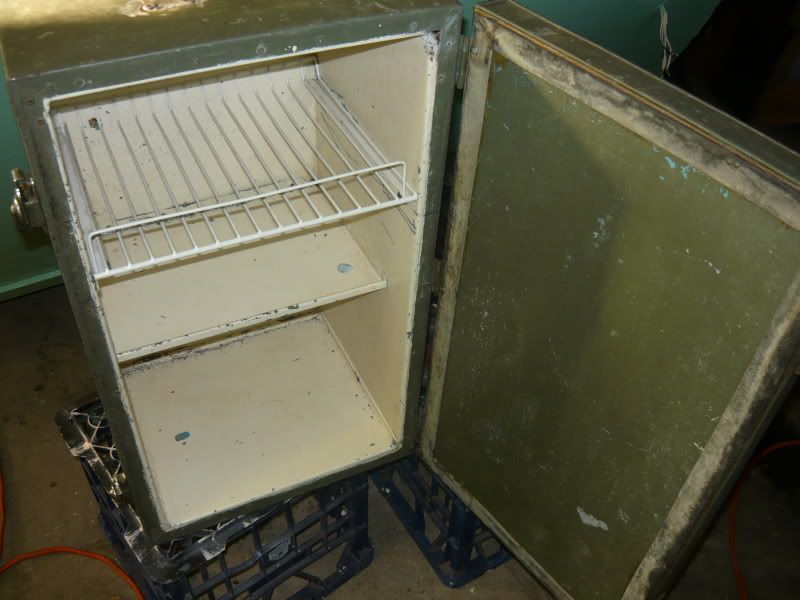 Just gotta whack a few holes down through the shelves and plum a hose down through the wheel arch to drain the water away. Then build a shelf across the top of the box to form a new bottom in the wardrobe.......woo hoo.. the cold beer future in Old Rosie is looking ... well.... Rosey i suppose. And if i cant fit enough beers in there . There is always this little option as well. 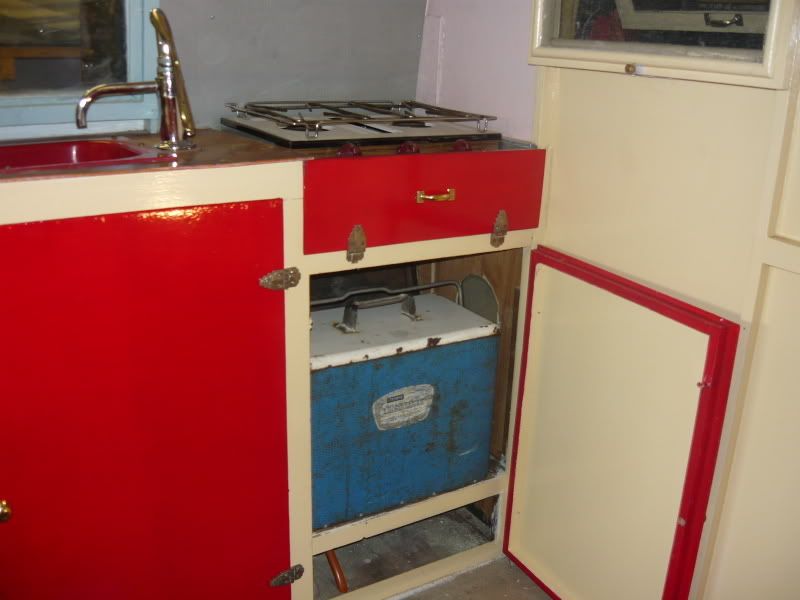 Never know when friends might drop in..... ;D ;D ;D ;D Nuff for today... Pizzas have just arrived. Set a trap... and catch ya later Reddo |
|
|
|
Post by cobber on Jun 22, 2008 19:30:44 GMT 10
You're a case 'arold, that's for sure , Are you telling me you riped the handles off that $200 army esky so it would fit in the cupboard where you put your stubbies and thongs...... sometimes I despair . I am pleased to see that you appreciate the value of slot headed screws in a restoration, I have found a fair dinkum old fashioned true blue ridgy-didge hardware store that is in the process of getting rid of all stock, at the moment they are having a 25% off sale, yep.. they have slot headed screws, anybody want some Cobber. |
|
|
|
Post by sportsman 1 on Jun 23, 2008 12:42:10 GMT 10
Hey Cobber,
are any of those slot headed screws of the raised countersunk variety? If so let me know what sizes, lengths and quantity.
cheers, Leigh.
|
|
|
|
Post by cobber on Jun 23, 2008 15:08:04 GMT 10
I have sent you a PM Leigh, Anybody else interested in these slot head screws send me a PM so we don't railroad 'arolds thread Cobber. |
|
|
|
Post by minicamper on Jun 25, 2008 8:13:22 GMT 10
Hi Reddo,
I'm guessing that Rosie is around the 9 to 10ft, what if any provision is made for table/bed? (Pics?)
Cheers
Chris
|
|
Deleted
Deleted Member
Posts: 0
|
Post by Deleted on Jun 25, 2008 11:40:58 GMT 10
Hi Chris "Rosie" is not a big lady . she is quite petite and no bigger than the TD i built a while back. Around 9ft in the body and of simple single skin construction which makes her a lightweight as well. The big difference/advantage over a TD is having the kitchen inside across the front and a double bed width ways across the back with a bit of room to move between the 2 areas. The table folds down off the right side wall in the middle.. Here is a picture of it before i started the resto. It is laminated in a sort of "coppertone marble look" , same as the sink benchtop. Once you have finshed the evening meal it can be folded up to reveal a dance floor / party area of approx 1.5 square metres ;D ideal set up for a bit of dirty Latern dancing with a person of the sexy female persuasion  Seating is a bit of an issue as you have to sit on the bed to eat your meal. Enough room for 2 people but guests would need to bring an small fold up camp seat to sit on. The bed is about 4ft wide and has 4 draw storage under it.. 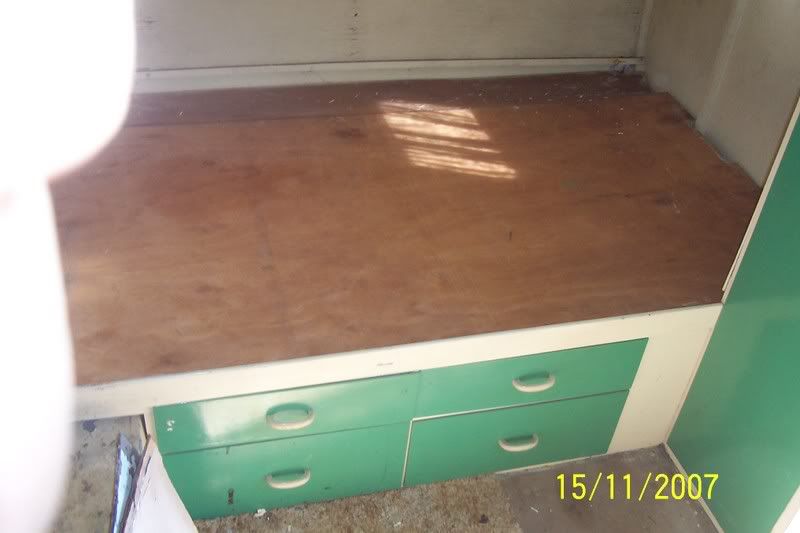 and a two sliding door cupboard above it as well as the wardrobe near the entry door. I'm a bit concerned about towball weight as the kitchen is across the front. By fitting the ice chest in the wardrobe. water tank behind the axle and either stowing the spare wheel on the bed while travelling , or making a wheel carrier under the rear or on the back of the van i hope to achieve a towball weight that is managable on my own without relying on the jockey wheel to act as a winch/ jack to lift the coupling off the ball. something like 20kg would be good. Reddo |
|
bobt
Full Member
"Ugly as Sin"
Posts: 455
|
Post by bobt on Jun 25, 2008 22:35:05 GMT 10
Hi Reddo Love the van. When the dancing is happening can I watch???  Mate I like the idea of a lite tow ball weight, but becareful you do not end up with a handling problem. If I recall correctly towball weight should be about 10% of the over weight, without the dancers, Bob |
|
Deleted
Deleted Member
Posts: 0
|
Post by Deleted on Jun 26, 2008 5:30:20 GMT 10
10% Yup.. i'm hearing ya Bob. I dont think the whole thing would weigh much more than around 350KG wringing wet unpacked. Towball weight or... balance factor can be fiddled with by smart storage and positioning of spare wheel and water tank, gas bottle etc. I have a dicky back and it doesnt take a lot to give me trouble. Last thing i want when i am away on a Vint van trip is to stuff my back up wrestling with heavy weight couplings and jiggling jockey wheels to get the van back on the ball. I have seen a lot of 50s, 60s and 70s vans that require Hercules to lift the coupling onto the towball. God help the owners if the thing happens to slip through the jockey wheel clamp and ends up with the coupling on the ground. It takes an even bigger effort to get it back up to towball height  This is half the reason that people rush out and buy 4 bar towing aids/load levellers. ( sway bars for want of a miss used term). The van shoves the bum of the car down way too far and then the owner has to try and sort the problem out with towing "add ons". Far better to sort this sorta stuff out in the vans design and aim for a better balance......20 to 30Kg should be plenty of towball weight for a van not much longer than a 8ft box trailer. Reddo
|
|
bobt
Full Member
"Ugly as Sin"
Posts: 455
|
Post by bobt on Jun 26, 2008 19:28:57 GMT 10
Hey Reddo. If this is a real 350k wet, then I have ta take more notice, I recon I could tow that behind my A7.
I have a modern, yep I use level rides, have for the last 25 years, I swear by em, not only for lifting the bum of the car up but they stop the pitching and help prevent swaying when you have heavy things passing you. 25yrs ago I could lift the front on to the tow ball, wouldn't dare try it now. I grew up around caravans I can not recall seeing my ol' man using level rides till about the late 70's. He always had 14 +/- footers, most of them were ally's Cannot ask him he is touring somewhere around Nth Qld.
Be most interested to hear how ya go with Rosie. Bob
|
|
Deleted
Deleted Member
Posts: 0
|
Post by Deleted on Jun 26, 2008 20:14:46 GMT 10
Hi Bob
Yeah i know there are those that swear by the bars but i want youto consider this.
When your car and van are dipping at the tow coupling and the bars are taking the load. The stress is being transferred to your car through 4 thin ( usually no more than say 12mm) bolts that hold the standard towbar on the back of the average family car. That is.. 2 either side.
Think about that "flexing action " happening thousands of times on a trip and consider the fatigue on those four bolts.
I know it happens even when you dont employ the bars but the leverage is increased when the bars are working hard to stop the pitching.
The weight of the van.
I dont think i will be too far off the money with 350 .. maybe 400Kg.
The TD i built had about the same amount of timber but a heaps bigger chassis under it from a 12 foot alloy van i demolished.
It came in on the scales somewhere around 350Kg.
The very first van i owned was around 10ft and single skinned with a,lot more cupboards in it. It was in the hi 300s as well.
When Rosie hits the scales she will be butt naked. No matress, no fridge , no spare wheel, no water in the tank. Not that it matters too much .. it is fitted with brakes anyway. I think once you get over 248kg in NSW you go to the next trailer category anyway..that is up to 750KG.and from memory around $150 a year to register
Stay tuned....
Reddo
|
|
bobt
Full Member
"Ugly as Sin"
Posts: 455
|
Post by bobt on Jun 27, 2008 22:56:04 GMT 10
Hi Reddo.
This talking about bolts and stresses is gunna give me nightmares tonight. I am going to have to climb under my car this weekend and check em out. I am greying the hair next weekend so I can blend in with the others on the sunshine coast. My towbar has 6 mounting points and I have 2 x 30 mil solid square tube bars. I am using a Hayman Reese heavy duty towbar and towing hitch. Been towing for a long time and in a caravan club, have not actually heard of anyone breaking those bolts. Seen bent cars, (Boot Drop), bent goose knecks, broken draw bars. That is not to say it could not happen.
Mate you need to move down to Mexico, rego for a private use trailer/caravan is the princely sum of $34.00. Under 200kg not longer then 3mtrs and no wider then ya car and there is no need to register it (TD territory)
I am most interested to see how this vv comes out, weight wise and tow wise, if you get the tow ball weight to your desired number. I have never had a van that weighed less then 1400kgs. My proper cars do not have the ability to tow this weight. I could think of nothing better then driving off to a caravan or car club event in my proper car with a VV in tow.
may your wheels keep turning and bolts stay attached
Bob
|
|
Deleted
Deleted Member
Posts: 0
|
Post by Deleted on Aug 5, 2008 8:34:43 GMT 10
Hi Dudes Dragged "Rosie" ( formerly Mildred ) outside yesterday to fit the new J moulds. I rang Trodler to ask what sort of gunk he uses when fitting the moulds. I know there has been a lot written here about fixing moulds but i figured it would be quicker to just ring an "expert" and get it straight from the horses mouth rather than fire up the 'puter and start searching. Trodler recommended "Butyl Mastic" as it never sets hard,, just forms a skin on the outside allowing for easy removal if you ever need to. Its not cheap compared to other sealing compound but is the "ants pants" for this application. While we where yarning he put me on to a trick of the trade. I have always mentioned installing the moulds first by firstly drilling the holes in the moulds while they are straight. then bending to shape on the van . Then drilling the timber and fixing the mould in place with screws as you work around the radius. Once done and fitted you remove them and run a good bead of sealing compound on the surface of the van. What trodler suggested was to run a pencil line around the edge of the moulds before removing them. Then run masking tape along that pencil line before applying the Butyl mastic. Then fit and secure the moulds in place. 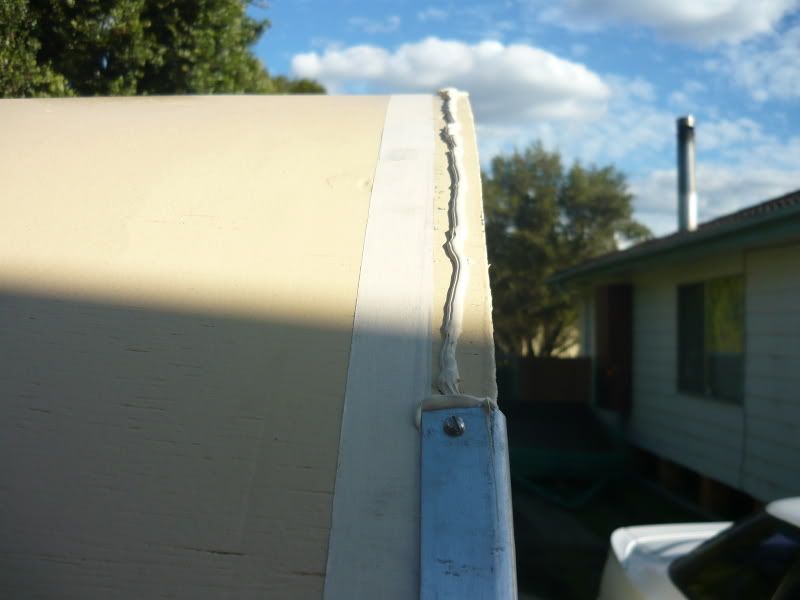 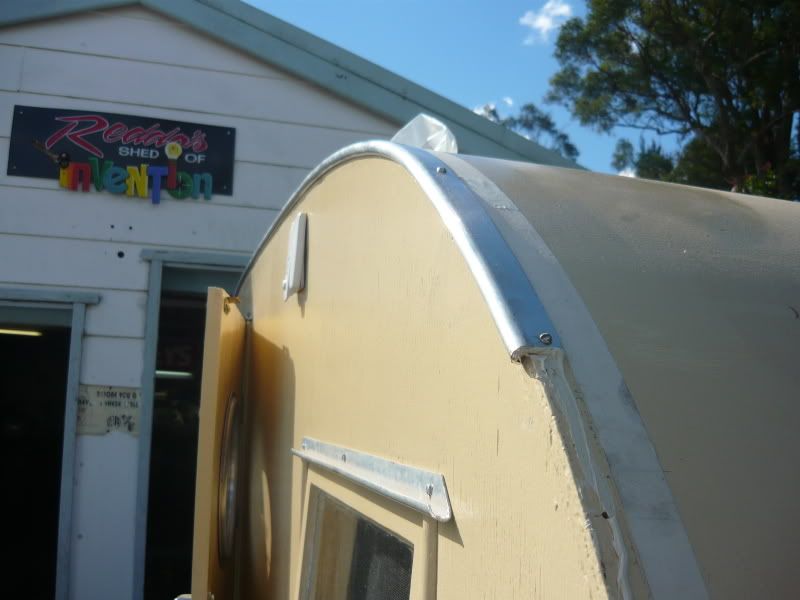 The tape helps stop the mastic squishing out from under the mould Also any excess that does squish out goes on top of the tape. 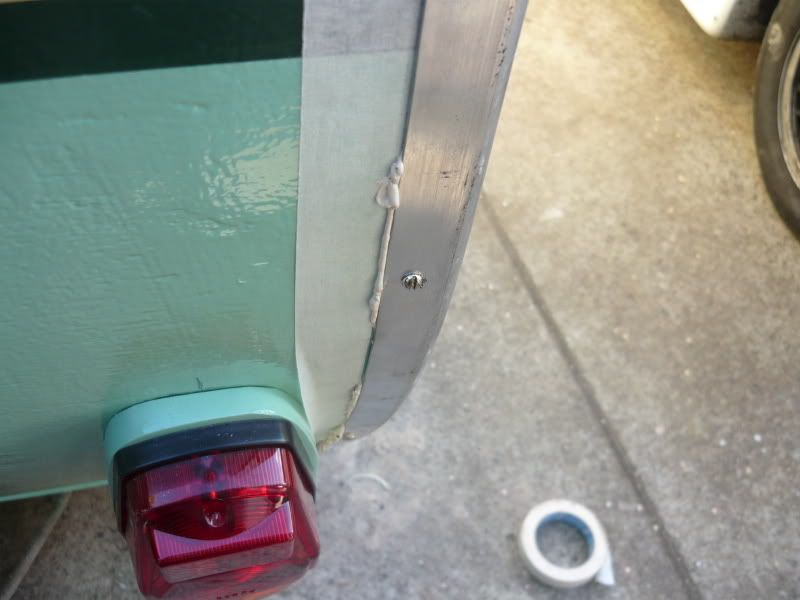 when the mould is fixed in place you simply pull the tape away and it takes any gunk away with it that normally would have been left all over the van.... too easy... Thanks heaps Trodler. Your idea works perfectly. Any mess left on the van or moulds was cleaned up with mineral turps. 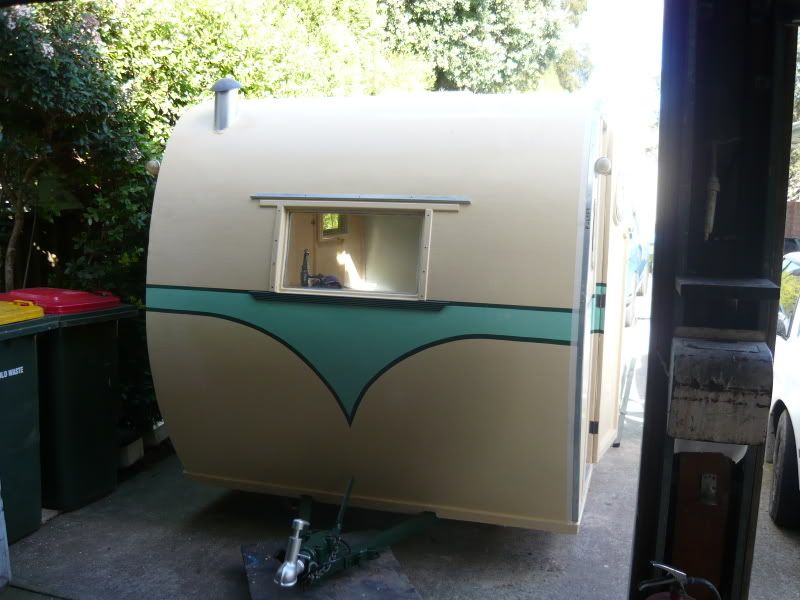 I was going to use staino steel woodscrews but the bloke at "specialised wholesalers" suggested that stainless will set up electrolysis with aluminium. So i bought chrome plated brass 6G X 3/4" slot/cuphead woodscrews. 60 of them cost me around $22. As the drill bit i used was smaller than 1/8th of an inch the chuck in my flogged out 1/2" electric drill would not hold the bit ... sooooo... I had to resort to the goood old Stanley "Eggbeater" hand drill i have had since i was a first year apprentice back in 1969. With a bit of wd40 to coax it back to life she done a great job. I didnt even break the bit in 60 holes drilled. Slot head screws, ... egg beater hand drills... talk about stickin to tradition If and when i get time i will re-apply the tape when i am polishing the moulds with Goddards glow or similar so the grey pastey mess doesnt get on the paintwork... Cheers Reddo |
|
|
|
Post by Franklin1 on Aug 5, 2008 22:25:43 GMT 10
Hey reddo, some fine work being done here!! But I notice that you never post a photo showing that it's YOU actually doing the work...are you being fair dinkum with us, or what?!! Just for future reference, the bloke at the shop is only partly correct in his information. Corrosion is also dependent on the surface area of the two metals, as well as with how far apart they sit on the scientific Corrosion Table. So all things being equal, having aluminium and stainless in contact means the aluminium will corrode in preference to stainless, in a corrosive environment. However, where you have a much larger surface area of ali and a small area of stainless, the corrosion rate is substantially reduced. So a stainless screw (small area) spaced along an aluminium cover strip (large area) results in very little corrosion of the ali. (unless the van is permanently parked near the sea). I'm in the process of restoring a 1977 Millard (...sacrilege to talk about it here, I know...) but there is not a hint of corrosion on the ali cover strips from any of the stainless screws, and that's after 30 years! The other interesting discovery on the Millard is that two different colours of sealant were used around the van. A cream colour to seal all the ali cover strips, which after 30 years was quite dry and brittle, and a blue colour to seal all the windows and other bits and pieces, and which is still very soft and pliable after the same 30 years. I'm not sure exactly whether the cream one is/was a butyl mastic, but the blue one seems to match what I remember butyl mastic looking like back in those days. When I get to the stage of putting the Millard back together, I'll be looking for something that lasts like the blue stuff. Keep up the good work, son! cheers, Al. |
|
Deleted
Deleted Member
Posts: 0
|
Post by Deleted on Aug 6, 2008 12:48:41 GMT 10
Hi Al Thanks for the techo stuff re electrolysis. Oh and you can rest assured that it is definitely me doing the work on the van. 2 things i point to as evidence of this.. 1: the scars and pieces of flesh missing from where i have been attacked by the tools of invention while doing the resto. I used to be very much "hands on" doing these restos. But after maiming and crippling myself and the constant grinding/cutting away of body parts while finishing 3 or 4 of these old darlins there isnt much of the hands left ... more like "stumps on" nowadays Sure i could have someone take a photo of me working on it but how is anyone going to recognise me when i am continualy "mumafied" in 2" gauze bandages and plaster of Paris. 2: The second way of identifying it was actually me doing the restoring is to look at the quality of the completed job. I aint no cabinet maker and have never professed to being one. I probably fall somewhere in the category of "Bush carpenter". Just because i am a lover of all things timber doesnt mean i know how to work with the stuff properly. Some days i amaze myself with what i can achieve, and other days .... well.. . i just pull the shed door down and walk away . Return to the shed the next day in hope that what i mangled the day before was all a bad dream. Bunnings love me..... More than once i have returned to thier shops to buy the same amount of materials as i did the day before. ;D I recieved a congrats card from 'em the other day. When i first read it i thought it was something to do with being the 1 Millionth customer. When i read it again it was congratulating me on spending my 1 Millionth Dollar there Meanwhile the cussing , swearing and self infliction of pain and suffering will continue down the shed of invention in a vein effort to have the Lovely Rosalee on the highway heading north outta Newcastle on saturday 11th October to Nambucca for the start of the 2008 East Coast Tour. Doc promises me i will be out of plaster by then... Reddo... from the far side. ;D |
|
Deleted
Deleted Member
Posts: 0
|
Post by Deleted on Aug 8, 2008 0:50:59 GMT 10
thanks Reddo and Trodler for those instructions on fitting the J mould ......I'm up to that stage with the lil van I'm restoring. Now, where did you say ya get the J mould ......can't get it anywhere over here Mark  |
|
Deleted
Deleted Member
Posts: 0
|
Post by Deleted on Aug 9, 2008 18:35:48 GMT 10
The place over here in Newcastle for Aluminium extrusions is called "Alspec" - J mould comes in 2 sizes . i used the 1" wide stuff.....$12 for a 4 metre length. I bought 3 lengths and ended up with about 500mm left over of the 3rd length after fitting them to the van.. "Rosie" is all of 9'2" long at her waistline and is just barely 1.85M ( 6ft) at her highest point. So if your van is any longer than that you will need 4 lengths. Wheels and tyres..... I bought 4 mini moon hupcaps of a kenworth truck today at Cessnock swap. 2 pair of different diameters . One set is about 1/8th of an inch under size . Other pair are about 1/4" too big.to fit the Morris rims . I am totally spat about payin $5 for the 4 of 'em ;D Anyone got a pair of Morris 1000 hubcaps and maybe a pair of 14" chrome bands they would like to part with. I have a pair of 14" full moon caps ( dust bin lids as Mark calls 'em) as a part trade if anyone wants em. Also just had 2 new 165/14" radials fitted . First time in history that i have had new tyres on a caravan or a trailer.... bugger all change outta $200. What price peace of mind while towing. Reddo
|
|


 .
.