|
|
Post by cardygeorge on Jan 29, 2014 21:55:47 GMT 10
Thought it was about time I gave Gertie her very own thread. It won't be a high speed rebuild, we've had her for nearly 3 years now  She was given to us by my Grandfather. As she hasn't been registered since the late nineties the original intention was to turn her into an extra kids room/guest room for our interstate family. At the time I suggested to my wife (Harriet) that we could rebuild Gertie and return her to holiday duties, which was almost immediately relegated to the Too Hard Basket. A chance encounter at a Hot-Rod show'n'shine with an owner of a van of similar age and condition showed Harriet just what was involved and after numerous assurances of my ability to take on the work, we are now well and truly into the process of rebuilding. We think that she was built in the mid to late 50's as she has Aluminium skin over a steel tubing framework. And after some consideration from Don Ricardo, JBJ, Roehm3108 and the like we're pretty much certain she's one-and-only. The all important pictures: The Better Half, the Van and the "temporary" tug 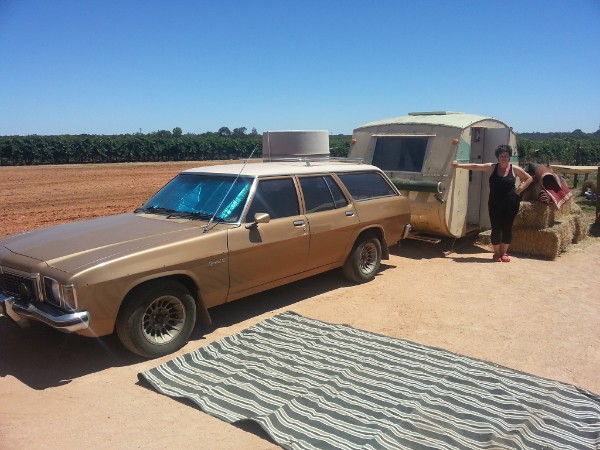 956f3c66-abfe-48a9-aba4-f5eb534a3122_zps4353cccd 956f3c66-abfe-48a9-aba4-f5eb534a3122_zps4353cccd by Jeremy Roden, on Flickr The thought from the guys at the 2013 Grand Parade is she may be based on a Windmill van 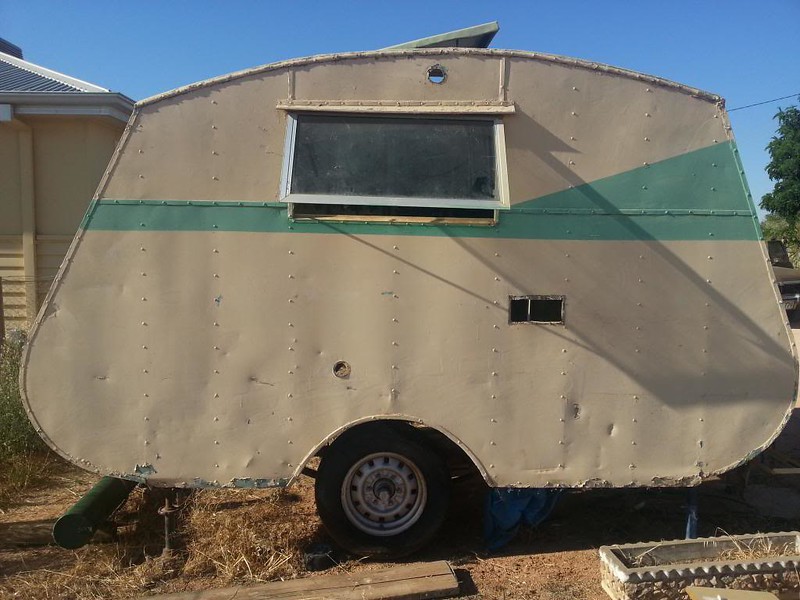 20130124_182155_zps0bf52d4f 20130124_182155_zps0bf52d4f by Jeremy Roden, on Flickr Panel attachment 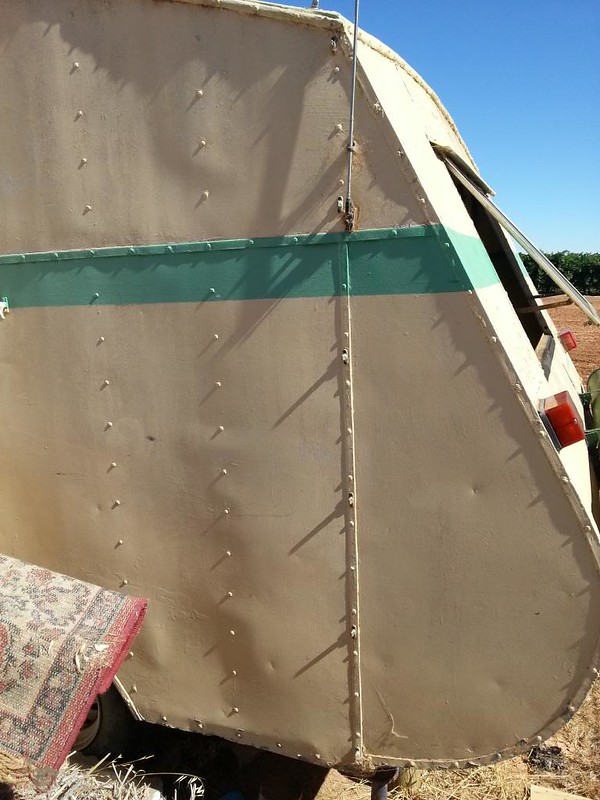 20130122_165320_zpsf0f476cc 20130122_165320_zpsf0f476cc by Jeremy Roden, on Flickr Bakelite Power Inlet 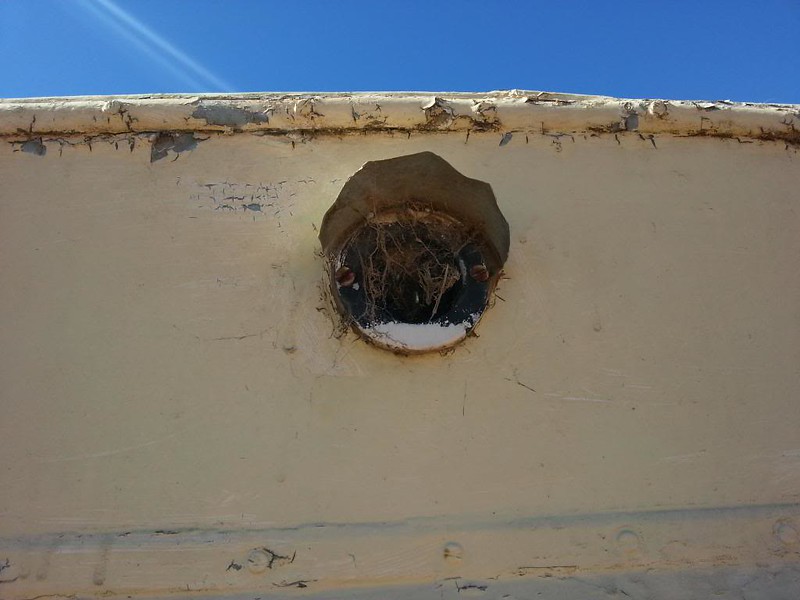 20130122_165216_zps28d80a53 20130122_165216_zps28d80a53 by Jeremy Roden, on Flickr Kitchen 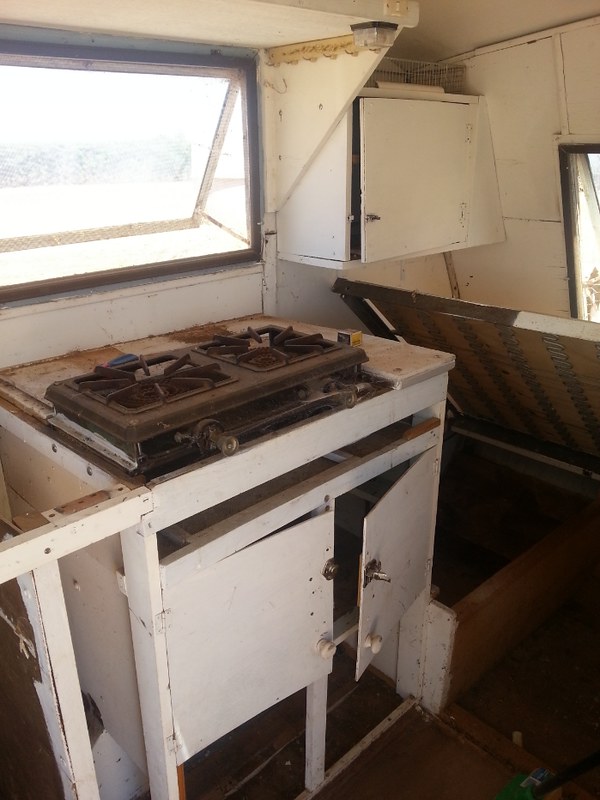 20130121_130201_zpsdc68ba0d 20130121_130201_zpsdc68ba0d by Jeremy Roden, on Flickr Dresser(?) 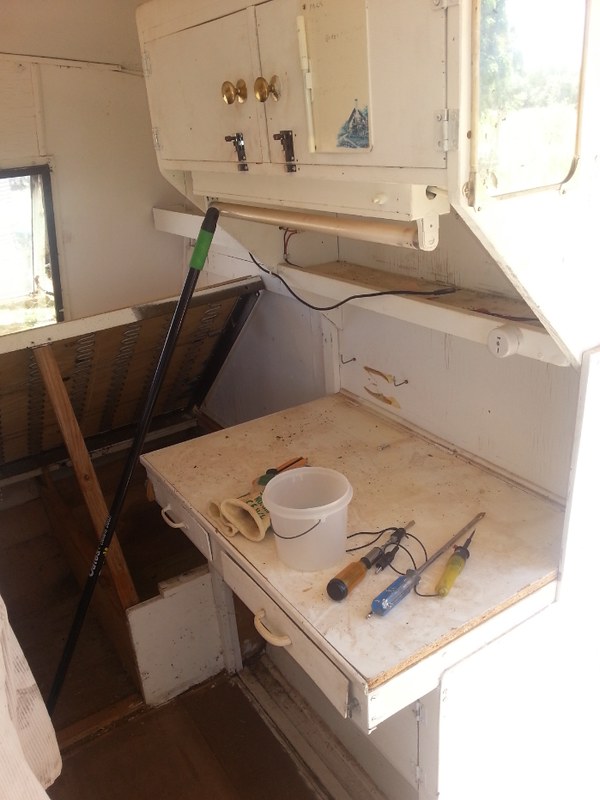 20130121_130154_zps2492a51a 20130121_130154_zps2492a51a by Jeremy Roden, on Flickr Under seat storage 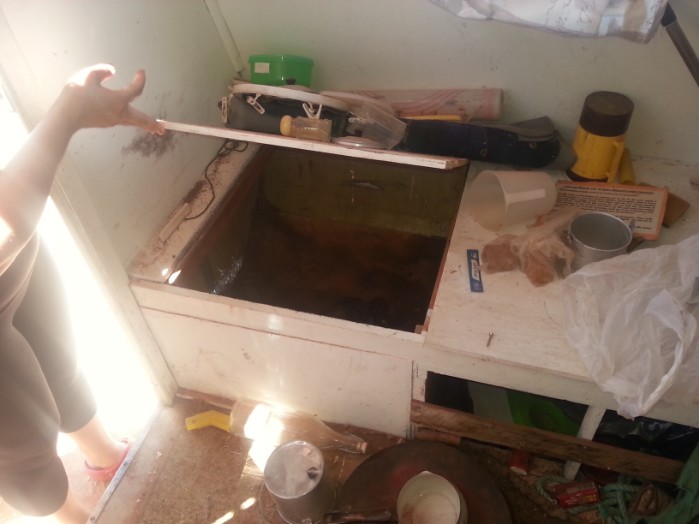 20130120_144502_zps600cdee1 20130120_144502_zps600cdee1 by Jeremy Roden, on Flickr Spice Rack, note the wiring in the background 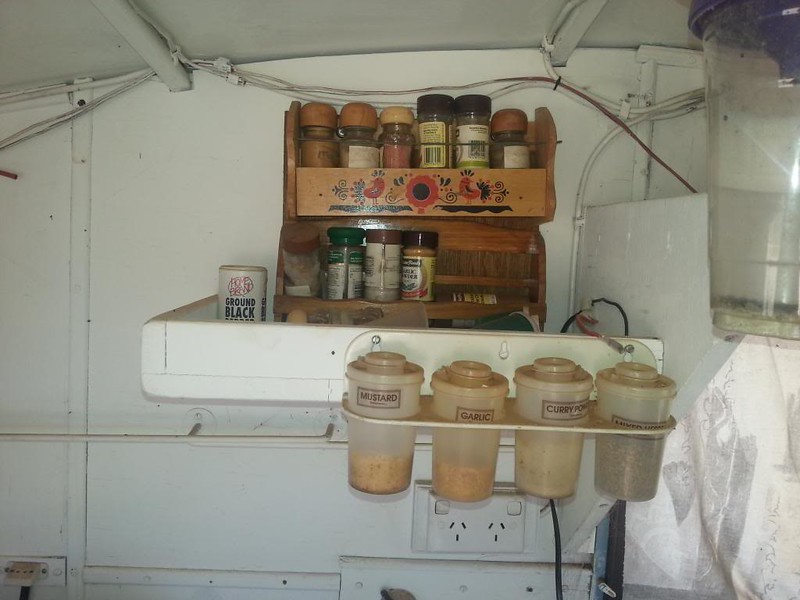 20130120_144516_zpsdbc38612 20130120_144516_zpsdbc38612 by Jeremy Roden, on Flickr When caravans get Gastro 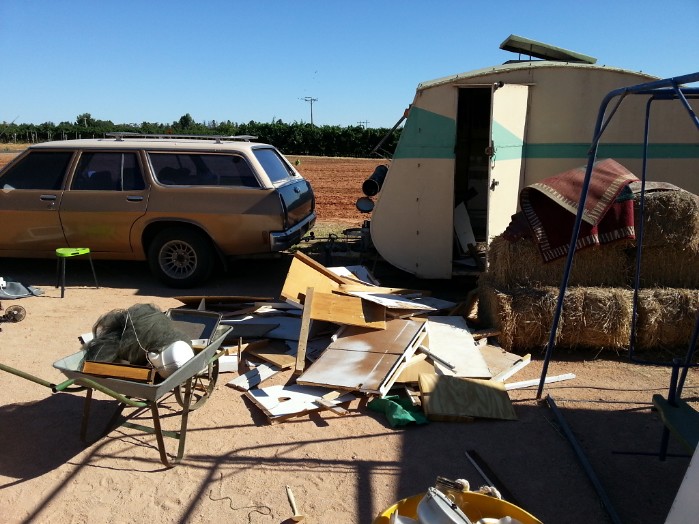 20130121_174348 20130121_174348 by Jeremy Roden, on Flickr Under the skin  20130122_165716_zps80681cae 20130122_165716_zps80681cae by Jeremy Roden, on Flickr Chassis 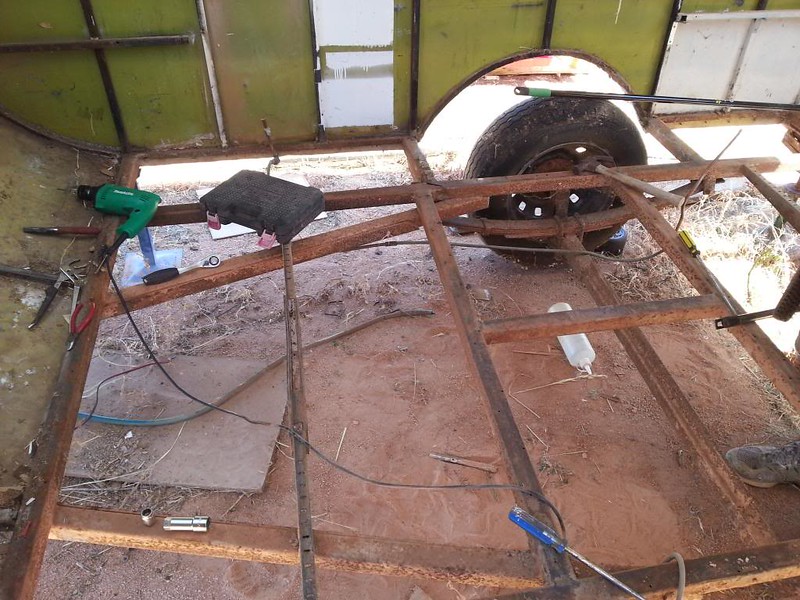 20130124_145452_zpsb993c398 20130124_145452_zpsb993c398 by Jeremy Roden, on Flickr Deconstruction nearly complete 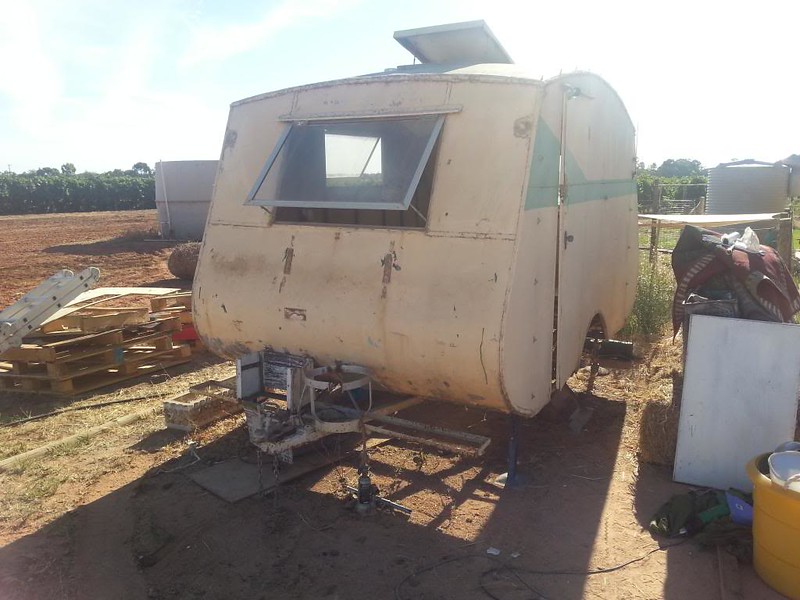 20130124_182120_zpsf1fe484b 20130124_182120_zpsf1fe484b by Jeremy Roden, on Flickr Progress has been slow, to say the least. But as the boys grow up, and more of them head off to school, we have more and more time each day to spend on Gertie. The first thing we tried were some new boots 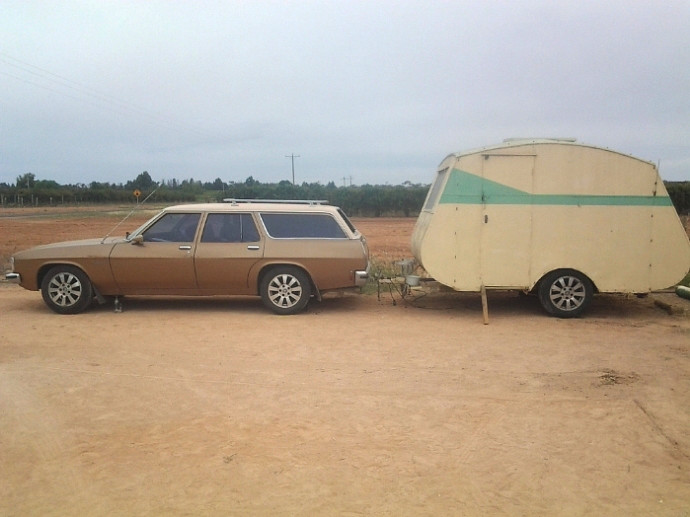 20130413_161519_zps47228654(1) 20130413_161519_zps47228654(1) by Jeremy Roden, on Flickr But, we weren't impressed. So, we bought her a play mate, and let her go back to sleep......  Playmate Playmate by Jeremy Roden, on Flickr Cue this week and it's time to face up to a little problem that's been brewing for 50-60 years 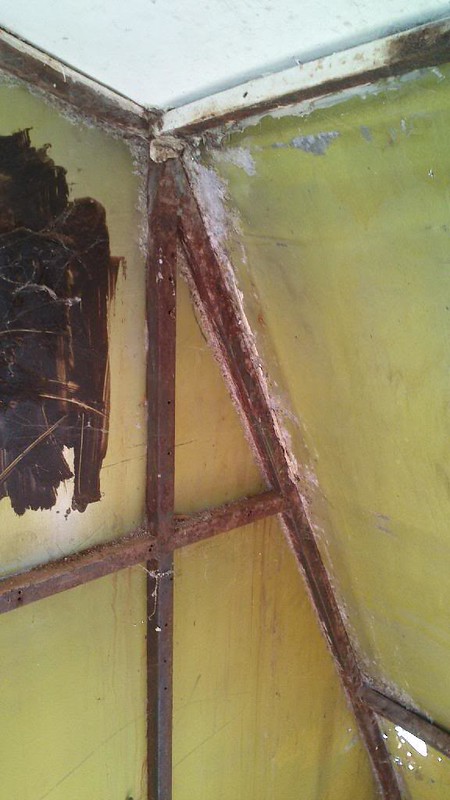 DSC_0511_zpscvw7rmle DSC_0511_zpscvw7rmle by Jeremy Roden, on Flickr Yup, electrolysis. The vast majority of the aluminium cladding is ok, except where it's been screwed onto the framework, with the worst places being the top rear corners. I've just started the process of removing each sheet and re-sealing the steel tube underneath  . Still, any guilt I was feeling about destroying the interior before we found out her history, has now been wiped. I'm very glad to have found this problem during the restoration, as opposed to after we finished. A few more pics, just cos i can. This is the only real evidence of the damage lurking inside 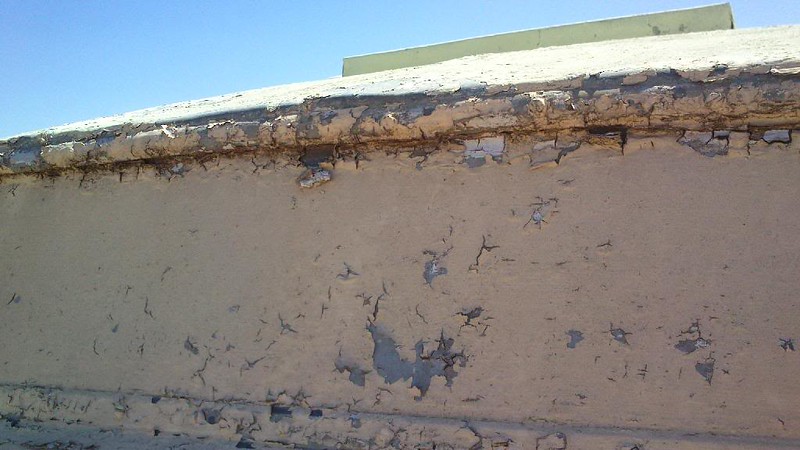 DSC_0510_zpskg1feyog DSC_0510_zpskg1feyog by Jeremy Roden, on Flickr The enemy. Three layers of paint, one layer of lead primer, 50 years of contact with a steel tube. They ain't unscrewing without a fight...... 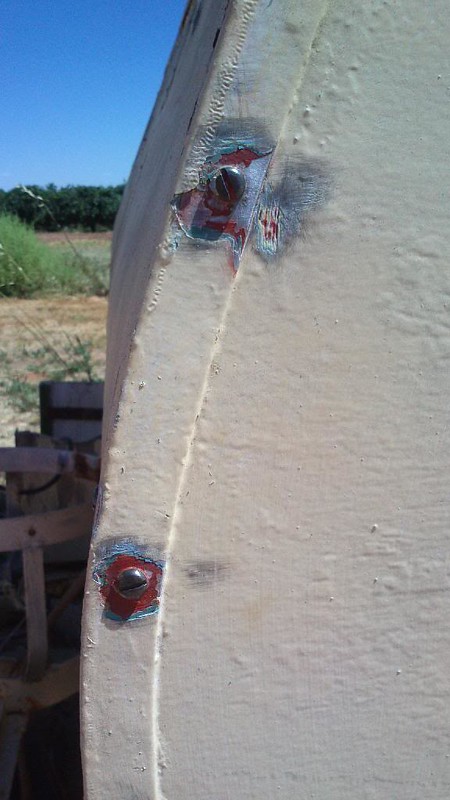 DSC_0513_zpsroweg6xw DSC_0513_zpsroweg6xw by Jeremy Roden, on Flickr The further I dig, the uglier it gets. This is the goop that's sealing the rain shield over the door. 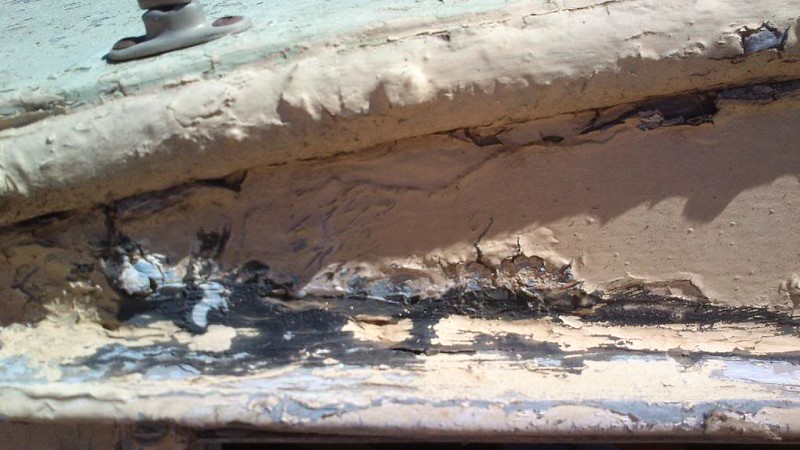 DSC_0514_zpsnhbpwrq2 DSC_0514_zpsnhbpwrq2 by Jeremy Roden, on Flickr Note to self: make sure the drill mounted wire brush has stopped BEFORE setting it down on the milk crate you are leaning on........ 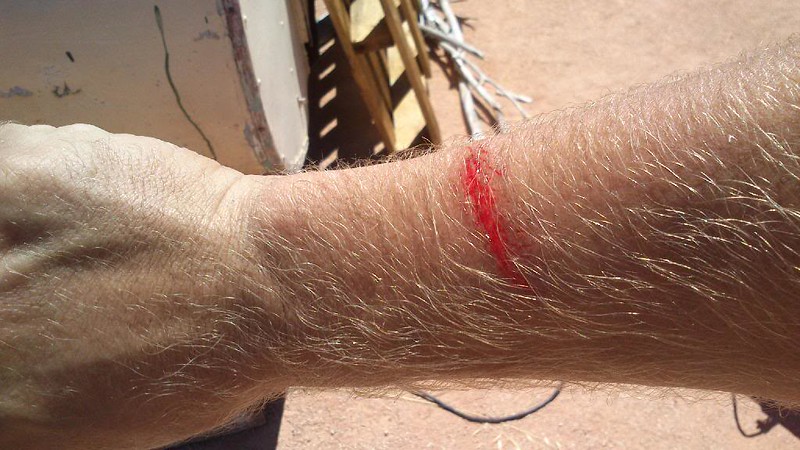 DSC_0509_zpsogiw1fnp DSC_0509_zpsogiw1fnp by Jeremy Roden, on Flickr |
|
|
|
Post by cardygeorge on Dec 21, 2015 22:08:13 GMT 10
Okaly-dokaly!! Fast forward 18 months and we have made barely any progress at all. But there is hope. I stepped down from a management position at work and suddenly found all this free time! We've also moved house in the mean time, giving me access to my other Grandfather's shed, including welder. The electrolysis is unfortunately worse than expected. I tried digging it out with a wire brush but left a hole, not to mention it won't stop the problem. And the steel tubing at the roof/wall junction has rusted away so it's off with the body work to fix the skeleton. Harriet desperately wants me to keep as much of the original skin as possible. We'll see how that turns out. I managed to grab a couple of shots of her in her new parking space  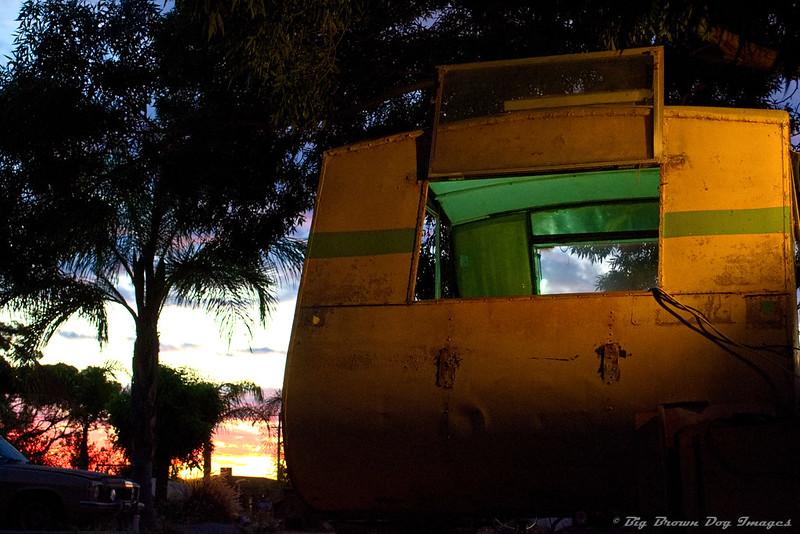 Golden Gertie Golden Gertie by Jeremy Roden, on Flickr 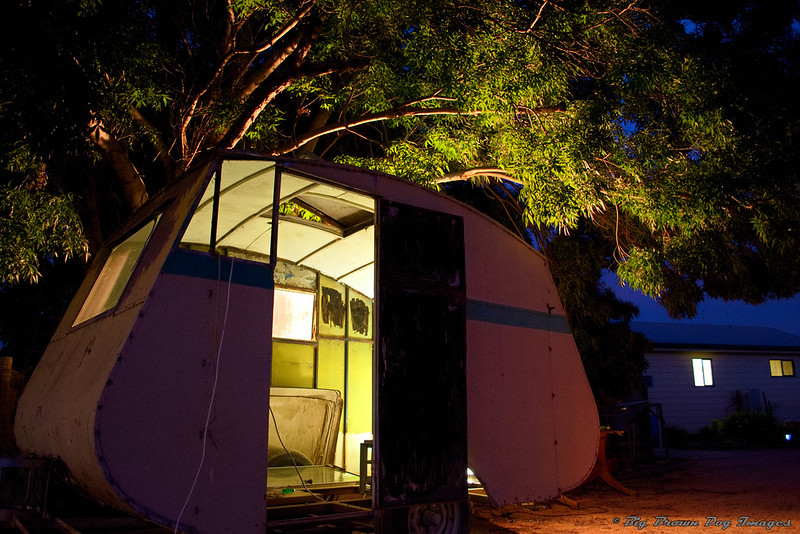 Night Gertie Night Gertie by Jeremy Roden, on Flickr |
|
|
|
Post by cardygeorge on Jan 31, 2017 21:36:42 GMT 10
|
|
|
|
Post by cardygeorge on Feb 16, 2017 21:19:19 GMT 10
|
|
|
|
Post by Mustang on Feb 18, 2017 10:38:57 GMT 10
I "doffs" my hat to you, I think the stripping down is perhaps the hardest beginning.
The Holden body looks in good order, you will end up with a nice combo.
|
|
|
|
Post by cardygeorge on Feb 18, 2017 12:45:18 GMT 10
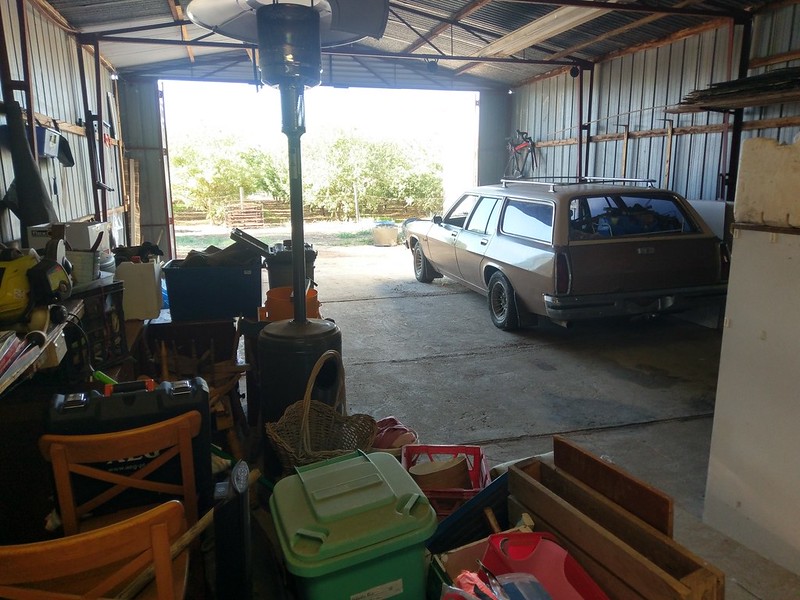
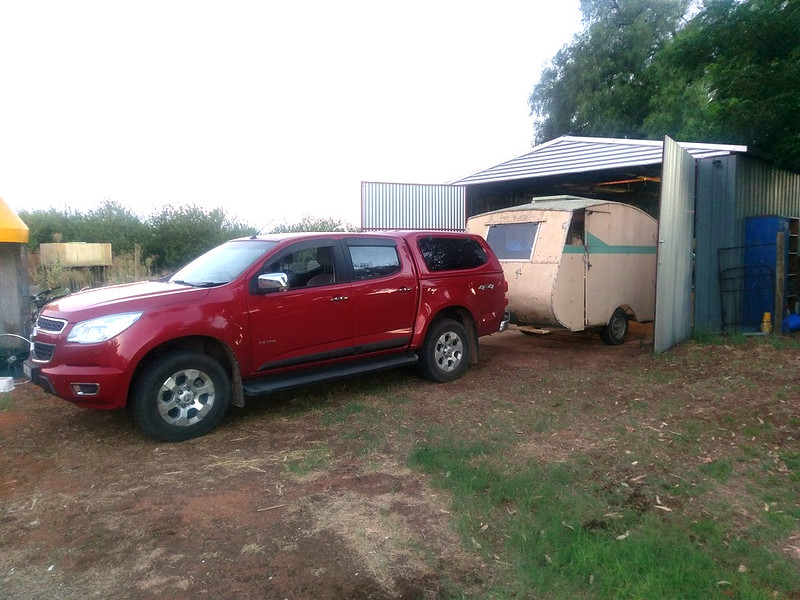
I "doffs" my hat to you, I think the stripping down is perhaps the hardest beginning. The Holden body looks in good order, you will end up with a nice combo. Thanks Mustang! The Wagon was my parents daily and is the car I learnt to drive in. It certainly is in pretty good knick given her age, especially given it slept out in the weather since we moved to this region in 2010. One of the benefits of living in a semi-arid zone I guess. She still runs, but all the suspension rubbers in the front end have deteriorated, some so much they have fallen out leaving metal on metal, so about 18 months ago the decision was made to park her up. Once the van is done, and the Colorado is paid off, she'll be returned to her former glory too. |
|
|
|
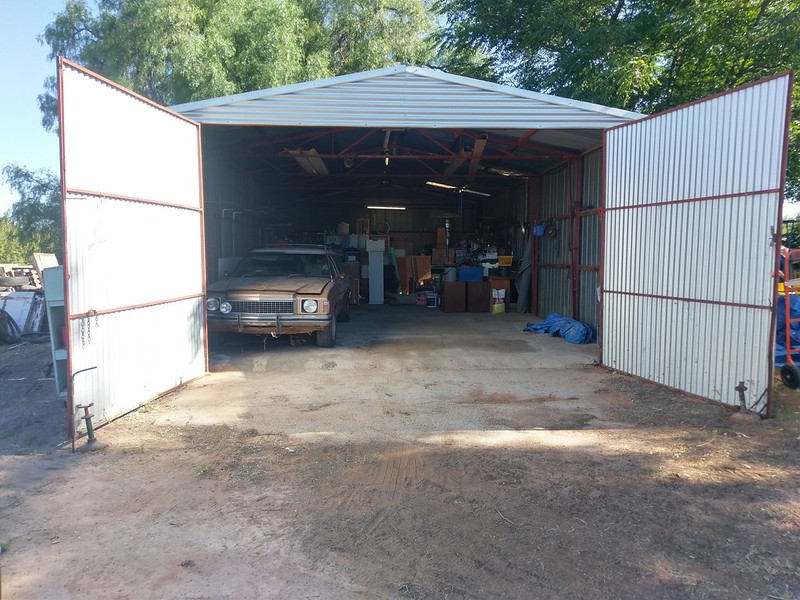
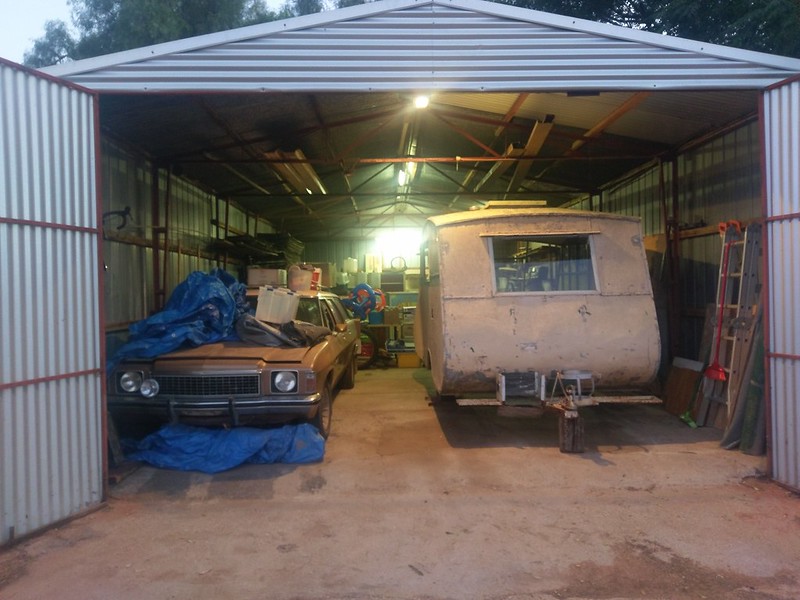
Post by cardygeorge on Feb 27, 2017 21:14:48 GMT 10
So right from the start I knew things would be easier if I could get Gertie in a shed, but I didn't think the difference would be this big. It took 6 YEARS (in two different driveways) to get to this 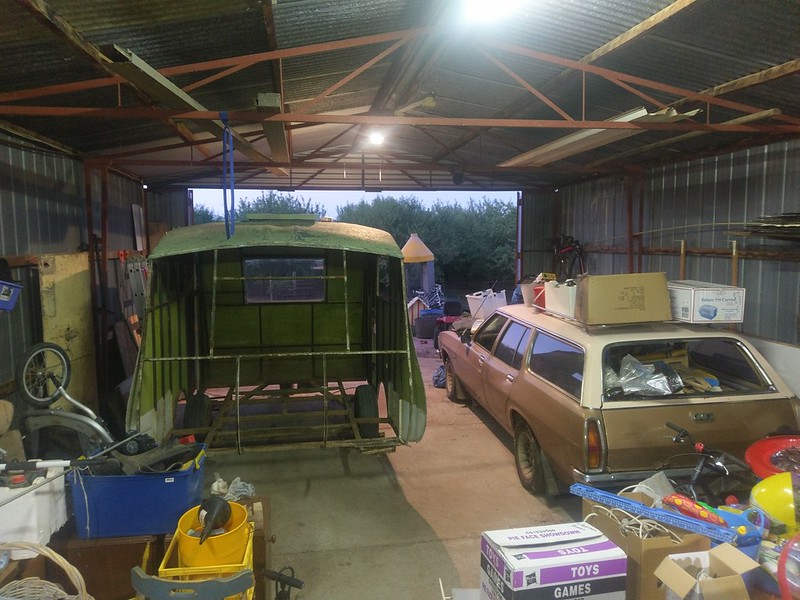 IMAG0372_zpscn52vqki IMAG0372_zpscn52vqki by Jeremy Roden, on Flickr And 11 DAYS to get to this 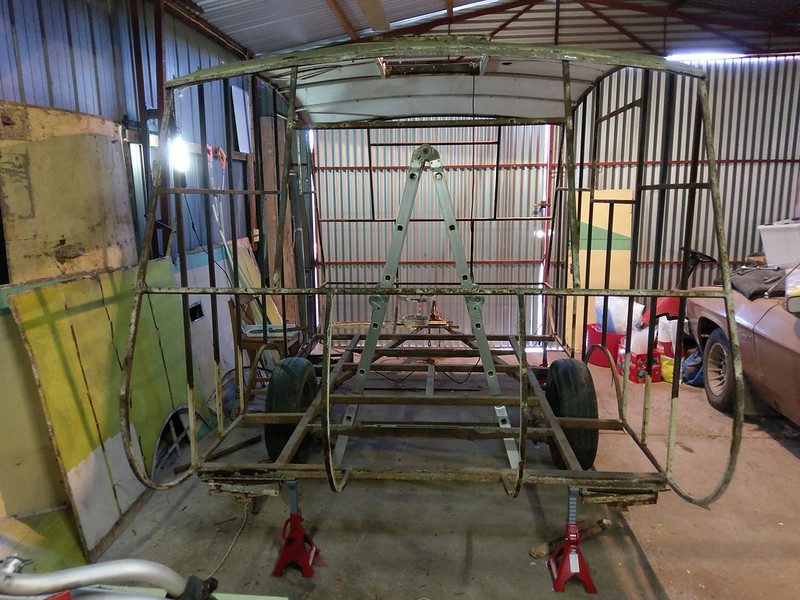 IMAG0422_zpssopxyjjt IMAG0422_zpssopxyjjt by Jeremy Roden, on Flickr There's just the roof left to remove. It's a shame it's bent and dented and just plain old, because the workmanship in it is amazing. It's a little hard to tell from these photos, it's actually made up of six panels of galvanised something, I think. It's definitely not Aluminium like the side panels  IMAG0410_zpskzgudrxj IMAG0410_zpskzgudrxj by Jeremy Roden, on Flickr Which are all soldered together to keep the water out. 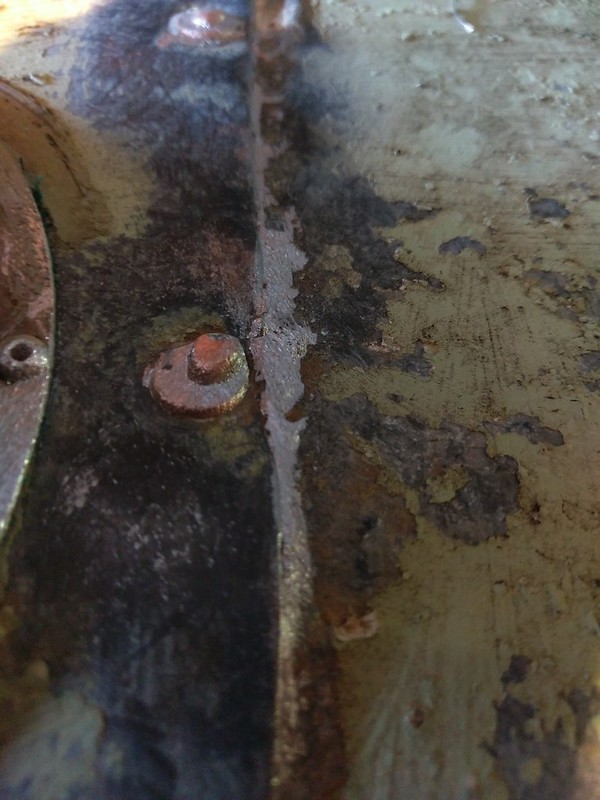 IMAG0420_zpshb8oacra IMAG0420_zpshb8oacra by Jeremy Roden, on Flickr I'm hoping that once the hatch has been unscrewed from the frame the roof will slide off in one piece, but if it doesn't I'm guessing I'll be borrowing/buying a blow torch and taking one panel at a time. Either way, once the roof is off the healing can begin.  |
|
|
|
Post by Franklin1 on Feb 27, 2017 21:33:39 GMT 10
G'day cardygeorge, I suspect the roof sheeting is galvanised iron. As you work on removing the roof, look carefully for any indication of the brand marks applied to galv sheeting in the old days. Have a read of this thread from our Technical Reference section: Galvanised iron sheeting - dating methods . If you are lucky to find any brand marks, you may be able to get an approximate age of construction for your van. cheers, Al. |
|
|
|
Post by cardygeorge on Feb 28, 2017 22:18:17 GMT 10
This emphasises my point on the craftsmanship in this van. Every panel has these raised edges where they overlap another, and I really don't know how I'm going to replicate that without a sheet metal folder. Really heavy roller maybe? I'm open to suggestions  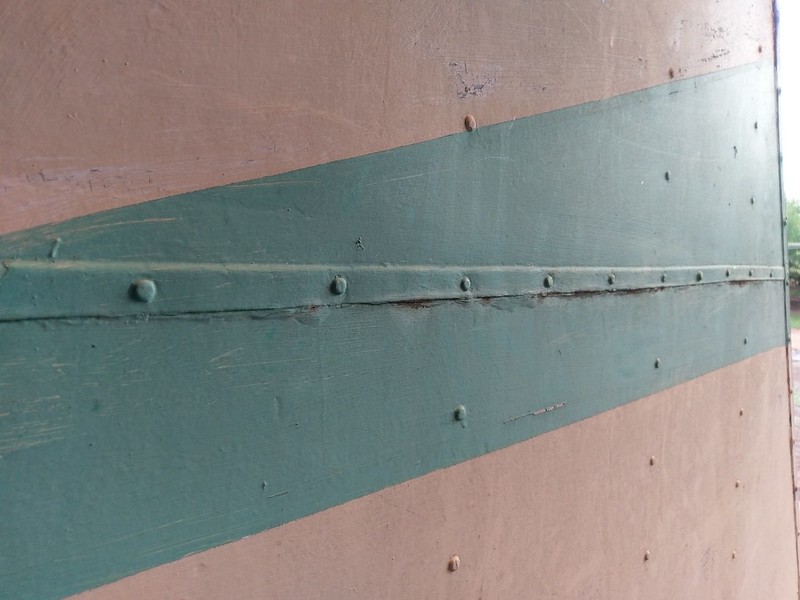 IMAG0383_zpssgefauyx IMAG0383_zpssgefauyx by Jeremy Roden, on Flickr Ever panel is hand made to make the most of the available materials. The drivers side has one solid sheet across the lower half and one full length of half-round moulding across the top. Where as the door side is made up of three panels across the bottom, and two pieces of moulding securing the roof. 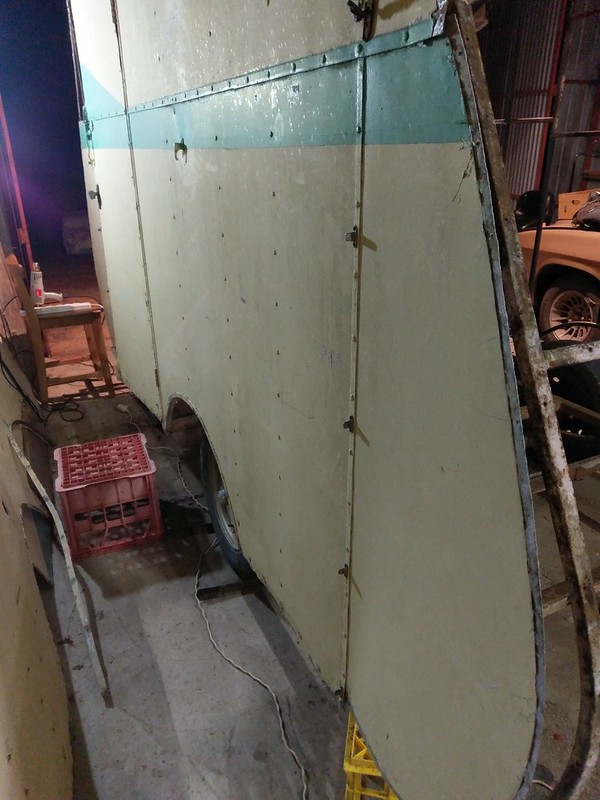 IMAG0401_zpsllw6zmjx IMAG0401_zpsllw6zmjx by Jeremy Roden, on Flickr I'm thinking I can re-use the roof hatch. The wooden frame is completely cactus, but the lid is made of Galv too, and if I'm careful I can peel the inner folds up, replace the wood and put it all back together. And given we were originally hoping to keep her skin with all it's dents and stories, it'll be a nice homage to where she came from. 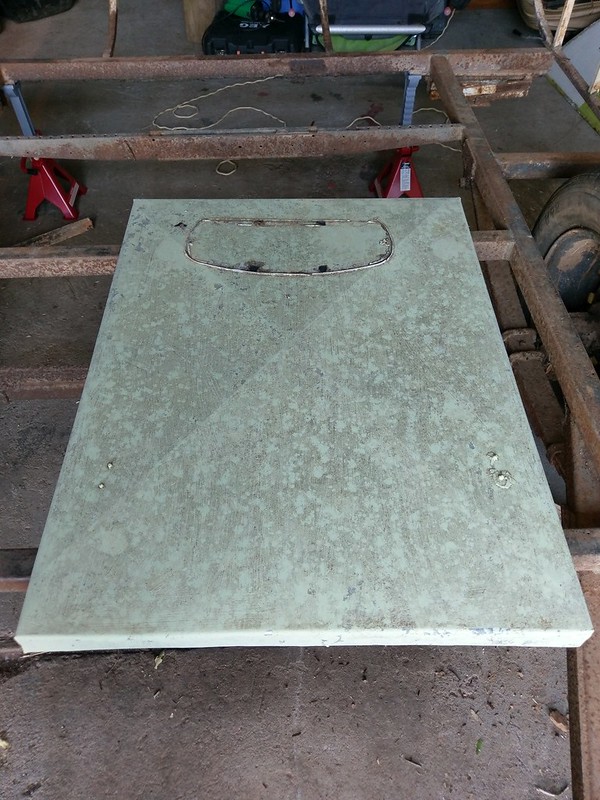 IMAG0413_zpscqtmuccy IMAG0413_zpscqtmuccy by Jeremy Roden, on Flickr 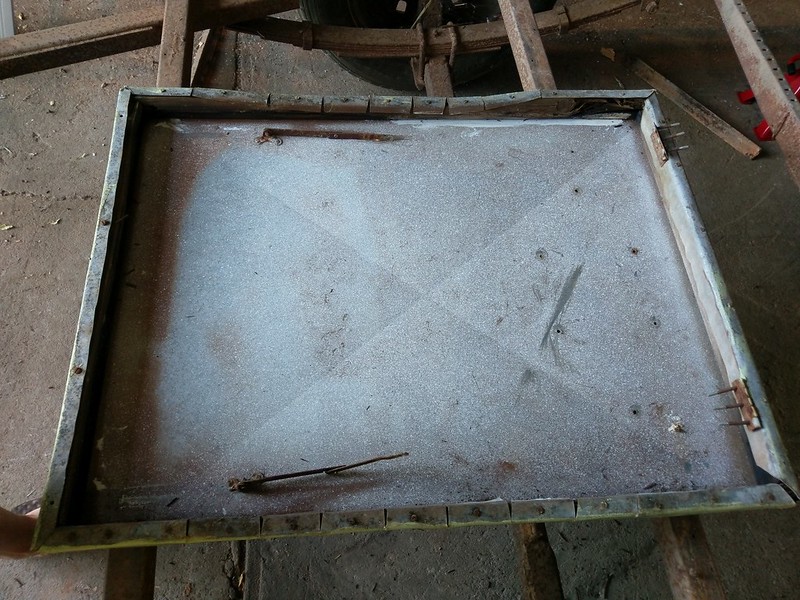 IMAG0414_zpsioxvcynh IMAG0414_zpsioxvcynh by Jeremy Roden, on Flickr I'll make a new door. The (very) small town my Grandparents live in has more than it's fair share of undesirables who have no problems overstepping the boundaries. The van lived behind locked 6 foot gates and they still managed to get to it and nearly get in. 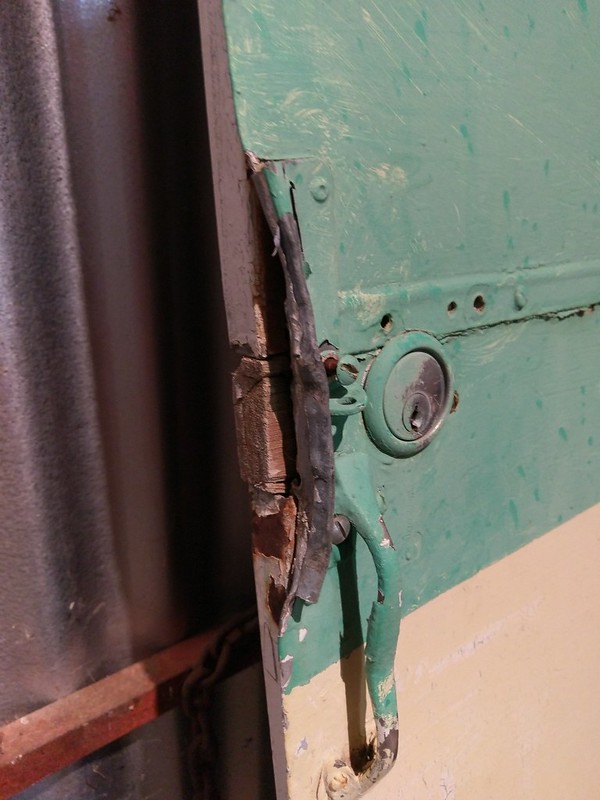 IMAG0407_zpsx2c4uivv IMAG0407_zpsx2c4uivv by Jeremy Roden, on Flickr They were helping themselves to the outside fridge last I heard.... 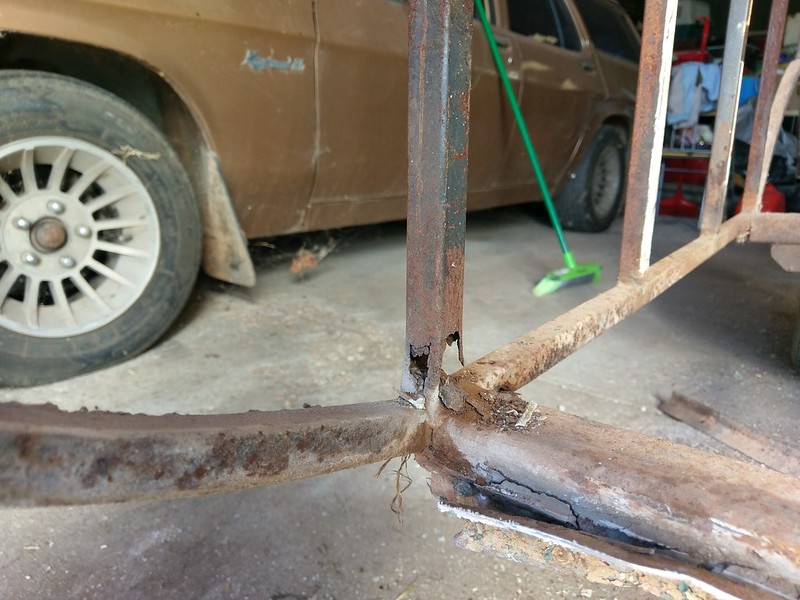 IMAG0409_zps8tk5es9h IMAG0409_zps8tk5es9h by Jeremy Roden, on Flickr 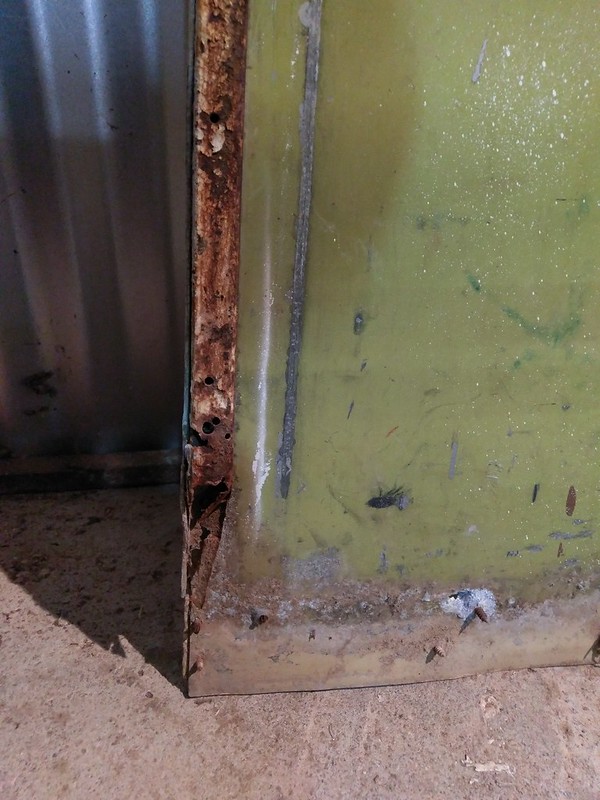 IMAG0408_zpsveqmy7f7 IMAG0408_zpsveqmy7f7 by Jeremy Roden, on Flickr 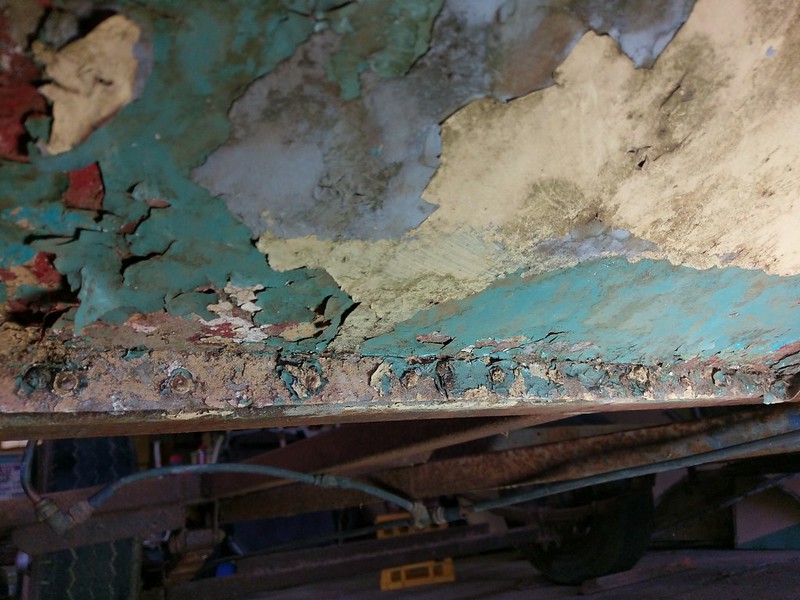 IMAG0398_zpsmfw9gdwt IMAG0398_zpsmfw9gdwt by Jeremy Roden, on Flickr So there's a few bits of chassis and frame that needed some attention, but considering that steel is at least 60 years old, I'm not too disappointed! |
|
|
|
Post by cardygeorge on Mar 3, 2017 21:38:24 GMT 10
Just been reading through my previous entries and it's seems I've turned the corner. I've removed all the crud and now every time I go near the thing I find something a little bit awesome. Like the joins in the framework that are all brazed together. Or these hand hammered brass rivets. 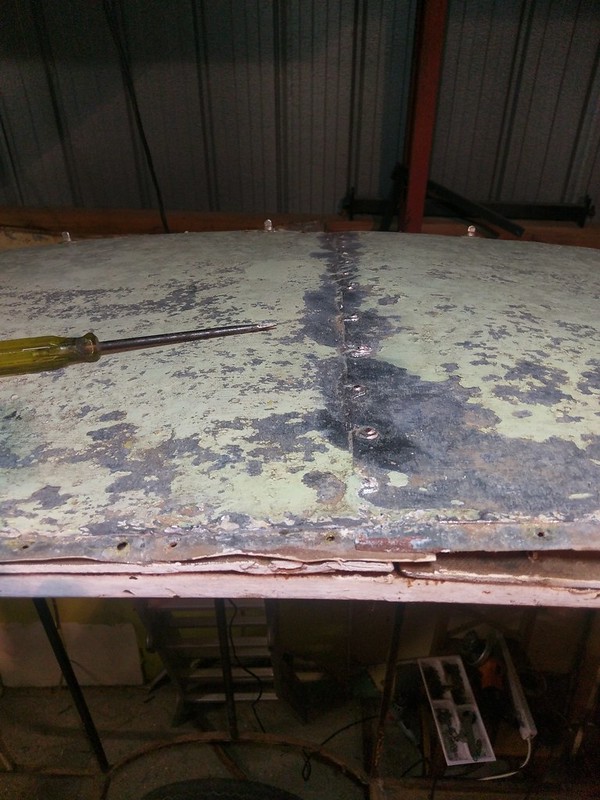 IMAG0427_zps3qcz8lrs(1) IMAG0427_zps3qcz8lrs(1) by Jeremy Roden, on Flickr Which are holding the masonite ceiling to the roof. 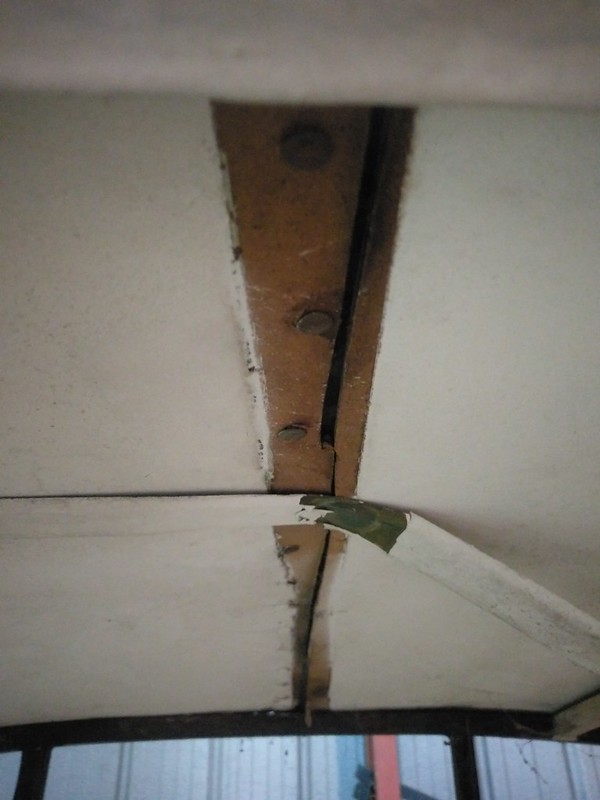 IMAG0428_zps51yfr3jz IMAG0428_zps51yfr3jz by Jeremy Roden, on Flickr So all I had to do was lift one edge of the masonite over the other and off with the roof! Gotta love it when a plan comes together! 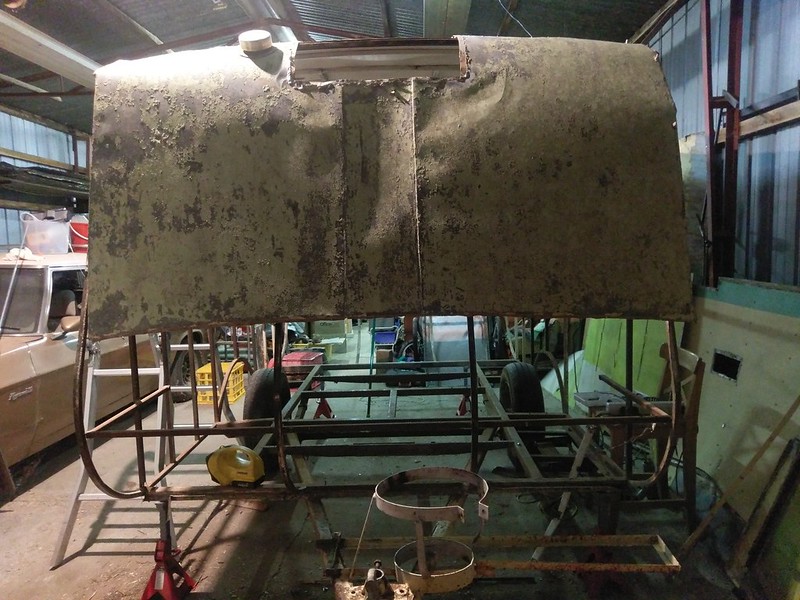 IMAG0435_zpsv1pqdkt0 IMAG0435_zpsv1pqdkt0 by Jeremy Roden, on Flickr Rolled and soldered roof joins, if you don't mind.  IMAG0432_zpsgw1ddhvl IMAG0432_zpsgw1ddhvl by Jeremy Roden, on Flickr Nekkid!!  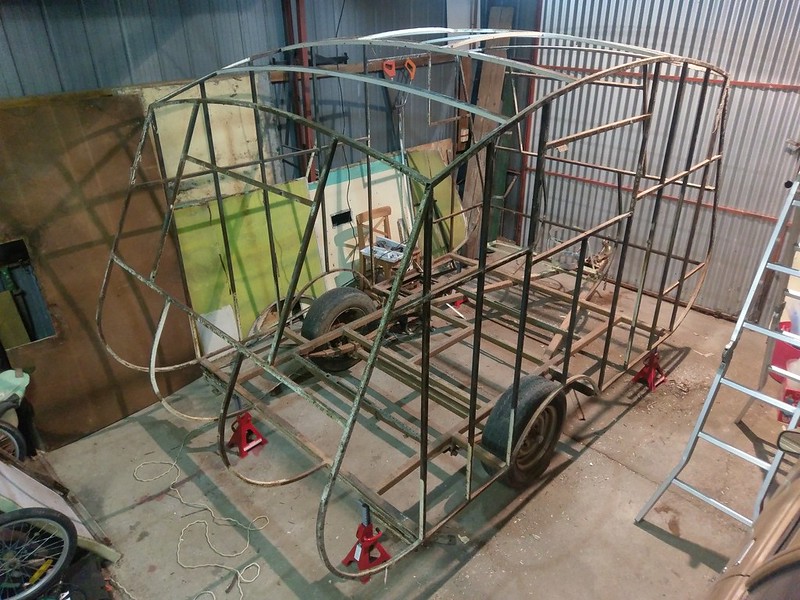 IMAG0436_zpsksdx1rga IMAG0436_zpsksdx1rga by Jeremy Roden, on Flickr So progress may slow a bit, moving forward from here requires things to be purchased. The plan is to break it down into stages. Stage 1 is to fix the "trailer" first, install a longer 'A' frame, weld and reinforce the chassis and frame, install the wiring for the indicators and tail lights, fit brakes etc. Stage 2 will be the interior fit out, that way I can attach brackets and run wires to where ever they need to go. Then finally Stage 3 will be the aluminium skin and paint. Still quite away to go, but it will be in Bridgewater this time next year! |
|
|
|
Post by aussieute on Mar 4, 2017 8:07:29 GMT 10
If you need to buy the solid brass rivets you can get them off ebay have just got some they went snail mail took nearly 2 months to get here so if you need them order them soon cheers chris
|
|
|
|
Post by Rattles on Mar 4, 2017 8:36:09 GMT 10
When you install the wiring for the indicators and tail lights, run a Negative Wire (Earth/Chassis) to each light position, and it is not a bad idea to make it a full loop, starting from the Neg common and daisy chain the lights and back to the Neg Common.
Just please keep up the photo diary of the progress as we forum member are keen to witness the highs and lows of such a great project.
Rattles
|
|
|
|
Post by cardygeorge on Mar 5, 2017 8:16:43 GMT 10
I'm pretty chuffed with the way the framework is cleaning up, I'm just using a wire wheel on an angle grinder. Before: 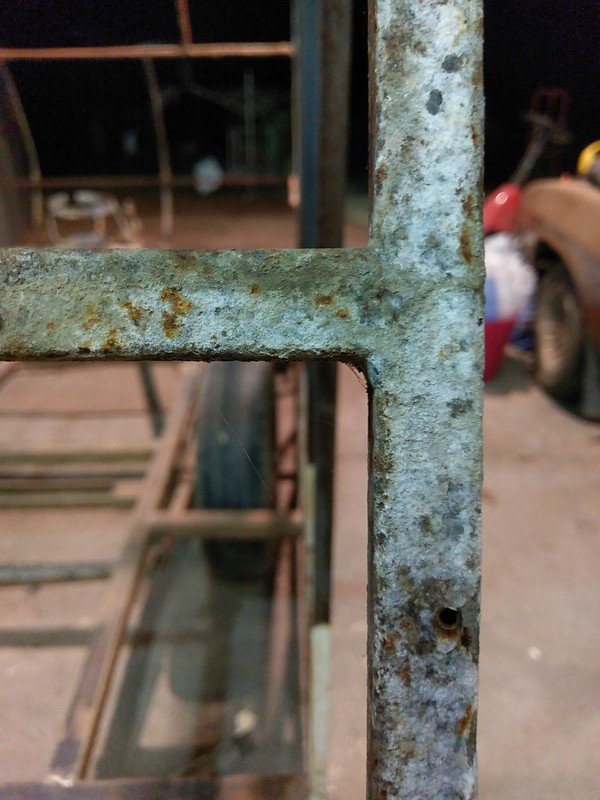 IMAG0443_zpsfrljwhiq IMAG0443_zpsfrljwhiq by Jeremy Roden, on Flickr After: 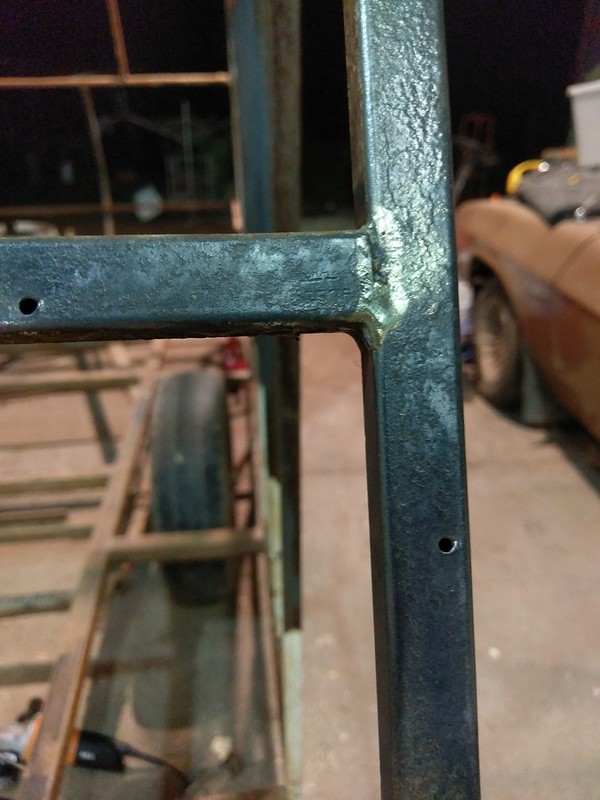 IMAG0444_zpsflndefuy IMAG0444_zpsflndefuy by Jeremy Roden, on Flickr As you can see there's a bit of surface pitting, but at the end of the day I'm going to paint over it to slow any rust and then it's all going to be covered by the wood work. The bars that hold the roof up are lovely and shiny, just like new. So new in fact I found some numbers stamped into two of them. If I ever get into the shed in daylight hours I'll see if there's anyway to decipher them. |
|
|
|
Post by Koala on Mar 5, 2017 11:30:07 GMT 10
[quote Still quite away to go, but it will be in Bridgewater this time next year![/quote] I take my hat off to you for taking on the challenge of having that van finished in a year. If I am at Bridgewater I will buy you a beer as you will likely feel like you need one by then  My rebuild of `Grandads Van' is nothing compared to what you are taking on. Best of luck with it. Koala |
|
|
|
Post by cardygeorge on Mar 6, 2017 6:08:36 GMT 10
[quote Still quite away to go, but it will be in Bridgewater this time next year! I take my hat off to you for taking on the challenge of having that van finished in a year. If I am at Bridgewater I will buy you a beer as you will likely feel like you need one by then My rebuild of `Grandads Van' is nothing compared to what you are taking on. Best of luck with it. Koala [/quote] Lol, I'll take that bet! I don't see it as anymore of a challenge than rebuilding a bondy, just different materials. And luckily I understand working with metal better than working with wood. Although by the time we've finished the interior that will be different. There's a few driving factors for my goal. First, I figured after 6 years it was time to get off my tail and do something with it. The "gonna do that one day" concept doesn't sit well with me. Life's too short. Then, I also want to get it done for my Grandfather who gave us the van. He's in his late 80's, and while there's no signs of him slowing down yet, I don't want him to think we've destroyed his van and then walked away from it. And finally most of our family live interstate, so we travel regularly. The problem is we have three country bred boys who are used to having space, so they go mental when they're cooped up in a city house which leads us to staying in caravan parks anyway. Why not do it in style! |
|
|
|
Post by cardygeorge on Mar 18, 2017 20:58:01 GMT 10
Spent three hours holding the angle grinder over my head taking the rust and paint off the roof rails, embedding a half inch long piece of wire brush into my cheek in the process. Didn't hurt as much as it sounds...... I did discover that under the white paint was a layer of green that matches the insides of the outer skin, leading me to believe that the plywood inner skin was a later addition. 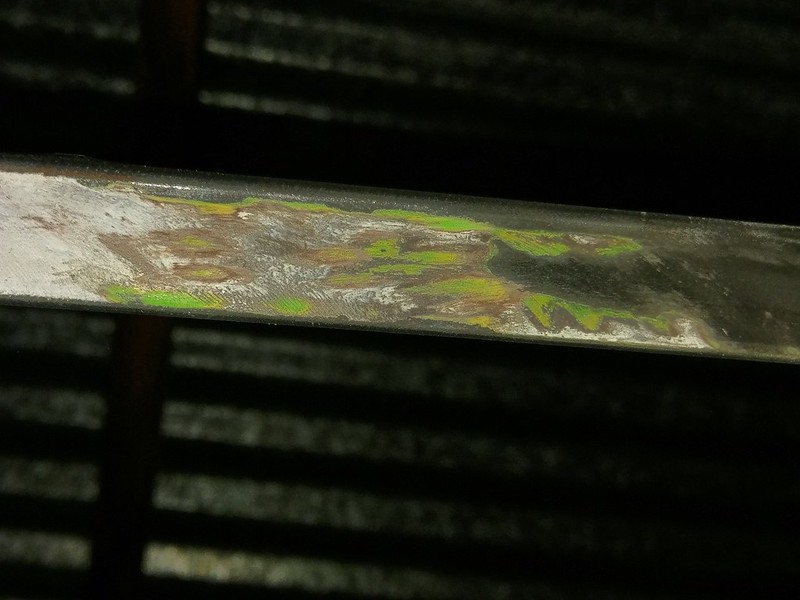 IMAG0451_zps58fhljrv IMAG0451_zps58fhljrv by Jeremy Roden, on Flickr |
|
|
|
Post by DC3Td on Mar 19, 2017 8:07:34 GMT 10
Hi Cardygeorge.Interesting resto progress.There are many material protection products.One of the best is POR-15.Painted on steel frame it sets rock solid.
|
|
|
|
Post by Mustang on Mar 19, 2017 8:57:40 GMT 10
Safety first mate, I expect you were wearing glasses.
I now were a full face mask like a welders but all clear & very light.
|
|
|
|
Post by cardygeorge on Apr 29, 2017 10:20:15 GMT 10
I take my hat off to you for taking on the challenge of having that van finished in a year. If I am at Bridgewater I will buy you a beer as you will likely feel like you need one by then My rebuild of `Grandads Van' is nothing compared to what you are taking on. Best of luck with it. Koala I'll have to take a rain check on that beer, Koala, due to finances. It's the last year before the youngest starts school and Harriet is (quite rightly) taking the year off to make the most of it. Won't stop me working on it, it'll just be limited to the things I can do for free or really cheaply. Hey, it's been 5 years now, what's another 12 months.....  On a side note, I had no idea brush wheels were so........ consumable 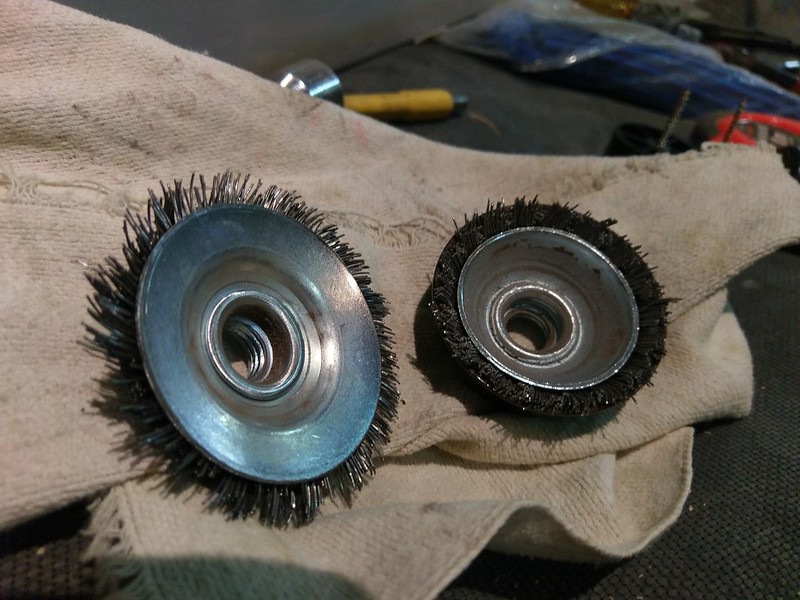 IMAG0474_zpsinl3vfbe IMAG0474_zpsinl3vfbe by Jeremy Roden, on Flickr |
|
|
|
Post by aussieute on Apr 29, 2017 12:36:23 GMT 10
I have lost track of how many wire brushes i have used and still the chassis to do. And burnt out a drill and sander but thats the fun of the restoration and seeing the van progress along the wife says i should have shares in the sanding discs and wire brushes company's time is the biggest enemy there is never enough cheers chris
|
|
|
|
Post by cardygeorge on Sept 30, 2017 9:18:01 GMT 10
We're back in business! Harriet has picked up a contract that fits around Junior's Kinder and our project money is now being used on projects I won't bore you with pics as it's just more rust removal, but after last night I've cleaned up three of the four walls and the roof. After sitting for six months some of the areas I'd already cleaned have some surface rust, but a quick brush and a wipe before painting will fix that. |
|
|
|
Post by shesgotthelook on Sept 30, 2017 9:49:07 GMT 10
Welcome back! Re pictures, in case you missed it, photobucket is now $400 a year so we now recommend postimage or flikr
|
|
|
|
Post by cardygeorge on Sept 30, 2017 10:55:04 GMT 10
Thanks SGTL, definitely didn't miss the PhotoBucket debacle, destroyed the cycling forum that Mustang and I are part of too. I'll get around to fixing these photos, I just have to find them all!
|
|
|
|
Post by shesgotthelook on Sept 30, 2017 15:32:28 GMT 10
Easiest way is to create an album on your pc, right click- open image in new tab, if it still doesn't show, right click & show image on that one & it will show. Then save it to your new album. Then when you have another spare hour 😆 Load them up to postimage etc & come back & just replace them on here
|
|


 .
.