|
|
Post by shesgotthelook on Apr 19, 2014 17:51:10 GMT 10
Nice work Murray, George looks much better without all that paint.  |
|
|
|
Post by akeepsake on Apr 19, 2014 21:58:57 GMT 10
Ru chemical stripping or using water blasting?
|
|
|
|
Post by murray on Apr 20, 2014 8:53:47 GMT 10
Ru chemical stripping or using water blasting? Chemical stripping . A certain car accessory place has 20% off at the moment so have 8 litres to play with. Weather was overcast yesterday so it won't dry out too quick Son has a high pressure sprayer he lets me use to knock a bit more off  cheers Murray |
|
|
|
Post by akeepsake on Apr 20, 2014 9:10:10 GMT 10
I have found a combo of both works well paint stripper then a blast with the karcher et.c What you need is a coconut shell blaster ! Like a sand blaster it uses small crushed coconut shells which doesn't pit the metal. Walnuts are used in the same way!
Is that the original stripe you've left?
|
|
|
|
Post by murray on Apr 25, 2014 21:35:46 GMT 10
Another few hours stripping "George" during the week (we can't all be going to the nationals enjoying ourselves,unfortunately) 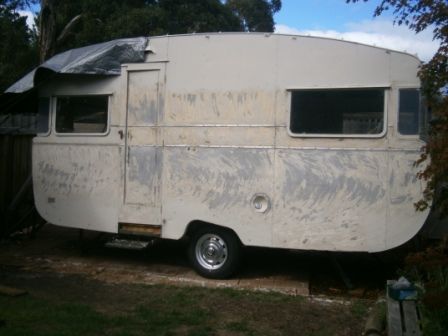 First application- way too thinly applied 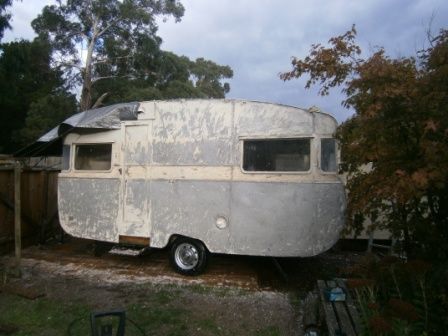 Second and third application - more thickly applied 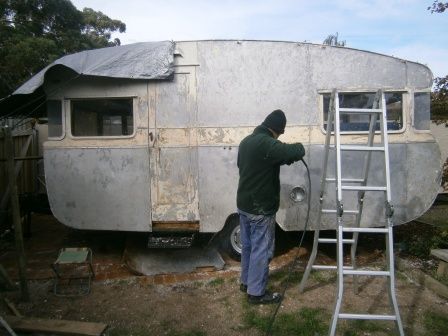 Washing van with the "gerni" spray cleaner Certainly a slow laborious job - used 10 litres of paint stripper so far. another 10 litres on order 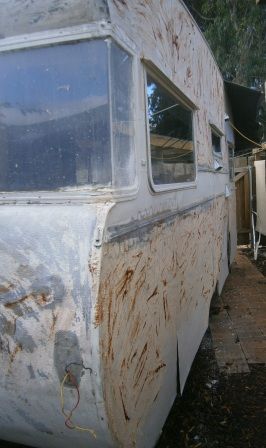 On to the other side - first application still found some time to move a Scenic van into a friends backyard 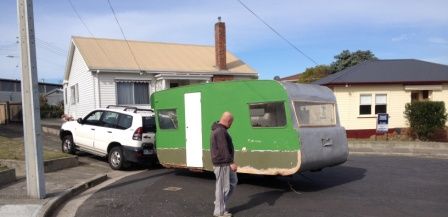 Through the backyard,under the powerline,around the clothesline 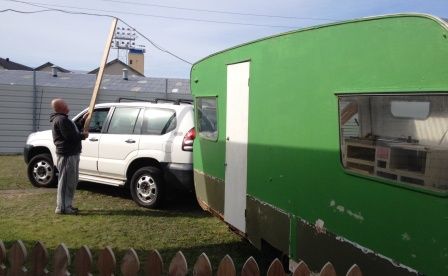 Past the shed and through the fence - very tight squeeze 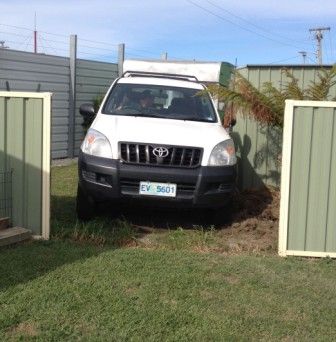 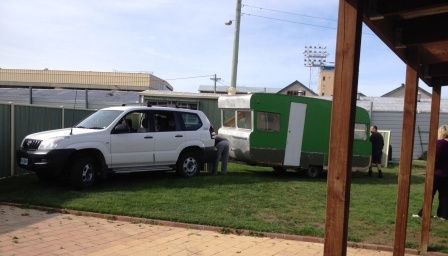 New home 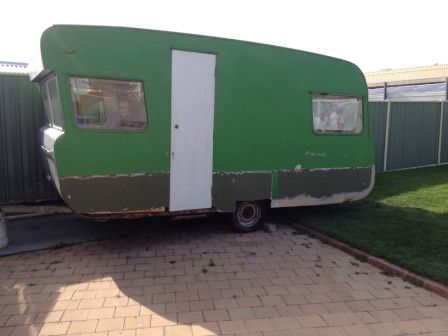 Cheers Murray |
|
|
|
Post by akeepsake on Apr 26, 2014 11:09:10 GMT 10
Good on ya Murray helping out a mate ! Looks like you have a vv reno buddy !
Keep on stripping!
|
|
annienpete
New Member
 Email now Ammt1961@gmail.com Old address doesnt work. System won't accept new address!!!
Posts: 34 
|
Post by annienpete on May 15, 2014 22:52:18 GMT 10
My Aunt had one of these older Harris Van's, and we've just started out on a restoration of a slightly newer one - 10'. Yes, cleaning up the textured aluminium is hard - and I've only got the traditional middle panels to strip back, then off to auto painter when made up my mind on colour. Good luck - will watch your blog with great interest, and heaps of support. Annie
|
|
Deleted
Deleted Member
Posts: 0
|
Post by Deleted on May 16, 2014 7:47:26 GMT 10
Hi Murray' That Patched up hole under the fridge you posted a while back....... I bought home a aluminium caravanpark deluxe van last year . it had a kero fridge. The van had a hole in the floor behind the fridge so that you could reach up through the hole with a naked flame and "Ignite" the fuel. Also had a whole above the fridge where a flue pipe extend through the roof about 100mm to allow the heat to escape. Regards Reddo Thanks Reddo, Something I hadn't considered. It is vented outside at the rear above the fridge area. An electric/gas fridge has been put there but the power cord is put through the sheeting near the seat and up into a powerpoint so I realised an electric one hadn't been there originally. There is an external door at the back of the fridge so I presume they were filled from the back ? Cheers Murray Mine had a rectangular hole under the fridge Murray which had 2 wingnuts underneath holding a hinged flap. I presumed it was just for ventilating the fridge although my Harris has an exterior door to open for ventilation behind the fridge. Cheers Brian |
|
|
|
Post by murray on May 18, 2014 18:30:59 GMT 10
Thanks everybody for all the encouraging posts etc. Seems daunting at times . Then I look through some other members photo album threads and get re-inspired. Subtropical in southern Tassie over the last week so while having time off from a full house reno ,what do you do ......caravan reno ...that's what  Spent 2 hours stripping paint off EACH window, then using 120 grade wet and dry paper, then some polish . Five completed so far   Then did some some insulating 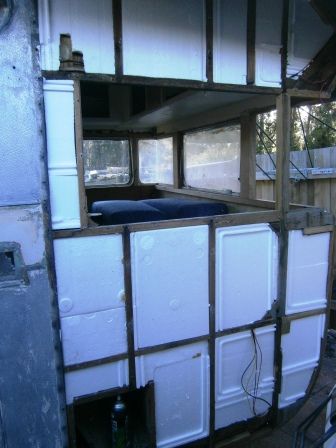 Those years of therapy are paying off 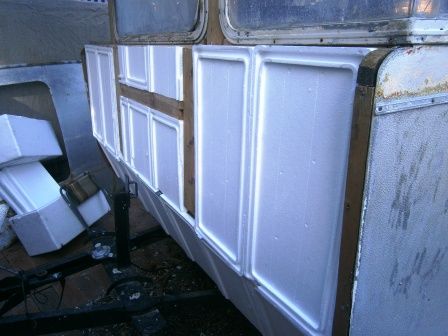 While the front panel was off, beated out the dings, stripped the paint,sanded and polished . The van has been around the block as there was a few inches of red dust in the rear panels. Therefore the lower sides have a bad case of gravel rash so have decided to use paint to mask the damaged areas (as shown) 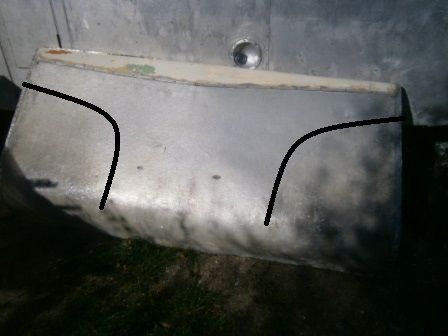 Any suggestions as to what could be used ? Something with texture ? Black maybe ? What would look best? Cheers for now Murray |
|
|
|
Post by JBJ on May 18, 2014 19:32:20 GMT 10
Hi Murray,
A couple of thoughts for the corner sections.
First one would be to buy some stoneguard from the automotive paint supplier. It comes in an easily sprayed tube with a spray nozzle available, & its around $25 or so per tube. You should get several coats to each side per tube, depending on how heavy you apply it. That can be then painted over, using automotive paint or pressure pack. I did the top of the hatch on my Olympic using it, & it came up OK. Certainly better than it was in raw fibreglass from the factory.
Next option, which would be more expensive, would be to buy some aluminium chequer plate, or embossed, panels from Bunnings. Trim them to shape you want, then fix them to backing using slot head screws preferably, or even rivet them on.
Other options are to get a quilted upholstered panel made , fixed over a panel cut from light aluminium sheet, & fix that to van.
I'm sure you get the idea I'm trying to give. Its easier to conceal a problem area than repair it in most cases.
JBJ
|
|
|
|
Post by murray on Jun 20, 2014 8:43:07 GMT 10
The weather has been very mild in Hobart (as elsewhere) so have been able to continue work on "George" Was able to remove some of the roof and instal more insulation 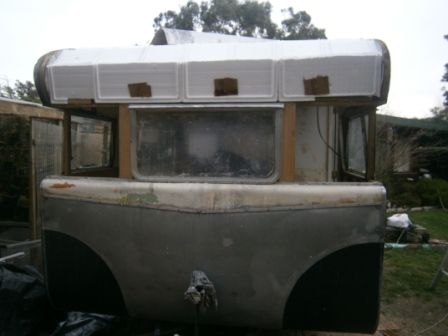 Took JBJ's advice and used a few coats of stoneguard on the front to cover the stone damage. Then removed some more of the paint from the roof using an angle grinder and flap disc. Had previously been using sand paper on the grinder but the paper clogs very quickly. Then I remember the flap disc that had been tucked away. Used on very slow speed and not kept in one place it works a treat. Followed this with 320 wet and dry paper on a 1/3rd sheet finishing sander.Will work my way to finer grades next. Note to self - last painted ally van I will buy 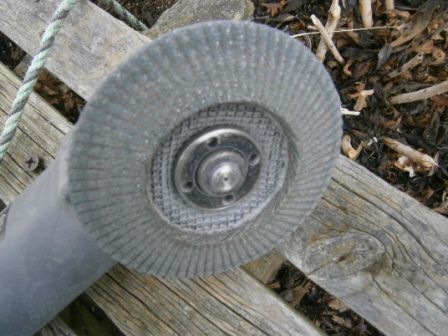 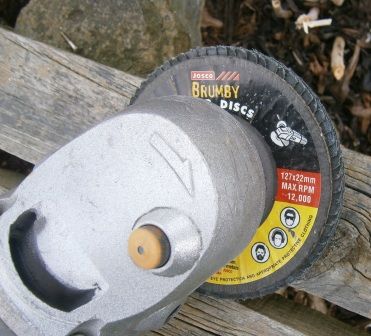 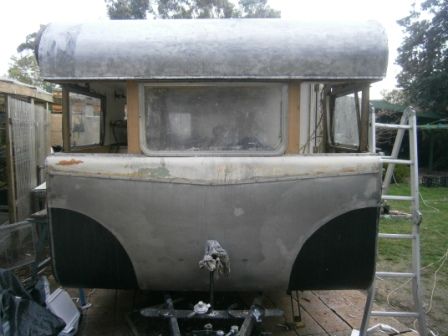 Caravan not waterproof yet so need to concentrate on that next. Cheers Murray PS " winter mofo" in Hobart at the moment. All the bright lights are in Tassie Last years effort  This years effort  |
|
|
|
Post by akeepsake on Jun 22, 2014 21:07:37 GMT 10
Murray you are an inspiration I will send a van down so you don't run out of things to do A suggestion for what it's worth I would make your stone guard tops parallel with the moulding above it and make the radius smaller ?? Suggestion below (for what it's worth) Cu soon! 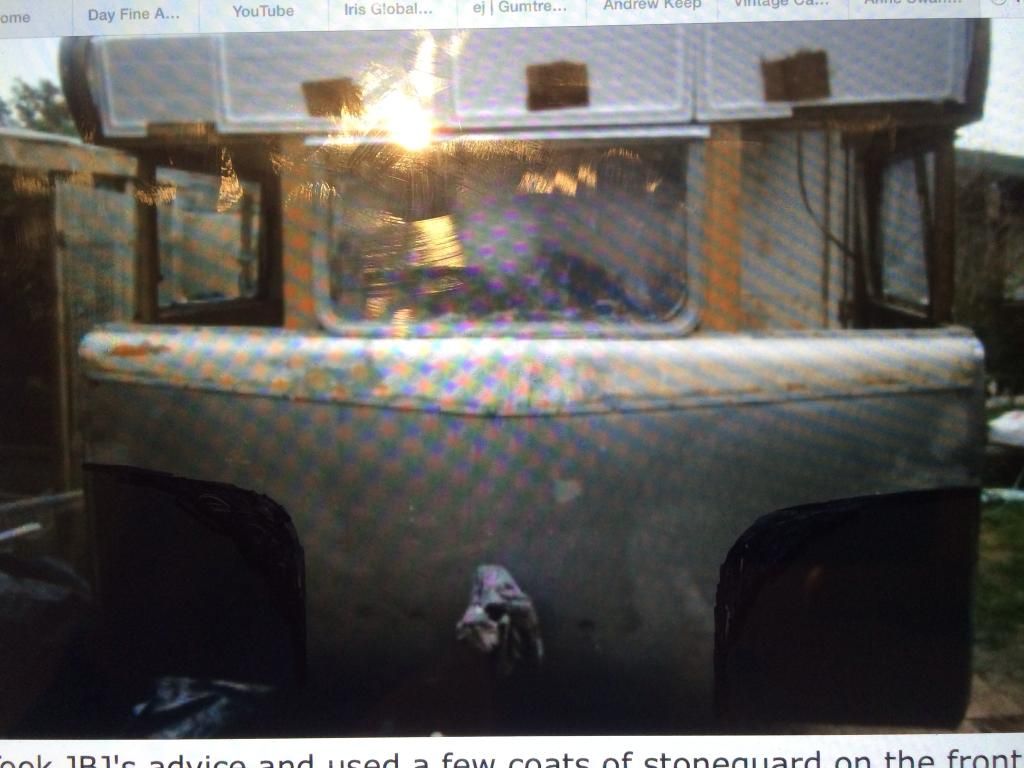 |
|
|
|
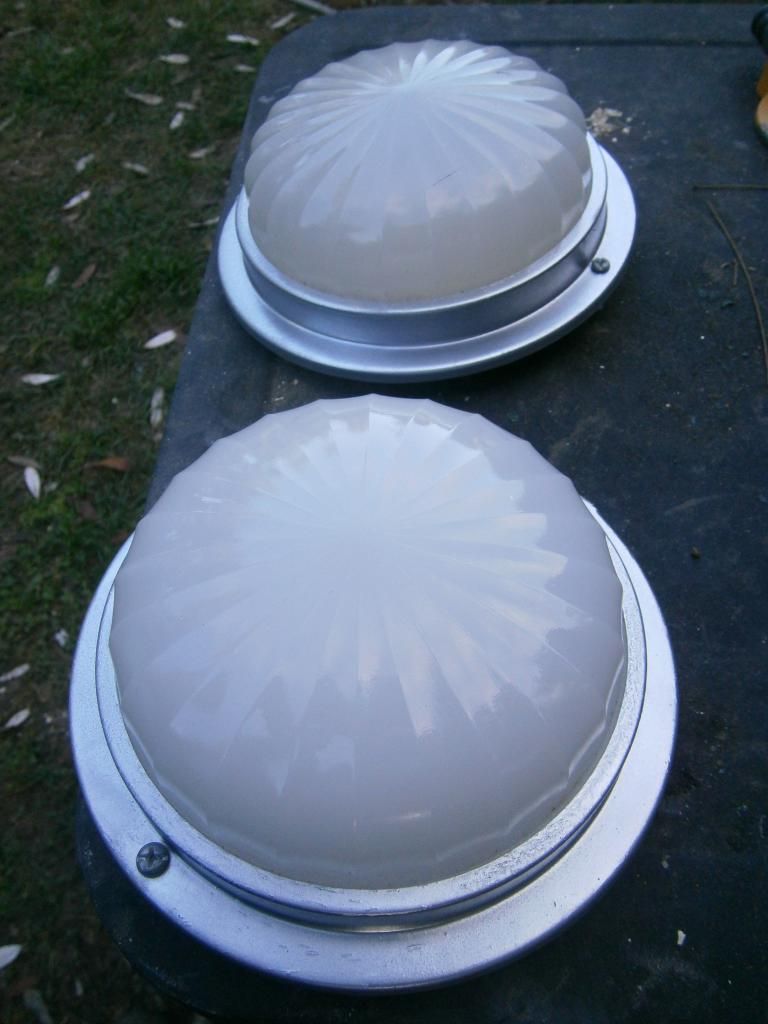
Post by murray on Aug 23, 2014 20:17:59 GMT 10
Decided to do some work inside "George" for a change.
Had a few clear sunny (warm,even) days in Hobart lately so has become easier to get motivated. Days are becoming slowly longer.....hooray They have even forecast a 19 degrees for mid-week. Just checked been downgraded to all 17's for the coming week.
Rescued a few lights from an old bondwood so decided to use in the reno.
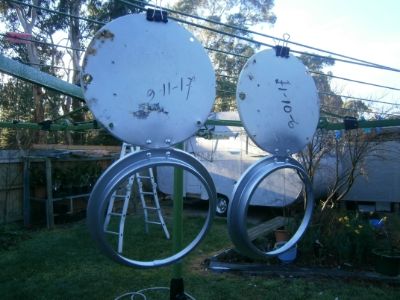
Cleaned of surface rust, primed and chrome spray paint. One of these must be old stock going by the prices .

an arty shot for the culture vultures. Should have moved the ladder......and the hose......and the clothesline. Wonder if MONA would be interested?
completed
Temporary placement to check what they will look like.
Have begun to clad around the front of the van as I install new 12v wiring. Van had a lot of extra 240v wiring everywhere ,7 powerpoints it total , even one in the wardrobe. I am taking a few out as I will be changing over to mostly 12 volt with a deep cycle battery and charger .
My son is using the van for year 11 project to design a total refurbishment for Housing and Design subject. I expect him to strip it down and only leave the wheel arches .Told him to balance the spa over the wheels :)Will keep you updated.
Cheers
Murray |
|
willow5075
Full Member
 Willow & the MOTH
Posts: 355
|
Post by willow5075 on Aug 25, 2014 15:55:57 GMT 10
A spa? Hmm wonder how many VVs have those? |
|
|
|
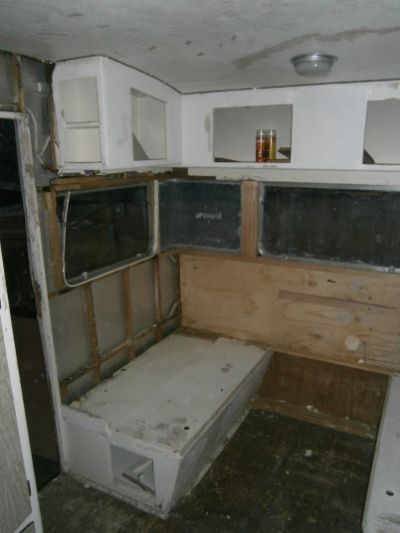
Post by murray on Nov 29, 2014 20:39:36 GMT 10
Finally found the camera....a senior moment turned into a 4 week moment  . Spent a few more hours today with the paint remover and pressure sprayer. I use a toothbrush and apply onto all the spots I have missed the time before....a very laborious task . Probably 4 - 5 applications of stripper to date . Onto the 5 th 4 litre can - Supercheap loves me Unfortunately some collateral damage the perspex windows reacted with the stripper All the paint on the roof removed with abrasive flap disc on a angle grinder (40 grit) Working my way through the grades - up to 320 grit so far - slowly getting shinier. Took a few snaps 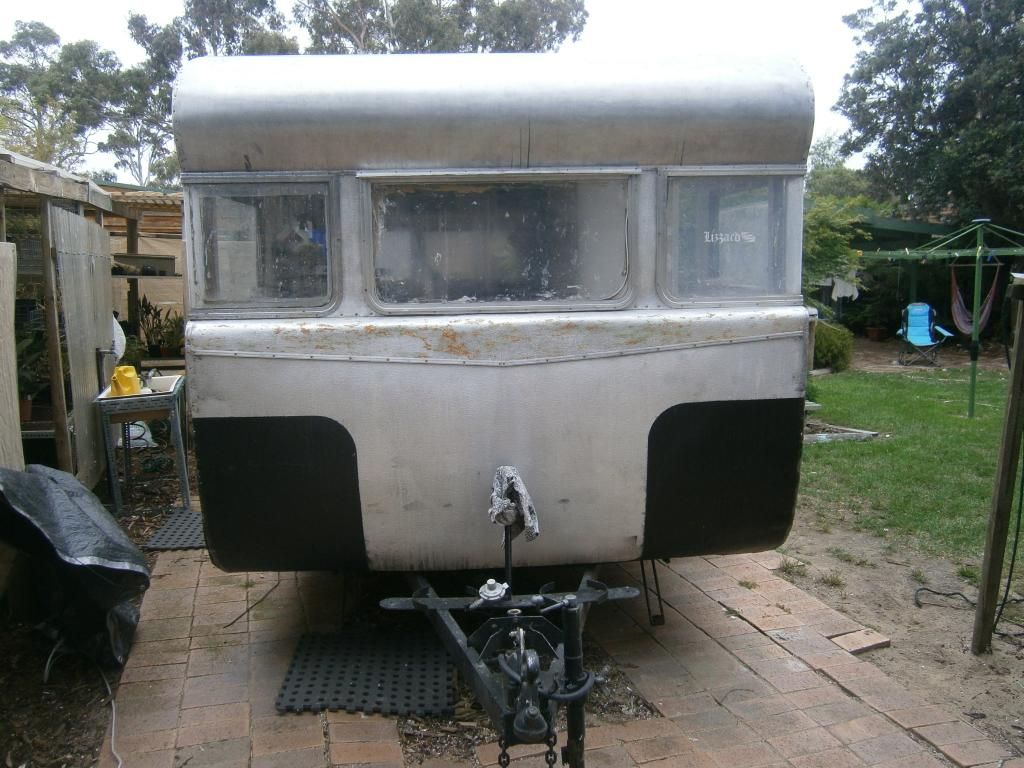 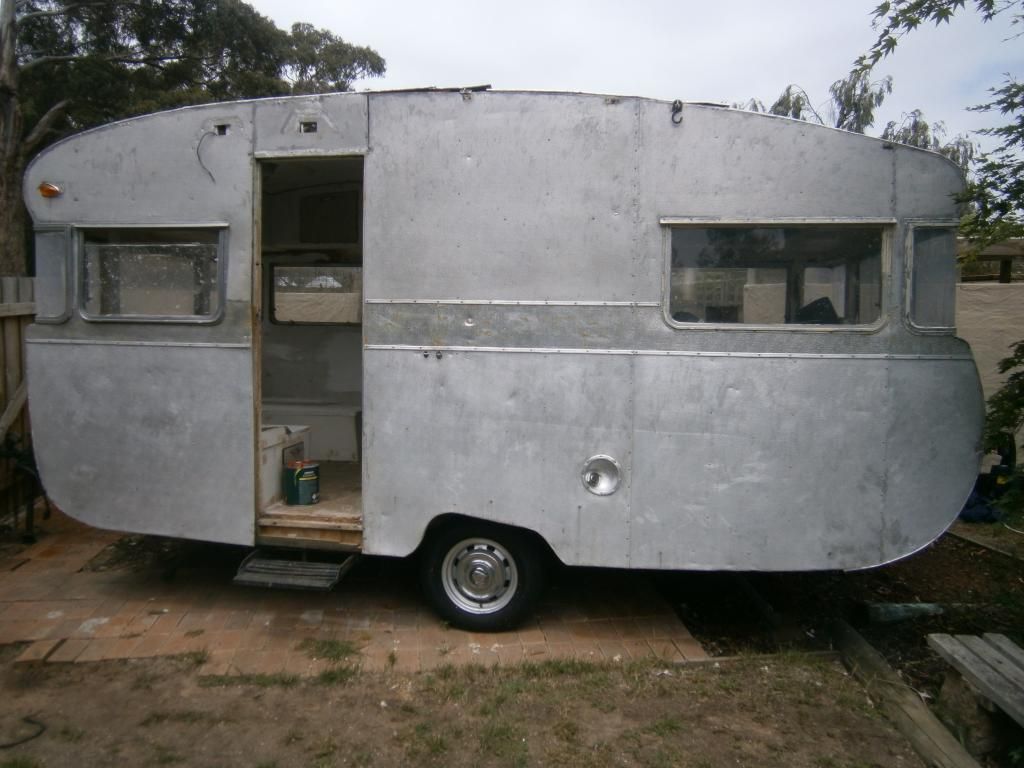 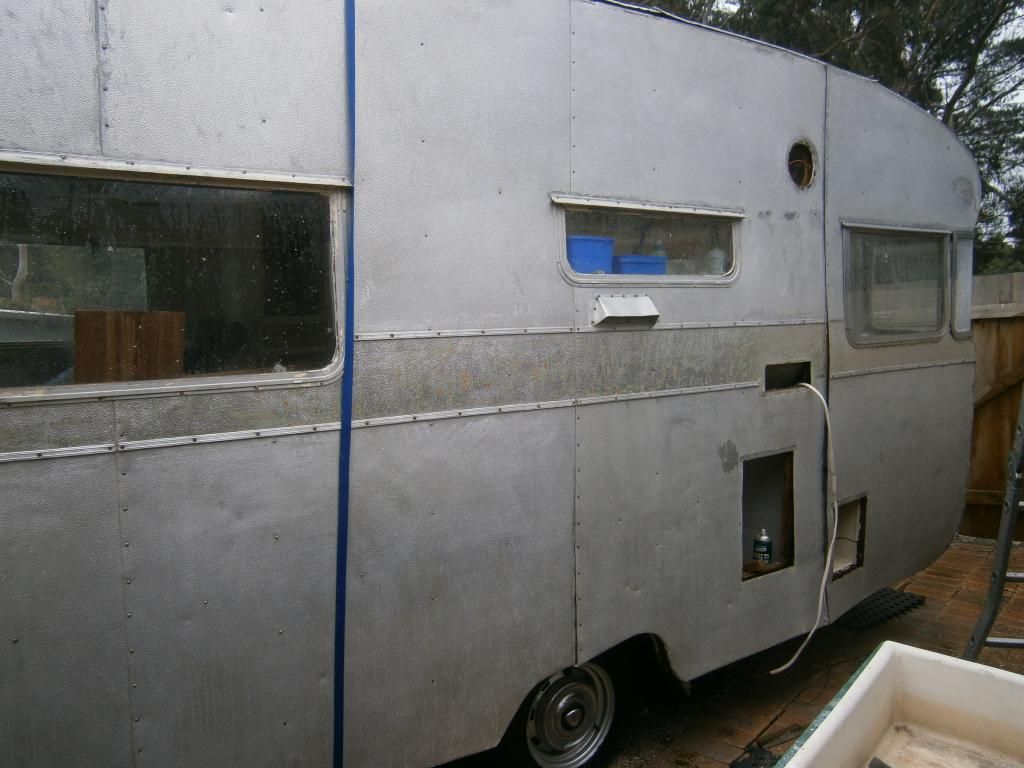 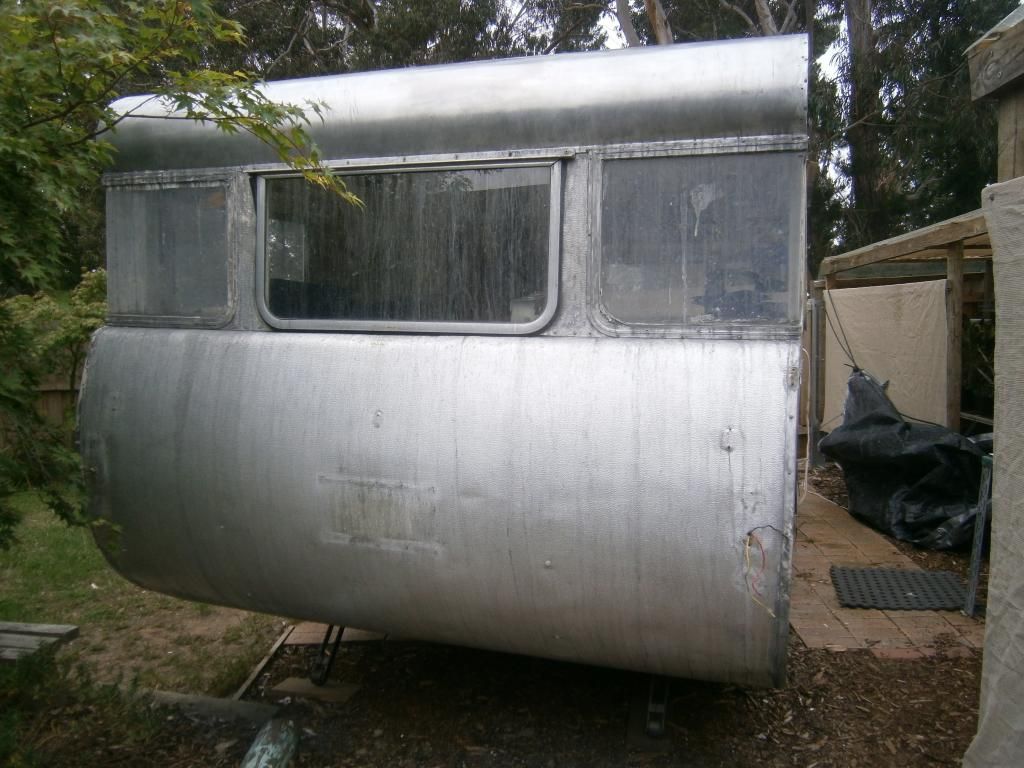
cheers Murray |
|
|
|
Post by murray on Nov 29, 2014 21:00:55 GMT 10
And a few interior shots 
the van as originally purchased . filled in the TV hole, and a new "old" aluminium window replacing the fill-in timber jobbie 
and the microwave hole above the sink has been changed back as original  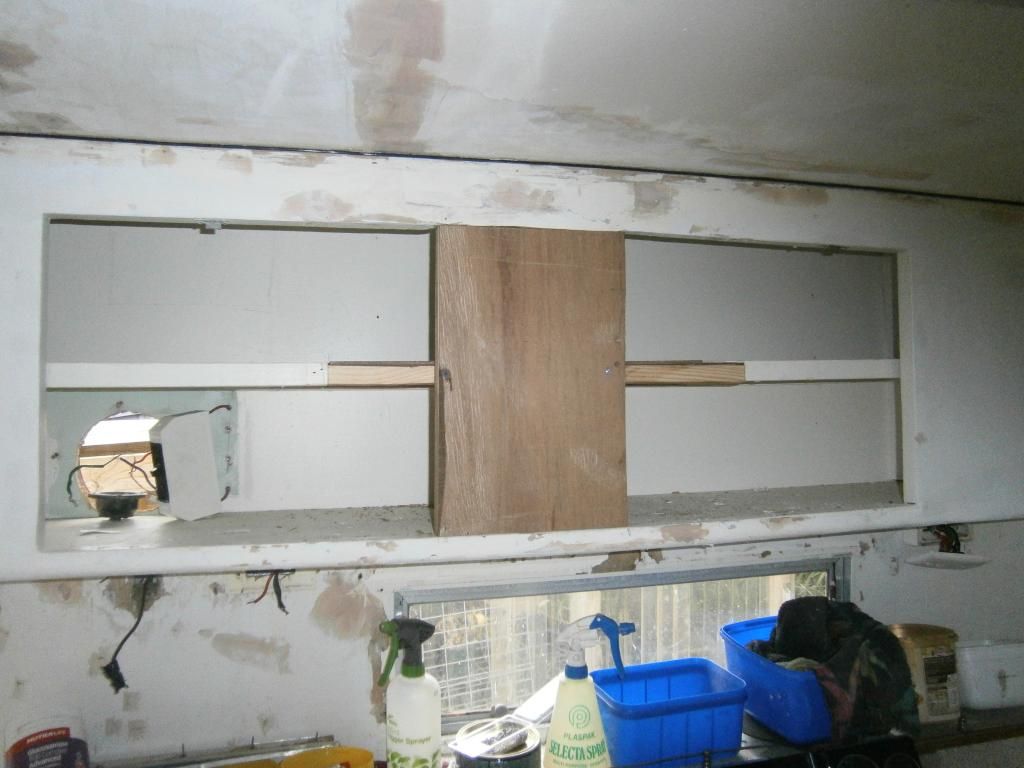 and the mirror hole has been filled in 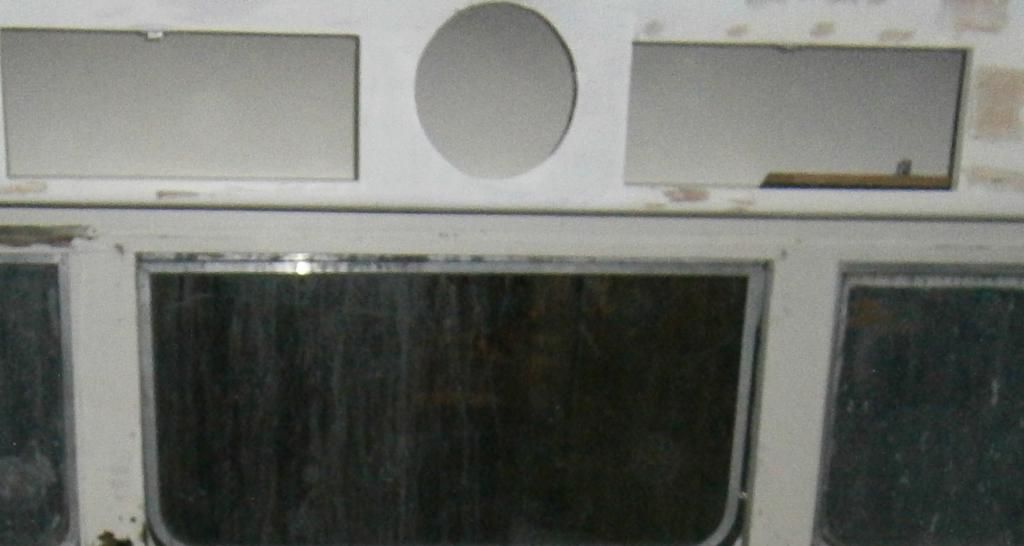 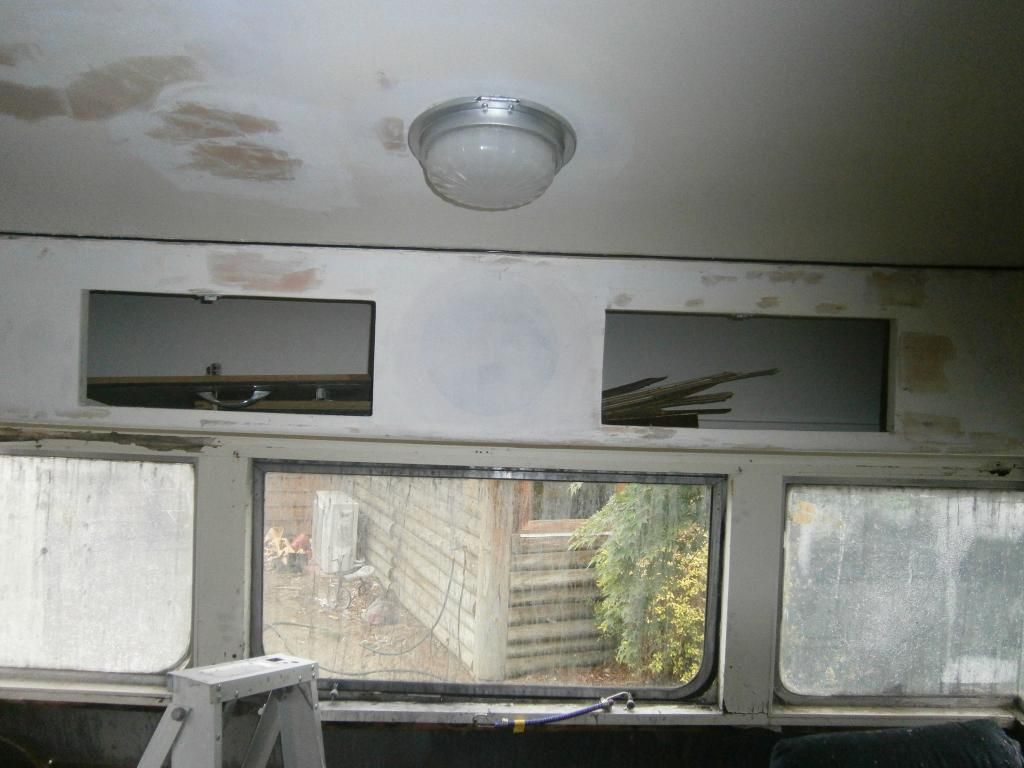
now lots of filling and sanding to get it ready to undercoat. cheers Murray |
|
|
|
Post by akeepsake on Nov 29, 2014 22:49:11 GMT 10
Nice going Murray ! Coming up a treat! You must get yourself a bondwood next time ....... much easier to get the paint off!!!
|
|
|
|
Post by murray on Nov 30, 2014 6:05:16 GMT 10
Nice going Murray ! Coming up a treat! You must get yourself a bondwood next time ....... much easier to get the paint off!!! Andrew , It's your experienced stripping style. Have you made room in the Jennison for that" pole" yet Cheers Murray |
|
|
|
Post by akeepsake on Nov 30, 2014 8:51:48 GMT 10
Pole is getting re chromed as we speak but it is the back bumper/towel rail!
|
|
|
|
Post by murray on Dec 28, 2014 15:13:52 GMT 10
ADVICE NEEDED !!!!
All has been progressing well with the reno. With 16 months to the nationals I decided to hurry things along and have a spurt over the break to take the cladding of the kitchen side ,replace any rot, insulate, run some wires and reseal. I just happened to notice that most of the whole side bows out by about 20mm (how could I not notice) from under the windows to 30 cm above the floor line . There is no indication on the inside of van apart from a crooked shelf above the sink area. Apart from taking kitchen out and replacing the whole side are there any easier fixes that can be done ? Can it be pulled in with tie-downs and braced with extra timber ? I don't want too quick a fix which could compromise strength of the build ,just some guidance as to avoiding a total side reconstruction if I could. HELP < HELP< HELP  Not happy at all Murray
|
|
|
|
Post by DC3Td on Dec 28, 2014 16:33:25 GMT 10
Gday Murray.Have a bo peep at Observatorys rebuild.
|
|
|
|
Post by murray on Dec 28, 2014 18:01:29 GMT 10
Gday Murray.Have a bo peep at Observatorys rebuild. cheers |
|
|
|
Post by akeepsake on Dec 29, 2014 7:10:34 GMT 10
Muzz may I suggest a horizontal pole between walls ! Seeing you have been practicing your stripping technique you may be able to handle it!! Seriously ...check out this Don restoration thread from Colin and Sue it may help vintagecaravans.proboards.com/thread/14020/colinandsues-don-caravanI'm about to fire up,on the Jenno as am on holidays till 19 jan Cheers Andrew |
|
|
|
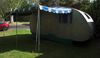
Post by murray on Mar 5, 2015 18:44:29 GMT 10
Well, finally found my camera Got around to putting in the replacement perspex windows and trying out the paint colour. Is turquoise vintage ? Certainly a slow process getting the windows to fit snuggly (and straight) Tested for watertightness and resealed a few areas. Cleaned light covers, door ,coverstrips etc and reinstalled. Have a few more windows to paint strip, and polish up, insert new perspex and install. At least the front is beginning to look respectable. Still plenty of rot to be replaced in the rear however. Unfortunately I didn't have the luxury of undercover to be able to work on the whole van in one go. Hope to seal it all up before winter then continue internally . Seem to be jumping around from one job to another without achieving much. As Frank would say "every day in every way I am getting better and better" Cheers Murray 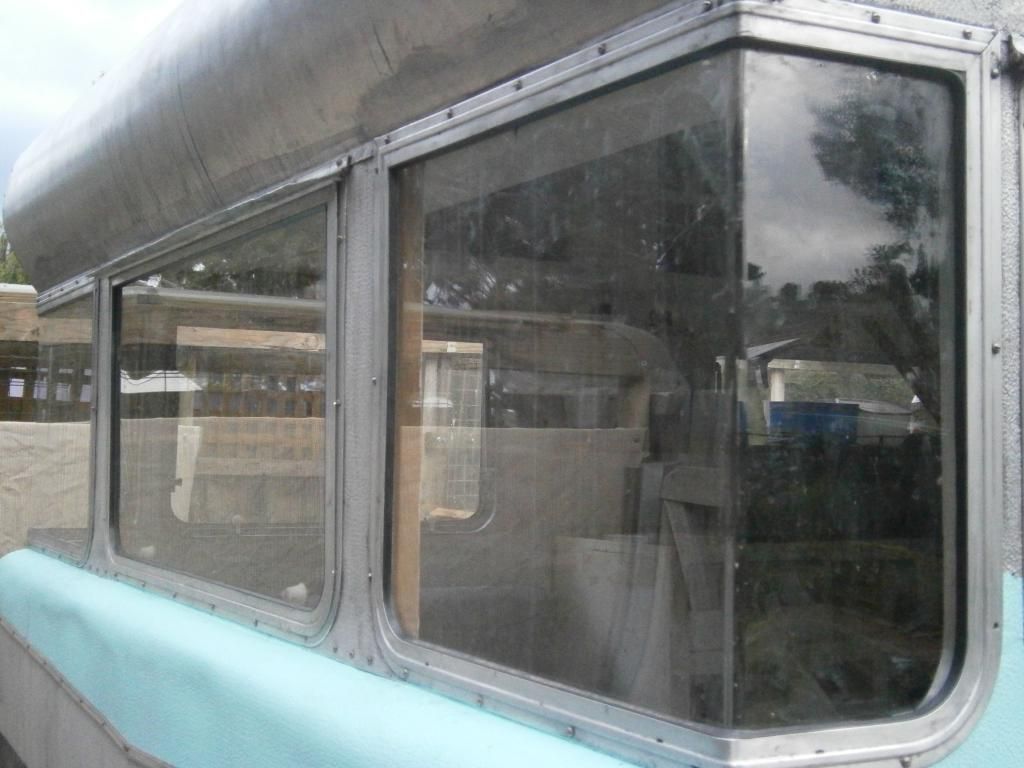 
|
|
|
|
Post by sarahlou on Mar 5, 2015 21:53:08 GMT 10
Tested for watertightness and resealed a few areas. Plenty of opportunity for testing for watertightness today with this rain down here in Tas today! Thumbs up for the turquoise! And the windows look schmick. |
|


 .
.


