|
|
Post by atouchofglass on Sept 6, 2011 6:13:53 GMT 10
Hey Guys and Gals Nutha little tip regarding fibreglass. When doing a repair or any glassing you want to make feather into the area it is bonding onto. Tear the fibreglass matt instead of cutting it.That way there is no line where it joins. It also makes it easier to grind so that you dont see the join as easily. If you need long strips of fibreglass use a straight edge of heavy aluminium to tear the glass matt with. IE lay the aluminium ruler over the matt leaving the required width of matt out to one side. Then hold the ruler there with one hand and tear the required width with your other hand. This is done on a bench or the floor if it is clean. It becomes a bit messy with the extra bits of fibreglass falling around but is far better as an end result. Sorry I didn't say that earlier. It is one of those things you think everyone would do cause you have done it without thinking about it for so long....   As it is under the bed it isn't a problem but good to know anyway. The fibreglassing you've done looks pretty good. Keep at it mate. To further waterproof your floor are you going to resin the untreated ply as well? When all the fibreglassing in the area you are working is finished Don't paint it with normal paint. Flowcoat it. Flowcoat is used instead of paint. It is waterproof if done over a good surface. If any of the older fibreglass is to be painted over it needs to be sanded. The new fibreglass won't need it if you are flowcoating within 24hrs. If not it will need to be sanded as well. vintagecaravans.proboards.com/index.cgi?board=technicalstuffboard&action=display&thread=4145Cheers Atog |
|
|
|
Post by seeshell on Sept 6, 2011 7:29:45 GMT 10
Hi Ozetrade I don't know what Bob did but we are going to do a bedhead as well just so that we don't put undue pressure on the outer wall. But I think it's going to be pretty unsophisticated - just battons behind it fibreglassed in with a bit of dressed and finished wood attached providing some rigidity. Because we have a double mattress, which I believe is a bit shorter in length, we could have had a bit of a thicker headboard if we wanted. But really there's still not much in it, and we wanted to keep as much as possible to allow the blankets to be tucked in. Also we didn't want the mattress to bind on the body/curtains/etc when getting to the storage. I bought a steel bed platform and gas lifts from a bed manufacturer, and so the bed will be able to be lifted with one hand so we can get under it to use that space. If you go with a queen just make sure you can reach the other side to make the bed, and that you can lift the sucker! And that the good lady wife can work with it too or that you will always be there to help - if mummy ain't happy, ain't nobody happy.  Cheers Seeshell |
|
|
|
Post by gregh on Sept 6, 2011 9:43:44 GMT 10
Yup that's what I need - the gold feedback. The type of info that gets overlooked when your trying to plan ahead. The place to get it is from those that have been there done that -gotta get one of those T-shirts. ;D :)Thanks Seeshell, Atog 
|
|
|
|
Post by gregh on Oct 9, 2011 19:26:28 GMT 10
Back again. Despite numerous family events and some storms and rain for most of yesteday, I've managed to get quite a bit done. Double bed frame is built, built in the cupboard frames where the single beds used to fit, draws and started the bedhead. You will notice that I've put 45deg braces under the bed frame - its quite solid. I was going to just use straight uprights, but I still wanted to be able to slip long things under the bed e.g. annex poles. I plan to put 2 access doors at the front of the bed; one for porta potti, the other to slip the annex poles in. I'm hoping to get the bedhead and some of the lining done next weekend - I will be relining the entire interior, doors and cupboards. 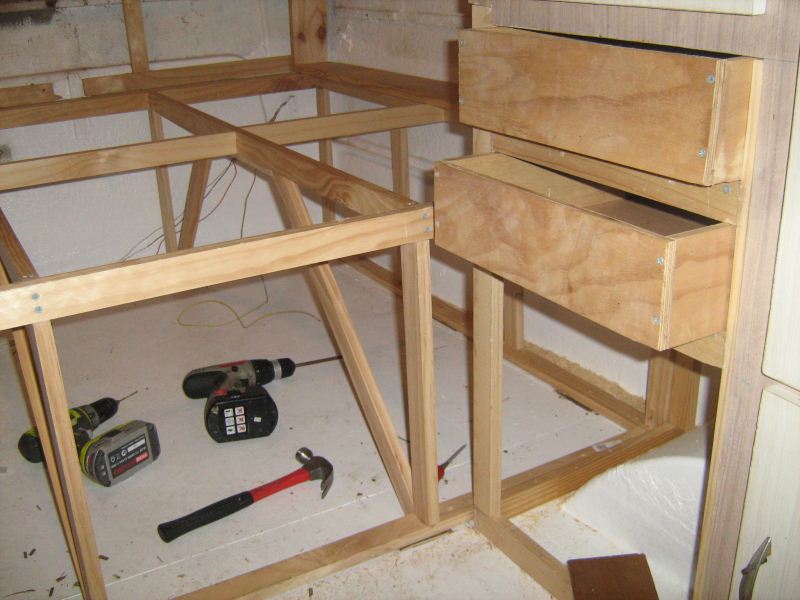 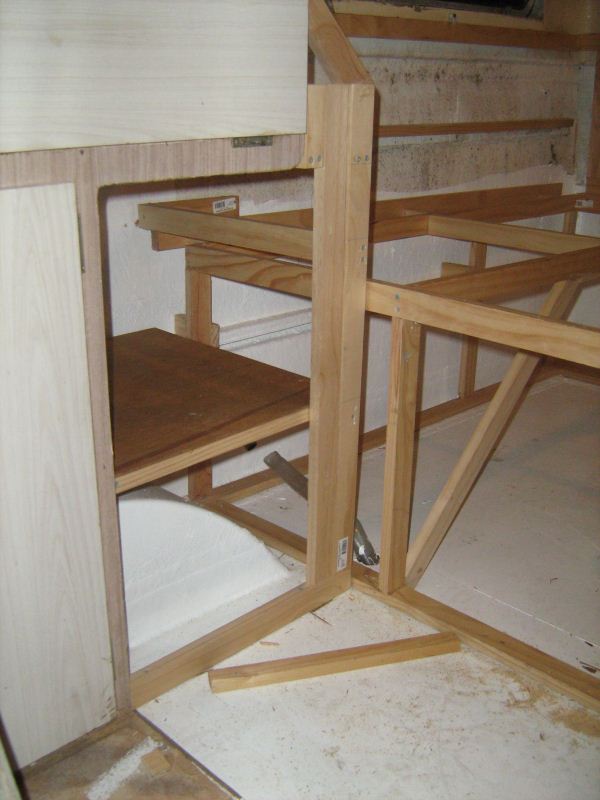 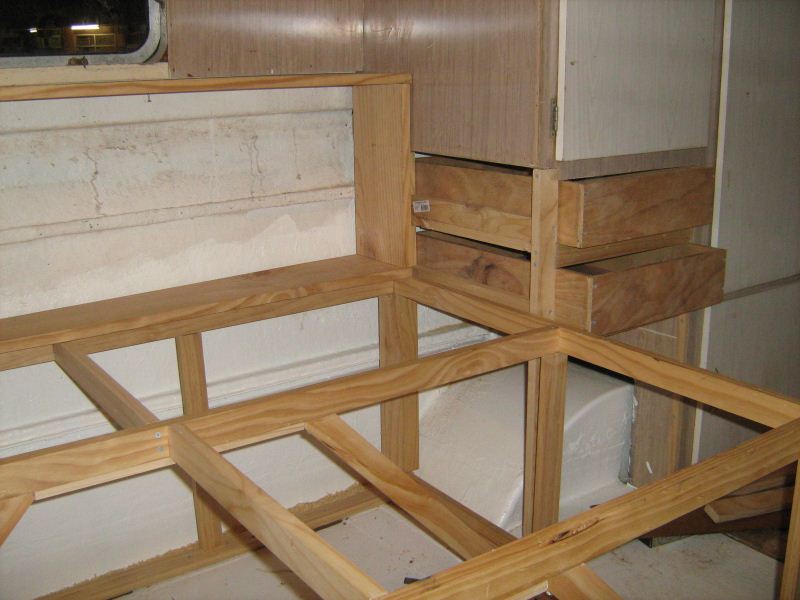 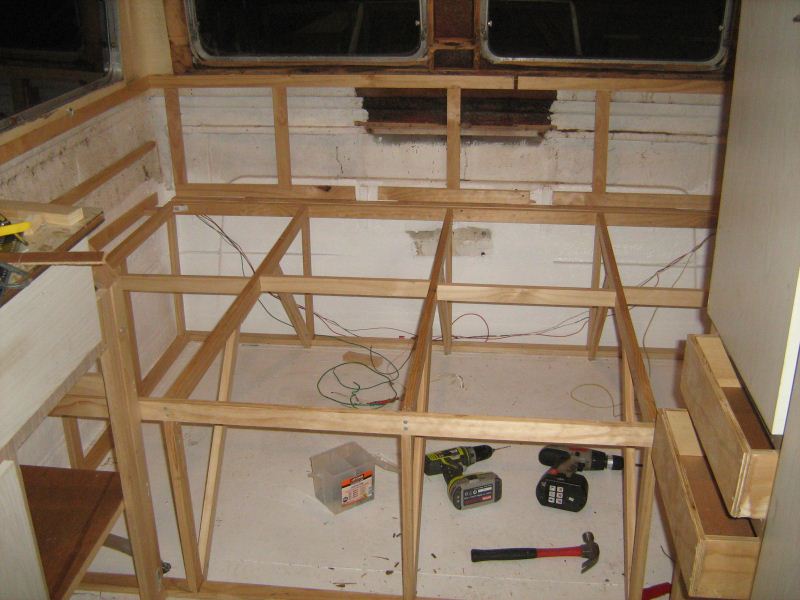 The missus thought I needed to show of the draw I made ;D 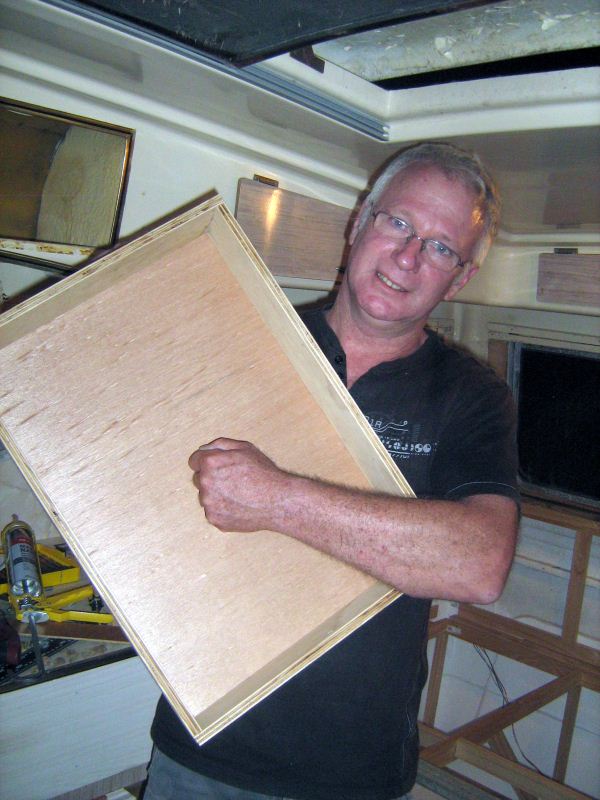 |
|
|
|
Post by gregh on Oct 16, 2011 18:34:05 GMT 10
Well you realize what you've taken on once you get into it. Everything seemed straight forward; do this, do that; but the reality is it is a big undertaking. You really do need to keep your mind on it and a positive attitude. Once you accept that there's less stress and more progress. Anyway had a good weekend with little interuptions and managed to get the bedhead finished; constructed anyway, still need to decide if I'll stain it first or just clear coat. I got a little innovative with the bedhead; I used some dowel to created a nice little rail inside the bedhead. Also found a way to utilize the compartment under the bedhead. I realised when I did this that this compartment will be hidden behind the pillows; should be ideal for hiding valuables.  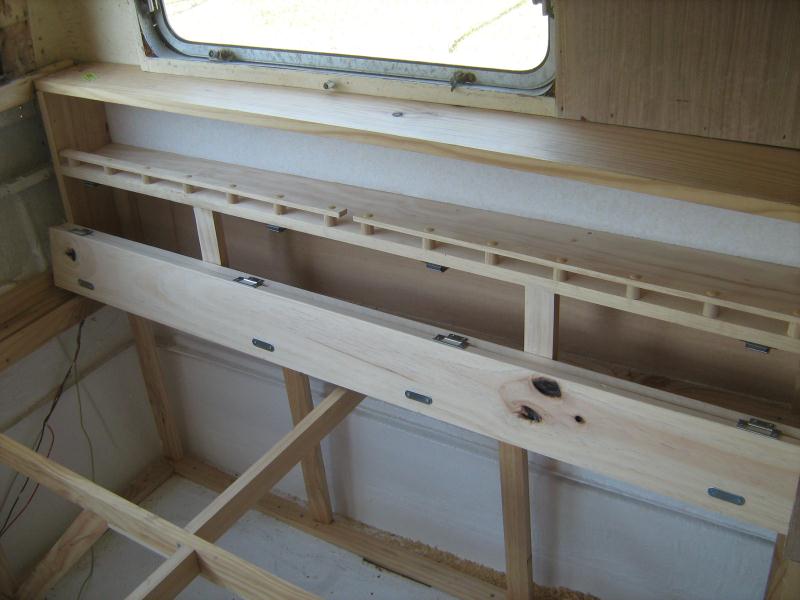 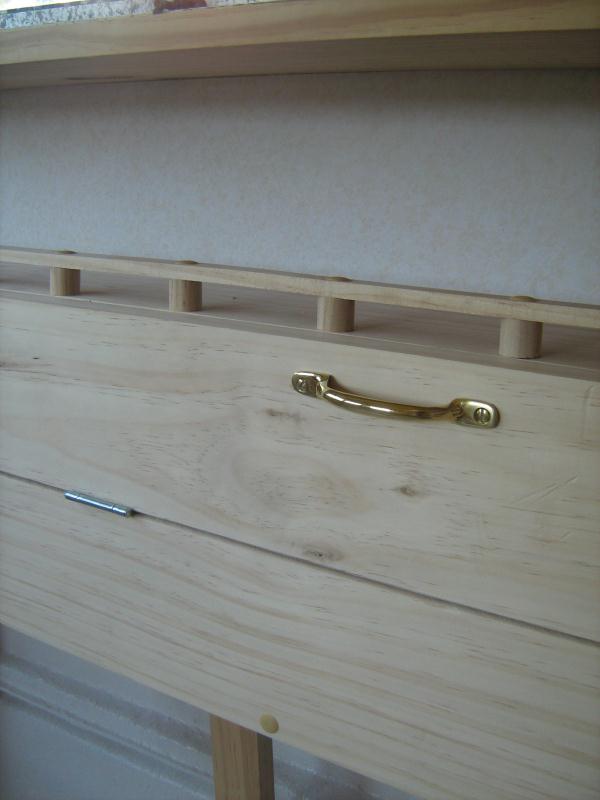 I'm hoping to get time through the week to finish the supports for the wall lining so I can start lining the walls next weekend. OZ. |
|
|
|
Post by gregh on Feb 13, 2012 22:10:06 GMT 10
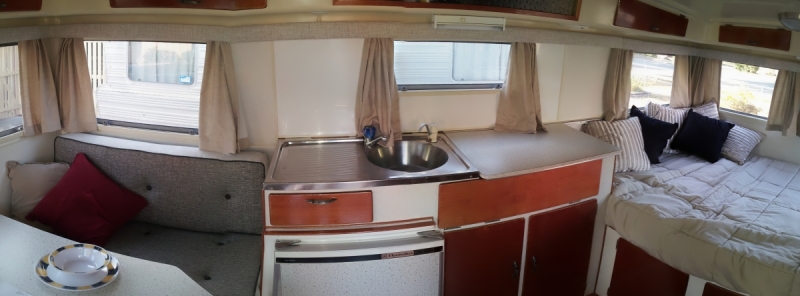
Hi All.  Guess I found the slow road there for a while, but now I'm back on board and motivated! Been a bit of a slog getting this lining done...who'd ever thought that every sheet would have to be measured then trimmed a dozen times for the perpect fit. Anyhow got it down pat now so things are moving along nicely. Most wall panelling is complete. Trimming around the roof at the wardrobe was a challenge and getting the new piping to fit neatly. As you can see I've used a good quality white panel at the door entrance and I'll use the same to line the lower part of the cafe seating and also around the fridge - including the fridge door insert. I plan a full wrap around curtain pelmet to line the entire area where the new wall lining meets the underside of the cupboards - burgandy colour with minimal gold design imprint. Cafe seating will be gold with light design imprint - just need to find a complementry curtain material. I still need to make new doors and cupboards yet; thinking of solid 12mm ply with a full gloss finish - but I'm open to ideas, any suggestions? I'v ordered new Olympic stickers from Bob and hopefully Tony will get back to me shortly about a full set of window rubbers. Oh yeh....does anyone know where I can get some nice trim to go around the sliding glass doors over the kitchen?? Had a good cleanout on the weekend, a good opportunity to get some progress photo's up. Most ply is only roughed in around the windows and cupboards because I've only just found a way to trim/finish them - that's next weekends project.  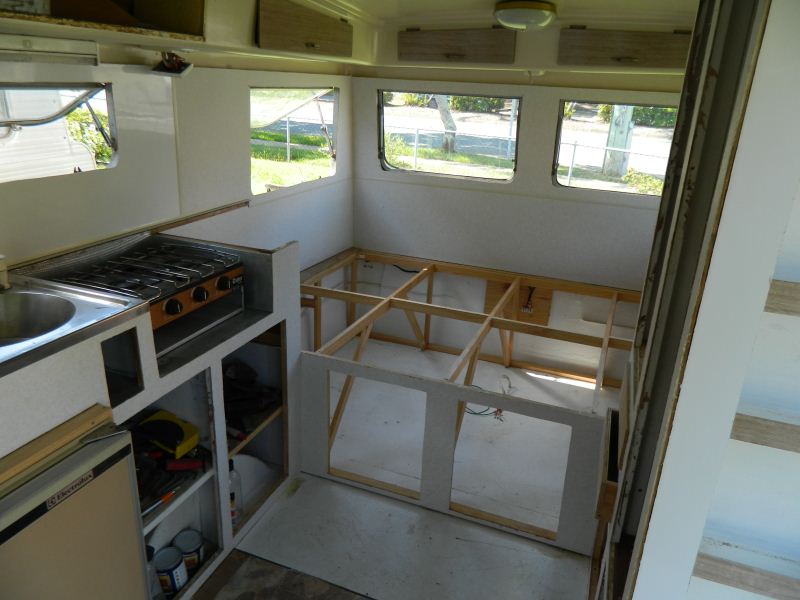 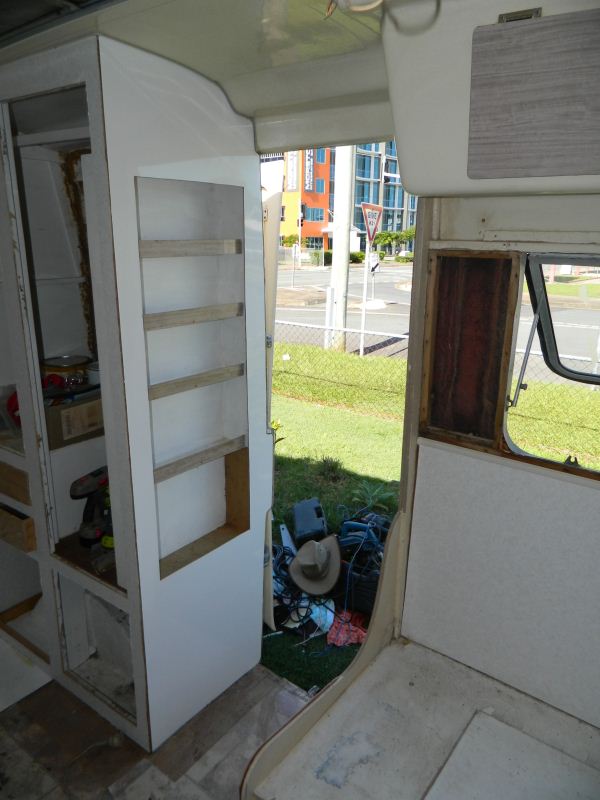  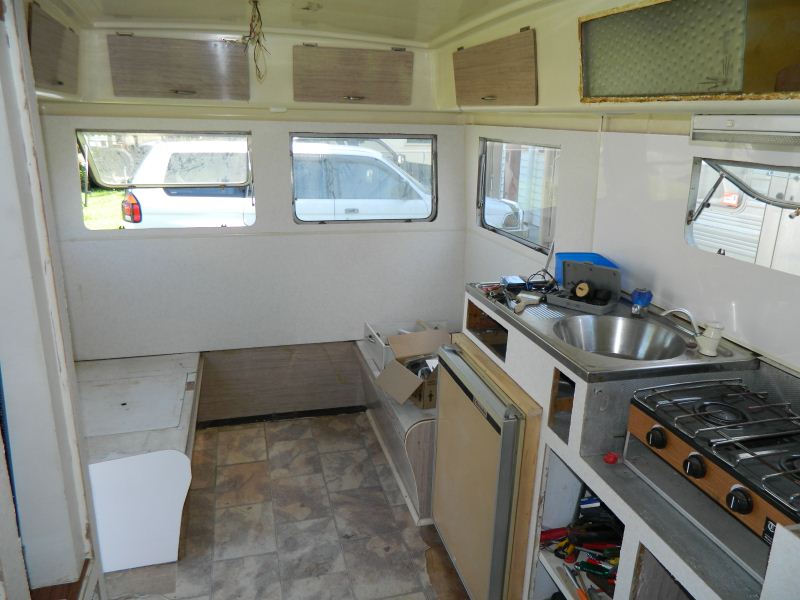 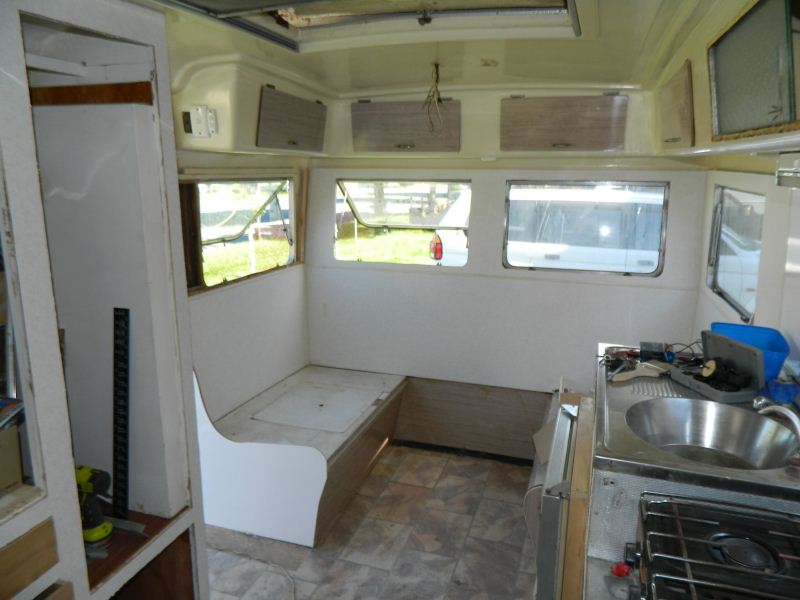 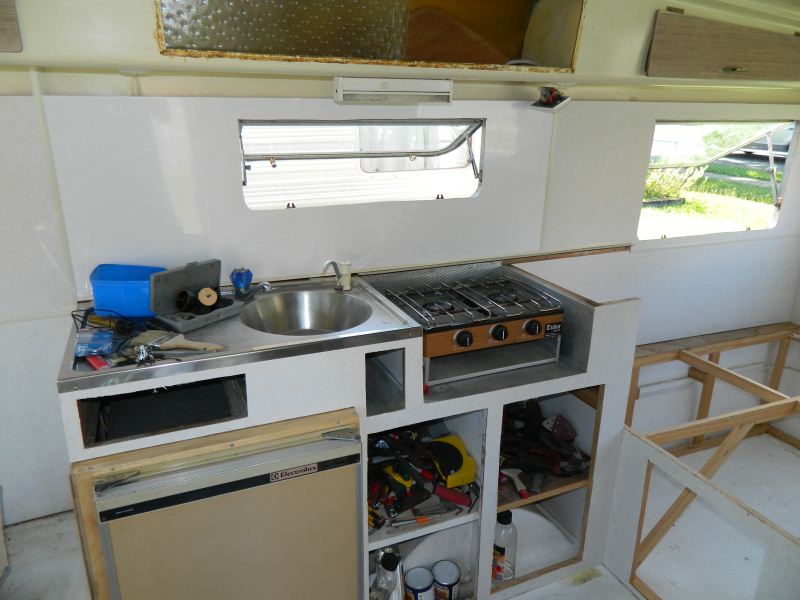 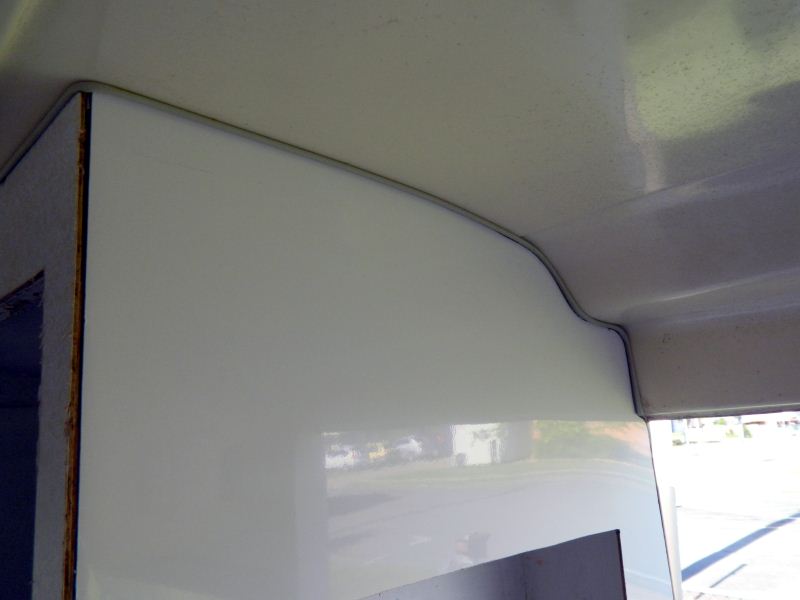 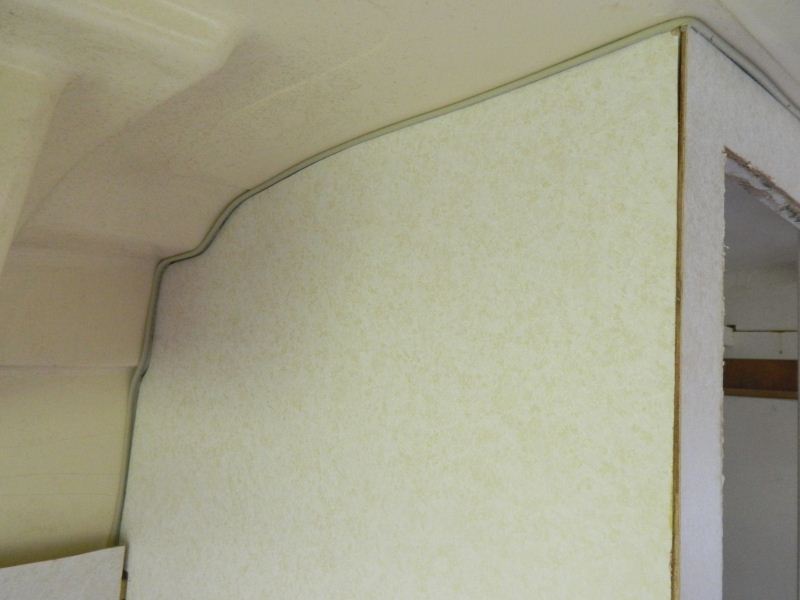 Cheers, OZ |
|
|
|
Post by seeshell on Feb 14, 2012 8:10:42 GMT 10
Hi Greg
Nice bit of work trimming those panels off so precisely. The new panels inside certainly have given her a freshen up - I think too that the under bed storage will be very handy.
I think your idea about wrap around curtains is a great idea, and we had planned to do the same. I did find some flexible metal curtain rail you can bend that has nylon or metal runners that can fix to the wall or ceiling - we were going to mount to the underside of the cabinets. It was called Silvo rail. Neat stuff that looks like a tiny I beam, and the runners are top notch (you can get them in all metal, like the good old days).
Ikea do have singe track curtain rail as well with turned corners that might do the job as well, cheap as chips and quite nice looking.
A piece of advice - make the curtain in two parts, rather than one for each window (3 in total). When pulled back each will sit into the corner, and not foul your windows, and when you "open" them, they pull both left and right from the corner to cover half the back window and one of the side windows. Interestingly, it also uses less fabric.
Cheers!
Seeshell
|
|
|
|
Post by gregh on Aug 8, 2012 19:00:36 GMT 10
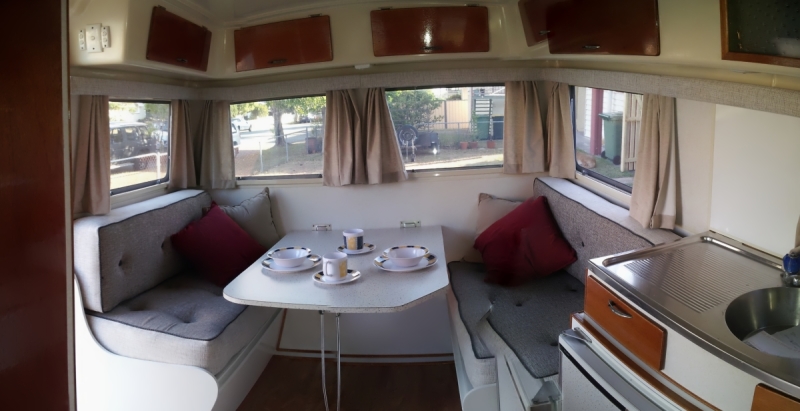
Hi everyone, I know I've been out of touch for some time, but I have been working of my gem every opportunity I've had. It's been a very busy year for me. I'm also excited because I'll be able to post some completed interior photo's soon - just waiting for the dinette cushions and pelmet to come back from the upholsterers. I think you will like what I've done. Though not retored to original, it has a nice new feel to it, but still feels period. PARTS WANTED:I'm also chasing some extra door handles - I need 3-4 the same style that can be seen in the photo's on page one of this thread. I'd really like to have all the same handles. Colour is not important as I will be refurbishing them. Any help on this would be great. I just have the chassis, running gear and exterior to finish now. That should be a breeze compaired to the effort thats gone into the interior. Greg |
|
|
|
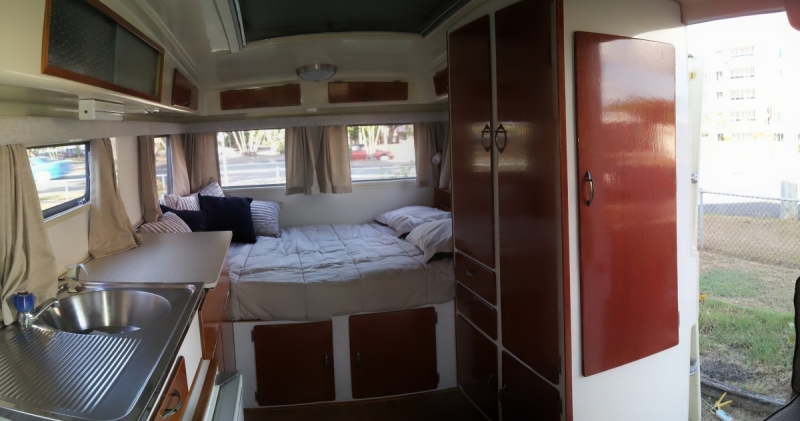
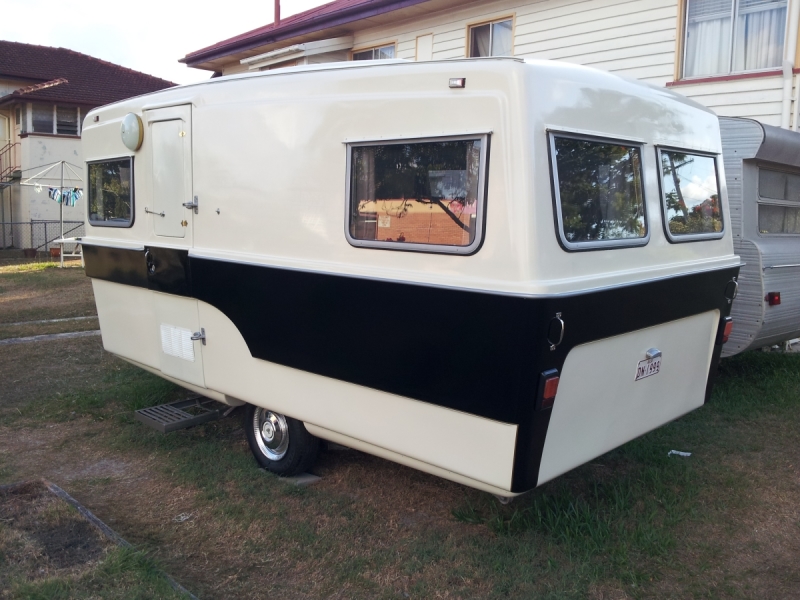
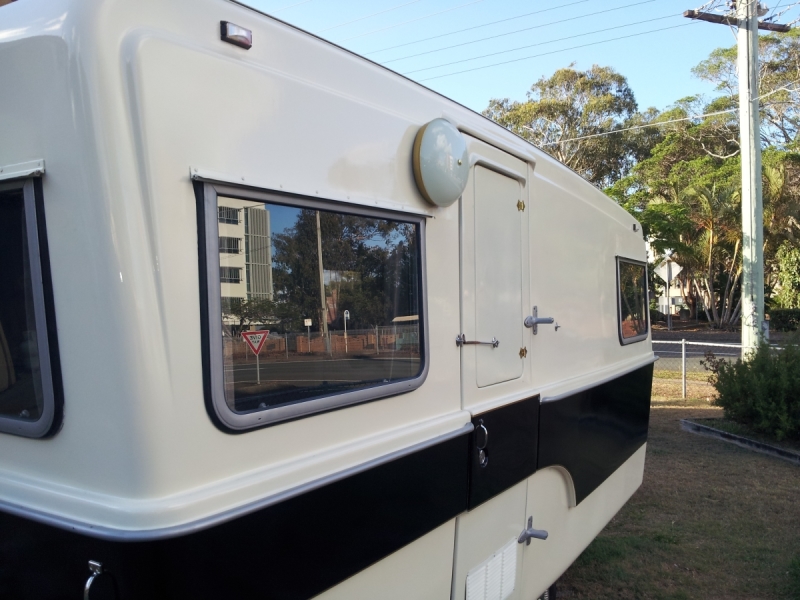
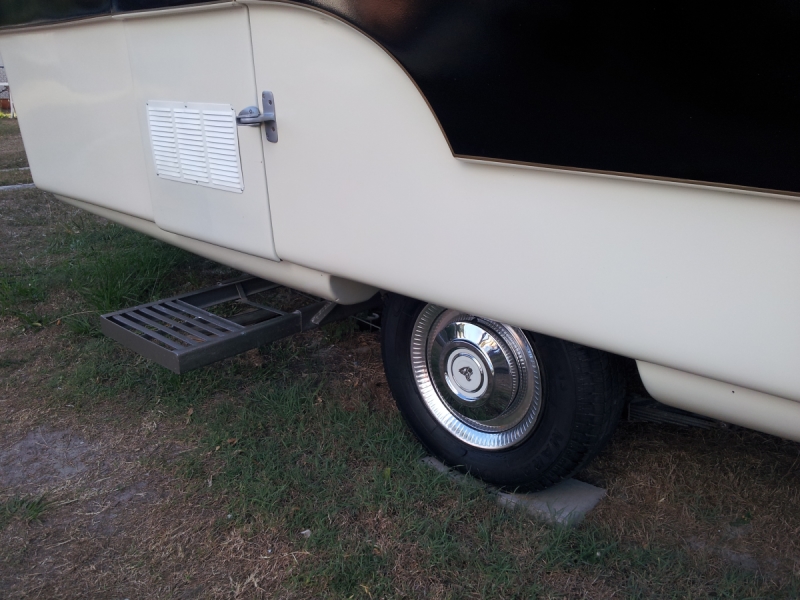
Post by gregh on Dec 23, 2012 22:01:09 GMT 10
|
|
|
|
Post by gregh on Jan 12, 2013 13:16:04 GMT 10
Just letting eveyone know that this van has sold and gone to a lovely couple that live in Coorparoo QLD. They have 3 kids and are looking forward to enjoying their vintage van at up and coming long weekends and easter.
Cheers,
Greg
|
|
|
|
Post by First Glass - Tory on Sept 1, 2013 1:15:03 GMT 10
Greg,
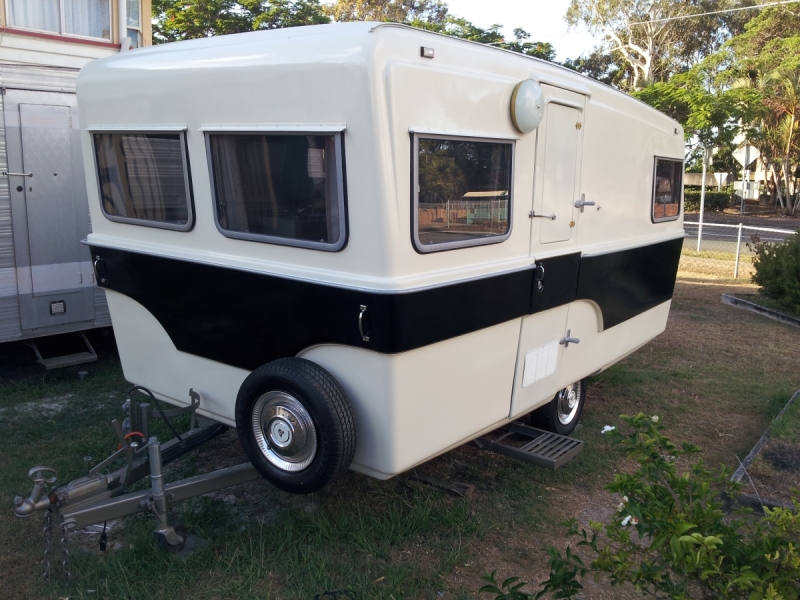
can i ask what you painted your exterior of your Debonair with???
Thanks Tory
|
|
|
|
Post by gregh on Sept 2, 2013 14:50:32 GMT 10
Hi Tory,
The Debonair was painted with 2 coats of automotive enamal. First coat was thinned about 10%; and it went on fairly light. When that coat was tacky, 2nd coat went on same as first. When that was tacky the third coat went on which was thinned about 7-8%.
The secret is to have good overlap of each spray pass without putting too much on otherwise you get runs.
By the way; do not use plastic masking over fresh paint. It causes sweating that leaves the pattern of the plastic in the paint.
Mine had a previous paint job on it which I sanded off. You will need to use a good quality etch primer on the fibreglass before painting.
Cheers,
Oz
|
|
|
|
Post by First Glass - Tory on Sept 4, 2013 23:56:42 GMT 10
Thanks Oz,
Excellent, thanks for letting me know & all the tips & tricks.
Cheers & Much appreciated
Tory
|
|
|
|
Post by gregh on Jun 17, 2017 16:59:35 GMT 10
Someone massaged me on my phone or through Facebook asking about the exterior awning light fitted to this van. Sorry, I saw your message, but when I came back after looking at the photos, I couldn't find your message to reply. So just in case you come on the forum again, here's my answer. The light is actually an interior light off my Olympic Stardust. It was common to fit them as an awning light back in the day. It's not a new light, it a refurbished one I salvaged from my Olympic Stardust. ebay listingMy Viscount Ambassador had a similar exterior light, in fact most early Viscounts did. CheersGreg |
|