|
|
Post by gregh on Aug 16, 2011 22:41:24 GMT 10
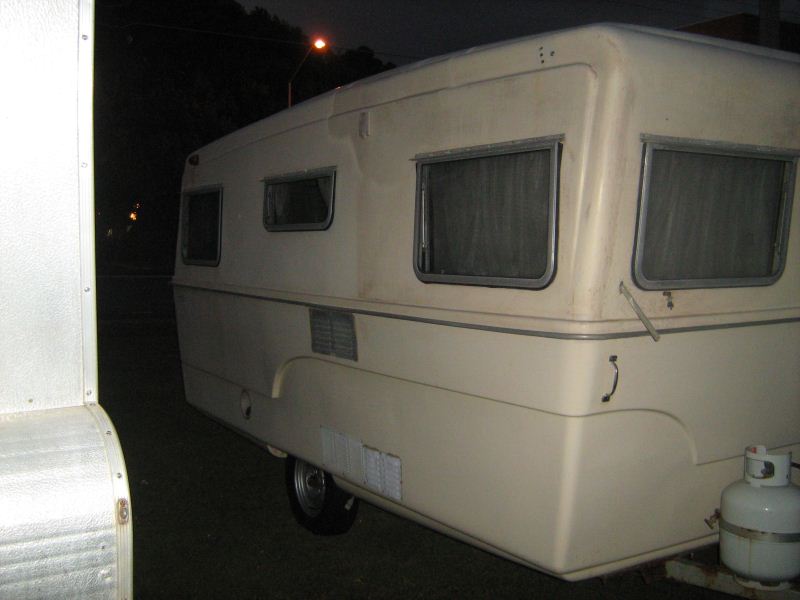
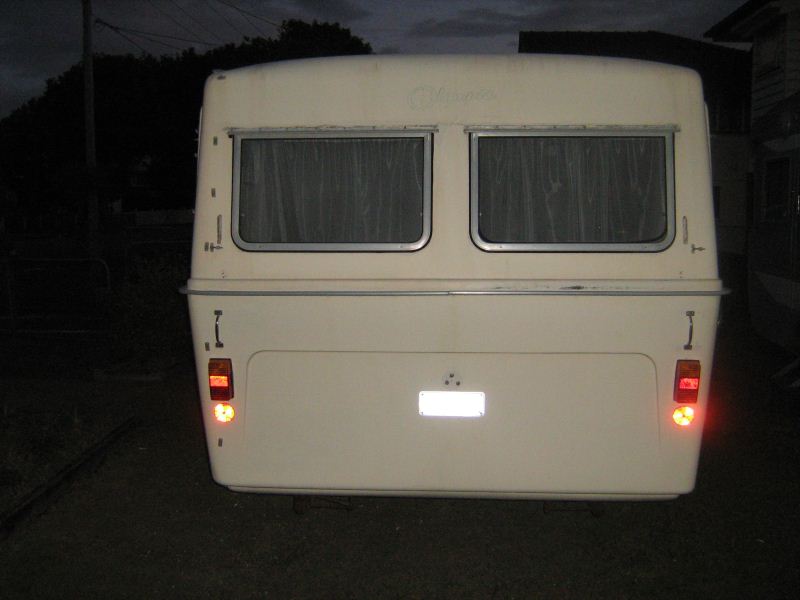
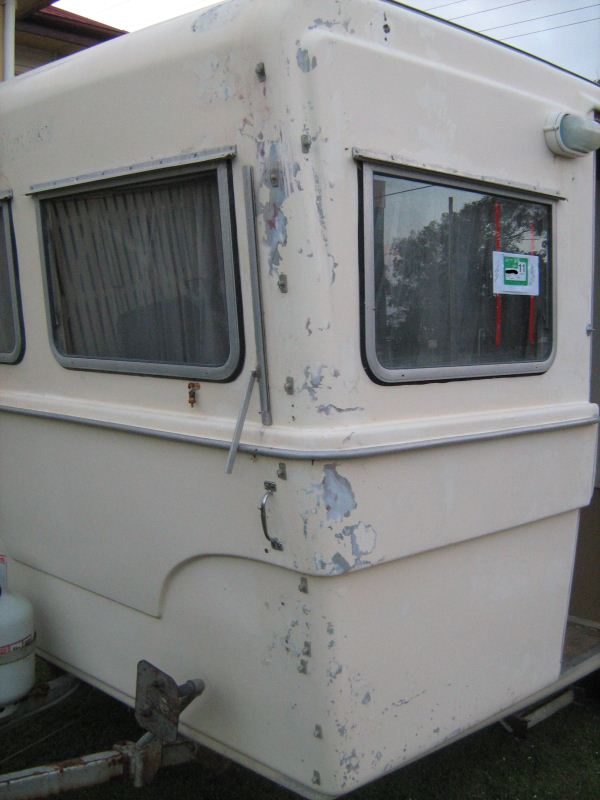
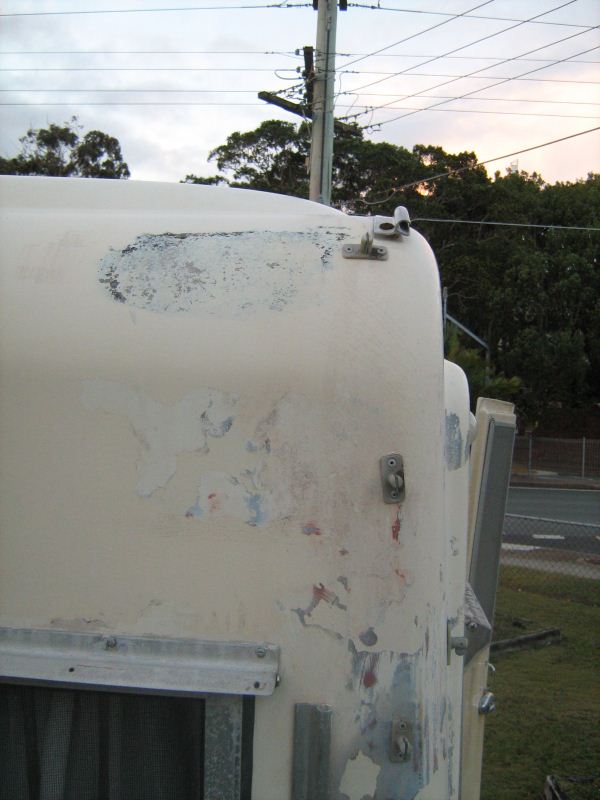
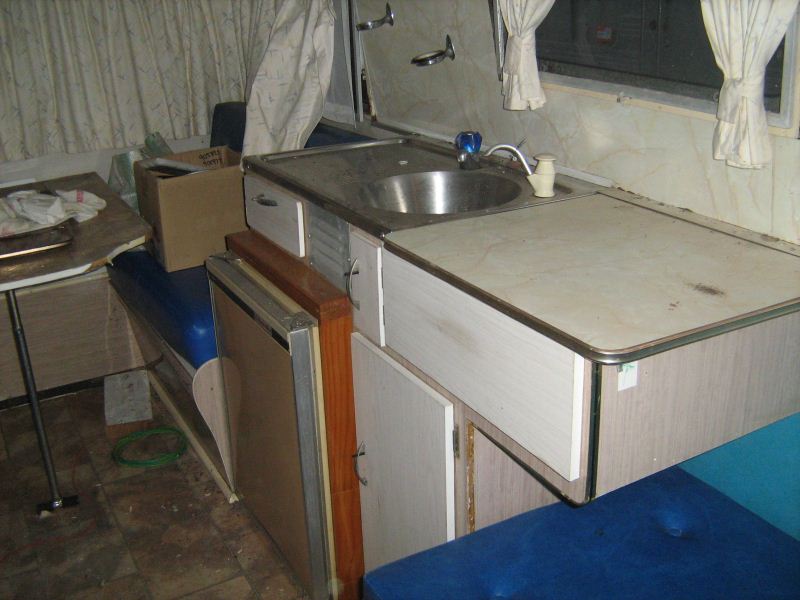
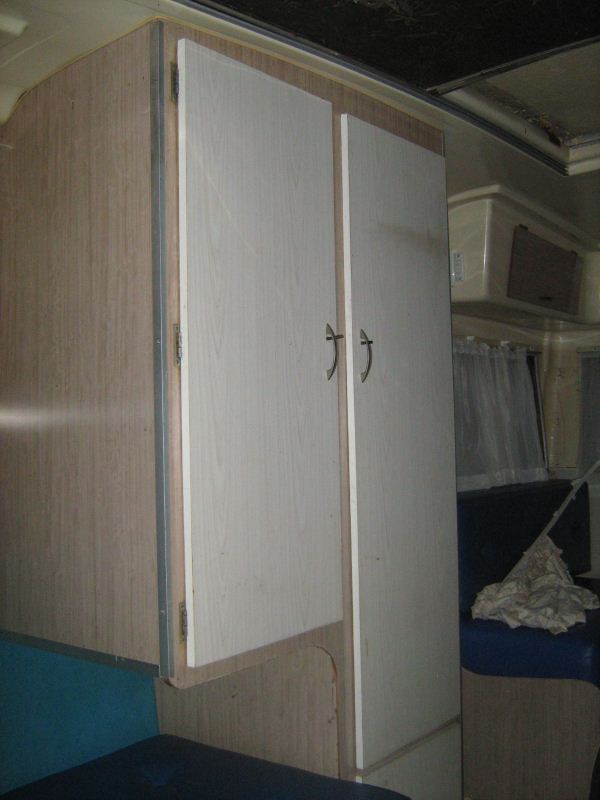
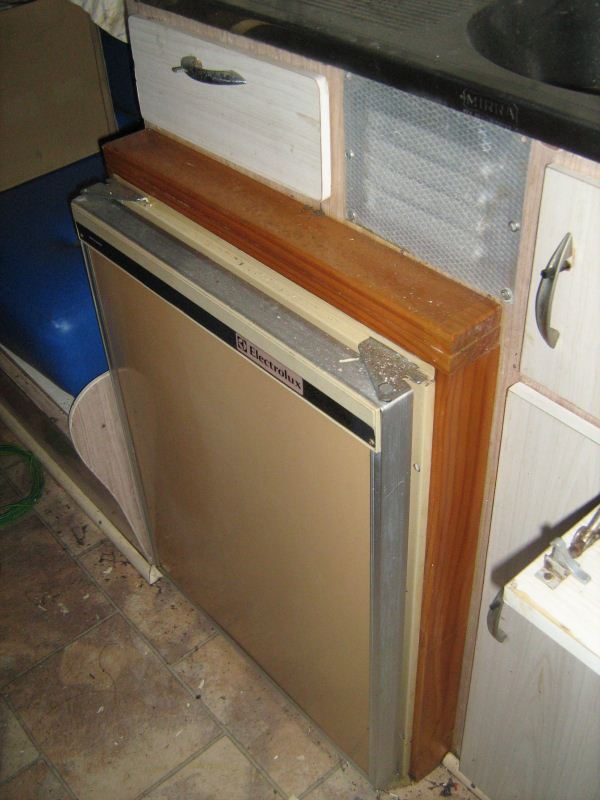
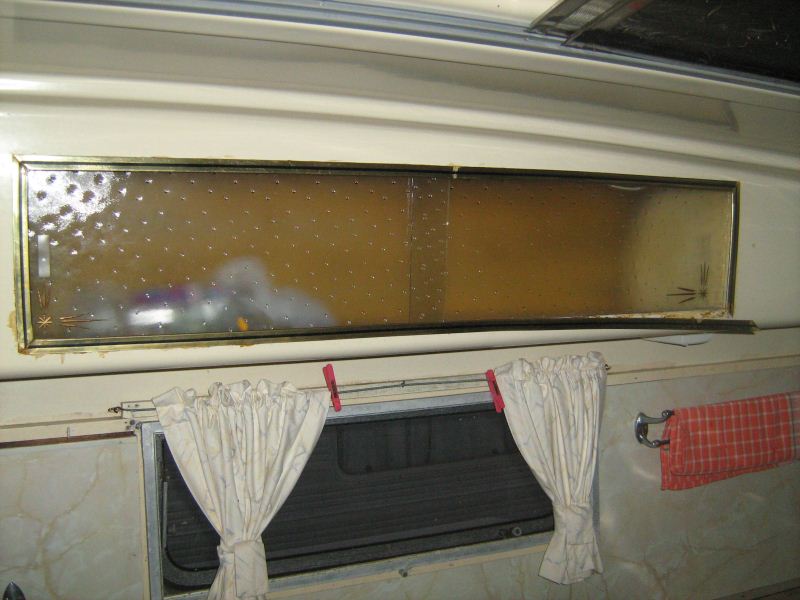
Hi everyone, . ALL IMAGES FOR THIS THREAD HAVE BEEN MIGRATED TO POSTIMAGE.ORG - 25th July 2017. I've just bought an early model Olympic Riviera - and this was before I did any research and stumbled across this forum. Externally it looks very sad, but the inside is in pretty good original shape. The body has been painted but peeling and there is evidence of some bog work. Though not fitted, has come with the original front and rear window awnings. The chassis no. found under the front A frame is 1396 - can anyone tell me what year it is? I plan to do a full restore on this gem - who's the best person to source bits and peices from. I don't think I'll be chasing much, but a few original Olympic stickers (or remade) will be on the cards. I'm gunna need some advise about stripping the paint of a possible redoing the gel coat - anyone care to share their experience! MAKE: Olympic MODEL: Deboniar SIZE: 13' 8" YEAR: 1968 BODY: fibreglass CHASSIS No: 1396 Here's a few pics of the gem before I start on her. 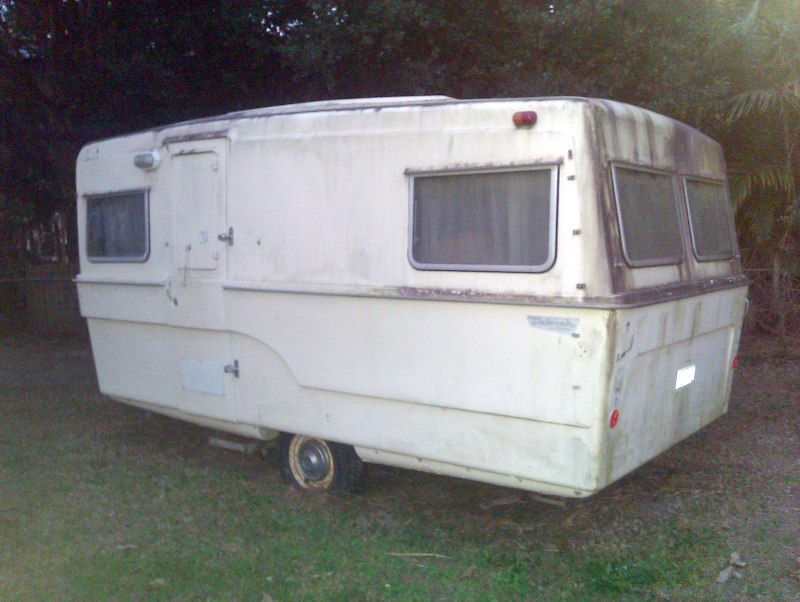 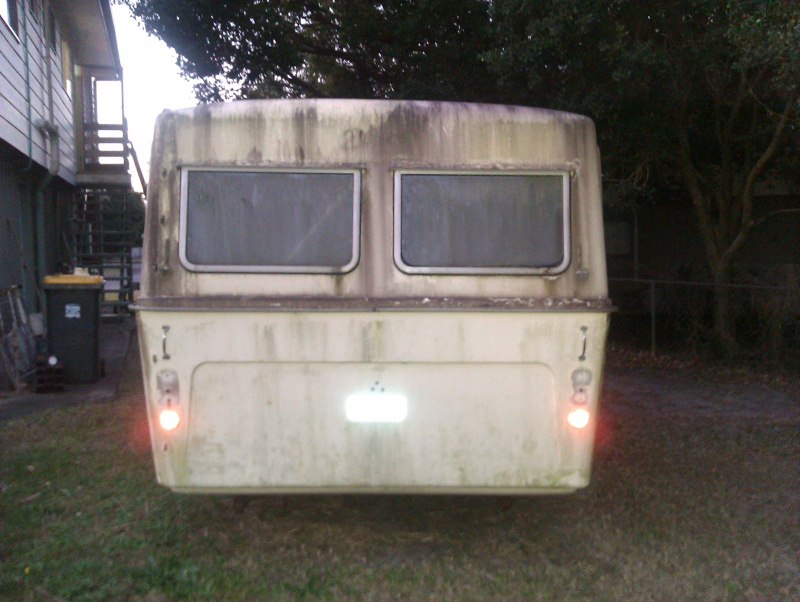 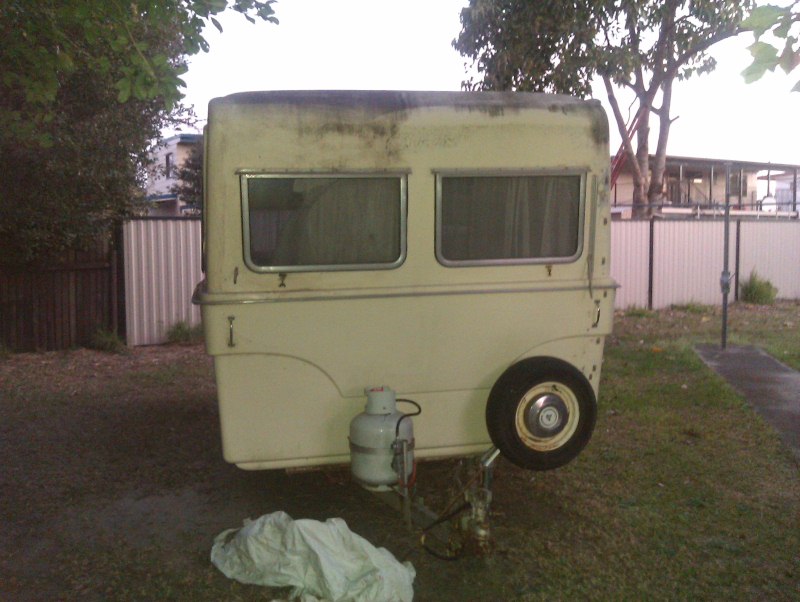 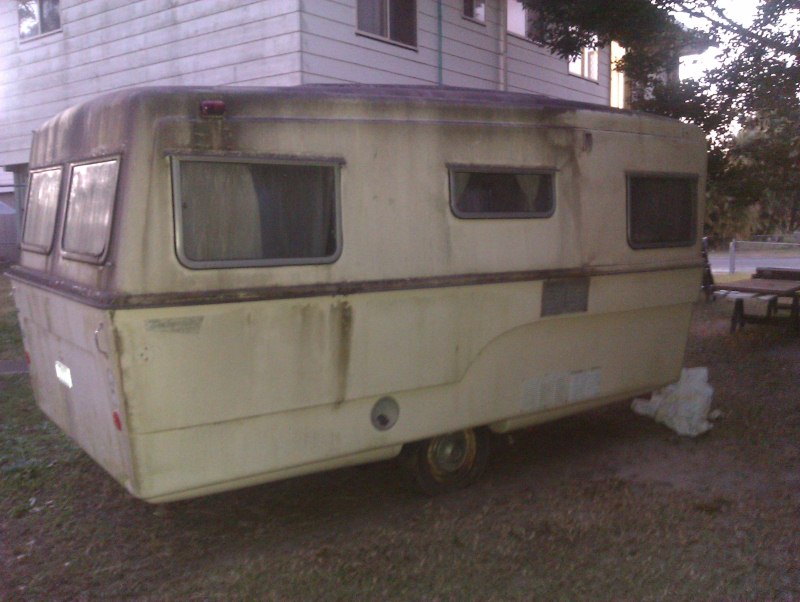  I look forward to sharing my resto with you  Greg |
|
|
|
Post by bobandjacqui on Aug 17, 2011 5:20:53 GMT 10
Good morning and welcome to the forum Greg, Your van looks nice and straight body wise from the pics which is a good start. There dosen't appear to be any sag around the wheel wells as that's where they usually let go I think mainly because people strip the interior out but forget that the cupboards etc are part of the strength of the overall van. Also happens if there's a lot of water damage to the floor and that's let go. Just looking at your pics again I'm thinking that it is actually a Debonair I'm sure I can read Debonair on the side sticker and looking at the front roof line it looks like a Debonair not a Riviera. Looks like you have found yourself a good platform to start with. I,m sure that our resident guru will be in touch re the chassi number and sourcing parts. He also has a contact re new stickers. Cheers bob and Jacqui |
|
|
|
Post by seeshell on Aug 17, 2011 10:01:09 GMT 10
Hi there Ozetrade Olympic internal fittings and bits and bobs come up from time to time on Ebay, but also it never hurts to ask on the forum - someone might have a few spares they are prepared to let go of. You're van looks lovely - can't wait to see some interior shots. As for the gel coat - that is a really big job if there's more than just crazing/cracking to fix. A lot of people repair those bits (see flowcoat and speak to some people who do fibreglassing) and then paint in a marine grade acrylic paint. One place to get advice about this kind of work is to troll around on the boating sites - there's a lot of advice that is very applicable to our vans. But of course if you have the energy and money putting on a new gel coat is very possible. Bobandjacqui had a friend (or it might have been their own van, I can't recall) who painted their Olympic and it looks spectacular. We plan to do the same when the renos are done. ATouchOfGlass (ATOG) also painted his van. You could look on the member pages and check out their posts and pictures. It's your van and you will need to decide what's right for you to do - there are no hard and fast rules other than getting them back on the road to enjoy!  And if you haven't talked to Boblor (knower of all things Olympic) he and others will be a valuable font of knowledge on how to proceed with some of the tricker tasks - they're lovely people. Best of luck with the reno - Seeshell |
|
|
|
Post by gregh on Aug 17, 2011 17:28:29 GMT 10
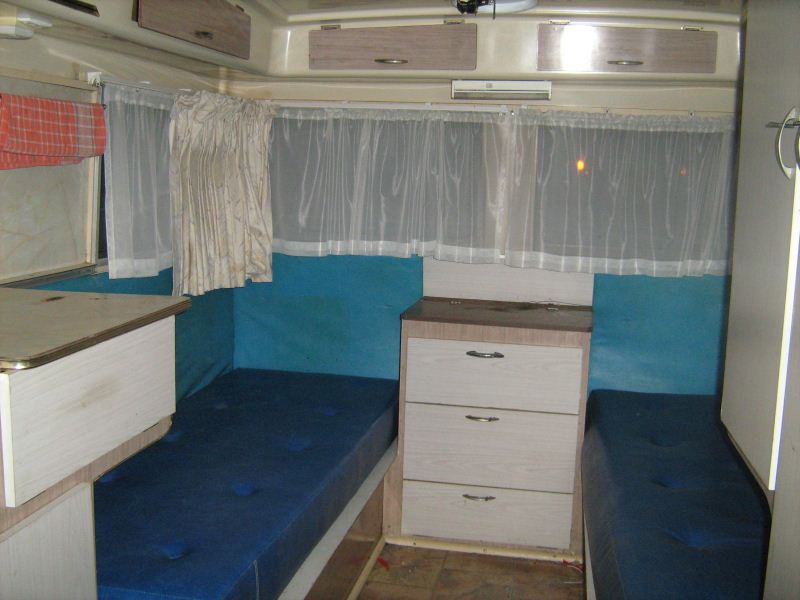
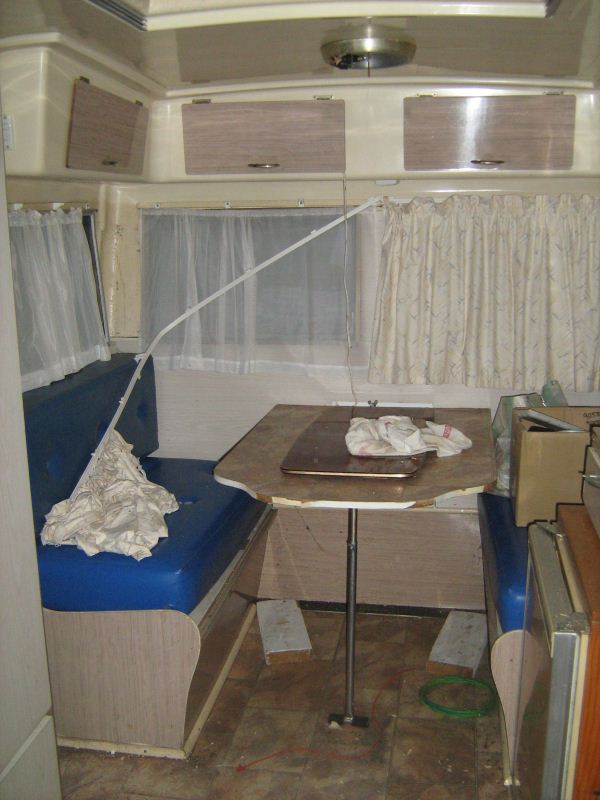
Just looking at your pics again I'm thinking that it is actually a Debonair I'm sure I can read Debonair on the side sticker and looking at the front roof line it looks like a Debonair not a Riviera. I believe your right. I guess I got a bit carried away. It does seem a bit small for a 16 footer - the sigle beds recess under the cupboards on each side. The van is still onsite at the sellers home - it's actually still registered, but I have to fit some lights, check tyres and suspension before I tow her home. Once I get her home I'll get some more pics up. I am aware of some wood rot in the floor under the single bed on the door side. Greg |
|
|
|
Post by boblor on Aug 18, 2011 11:32:10 GMT 10
Hi Greg
Welcome to the Olympic family, remember glass is class. Your van is an early 1968 model.
This is a good model to restore, you will more than likely require window rubbers , these are availiable from Tonyh on this forum. As stated above if you have a problem with restoration and need some guidance this forum has abag full of knowledge.
Cheers boblor
|
|
|
|
Post by gregh on Aug 18, 2011 19:30:58 GMT 10
Hi Boblor,
Yeh I know a few window rubbers will be on the list. I'm actually hoping to get her home on Sunday. I'll have to rip the wheels off my 67 Vicount Ambassador to get her home and fit some temporary lights - check bearings brakes etc also.
I'll try and get a few interior photos up Sunday night.
Cheers,
OZ
|
|
|
|
Post by gregh on Aug 22, 2011 18:33:50 GMT 10
|
|
|
|
Post by atouchofglass on Aug 23, 2011 5:56:57 GMT 10
|
|
|
|
Post by seeshell on Aug 23, 2011 7:08:13 GMT 10
Hi Ozetrade
Adding to ATOG's very fine advice, we were told by an old salt at a fibreglass shop that if you do use flowcoat (a finish layer which is harder than the hobs of hell when it sets up), paint it on, then overlay the wet material with a sheet of acetate (like you get at Officeworks for overhead transparencies ).
Squeegee the material flat with the acetate in between and remove excess. When the flowcoat is set up, the acetate peels right off and gives you that smooth surface closest to out of the mould finish. It definitely cuts down on some painful sanding time.
Best of luck with your repairs!
Seeshell
|
|
|
|
Post by gregh on Aug 27, 2011 17:33:16 GMT 10
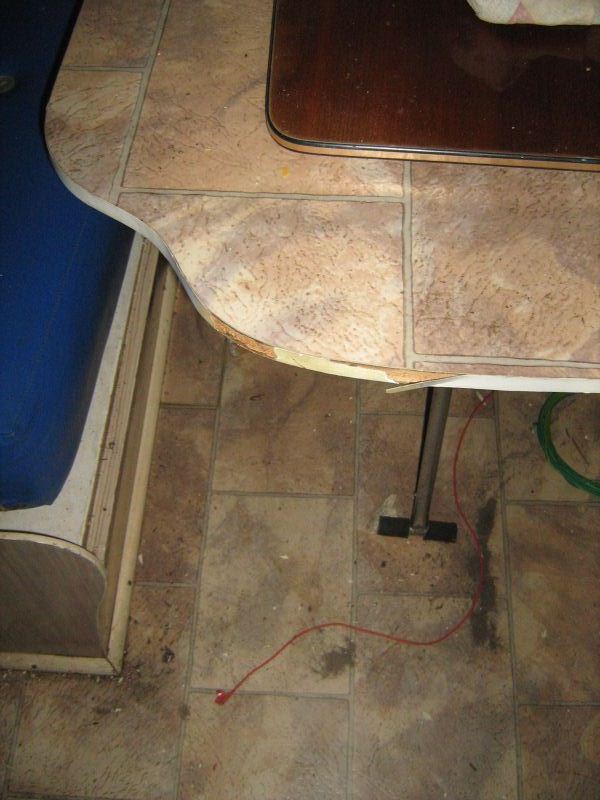
Finally got a start on her today. It's been raining on and off all day so I had to spend the time on the inside. Thought I'd check out how extensive the floor rot was under the single bed. It was bad.  Further investigation found that some previous owner had laid another sheet of ply across the rot to hide the floor flex. Decision time - I was hoping to keep her original, but not possible the whole floor has to be replaced - up she comes. I think I'll build it back up as a double bed with storage under; a bit more practical for a couple plus gain a mass of storage space. And since I've got to replace all the chassis bolts, I'll jack the body up and cleanup the complete chassis as well. ton's of rot. 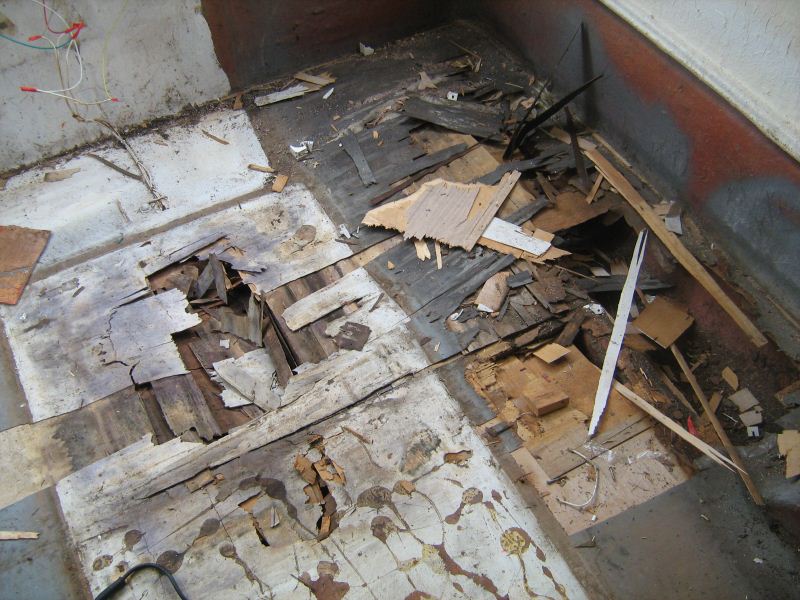 Here's some more. 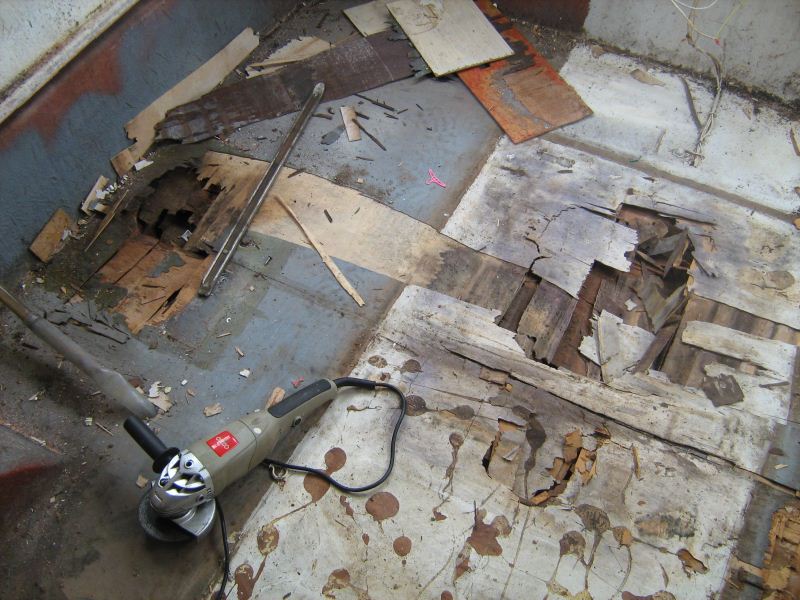 All Gone.....  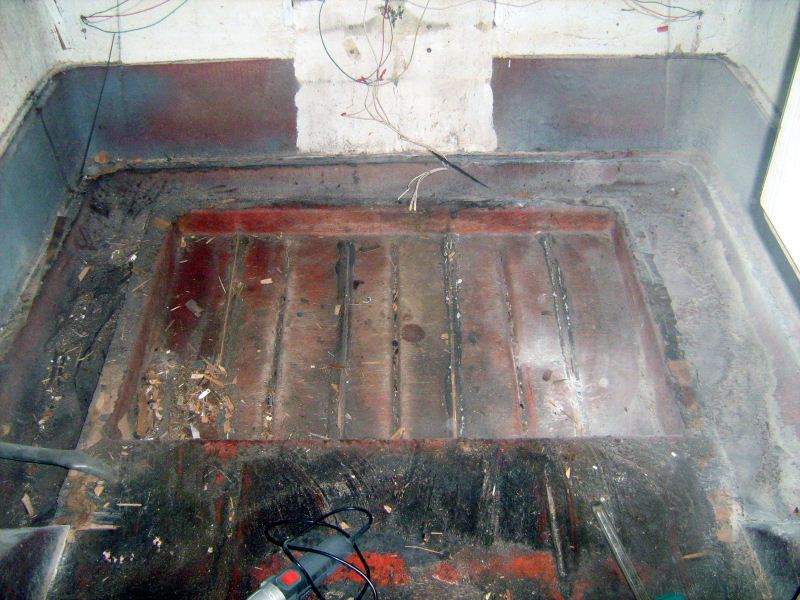 |
|
|
|
Post by gregh on Aug 29, 2011 17:07:31 GMT 10
Hi All, I have a floor level issue which I seek advice for. The floor section on the drivers side has sagged by around 20mm. You can just see it in the last image of my last post, but here's a section drawing of what I mean.  How do I deal with this? Do I jack that side of the van up to meet the new floor and glue, or do I just pack it out? My new floor in 15mm ply. This is a Deboniar at the rear where the single beds used to be. Thanks, Greg |
|
|
|
Post by seeshell on Aug 29, 2011 19:07:40 GMT 10
Hi Ozetrade This is the reason to shore up the body a bit - the whole thing will be racking, twisting and out of square which will contribute to what you are seeing on the floor level. If you can support it around the belly band with a frame and level side to side and end to end you might find that the 20mm gap disappears (or diminishes significantly!) This may sound a bit scary, but I don't think anyone should be put off by a bad floor in an Olympic - it's time consuming, and messy, but if you take the time it's not actually terribly hard to do. We're managing it and we're only first time renovators who openly seek good advice (here and from suppliers) and are prepared to have a go. Though of course, you WILL learn how to do it expertly just as you finish the job. Our Seeshell suffered a similar problem to the van posted today for sale out of Brisbane where the floor subsided and the kitchen leaned over and pushed the far wall out significantly. While repairing the floor we had as much as 60mm out on the ends of the van - the outer edge had drooped over the frame and we fixed by supporting and levelling the belly band. Doing the repairs now is well worth the effort as you go on too. As anyone will tell you, there's not that anything is exactly straight or plumb in these vans, but these renovations are a big investment of time, love and money. You're doing such a lot of great work, and the effort you put in now will result in a really great finish. We're cheering you on! Best of luck! Seeshell |
|
|
|
Post by hocking4 on Aug 29, 2011 20:50:23 GMT 10
Hi Oztrade, I would agree with seashells above. I was up to my elbows today in resin as it was posted doing the very same area! My floor had sagged approx 60mm. Unfortunately when the floor goes the sides loose thier integrity. Your sides look quite good from the pics...mine looked like a well worn thong  If you have talked to boblor or touchofglass they will also tell you to support the waist band. Its fiddly. you will need hydraulic jacks and support beams etc. The weight of my roof added to the issue. Could not tell but when supported well and jacked slowly and easy the sides straightened up even more, but once you get it...sweet! Lucky you, you get to put in a nice solid floor. I had to do a fair bit of patching as I am keeping it absolutely original(to the eye anyhow  ) Spend the time. Its all in the prep. You will be happy with your results. lookforward to seeing it evolve cheers Bruce |
|
|
|
Post by seeshell on Aug 29, 2011 21:16:39 GMT 10
Hi Hocking4 and Ozetrade Oh yes, the resin....*shiver* It really is the sh*t to the proverbial to get off - only grinding works. Believe me, I tried everything else first hoping for a miracle, but no. It ALMOST made me wish for a plywood van...nah! While you have the floor off, do check around for thin spots in the fibreglass on the tummy which will be *much* easier to fix with the floor off. Get her square FIRST, then patch from inside the van (if not you're locking in the frame wonk!). Doing it this way makes it much easier to hide it when the floor goes back on and you don't have to try and apply it while it falls in your face while you're crawling around underneath on the gravel. We had quite a few thin spots on all parts of the van, and a few spots too where the grinding took off a bit more "van" than we expected even though we were quite careful. I think I mentioned it before, but he acetate trick is gold - lovely smooth finish and less sanding. And Bob (Boblor) had warned us that the later Olympics were pretty light on on the fibre in the fibreglass department and could use a bit of toughening /thickening up of the shell. If you notice crazing on your outer gel coat or paint around compound curves, try and put some additional fibreglass behind the damaged area on the inside - it will help avoid flexing on those joints and curves, which will prevent future cracks, and will be hidden when you refit the interior. If you are replacing the joists under the floor as well, ATOG has previously recommended making them in fibreglass, or at the very least ensuring what is there is impregnated with resin so it's protected from any future rot. Not like you want to get under there again any time soon! It's been a lot of fun learning new skills, and into the bargain standing back and looking at your handiwork thinking it looks good enough you might ACTUALLY tell people you did it yourself and feel good about saying it. The Olympic group are a great family and have been wonderful sharing what they know with us. If you have some good tips as you go along, we'd all love to hear them to add to the general knowledge. Every little bit saves a marriage. Cheers! Seeshell |
|
|
|
Post by gregh on Aug 29, 2011 23:05:31 GMT 10
Thanks heaps for the input/advice. I had already glued in the replacement floor joists, which I had coated with a good quality timber sealer, but the concept of fibreglassing them in appeals to me and makes sense - extra strength & support.
Your right about the support offered by the Olympic group/family, Bob T also called to explain the method of lifting/supporting the body to square it up before installing the floor what a top guy!
I'll be sealing all the flooring both sides before it is glued in to place, then use fibreglass and resin off the floor and wrapping up the walls. I should have a pretty solid base then with the 15mm ply floor.
Throughout the forum I read a few areas that mentioned floor replacement and sagging bodies, but I couldn't find any mention of how to resolve, so I might post images and descriptions as I proceed so others have a reference.
Once again thankd Guys
Greg.
|
|
|
|
Post by atouchofglass on Aug 30, 2011 6:28:11 GMT 10
Hey Oztrade and all the other Olympic tragics ;D Mate the advice you have been given is solid. Straighten then repair. Use fibreglass and foam where possible or fibreglass and timber/ply. Always repair from the inside if possible. Thicker flooring is a good idea. Added strength without much extra weight gain. Tonyh did his floor ages ago. Worth a look vintagecaravans.proboards.com/index.cgi?board=photo&action=display&thread=1448Still waiting for him to finish his van..... Will float on air bags and be able to adjust heights across the van for uneven ground when setting up for the night. Come on Tony.... pull the finger out.   ;D Any photos of your rebuild will be good as it creates a reference for those that follow. None of us have done it all and we all do things a little different. Keep up the great work and post heaps of photos. ;D ;D ;D ;D Cheers Atog |
|
|
|
Post by gregh on Sept 4, 2011 15:02:47 GMT 10
Busy weekend. Managed to get the floor down after leveling the van - just waiting for the glued to cure before I fibreglass the edges. I'll get some photo's up after I tidy up a bit. On another note; I've been thinking ahead and looking at possibilities for lining the walls and the cupboards. Hardware stores and a quick google search all point to Gunnersen. www.gunnersens.com.au/products/building-products/plywood/paper-and-polyester-overlay-plywood.htmlThey have a reasonable range but mostly timber finishes. I was hoping to use something of an antique white or even a light beige colour - something the blend with the natural fibreglass finish. Is there anywhere else that supplies these types of products? Greg. |
|
|
|
Post by Roehm3108 on Sept 4, 2011 15:54:36 GMT 10
I think that coloured melamine board only comes in 16 or 18mm thick particle board or MDF, which may be too heavy for your purpose.
Ray
|
|
|
|
Post by seeshell on Sept 4, 2011 18:40:54 GMT 10
Hi Ozetrade
I dunno - I think a good bit of 3mm ply with a nice oil painted finish (several coats with inbetween sands) would get you a lovely final finish which is much more repairable in the long run than the paper covered sheet - holds up well. Likely too to be able to matched exactly to the rest of the interior.
Just my few cents!
Seeshell
|
|
|
|
Post by gregh on Sept 5, 2011 14:09:21 GMT 10
I could have sworn I did this post last night - hmm, mayby I didn't click the right button, anyway here is is 2nd try. Prior to laying the floor, I sanded the side walls to a height of roughly 130mm above floor height so when I fibreglassed later it would stick. I foundd that hand sanding or even an orbital sander was too slow so I went to Bunnings and bought a small belt sander and coarse grade sandpaper - made tha job real easy. Took some photo's of the floor after I glued it in place. I used construction liquid nails to glue it to the body. I saw that somwone had used 20 litre bottles filled with water to keep a downward pressure while the glue dried - I did the same and it worked well. I also use normal buckets full of dirt. The gap between the edge of the board and the body I filled with a can of space invader product - then trimmed back after it was dry. 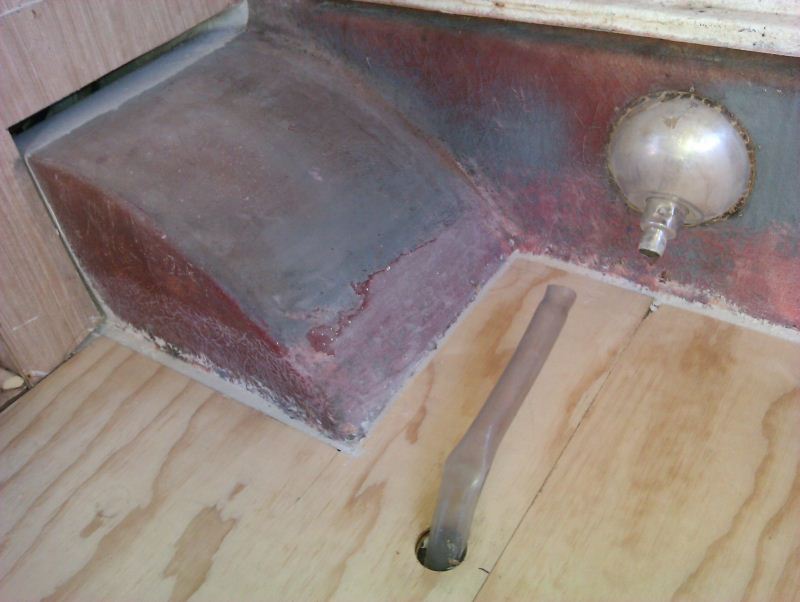 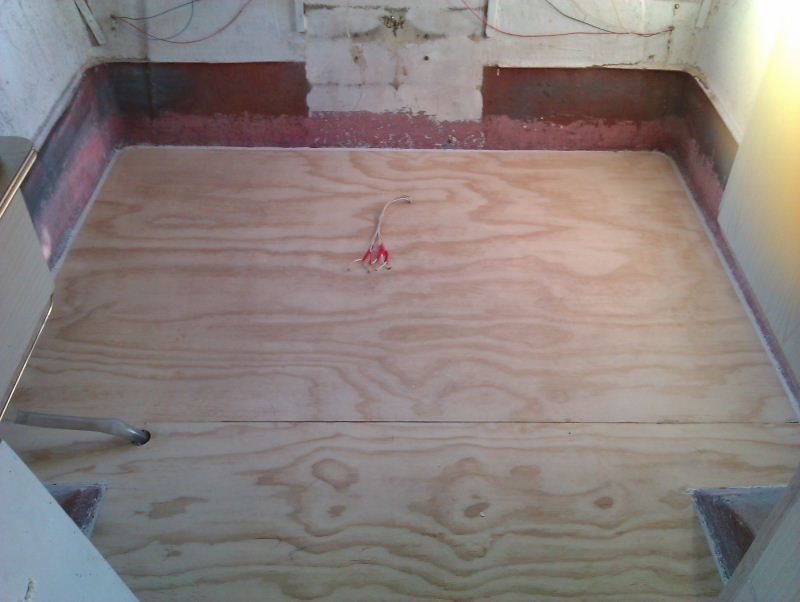 Finished the fibreglass last night but to dark to take photos. Post them later. Greg |
|
|
|
Post by atouchofglass on Sept 5, 2011 16:53:25 GMT 10
Hey Ozetrade
It's a good idea to resin coat the ply before trying to fibreglass to it.
Makes for better adhesion.
Just have to remember when painting resin over timber you need to add three times the amount of catalyst as usual.
Then let it dry before starting on the fibreglass layup.
Using the normal amount of catalyst in your resin,
Cheers
Atog
|
|
|
|
Post by gregh on Sept 5, 2011 18:23:01 GMT 10
Thanks Atog for the heads up - bit late though, glassings already done. I didn't go in blind though; I bought all my fibreglassing materials from the local boat chandlery, including a book all about fibreglass repairs to boats. The guy at the store was very helpful. The guy at the store didn't mention any timber prep methods, and neither did the book, but I'll keep that in mind for next time. . The bottom & edges of the 15mm ply have all been sealed with a good quality sealer. The top is not yet sealed. I thought it best to leave it natural so the fibreglass would adhere better. The exposed timber will be sealed, but how do I prep the fibreglassed areas for a top coat of paint. Just making it tidy - this will all be hidden under a double bed. Heres some photo's of the finished fibreglassing. A bit messy  but hey not bad for a first timer. ;D 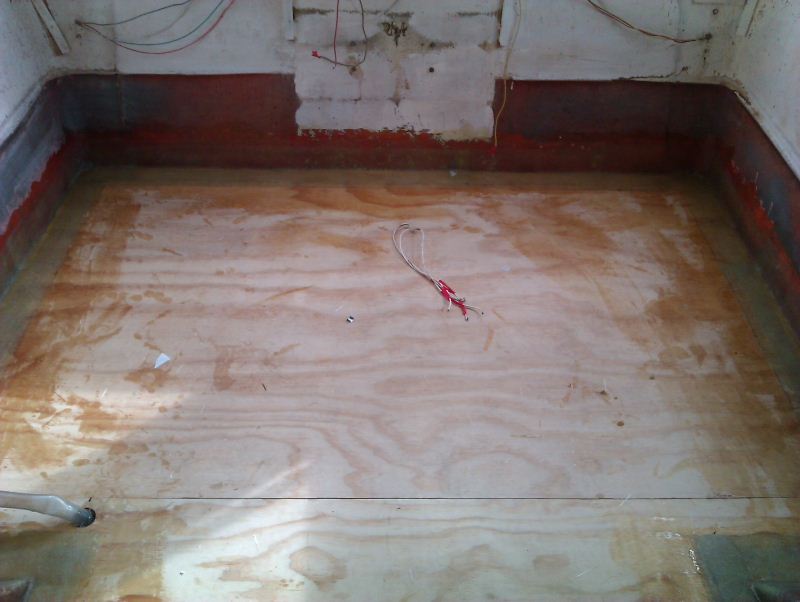 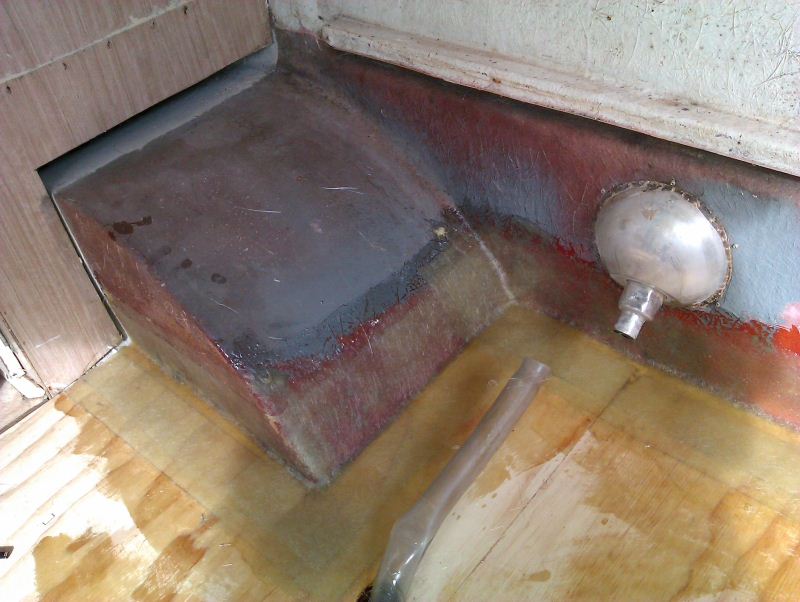 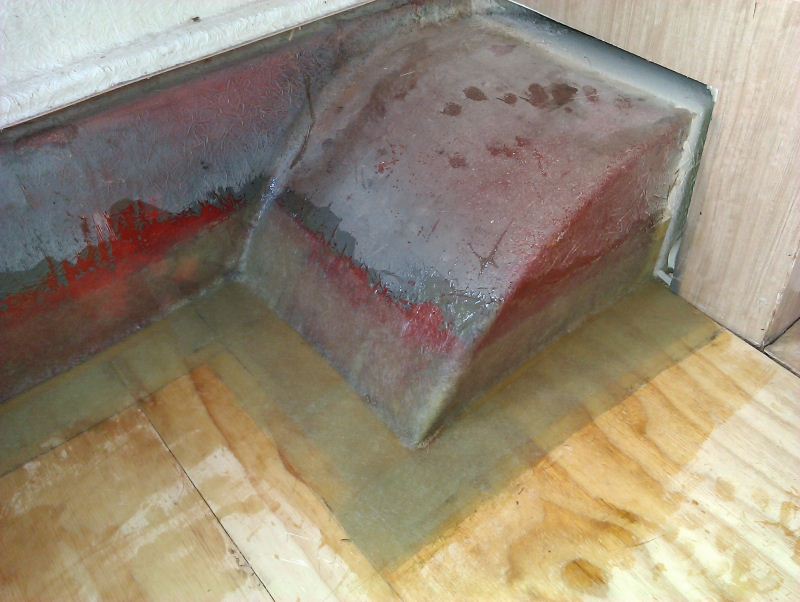 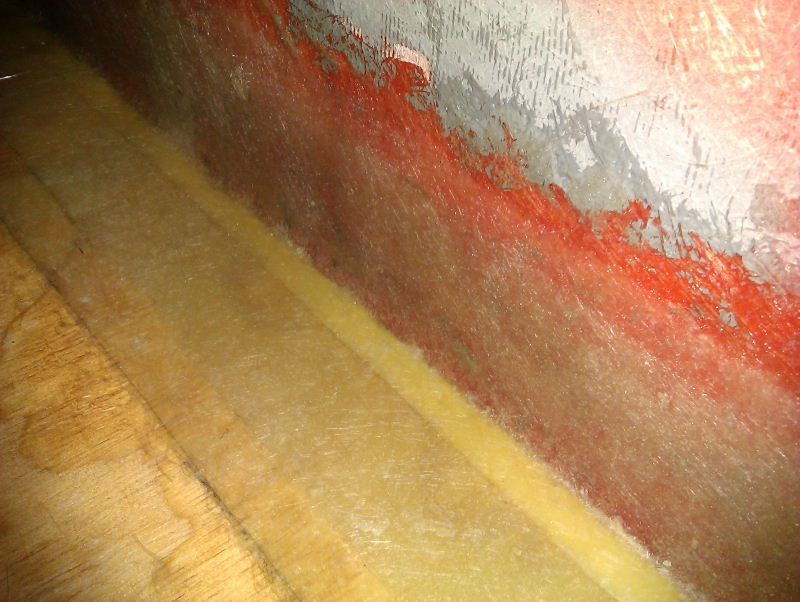 |
|
|
|
Post by seeshell on Sept 5, 2011 20:19:28 GMT 10
Thanks for the tip Atog! What we need is a tips and tricks area I think-- One for Fabuglass, Wood, and Ali... What about it Moderators? We can collate all the good advice into one area so it isn't repeated. I'm SURE everyone will remember to refer to it. Cheers Seeshell |
|
|
|
Post by gregh on Sept 5, 2011 20:39:09 GMT 10
Top idea seashell. Great way to centalise a share. I was chatting with boblor the other day about how to square up the van before glassing the floor in, he mentioned that he built his bed with a bedhead. What size matress did you use bob - double, because I plan to use a Queen size and I'm not seeing any room for a bedhead. The queen mattress is 1530mm x 2030mm. The overall width of the van is 2050mm near the cupboards and 2010mm at the rear of the van - measure at the lower window jams. At the moment the best depth of a bedhead I can see is about 110mm if I recess it to the outer skin. Is this what you did? Has anyone else done a bedhead with a queen mattress? Oh yeh, I'm the proud owner of another Olympic (Riviera) - just won it on eBay. Lot of work in it though. www.ebay.com.au/itm/270808579275?ssPageName=STRK:MEWNX:IT&_trksid=p3984.m1439.l2649Cheers, |
|
|
|
Post by firefighter on Sept 5, 2011 22:47:16 GMT 10
|
|


 Further investigation found that some previous owner had laid another sheet of ply across the rot to hide the floor flex. Decision time - I was hoping to keep her original, but not possible the whole floor has to be replaced - up she comes.


 )
)
 ;D
;D

 but hey not bad for a first timer. ;D
