|
|
Post by Surf Tragic on Jun 21, 2010 21:31:10 GMT 10
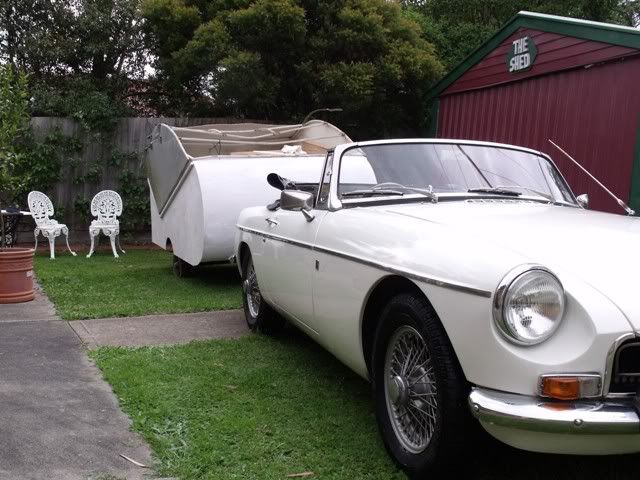
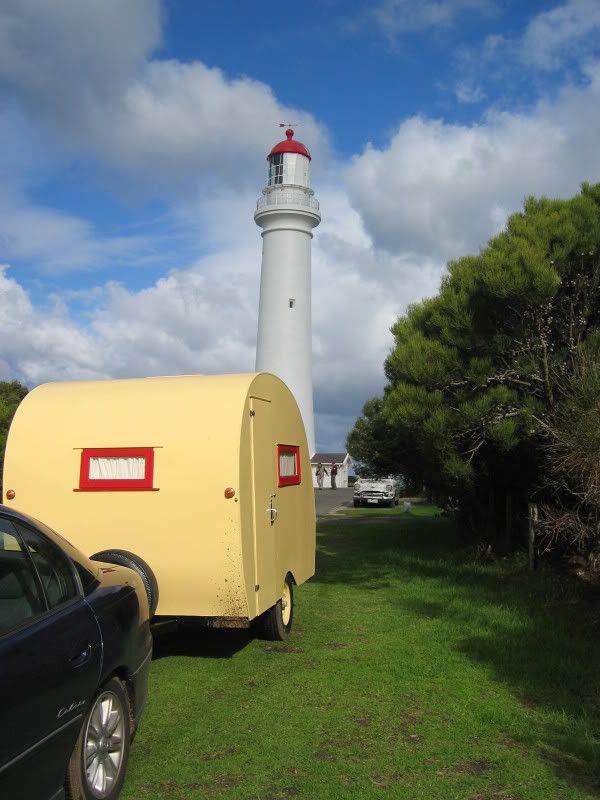
During all the madness of moving & storing, I was contacted by Rakte, forum member from Mornington about a Don 133. She said it was time to part with this family van & wondered if I was still interested. Timing on this was critical as we were 1/2 way through shifting & had agreed to a 30 day settlement, pressure was on. The Tri-ax was being used every day, & the last load would have the 1/2 finished boat tied on it, not to be removed for possibly 12 months, so had to fit in a run to Mornington, 780k round trip. If I didn't pick it up now & get it stored, the opportunity would be gone. Probably the trickiest part was telling Mrs ST, whatever would she say ?? It couldn't be avoided any longer, so just said " I,ve bought another Don & have to pick it up this Saturday"...... This tired, pale face, near exhausted little person gasped, " you've done WHAT !! A fair bit of talking, justifying this madness,(it seemed the only logical thing for me to do) & the promise of a break & weekend away did the trick. The best route for me was Seymour, Yea, Yarra Glen, Lilydale, then the M3 Eastlink starting at Ringwood through to Frankston & on to Mornington, about 5 hours plus.... It started to rain as we booked into the Motel. . 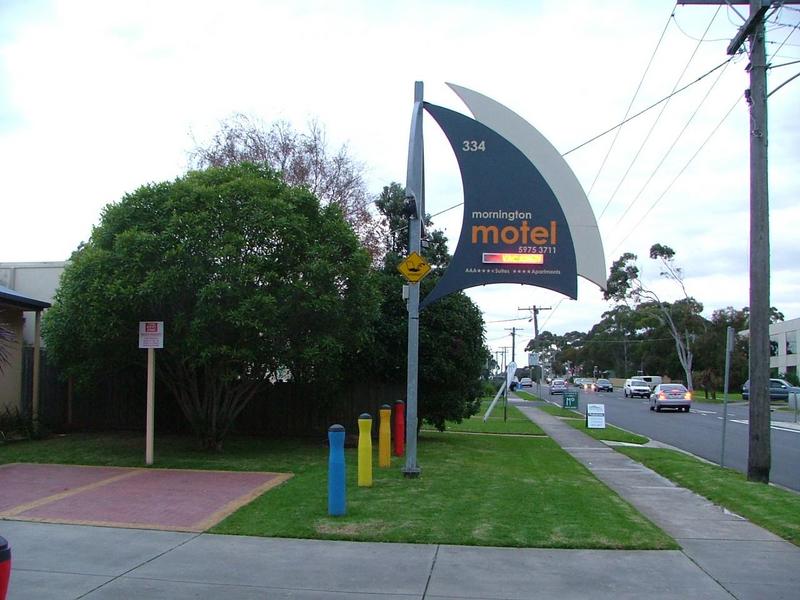 Next morning it was still spitting rain & I was anxious to get the van loaded in case it started pouring , & thought we would get soaked for sure, so was knocking on the door somewhat earlier than arranged, but 'rakte' & Daryl pleasantly accommodated these early birds & hopped in to help. 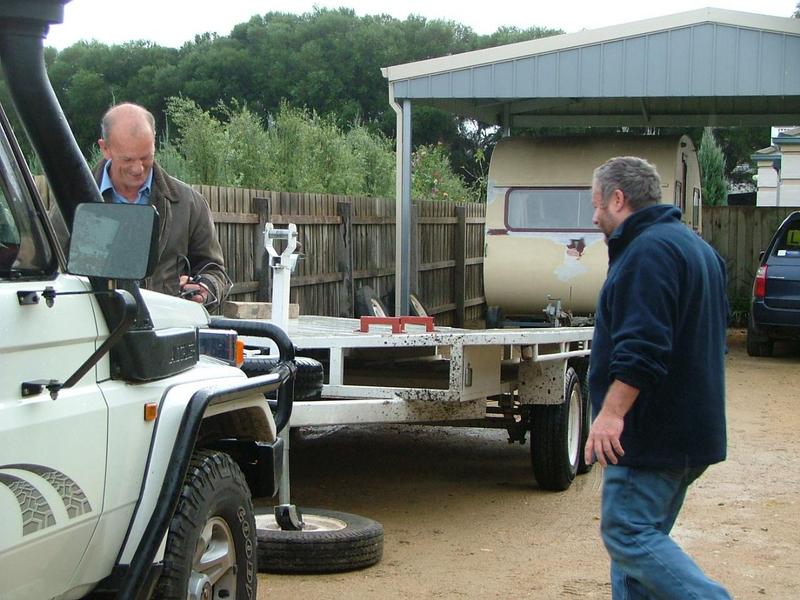 Darryl was the best help, used to loading big boats, so could anticipate what was to happen, so it was the quickest incident free loading to date.  The driveway had a fairly tight bend that took a 3 point manouvre in the limited lock steering of the ute. The funny part was when I first reversed in there was 3 driveways side by side to choose from, I got out & checked to make sure, but after some careful reversing down a driveway & around a sharp bend, voices from the next driveway & heads popped over to inform me I was in the wrong one !!! It was a battle-axe setup. 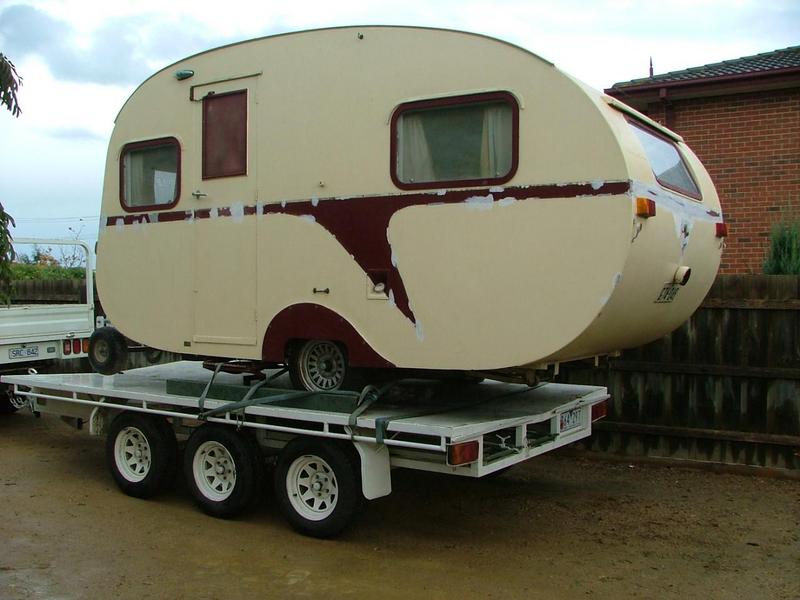 Ready to go. That much overhang was a surprise. 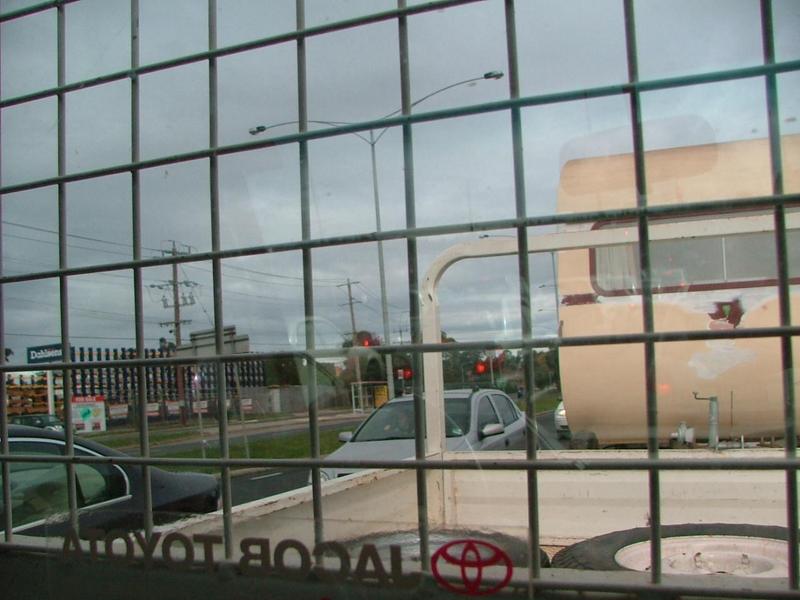  In traffic at Croydon North, the run back seemed better & took less time, it feels better with a load & the brakes are more effective. 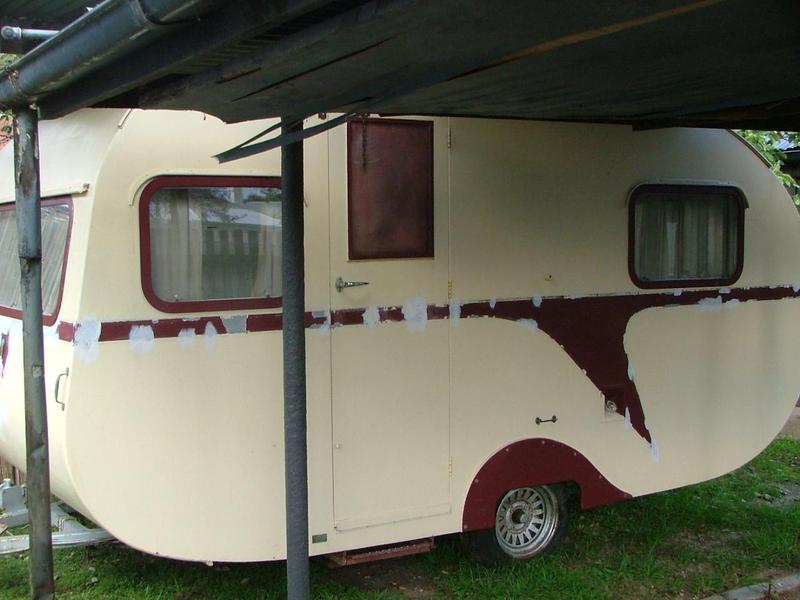  Back home, my daughter had a spare space for the van, it fitted perfectly. She & hub are the only other people who know about the van. It is the most intriguing little van & something that had to be saved, even if not for myself, in the future it may end up in a museum collection. The inside is in very good order & has all the original appliances, outside, the major part only needs stripping & repainting, but there is some major rot in the front & side bearers, so am glad for the opportunity to fix it. This van is road registered & ready to roll, it has never been unregistered. Surf Tragic. |
|
|
|
Post by jenniewren on Jun 22, 2010 11:47:04 GMT 10
Love ittttt.......beautiful......if only I had the time to start collecting...sigh.....
|
|
|
|
Post by cobber on Jun 22, 2010 18:10:17 GMT 10
And you call your self "Surf Tragic"  Let's face it you are a DON Tragic. On the Don R 2000th post thread I wondered how Mrs Ricardo puts up with him, I have to say ST.......... how does Mrs ST put up with you  In fact... how do any of our women folk put up with we vintage caravan tragics, we do tend to become obsessed aye? What does it look like inside Ron ? Cobber. |
|
|
|
Post by Surf Tragic on Jun 22, 2010 19:40:26 GMT 10
Yep Cobber, years ago Mrs ST reckons I shoulda been a fish, and now   She, & many others like her should be given medals for tolerating the likes of us Maybe there's worse things to be doing I could give 20 reasons as to why this little van needed to come home, maybe could also convince a few people, even convince myself, but ultimately I only want the one. There's a few photos I managed to get before we left, will post them in the next couple of days ST |
|
|
|
Post by kazandadam on Jun 22, 2010 20:31:50 GMT 10
Its not hard to see why you saved this one ST..........you'll have to open a museum one day soon ;D
Adam
|
|
John
Full Member

Posts: 267
|
Post by John on Jun 22, 2010 20:59:01 GMT 10
Nice one Ron!  Yet another one, and just down the road! Your comment of it ending up in a museum.......its not heading west is it..........? By the way, nice to have you back on here, good to have the regular updates on the "Don Fleet". Regards, John |
|
|
|
Post by Surf Tragic on Jun 22, 2010 22:47:08 GMT 10
G'day Adam great to hear from you, it would be fun to show them in a museum atmosphere, who knows It feels good to be back thanks John, this forum & the history of all the Vintage Vans keeps me enthused. I cant wait to get back to the vans. And who knows, it may end up in WA, we will try & keep it with a Don tragic. ;D ST |
|
|
|
Post by Surf Tragic on Jun 29, 2010 21:30:44 GMT 10
There's a few photos to go, so won't post too many at once. the inside of the van is good as is, so don't imagine doing anything in here, it is one lovely little van, has been very well cared for & I intend to give it plenty more good care & attention.  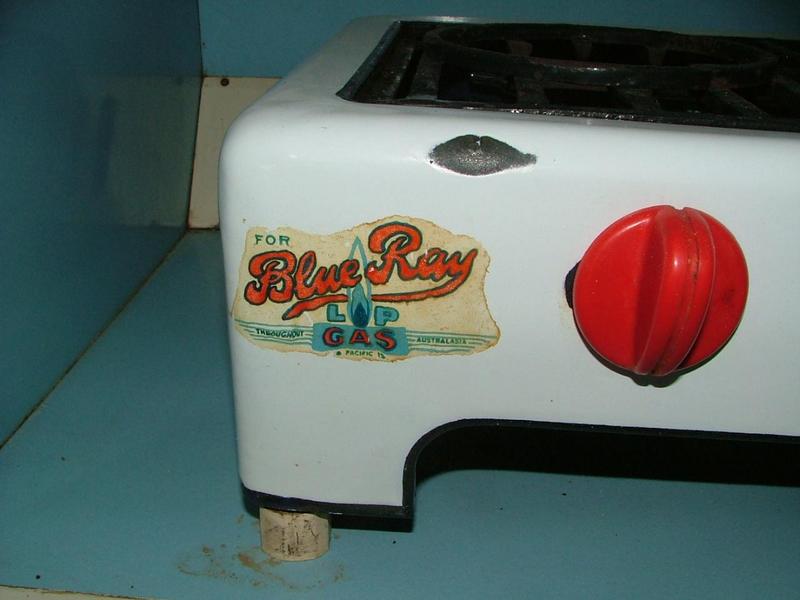 the stove looks in good order, it is hooked up to a gas bottle in a cupboard, that will be shifted out of there to the front where it belongs .  the pump is hooked up to a tank underneath, looks all original.  All this area is in very good nick 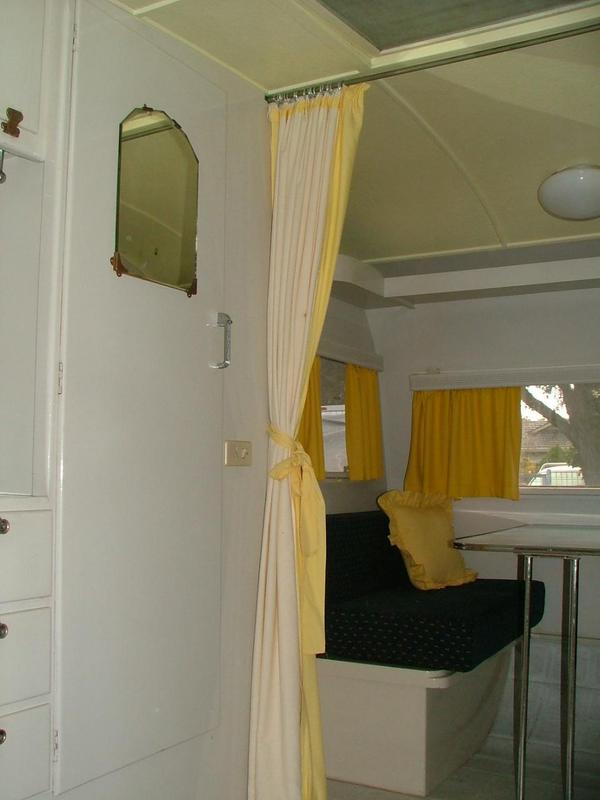 I have seen photos of this rare model with the fold down vanity centre in the robe door, this one doesn't. There are a lot of differences in the same model vans throughout the range, so people must have had a choice when ordering. 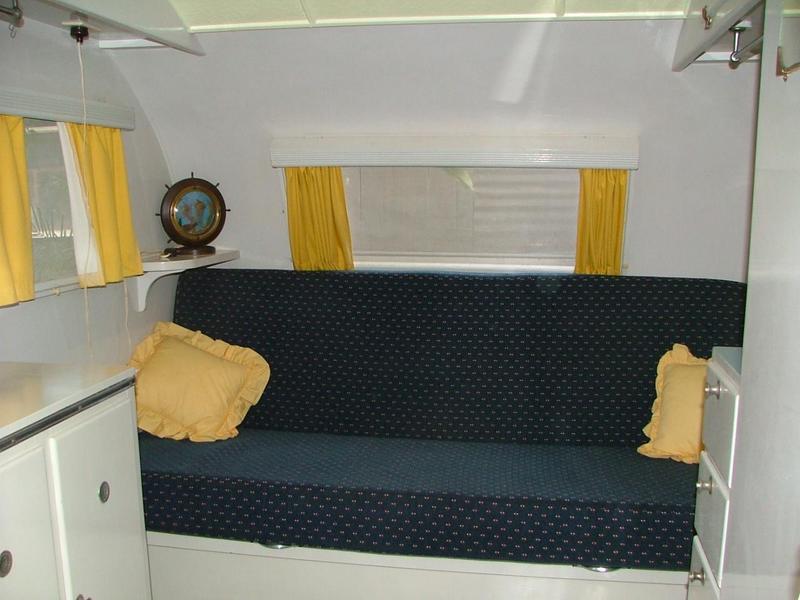 This is as good as it looks too. 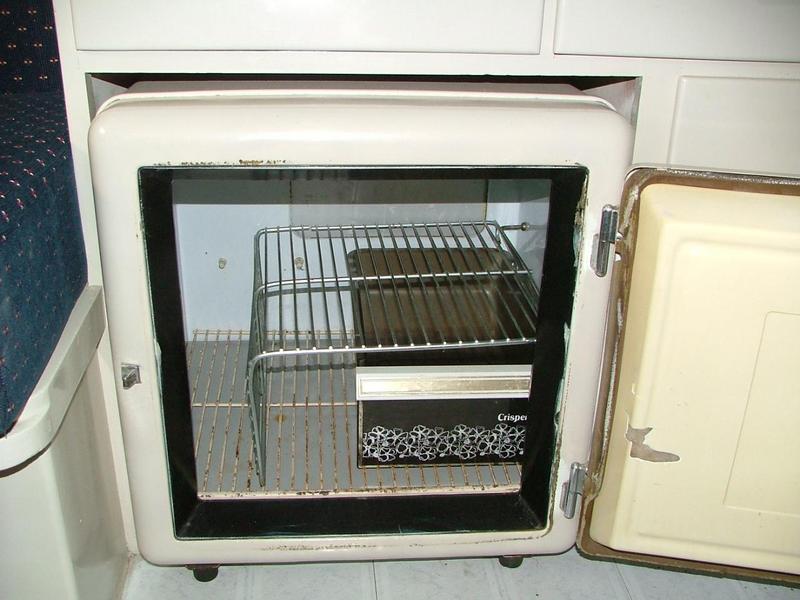 Just a small piece missing out of the back of the frig door, maybe it can be repaired ?  I am rapt with the frig, it does't work on gas at the moment, but would imagine it could have a heart transplant surely, just have to get the right tradie. You can see why I had to stop what I was doing & go pick it up, don't think opportunities like this come very often, but still marvel at what comes to light. More later Ron. |
|
|
|
Post by cobber on Jun 30, 2010 9:52:54 GMT 10
Must admit Ron.... the thought did run through my mind..... why is he bothering with a 133 when he has those unique Dons with the lead light windows, bath under the front seat, wash basin in the wardrobe door etc. etc. Now I understand, that is a very clean unit  It can be a bit of a problem when they turn up as good as this one inside aye? My “Swamp 'van” is almost as original and tidy inside as your 133... I feel it would be almost insulting to the previous owner to interfere with it although... it has been suggested that a refrigerator might be handy I'm sure you'll slap a bit of fibre glass over that hole in your fridge door and then get it working. Tell me Ron ....does the sink have any rust spots on it ? Cobber. |
|
|
|
Post by Surf Tragic on Jun 30, 2010 13:32:38 GMT 10
I didn't see any rust spots in the sink Cobber, but must admit I didn't give it a real close  look ;D In your "Swamp 'van", or in most vans of the era, to my mind, it would look quite in order to fit a frig of this style. Ron. |
|
John
Full Member
Posts: 267
|
Post by John on Jun 30, 2010 14:35:38 GMT 10
G'day Ron,
I think I've put this somewhere else on the forum but if you can take the fridge out and take it for a ride in the back of the ute or in a trailer, it will stir up the coolent(?) inside the fridge. Dad has a gas only fridge in his van and was given this advise. It worked pretty well for him.
Hope this helps.
Regards,
John
|
|
|
|
Post by Don Ricardo on Jun 30, 2010 20:39:15 GMT 10
Hi S/T and Cobber, The interior of the 133 is incredible isn't it? Hard to believe it's ever been used, especially the upholstery. Is that original, S/T, or has it been redone by Rakte at some stage? Every time I look at the pics I just shake my head in wonderment at its condition. Re the rust on the sink, Cobber: Rust? Rust??  THAT's a "Steelgleam" stainless steel sink I'll have you know! There's nothing overrated in a...  Oops, better not go there... ;D ;D ;D ;D Don Ricardo |
|
|
|
Post by Surf Tragic on Jul 1, 2010 17:53:37 GMT 10
John, I think there is more to the problems in the frig than needing a shake-up, but appreciate your comment as I know what you're talking about & it works for that particular problem. Don Ricardo, rakte said she reupholstered the seats over new foam & retiled the floor, it has been done twice since original, so this tells me it's been well used, also very well cared for. The frig & stove are original. Now look at this priceless document, this is the factory build sheet, dated 1958, & gives the upholstery & curtain colours, also the lino, Vacuum Brakes, 6 volt, even the original owners name, & the rego number. I'm pretty chuffed about this, nearly as much as the van itself. Also, I have found out from Wal Robinson, that this is his Fatheres' handwriting, so quite an emotional connection between him & this van 
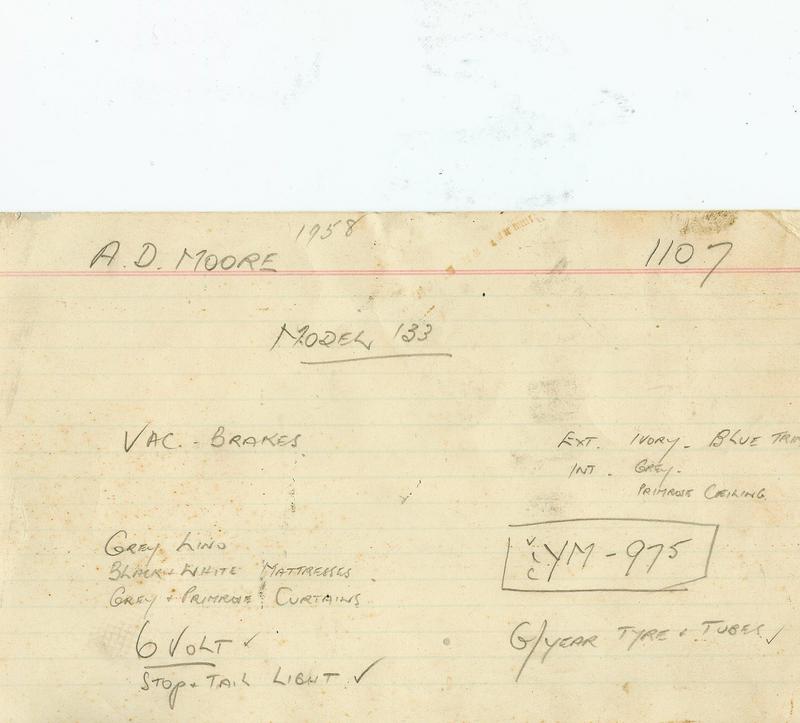 The original lino is in the cupboards, lockers, & seat cavities. ST |
|
Deleted
Deleted Member
Posts: 0
|
Post by Deleted on Jul 1, 2010 18:41:42 GMT 10
|
|
|
|
Post by Surf Tragic on Jul 1, 2010 22:10:12 GMT 10
Exactly what I reckon too Mark, the profile is near identical to Aussietankers' 150, except for that protuding piece in the front centre of the 150. It looks like a mini 150 to me. The interior is identical to all the leadlight models, same hardware, another reason it appeals to me. The vacuum brake system has been taken off & replaced ::)with a mechanical over-ride setup I want to get some photos of that on here to see what Cobber has to say  ;D. The FX would really know if it was towing this one, it feels heavier, but it has a frig , stove, water tank. Must be a fair bit longer than the 100 as well. The original hubs are there complete with brake drums & shoes, what intrigues me is that 13 inch wheels have been fitted, (giving the van a very low profile)) the brief look underneath, the rims clear the drums by about 3mm. Also the rims are 4 stud. Will be interested to see what has been done to convert from 6 stud to 4, using the existing hubs/drums, someone out there would know, redrill ? new studs ? I didn't have time to check that one out before leaving.  ST |
|
|
|
Post by Surf Tragic on Jul 2, 2010 21:59:33 GMT 10
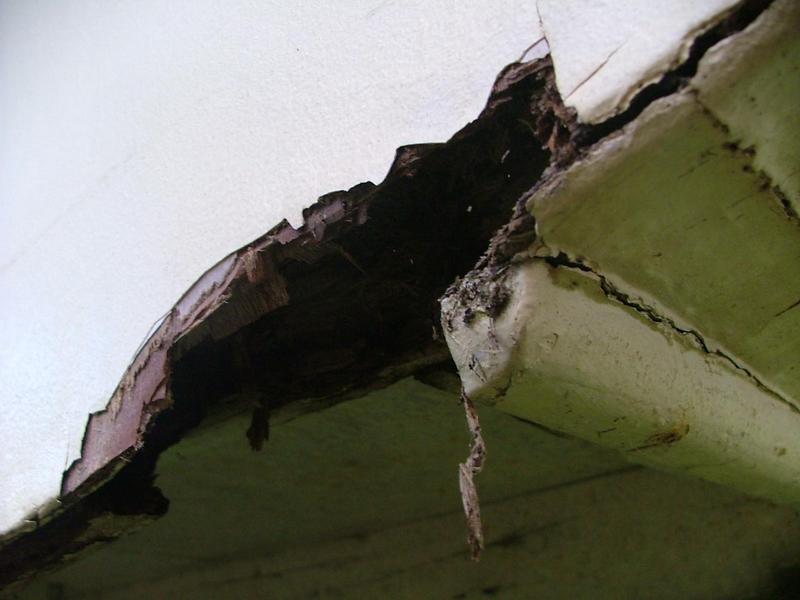 Now the "not so pretty" side of the van, some rot that has come through the wall sheet on the outside only.  The way the rot has eaten into the front & side bearers is a mystery to me, it has eaten through 50mm of timber here from underneath, with no sign of rot inside or in the floor. 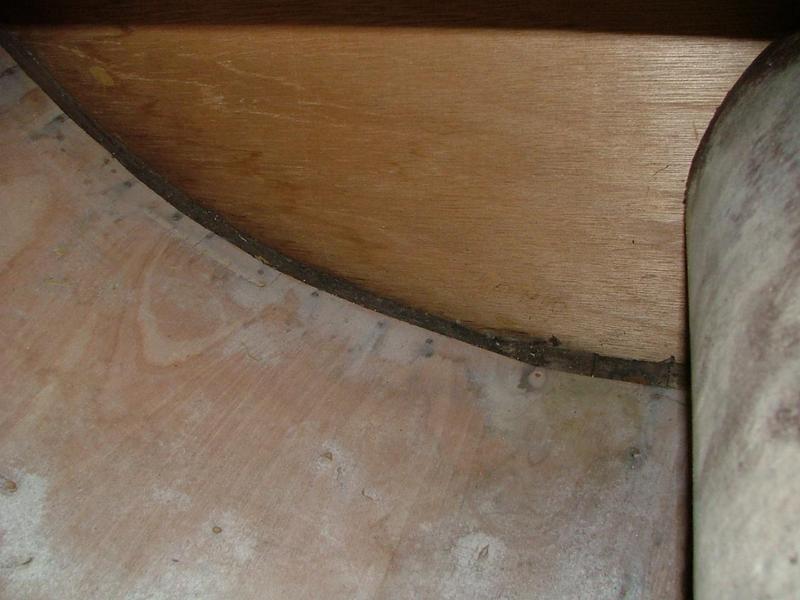 This shot is just inside the rotted bearer in the cavity under the front seat, pulled the lino up & see no evidence of rot in the wall frame at all, wonder where the water came from? It must have happened over a long period of time one would think, but stayed confined to the bearers. 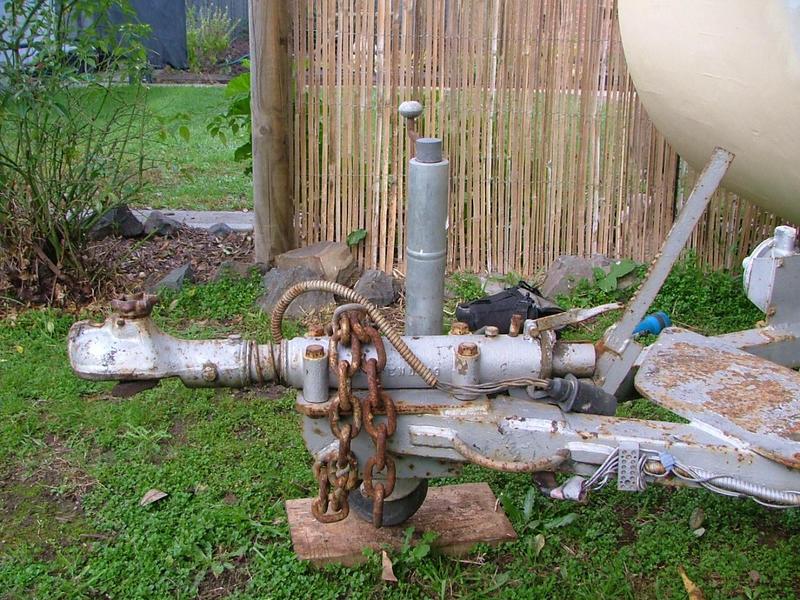 Now some for Cobbers expertise, what have we here? This can't possibly be original?. It says on the build card "vacuum Brakes", & this mechanical over-ride setup would love to know what the original was like, maybe Ausietankers 150 has the answer. I have no doubt this setup works well. 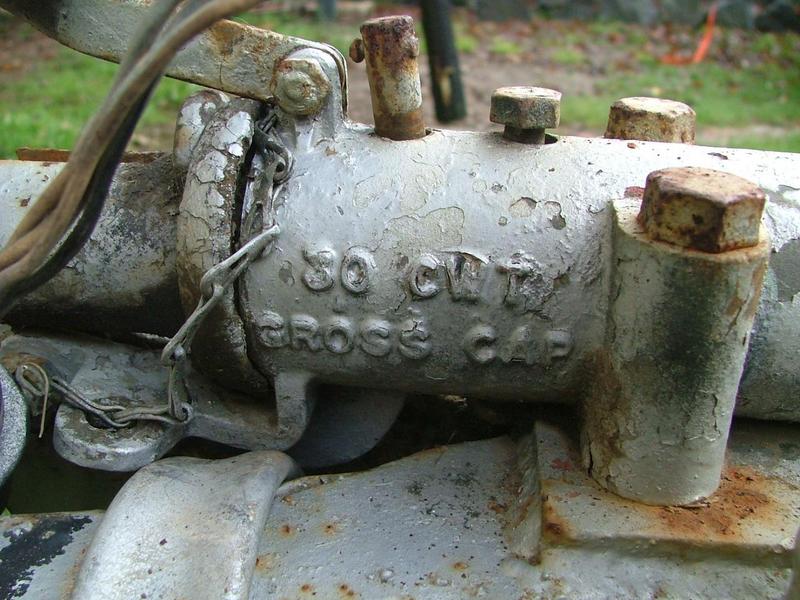 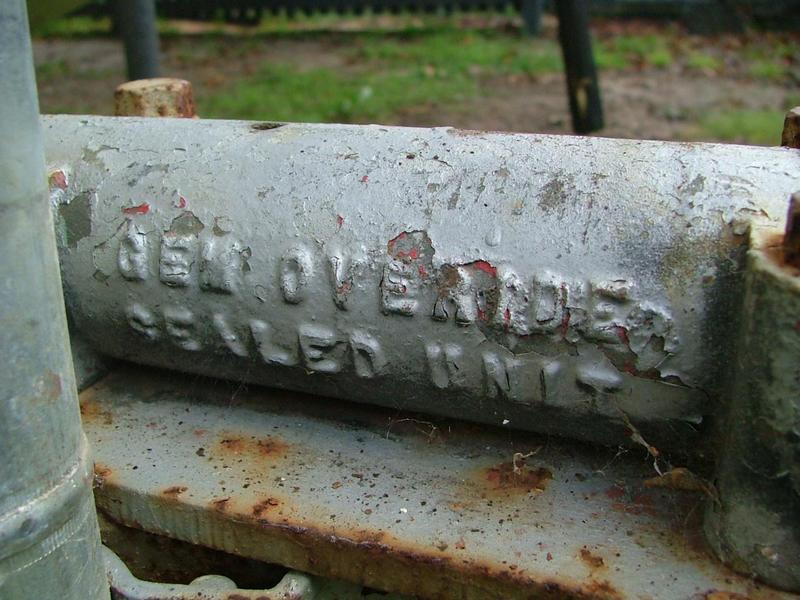  That's about all I have on this little van for now, won't be able to get back to this interesting stuff for quite some time. Cheers, ST. |
|
|
|
Post by cobber on Jul 4, 2010 16:12:55 GMT 10
G'day Ron, Why did you have to show us these photos It is true to say water works in mysterious ways aye? Love the tow coupling, it's got all the numbers on it so you should be able to retain it.. although I don't think it's the original fitting either. Aussietankers 150 had the trade mark Don set up originally... he had it converted to this. Cobber. P.S. I've pinched your photos and placed them in the “Old tow coupling” thread OK |
|
|
|
Post by Don Ricardo on Jul 4, 2010 21:02:04 GMT 10
Don Ricardo, rakte said she reupholstered the seats over new foam & retiled the floor, it has been done twice since original, so this tells me it's been well used, also very well cared for. The frig & stove are original. Now look at this priceless document, this is the factory build sheet, dated 1958, & gives the upholstery & curtain colours, also the lino, Vacuum Brakes, 6 volt, even the original owners name, & the rego number. I'm pretty chuffed about this, nearly as much as the van itself... The original lino is in the cupboards, lockers, & seat cavities. ST G'day S/T, That explains why the upholstery looks so good - very nicely done by the look of it too. It looks as if the inside has been repainted as well, but based on the build sheet, it appears as if the original colours - grey and primrose - have been retained. How incredible to have the build sheet with so much information on it, regarding specifications, colours, etc. A real link back to the van's beginnings, which not too many are fortunate to have. The build sheet looks quite "scrappy" (no negatives intended) compared to what we are used to now. Today if we are ordering something significant like a new caravan, we are shown into a nice office and the salesman turns to his computer and types up a professional looking order. Things would no doubt have been much more informal back in 1958 - possibly not even a formal contract to sign when ordering the van. It would have been assumed that if you were ordering a caravan you would follow through with payment at the end, and the details would possibly have just been jotted down on a pad of paper, and then on another piece of paper to give to the tradesmen building the van, and the seamstresses making the curtains, etc. Regarding the tow coupling, as Cobber has indicated, Aussietanker's 150 has (had) the Don 'captive ball' coupling on it. From photos of the 133 recently offered on Ebay, we can see that the 133 model also had the same coupling (at least in the era we are talking about). However, from the photos it appears that on your 133 the original coupling has been cut off level with the A-frame and a new coupling welded and/or bolted on. I'm still trying to work out whether your jockey wheel is original or not - I'm not sure about that yet... Don Ricardo |
|
bobt
Full Member
"Ugly as Sin"
Posts: 455
|
Post by bobt on Jul 6, 2010 21:21:36 GMT 10
Hi Surf Tragic Nothing wrong with a good healthy craving for more and more vintage caravans... Is a nice one... DR.. that is a very modern jockey wheel.. ;D |
|
|
|
Post by Surf Tragic on Jan 29, 2016 10:11:33 GMT 10
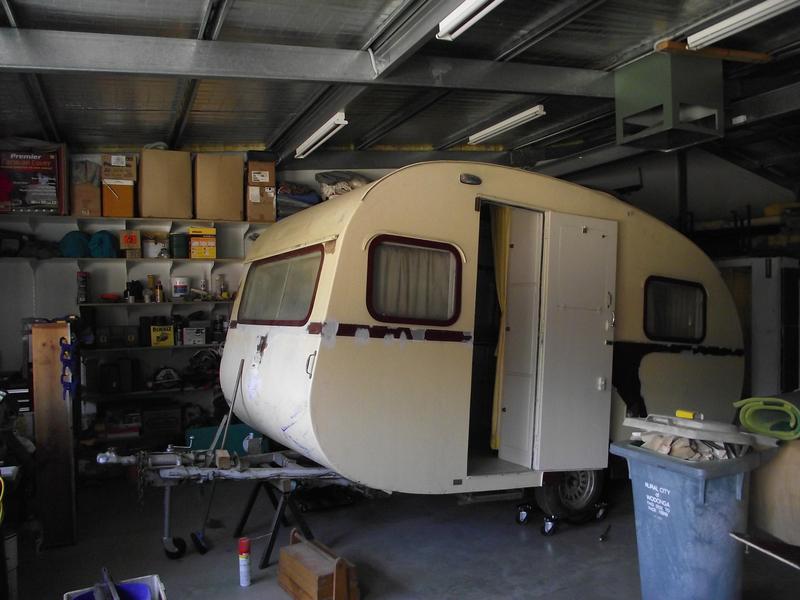 Have decided to restore this little 133 van next because there seemed little to do, but wrong again, there's twice as much rot as I thought, that's usually the way. First thing was to shuffle the vans around, (& the boat), so used dollys under the wheels of 3 vans, it was simple & could do it on my own.  That's about all the timber needed for the repair, it is old & seasoned hardwood that's been kept for many years, some recycled.  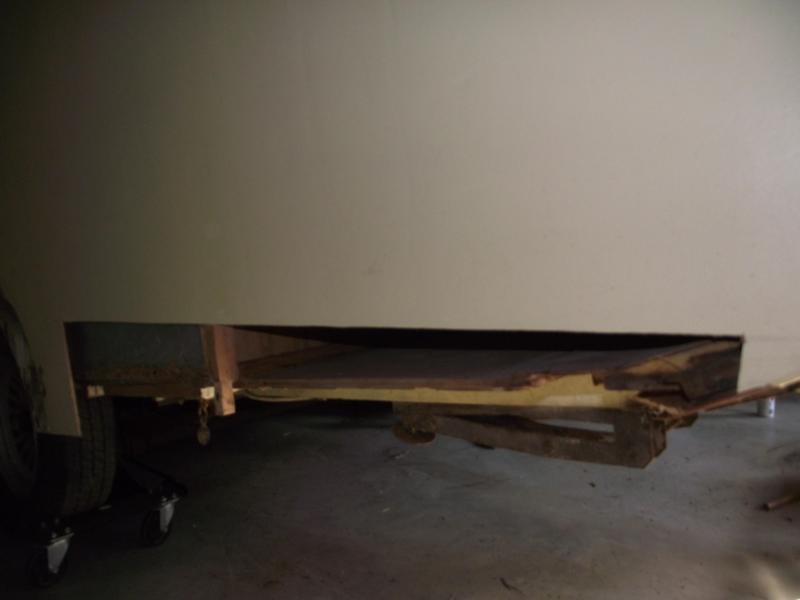 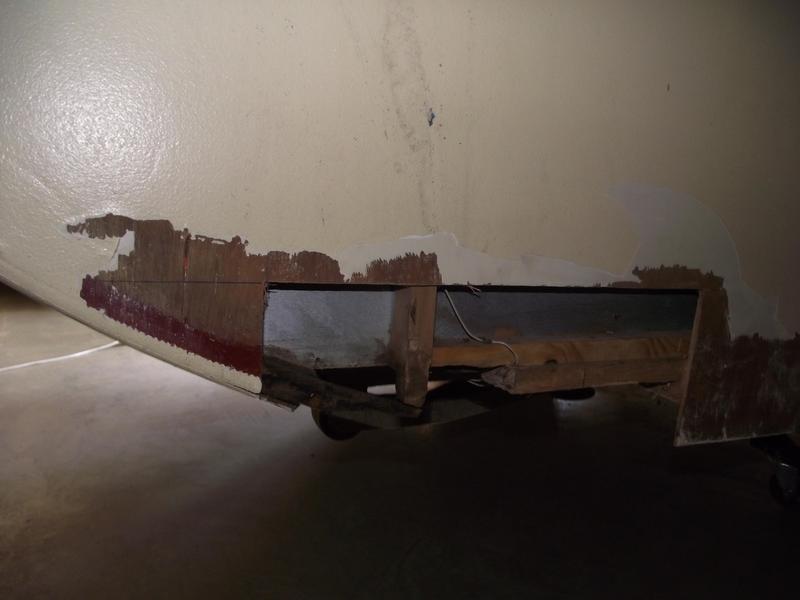 Having done similar repairs to the 120 that's just been finished, it has seemed straightforward work. I always cut the sheets about 200mm above the repair, then patch the sheets & join them like is done on bondwood boat repairs. This will be done after sanding the van ready to paint. Time estimate to restore this one is probably 18 months to 2 years at the pace I'm going & many other quite major things that need attention. |
|
|
|
Post by Don Ricardo on Jan 29, 2016 22:27:20 GMT 10
Hi Surf Tragic,
Great to see that you've started work on the 133. There's so few of that model around that it is wonderful to know that one of them is to be restored using your excellent craftsmanship!
I look forward to following your progress.
Don Ricardo
|
|
|
|
Post by Surf Tragic on Feb 9, 2016 19:13:14 GMT 10
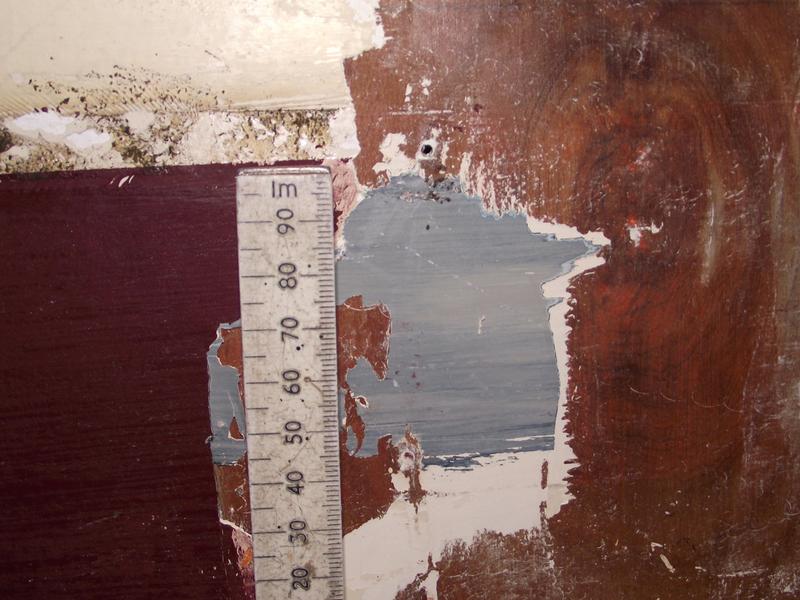  It looks like this might be the original blue coloured stripe along the sides, it may have gone front & back too, not sure. It runs about 30mm below the bottom of the side windows. We don't seem to have any photos of the original 133 colour scheme, but have found the usual cream under the clearance light rubber gaskets. I do have a photo of another 133 up in the Alpine region near here showing the blue marking on the side. 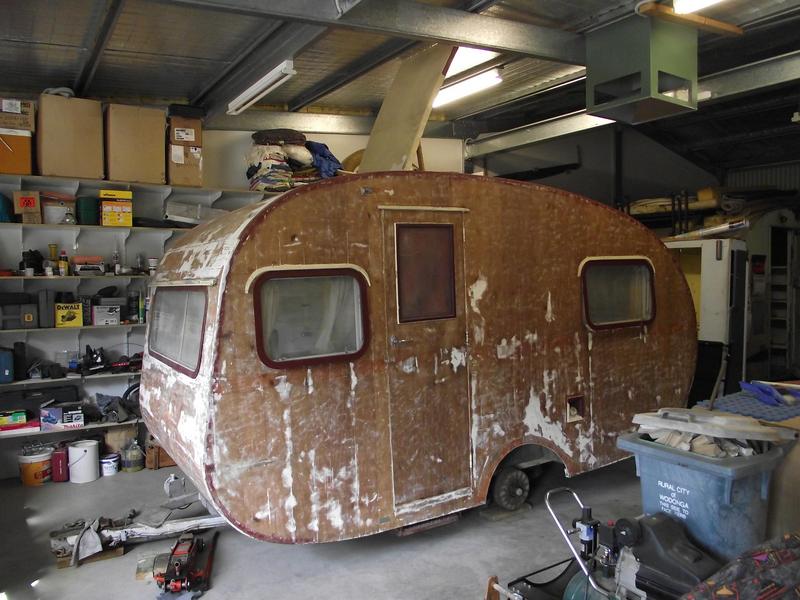 The hatch is so large, the van had to be lowered, how low can you get, wheels off, to be able to unscrew the hinges.  The hatch has a large hangover overhang so would be very weatherproof compared with earlier models. The ply looks pretty good everywhere. 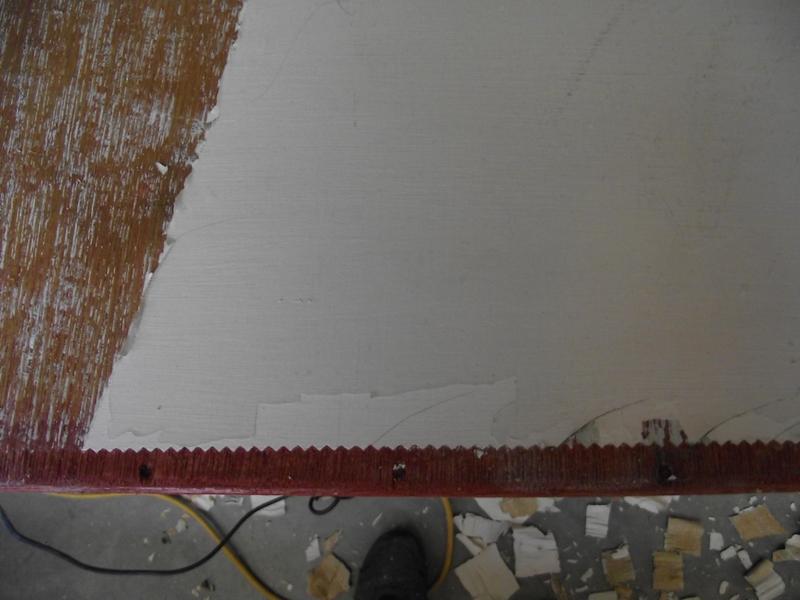 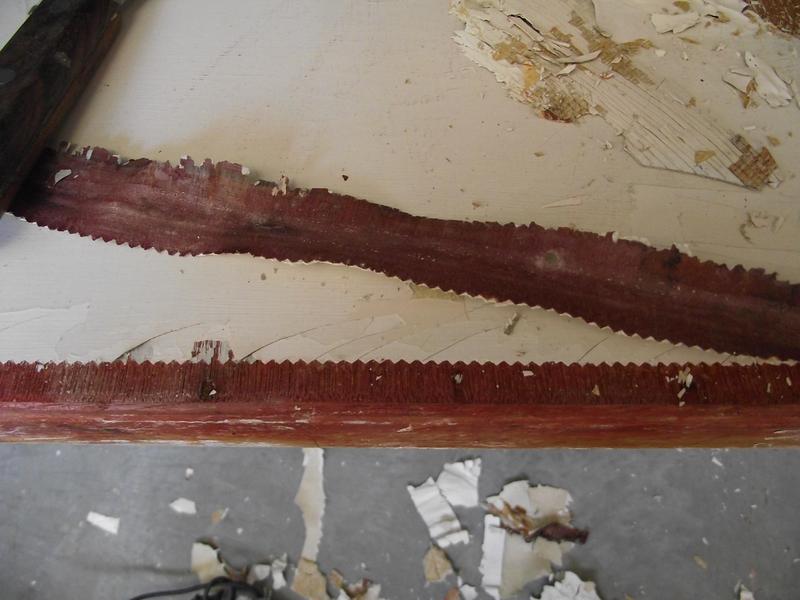 Now this is interesting & original, Reddo has mentioned this before, pinked tape, pinking shears. This is the overlap joint from roof to sides & the tape has done a very good job of preserving the rounded corner. I have been over to the Airport & talked to a Restorer of Antique/Classic Aircraft, he gave me contact details for what is needed here using Dacron instead of 'Irish Linen' doped on with red oxide in the dope or glue. He suggested a "Super Seam Cement" & "Ceconite" pinked tape from 'Aircraft Spruce & Specialty'. There has been no reply to requests from me for quotes from this business so far, it is listed as an Australian supplier, even though the quantities are in Quarts & inches. I will keep persevering, & if all else fails, it will be BoteCote & fibreglass. ST |
|
|
|
Post by akeepsake on Feb 9, 2016 19:40:33 GMT 10
ST enjoying this thread very much ! Great your taking your time and discovering the hidden treasure of original livery under the paint. Well done!
|
|
|
|
Post by Geoff & Jude on Feb 9, 2016 21:34:45 GMT 10
I have been over to the Airport & talked to a Restorer of Antique/Classic Aircraft, he gave me contact details for what is needed here using Dacron instead of 'Irish Linen' doped on with red oxide in the dope or glue. He suggested a "Super Seam Cement" and "Ceconite" pinked tape from 'Aircraft Spruce & Specialty'. hi st we used the ceconite pinked tape on the aerolite when we re-did the roof. it was put on all the edges to seal the join. it worked well but we had a problem with puckering when it came to going around the tighter curves at the lower front and back areas. if you use ceconite, i suggest that you get the "biased" type which is designed to stretch to allow tighter curves like in wingtips. (we were ignorant of the stiffness of the normal tape until it was too late - it has very limited flexibility for curves edges.) www.ceconite.com/surface.htmgeoff 'n jude |
|
|
|
Post by Surf Tragic on Feb 10, 2016 10:54:01 GMT 10
Hi Geoff & Jude.
your advice is just what I need & very timely. What did you use to glue the Ceconite tape on is my biggest question? and did you buy it all from the company you gave me the link to?
I have looked at videos on utube where it demonstrates using a hot iron to shrink it around the corners to get rid of the puckering, so would imagine I would be doing some experiments with it before using it on the van. The biased material would be the answer for sure.
Thanks heaps. ST
|
|


 look
look 


 ;D.
;D.