|
|
Post by JBJ on Jan 10, 2008 19:56:44 GMT 10
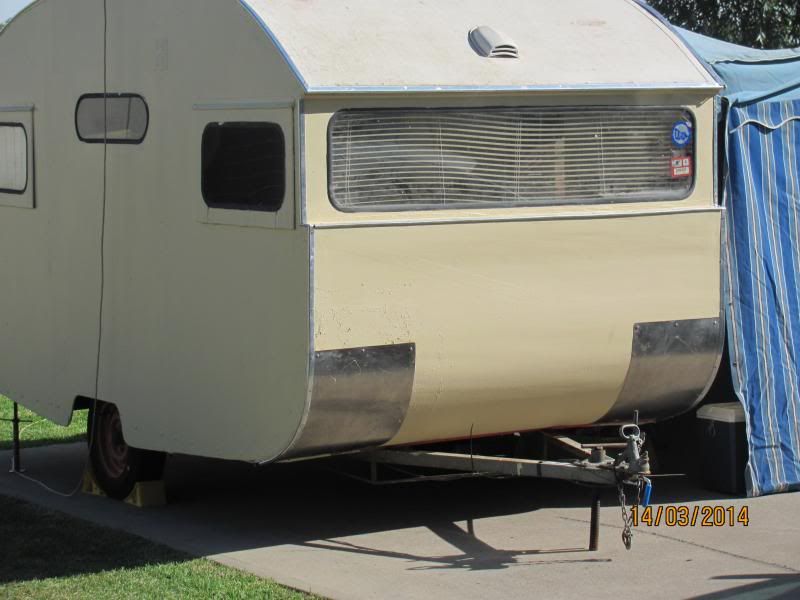
Hi All, Well I’ve finally done it . I was shown a photo of a home made van this time last year, when Sutcac & I were at the Ballina Street Machine show. The guy wanted $1500 for a van his dad built in the 50’s. I went & looked at it, but decided not to buy it as I was intending to sell Groovin & get into the Sunliner . Well 12 months later, today I was offered it for $ 500, so I bought it. Seeing the Sunliner is registered, & about to go to the painters, I thought that as I’m enjoying working on old vans why not restore one.  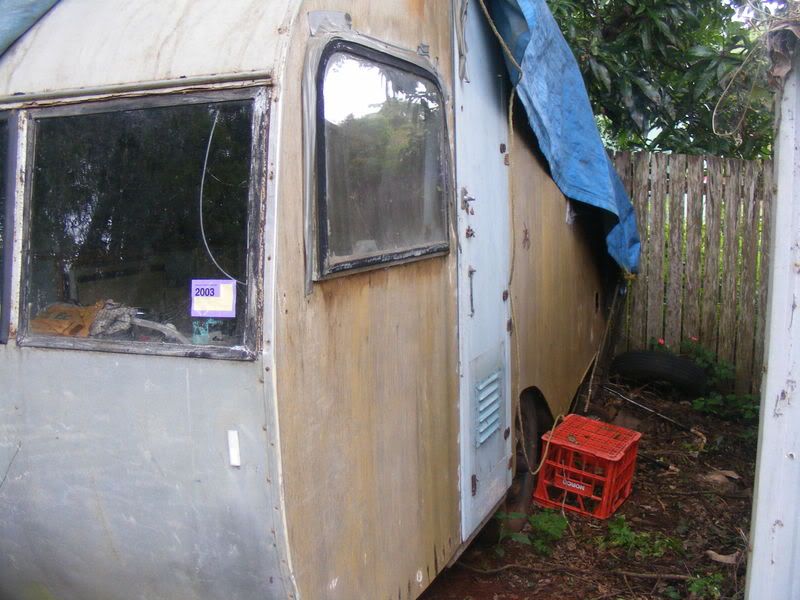 So here it is, not a kilometre from where I live. It’s a bit of a mess, but such a simple van. 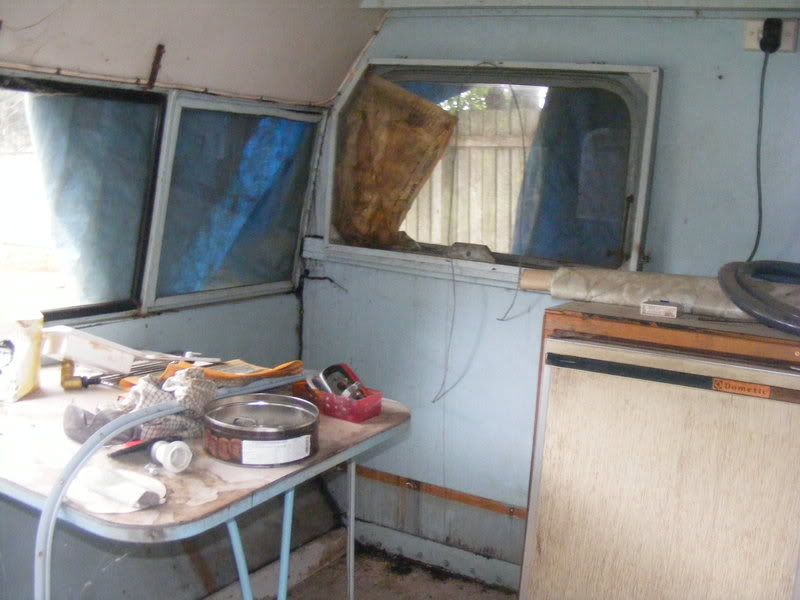  It was built at Blayney in NSW, by a farmer. He used a late 30’s mid 40’s Chev car chassis, turned back to front. The rear chassis kick up has been joined to make a drawbar, with overide hydraulic brakes. It has a plate screwed on the chassis with his name & build date. 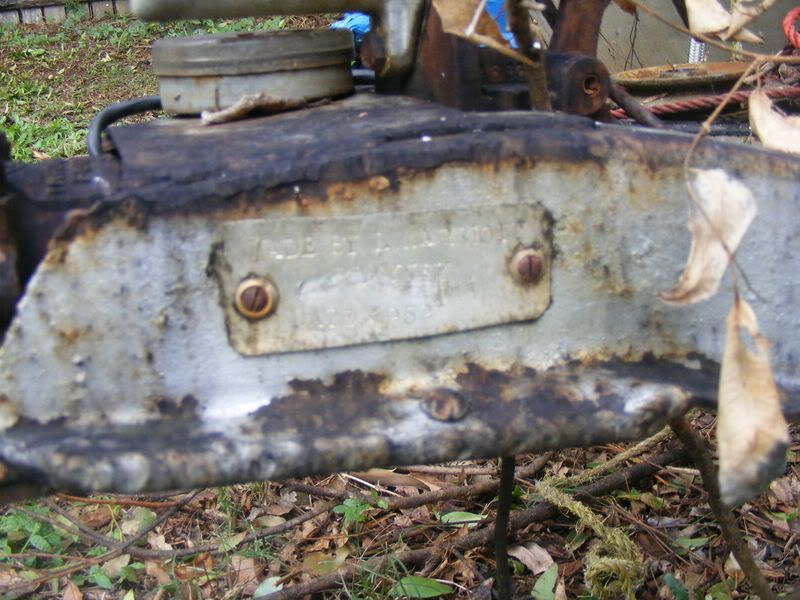 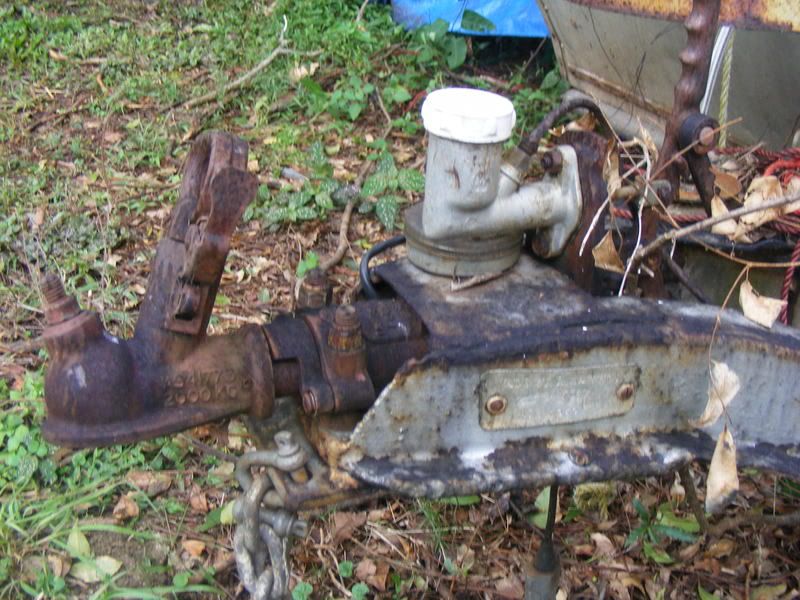 The chassis has lightening holes cut in it, & a hand made independent suspension, with coil springs & a sway bar, using 16” Chev 6 bolt wheels. 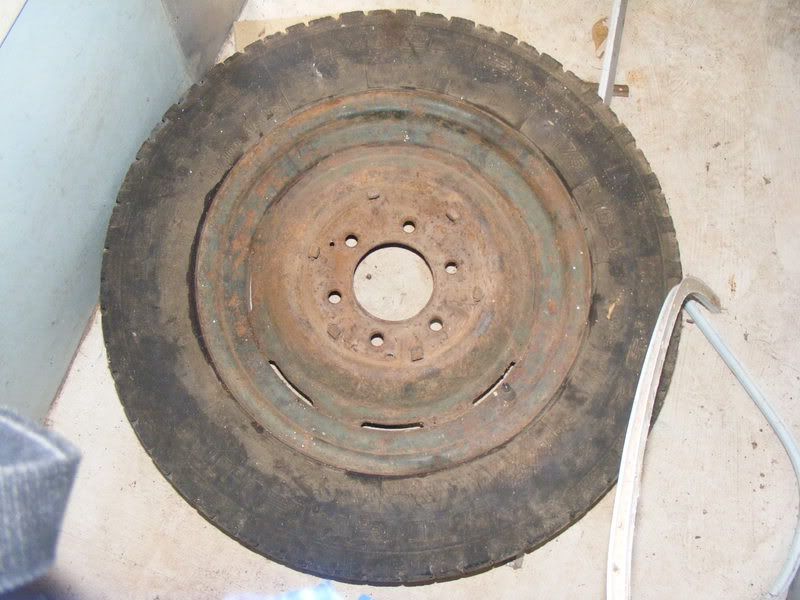 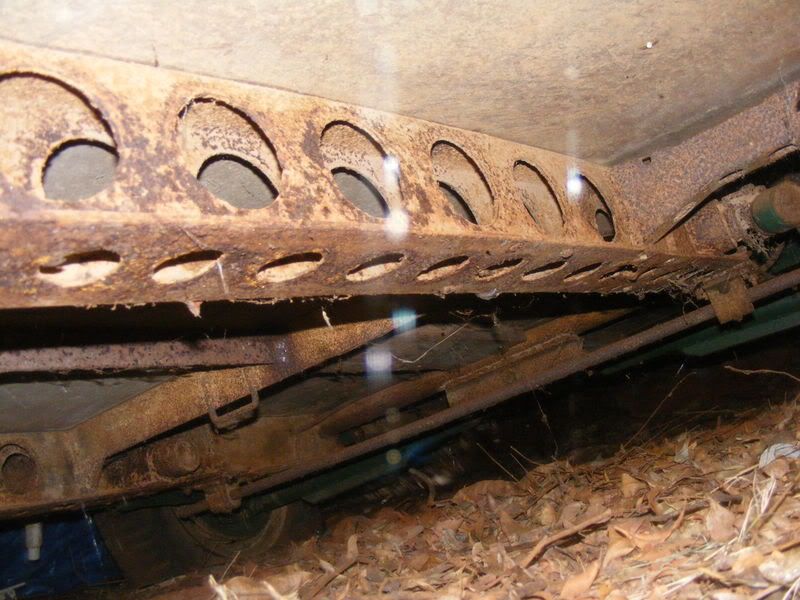 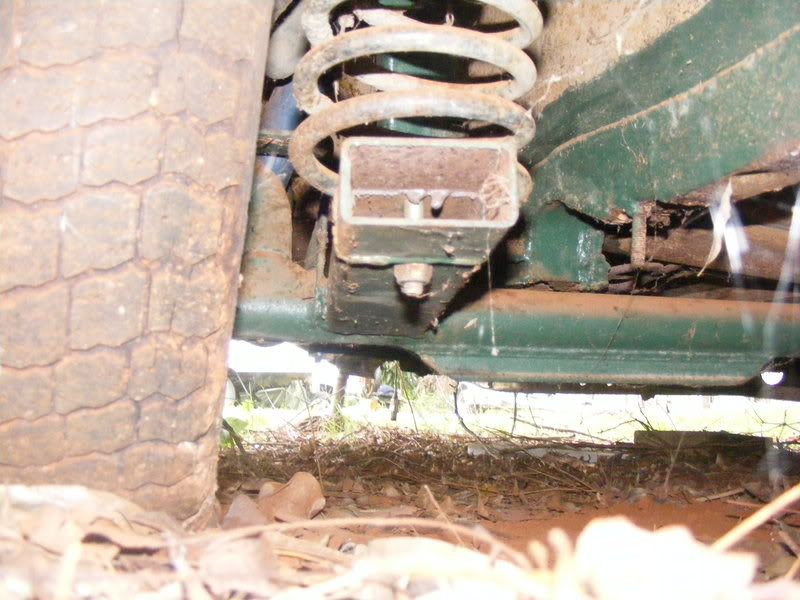 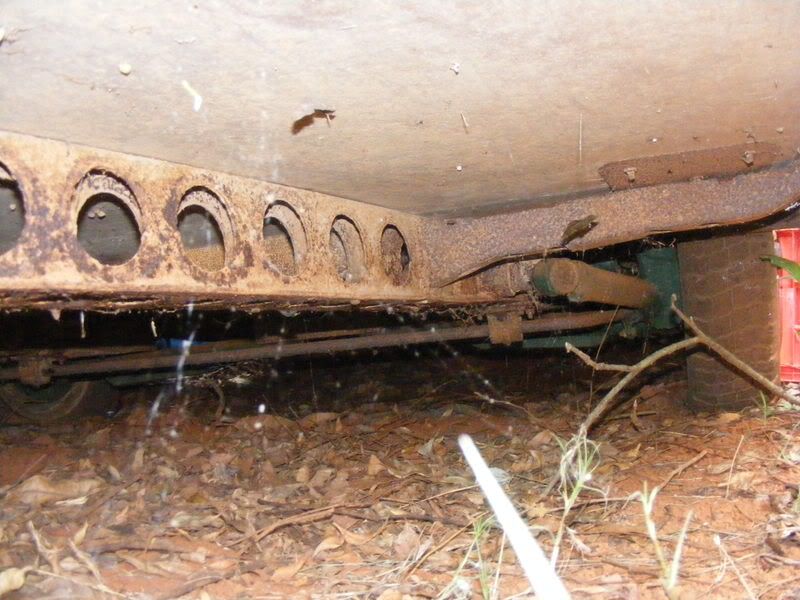 The van body was made with oxy welded 1” steel angle iron frame, with ½” ( I think) ply sides. The roof is ply with canvas over, & front panel is aluminium. Windows on sides are hand made brass frames, with hinged flyscreens. Front windows apear to be fixed, & no rear window. Hatch is enormous, & the rest of the interior is pretty basic but functional. 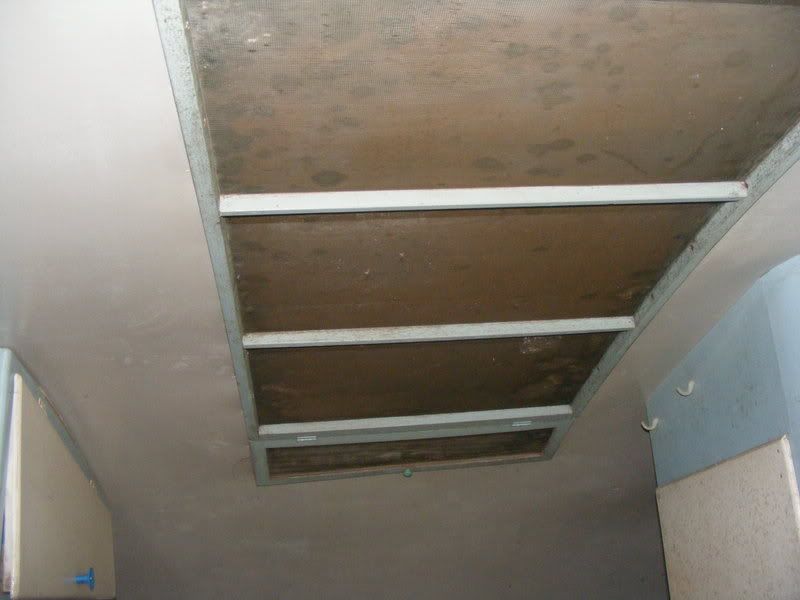 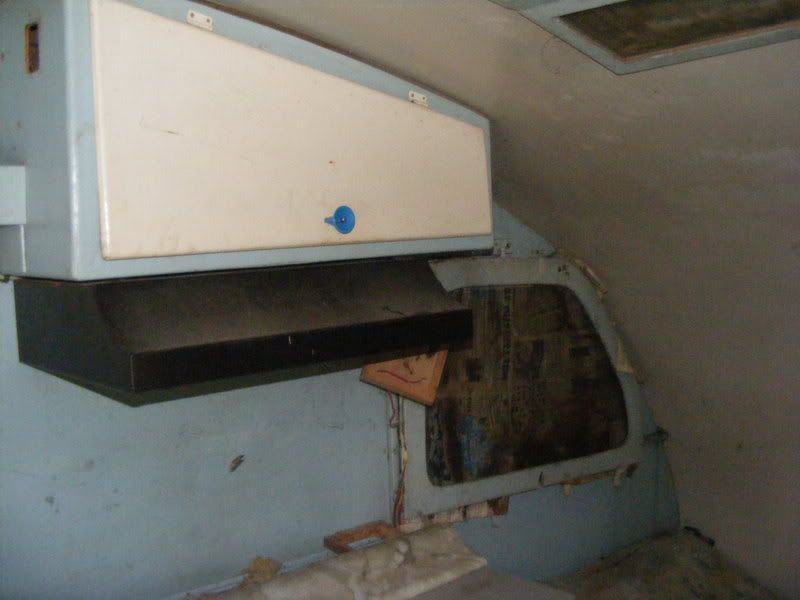 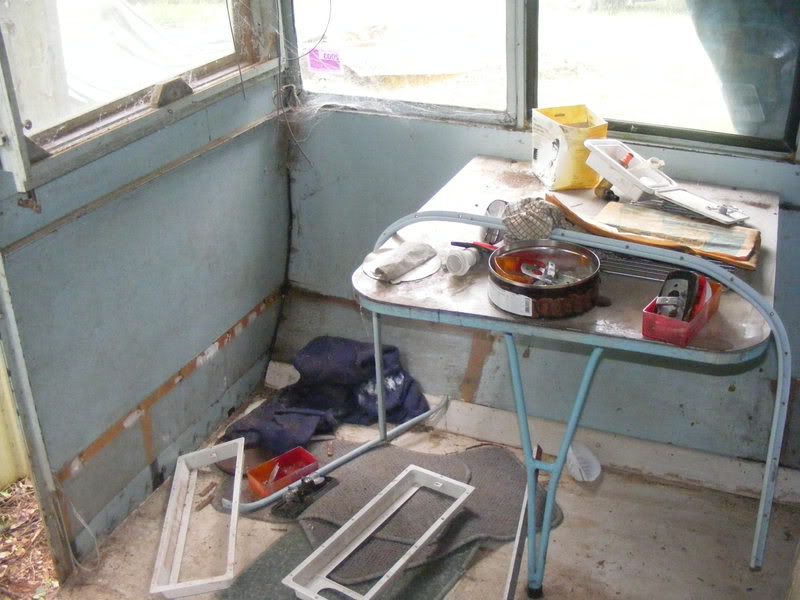 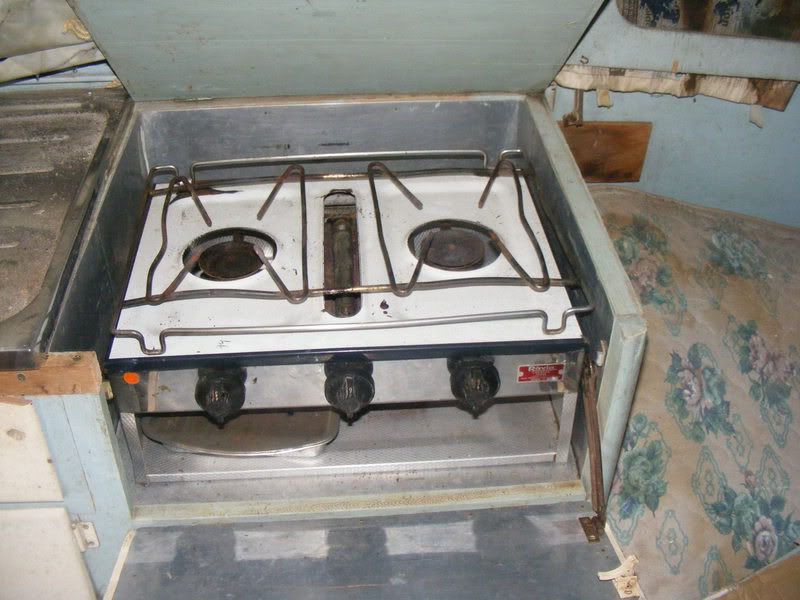 It was registered about 15 years ago, & I got papers with it, as well as access to the original photop album of its construction & trips. I’m going to get all that digitally copied when they turn up. I'm buying off the son of the builder, who remembers the trips in it. Hopefully I'll get it rebuilt while his dad is still alive, & go to where it was built for some photos. Its an overgrown teardrop to look at. I should have more pix when I drag it out on Saturday. This one will be rebuilt pretty well as it was built if I can get it registered with the home made suspension. Jailbarjuice |
|
Deleted
Deleted Member
Posts: 0
|
Post by Deleted on Jan 11, 2008 16:30:45 GMT 10
;D ;D ;D ;D A glasshopper. You have travelled full circle. You have done your time in the world of fibre and have now come back to the roots (or is that the tree) of vintage caravanning.... Timber.. with a dash of aluminium. Tis the dreaded restoration/ renovation bug gnawring at your earlobe once again.  She looks like an interesting old van too. Dont ya just love good old Aussie ingenuity. Give me a yell if you get stuck for bits n pieces. and Good luck with your endeavors. I am heading to Scone tomorrow to bring home the "Lockhart 1948 TD" Reddo I fobbergross Sunliner 1 replica TD 1 real TD I 12 ft Fairway 1 10footer in the shed part restored 1 10 footer has just made a blip on the wood-o-matic radar between Gulgong and Dubbo... stay tuned  There is no cure  |
|
whippy
Full Member
 "Twiggy" the Globetrotter
Posts: 462
|
Post by whippy on Jan 11, 2008 21:22:57 GMT 10
What a fantastic find, I just love the originality of the construction. It looks like it is very well made.
|
|
|
|
Post by pymie2 on Jan 12, 2008 19:51:45 GMT 10
Hi, Hotrod cross Caravan interesting all in one build, next you will need one with with the motor in it as well.
You are correct there is no end to the fun (Madness)
Pymie
|
|
|
|
Post by JBJ on Jan 12, 2008 20:28:11 GMT 10
Hi All Well we towed our new van home today. Big tow of just over 1Km. 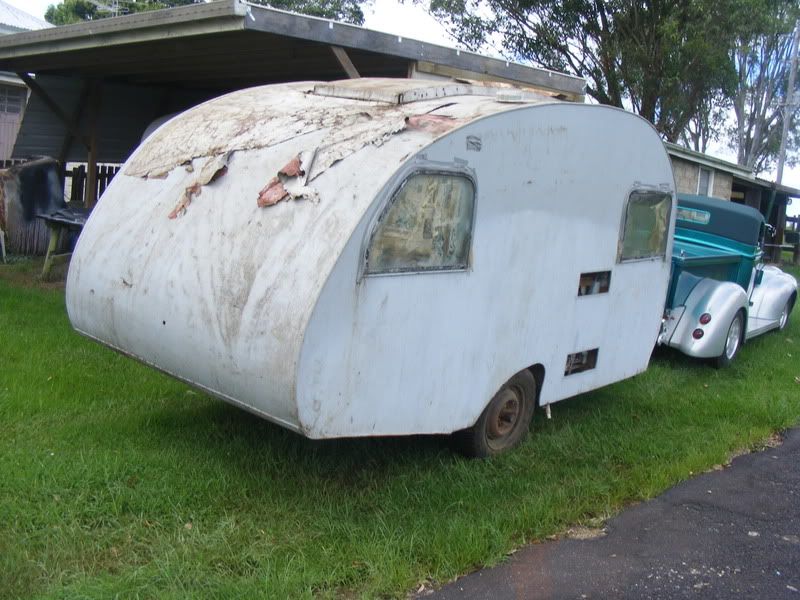 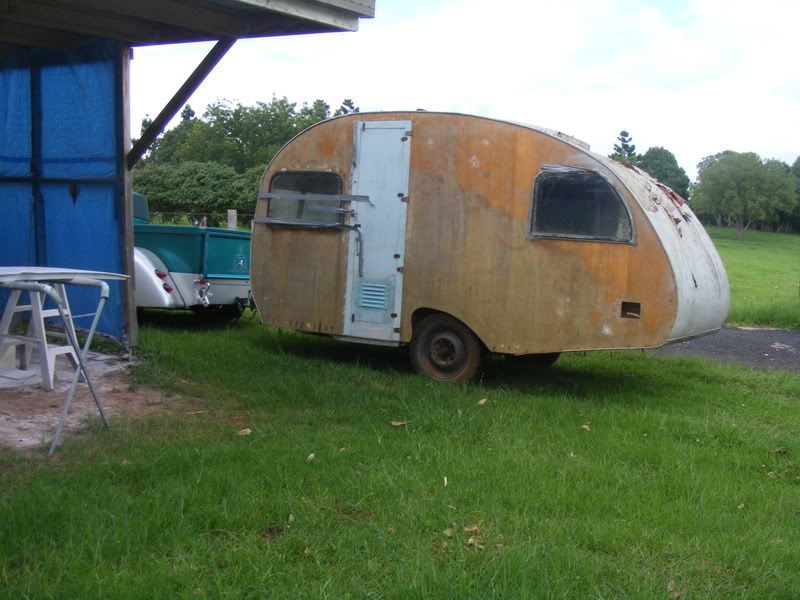  In that distance the hatch blew apart. 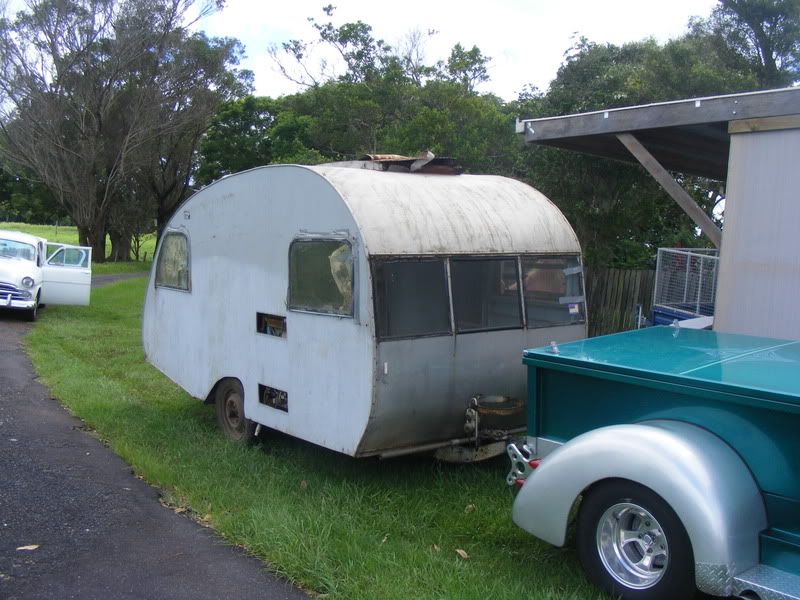 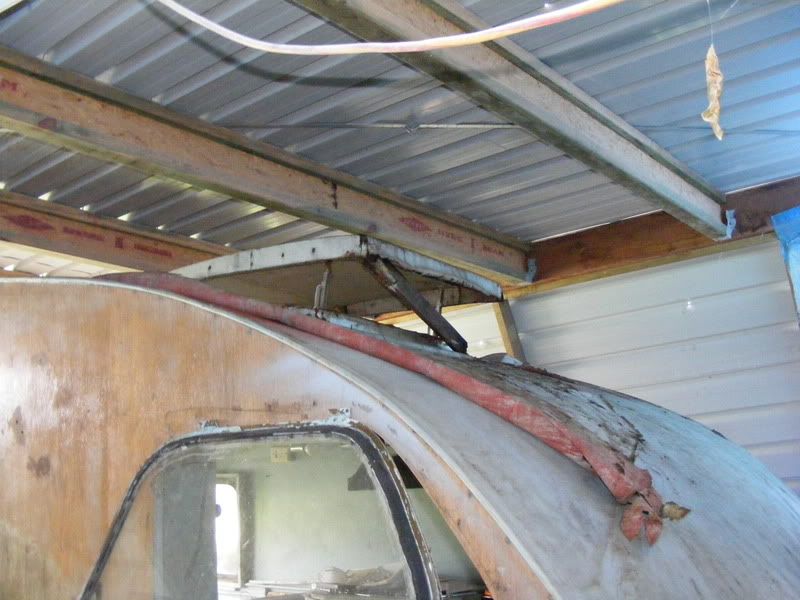 The van is a really unusual shape. It has double skinned roof & single skin walls, with 1” steel angle iron frame. The rear end is unique, & has an aluminium belly pan from the rear back to near the axle. 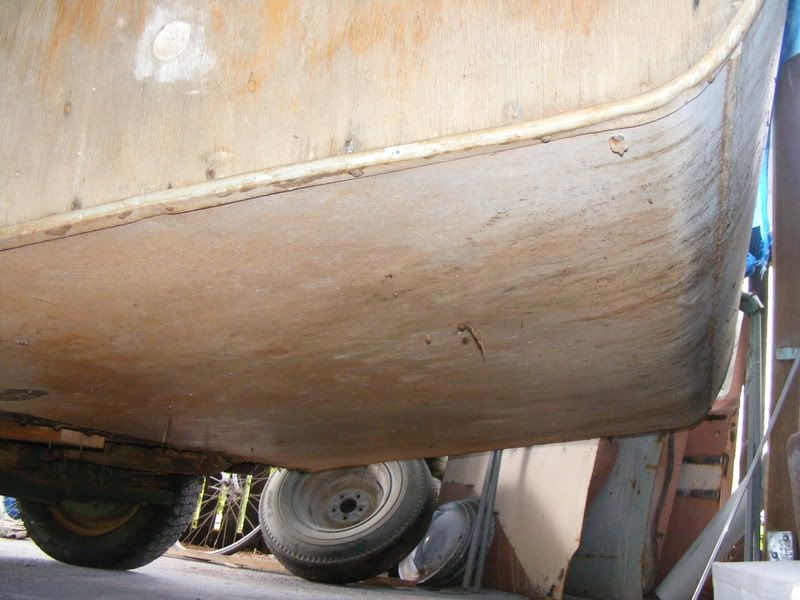 Some more shots of homemade swing axle suspension. It runs coil springs & new style tube shock absorbers 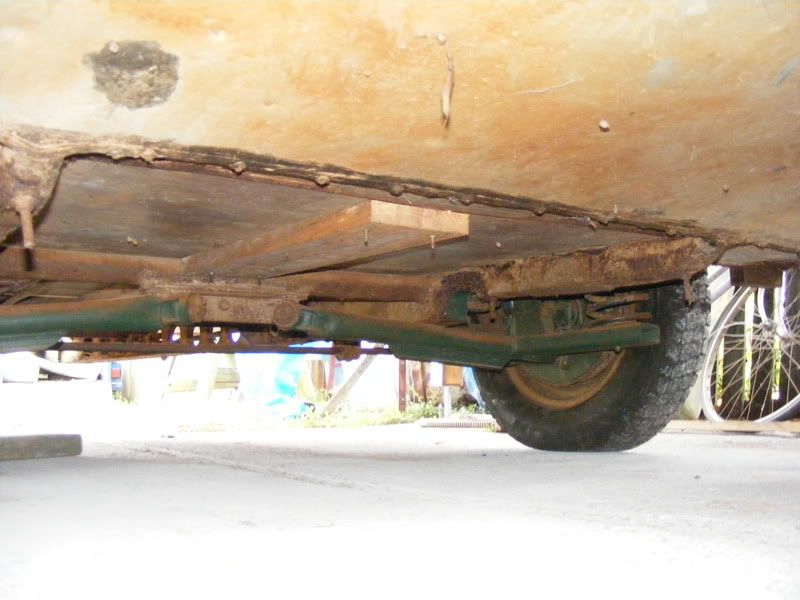 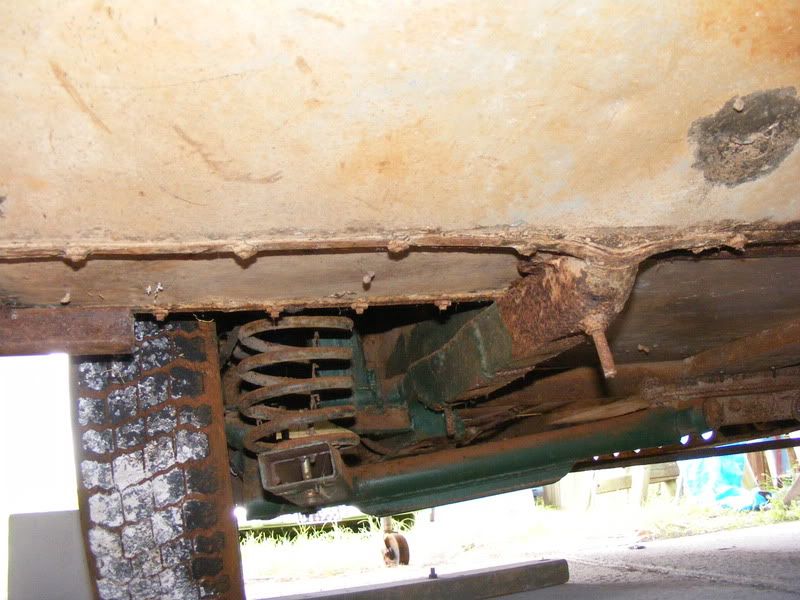 Interior looks better with the crap removed. Threw away the oversized fridge & mattress. There appears to be a custom made copper water tank right across the back under the bed. Havent got to it yet. 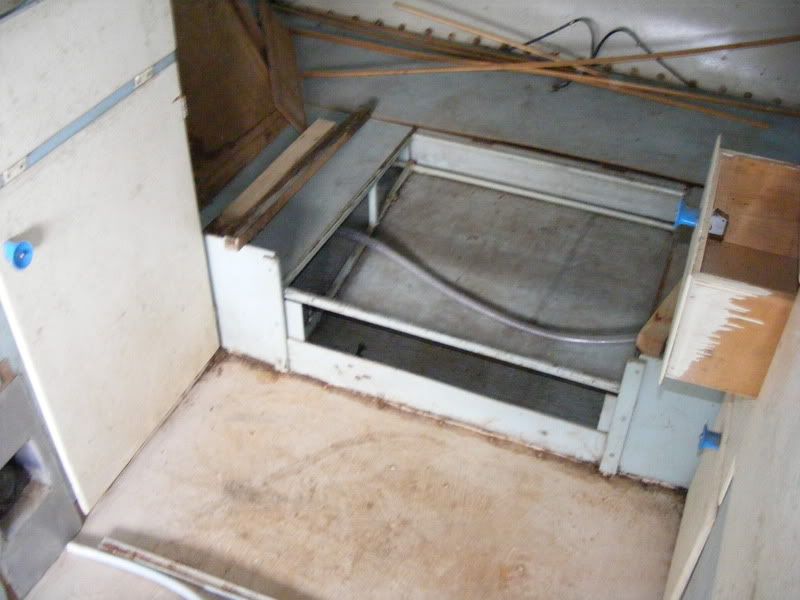 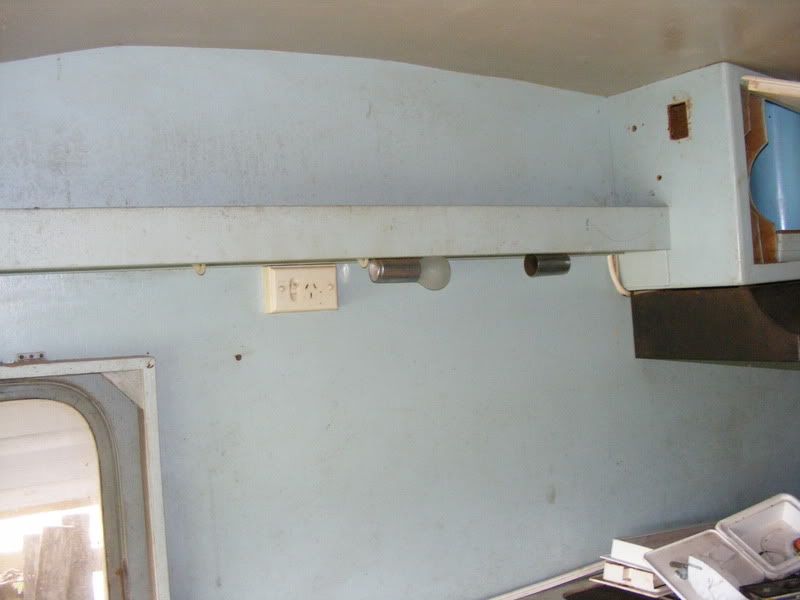 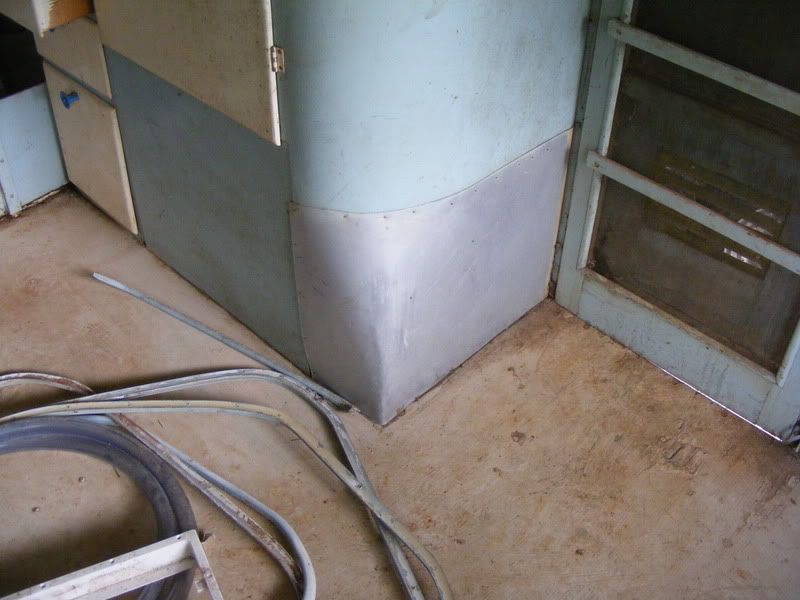 The cupboard over the range hood is fitted for plates & cups. 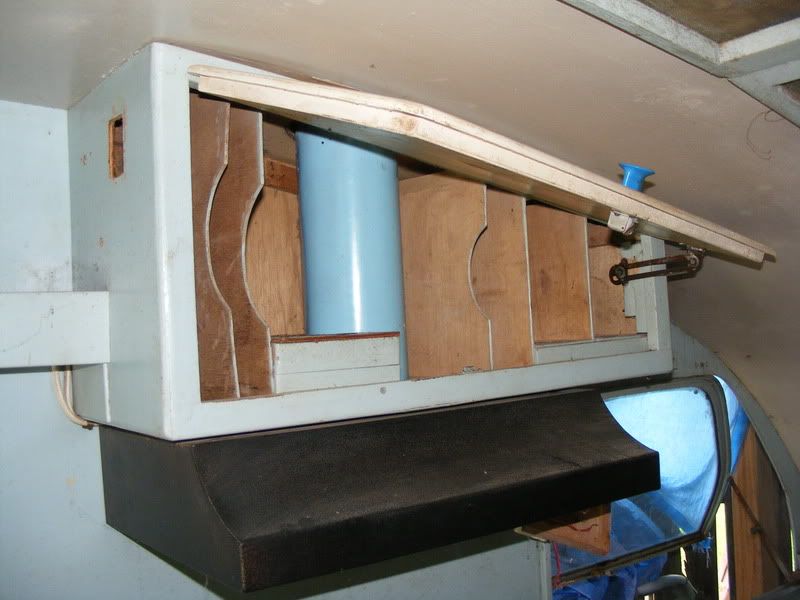 Lights & fittings are mostly black bakelight, which I’ll try to keep. Flyscreens are a big structure, that enclosed all the hinges & catches for the windows. 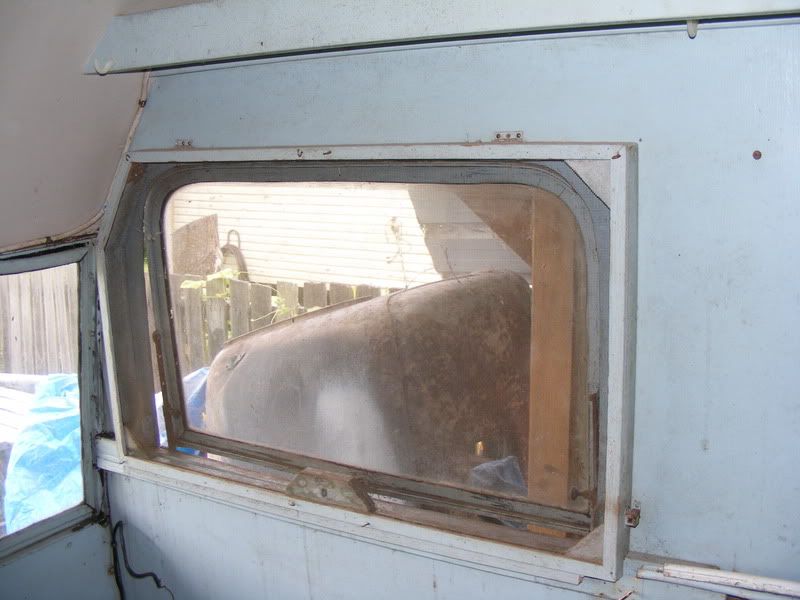 All the hinged window frames are hand made from flat brass, brazed together. They hold the glass in a simple H mould rubber, which will be easily replaced. Boots has named it “Lucille”, & it’s a better van than I thought. Its 2000 wide & 4000 long, which is just over 13’ long. Its nearly the same size as the Sunliner. 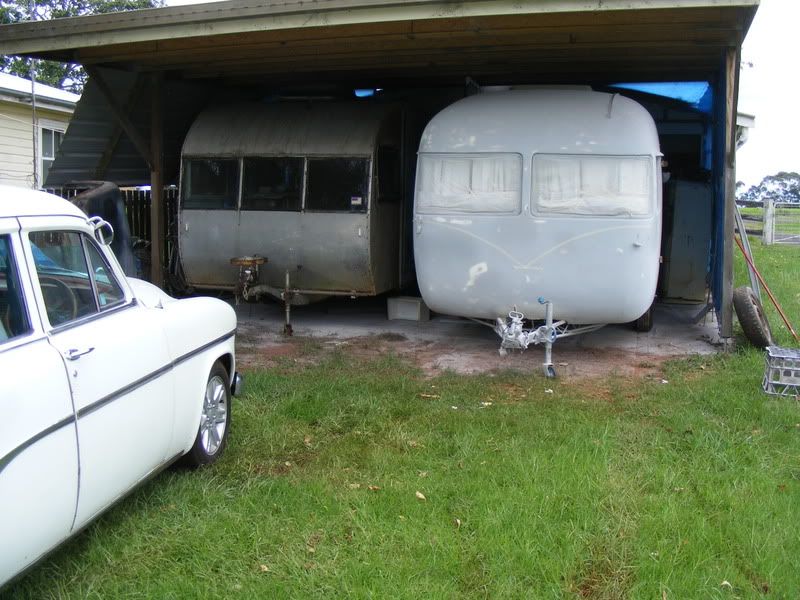 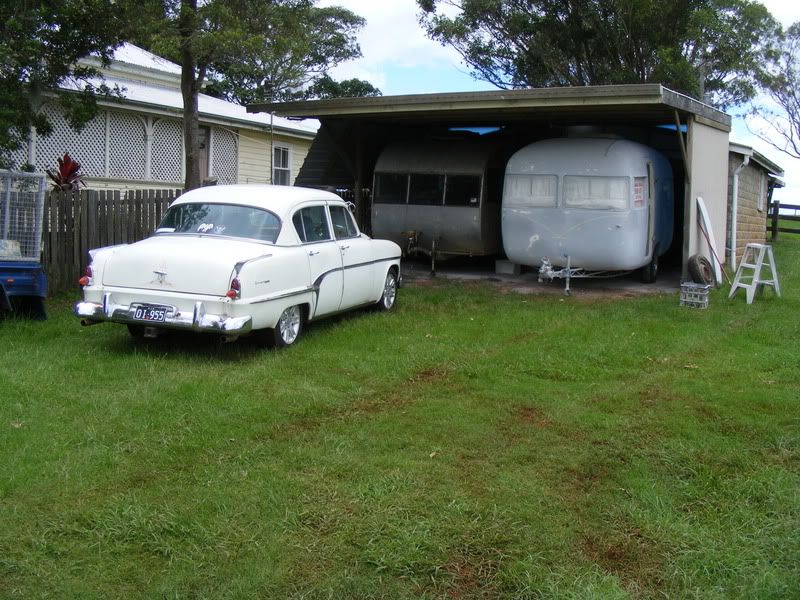 But the best thing is that I’ve got it out of the weather. It wouldn’t have lasted too many more years under tarps in this high rainfall area. I’ll have it registered & at Wintersun as my second van for my family to sleep in this year I hope. Jailbarjuice |
|
Deleted
Deleted Member
Posts: 0
|
Post by Deleted on Jan 12, 2008 21:28:33 GMT 10
|
|
|
|
Post by JBJ on Jan 13, 2008 7:04:32 GMT 10
Hi Reddo,
Registered means to me with the outside weatherproof & a bed installed.
Just need a new hatch, new tyres , window rubbers, some paint & wiring, & rego.
It shouldnt be that difficult ( I hope)
Jailbarjuice
|
|
|
|
Post by JBJ on Jan 21, 2008 20:23:36 GMT 10
Hi All, Well I’ve been waiting for my paint for the Sunliner to come from Spray Chief in Adelaide, so I got stuck into Lucille, the ply van we picked up. I stripped all the windows & external fittings off it, then got into sanding the exterior. I repaired a hole that had been punched in the rear. It was about 200mm square. Glued in a patch panel with some backing strips, a bit of bog over the joins, sanded smooth, & you can barely notice the repair. 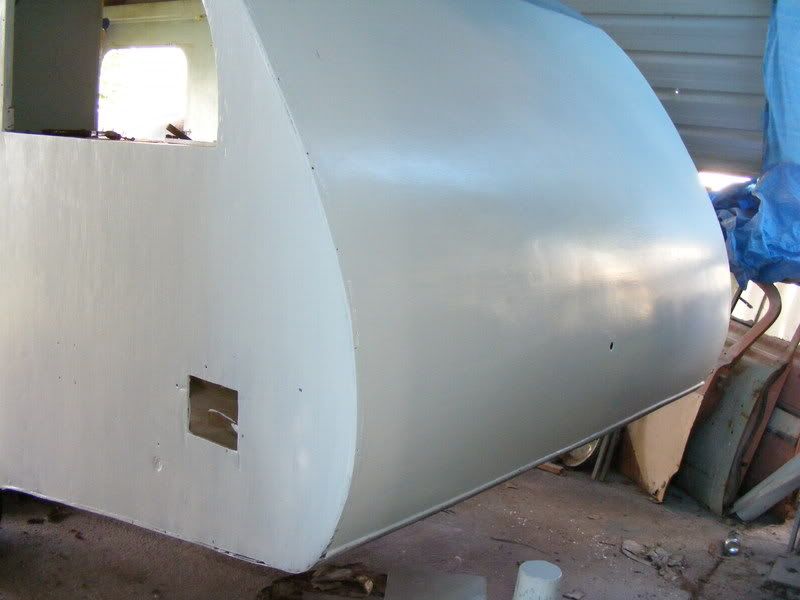 The ply is soaking up the oil based primer surfacer I’m brushing on. It certainly dried out in the weather. Since I’ve got it, I bought a set of 600X16 Indian made conventionals. I shopped for US made whitewalls, & best price was $259 each plus tubes. I got these at my local tyre service for $150 each, including tubes, removal & disposal of old tyres, & fitting on the freshly powder coated rims. 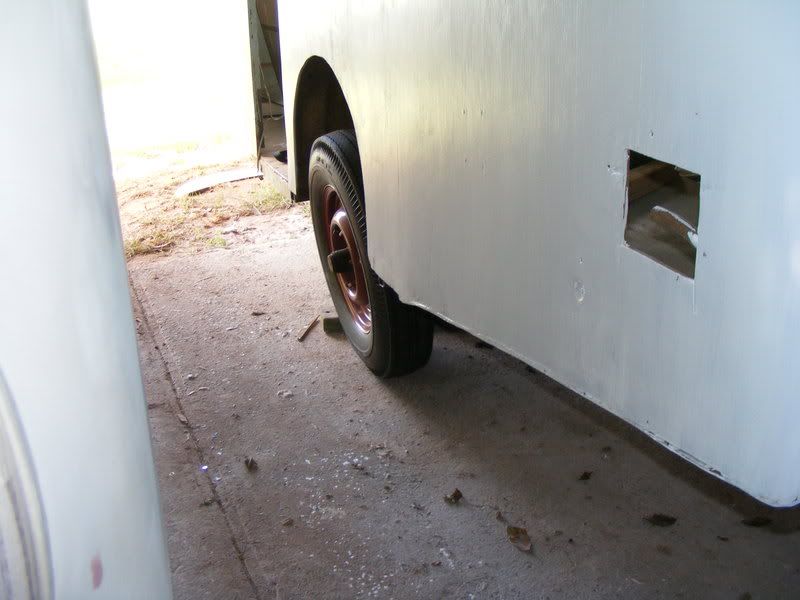 I’ve looked at the home made independent swing axle suspension it has many times since I got it. Its very wierdly put together, & the wheels sit like a VW without an engine. 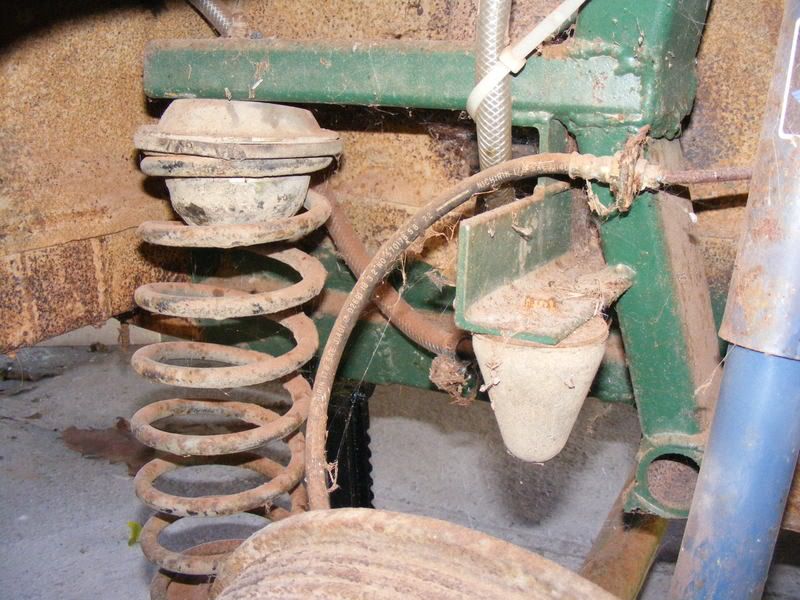 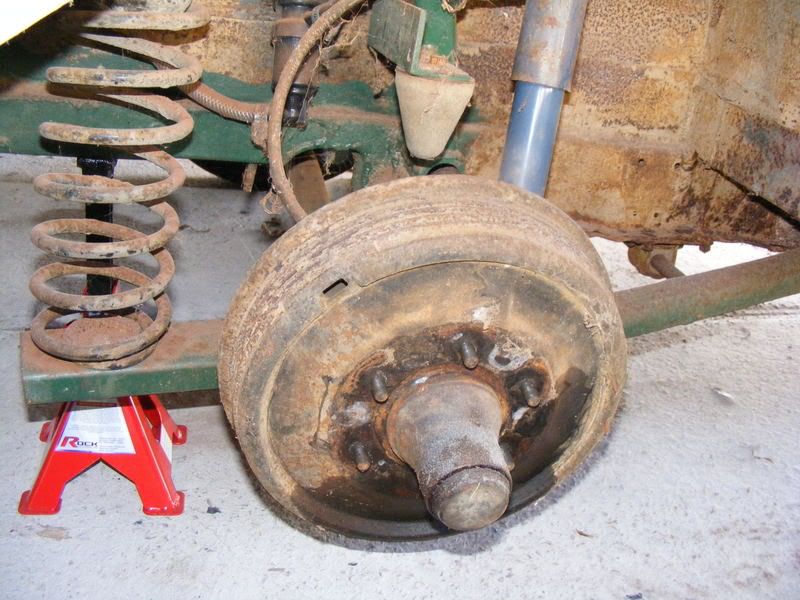 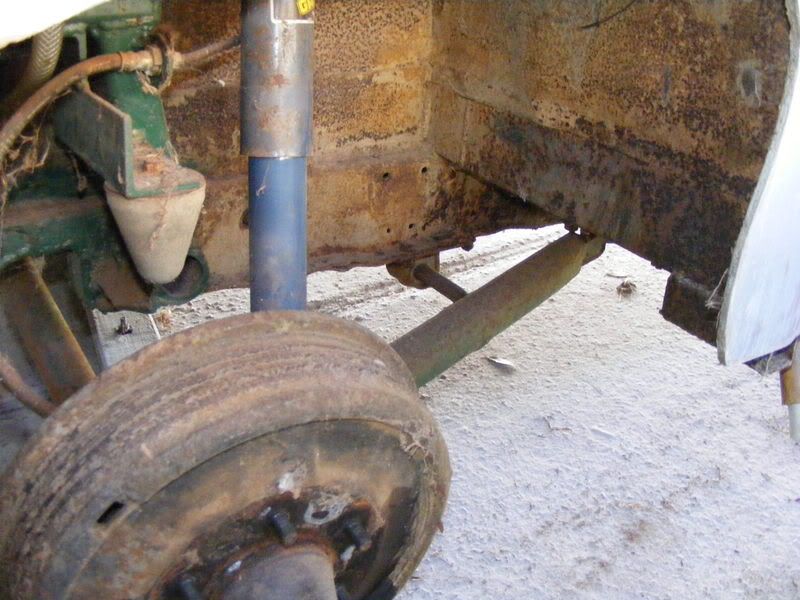 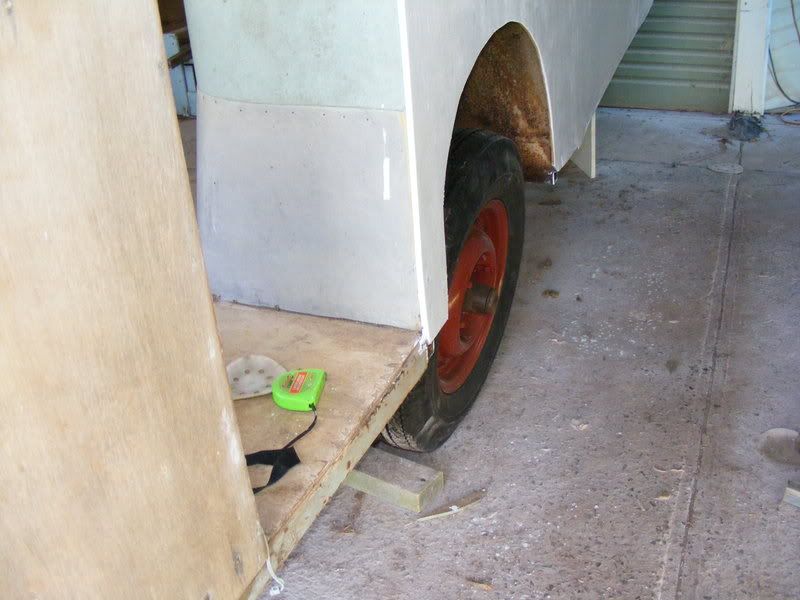 So I’ve decided to replace the existing set up with a rubber torsion set up. I can get a PBL axle custom made thru the local caravan & trailer parts dealer, for under $ 1000 including new hydraulic drum brakes. I’m getting spacers machined to use the Chev wheels & tyres, to keep the early 50’s era of the van exterior closer to authentic. We’ll be removing the gas bottle from the front, & mounting a spare there. At this stage that is the way I’m thinking. Its fun working on ply. So much simpler than glass is. But I still love our Sunliner, & it will remain my favourite, but this one is growing on me. Jailbarjuice |
|
|
|
Post by JBJ on Jan 22, 2008 20:07:16 GMT 10
]Hi all, Made the adaptors I wanted to fit Hillman tailights 9 same as on my sunliner) to lucille . 2 bits of 19mm pine, bandsawed & glued together, then sanded, & ground with a hollow at the back to fit the curvature of the van. I like them there. Its an interesting contrast to the same lights on the Sunliner, which is the same year build pretty well as Lucille. I’m going to make an oval number plate frame & light panel similar but larger. 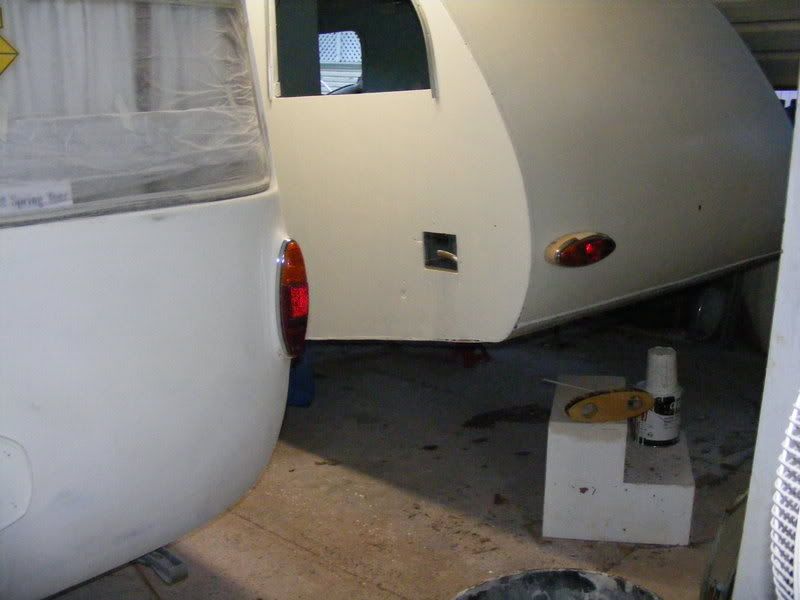 Also paint stripped the original aluminium weather gutter strips for the windows & door over last weekend. They took lots of effort & stripper to remove what seemed like about 4 layers of paint. 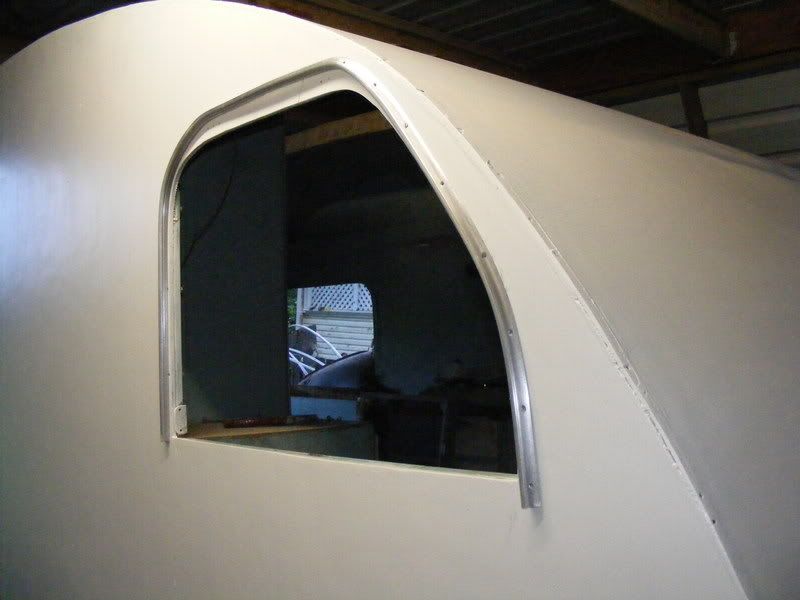 My Sunliner paint arrived today, so Lucille gets a rest for a while while I prime & re assemble the Sunliner for Mooloolaba. I need 3 hubcaps to suit the Chev 37 wheels, & 3 x16” stainless trim rings. I’m prepare to pay a good price for reasonable stuff. If anyone wants the old 12” dia 6 stud Chev brake & hub assemblies they can have them free, or else they go to the tip when I replace the suspension. Jailbarjuice |
|
|
|
Post by JBJ on Apr 10, 2008 10:11:34 GMT 10
hi All,
I'm looking for a LPG/12v/240v fridge,up to 90 litres but smaller is OK, reasonable exterior, but working well & clean inside, for Lucille. It would need to be within about 3 hours of here, sorta between Brisbane northside & Coffs Harbour, or up to Tenterfield.
Also looking for 12v/240v bits, like automatic battery tenders/chargers, etc.
Anyone know of anything?
Jailbarjuice
|
|
|
|
Post by Geoff & Jude on Apr 10, 2008 12:41:59 GMT 10
hi dennis
we got a battery charger/monitor for our van from caravan accessories/camec.
it works well, charging the battery whenever it is connected to 240v and also shows if voltage is low with lcd indicators.
cost about $65 i think, can't remember the brand though.
will have a look at it tomorrow and let you know.
geoff 'n jude
|
|
bigkel
Full Member
If you never never go, you never never know.
Posts: 248
|
Post by bigkel on Apr 10, 2008 16:47:13 GMT 10
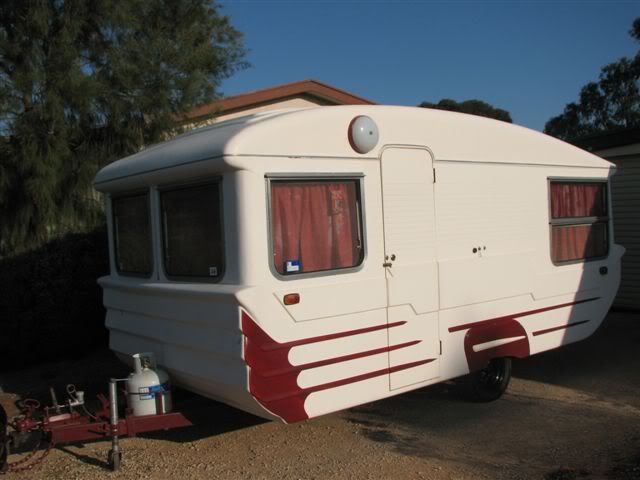
hi all , who owns the white 4 door ,with the k-mart plastic wheel covers, i have a set of stainless steel covers in cairns they look like they could be off a mopar ,mine have that cross bar in the center, spinner look, they might be the right style for a 60s car not your 50s. (mine fit 14" wheels)POA, ALL THE BEST KEL. 0740 581217
|
|
neilncheryl
Full Member
Make God laugh, tell Him your plans.
Posts: 324
|
Post by neilncheryl on Apr 10, 2008 20:57:19 GMT 10
Hi JBJ If you get stuck for your 12v bits Springers @ Brendale (Brisbane northside) claim to specialise in 12 volt & solar. I believe Kedron Caravans get use them as one of their suppliers. They have a website www.springers.com.auHope this helps Neil |
|
|
|
Post by JBJ on Apr 10, 2008 21:59:15 GMT 10
Hi Kel,
I dont understand your post.
I own the white 4 door with 16" mags,
Jailbarjuice
|
|
Deleted
Deleted Member
Posts: 0
|
Post by Deleted on Apr 11, 2008 8:00:50 GMT 10
Kel wrote: "who owns the white 4 door ,with the k-mart plastic wheel covers"  Heres a tip mate.. "Never ever assume" More to the point. Respect the rights of others to fit what they like to thier cars ( and vans). Reddo |
|
|
|
Post by Geoff & Jude on Apr 11, 2008 9:24:07 GMT 10
hi dennis this is our battery charger/monitor 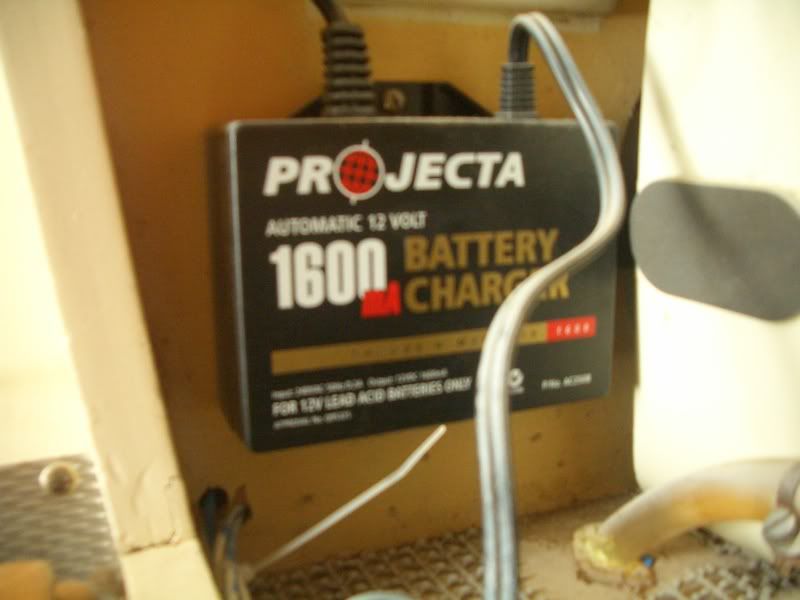 geoff 'n jude |
|
bigkel
Full Member
If you never never go, you never never know.
Posts: 248
|
Post by bigkel on Apr 11, 2008 10:21:55 GMT 10
i do respect your right th do what you wish with what you own, my mistake sorry, just goes to prove you cannot see any detail in a photo on a computa screen.i did think after i did the post , whoops they could be mags, NEXT TIME I WILL SAY NUZZINK, the people that know me know that i like all makes of classic cars & vans , kel.
|
|
bigkel
Full Member
If you never never go, you never never know.
Posts: 248
|
Post by bigkel on Apr 11, 2008 10:26:42 GMT 10
reddo, it appears that my reply post has gone onto the wrong thread, it went under the photo of the battery charger, kel.
|
|
|
|
Post by minicamper on Apr 11, 2008 13:09:48 GMT 10
Hey Jailbar, I was just reading through this entire thread and saw your plea for a fridge. i assume the 3 hr limit was becasue you didn't want to travel? Well if you haven't sourced one yet, don't stress about the distance, I found these courier guys who are dirt cheap, door to door! www.smartsend.com.au. i sent some bloody heavy commercial coffee machines to Cairns and it was less than $100 and they would have been double the weight of a fridge! Cheers Chris |
|
|
|
Post by JBJ on Apr 12, 2008 20:01:03 GMT 10
Hi all, Been doing a bit on Lucille. When Clyde & Barb called , I showed Clyde a levelling device that was on the tow hitch. ( That’s what I was showing in his picture he posted). Its about the size of a round tobacco tin. It has a plastic lid that was originally clear, that screws on. Inside are 2 spirit levels, mounted on a spring loaded plate, at 90^ to each other. Its very similar to the one I have in my Sunliner, but this one is called a “Reese Levell-All”, & made in USA. I’ve never seen another like it.. I’ve been busy priming in oil based primer, over the weathered ply exterior panels. They have absorbed heaps of paint, & I’m sanding with my orbital sander between coats. Its getting close to being ready in areas for final paint when it eventually happens. 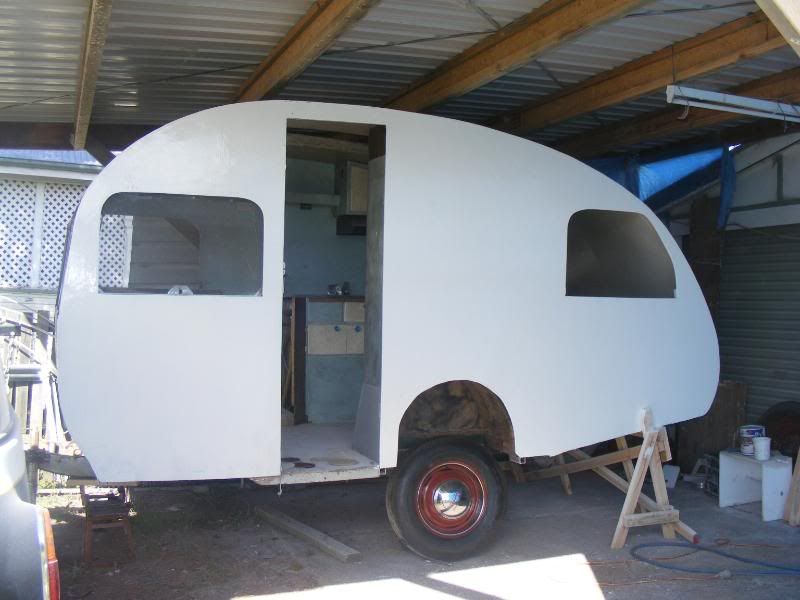 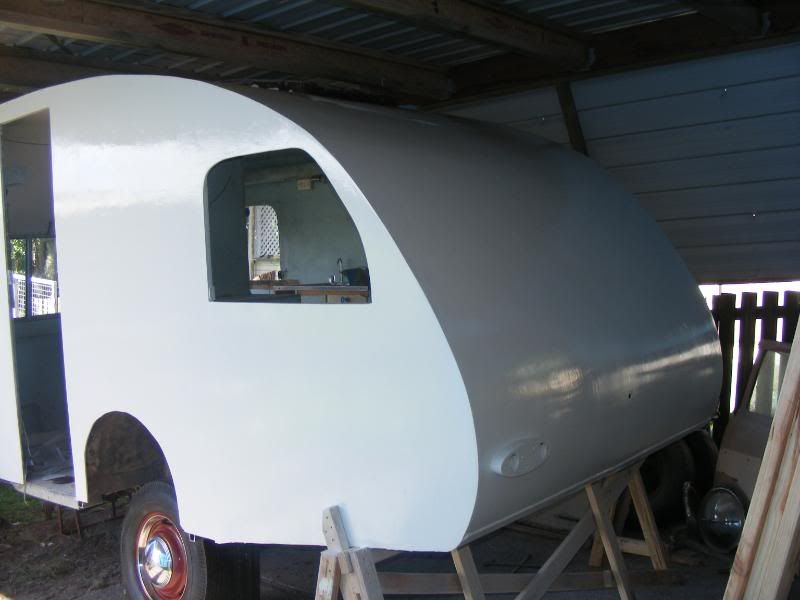 I got a water filler neck on Friday, gave it a polish & cut hole & fitted it. I also closed up all the other holes in the walls that were all over the place. 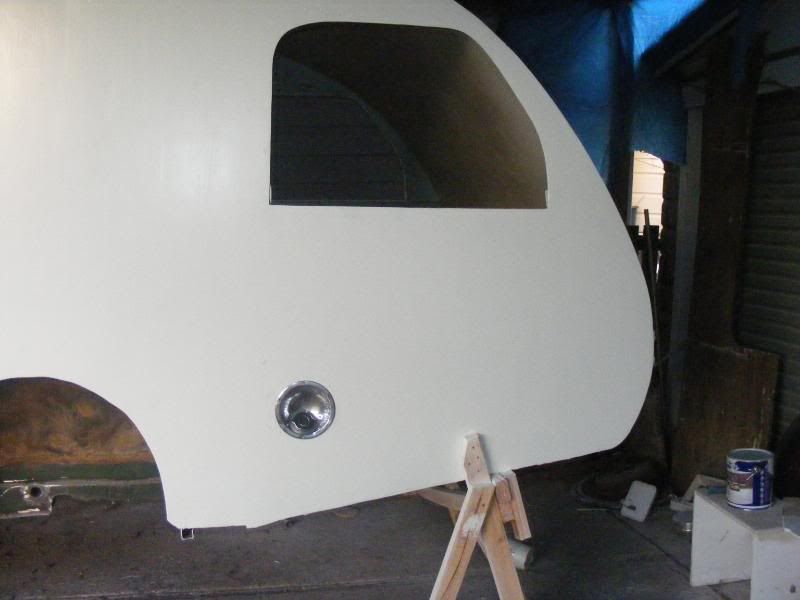 Cut out the home made suspension, & ordered a new AlKo rubber suspension axle, with hydraulic drum brakes in Toyota 6 stud, which are a copy of the late 40’s Chev 6 stud. $877 for new axle & brakes complete, custom made. You would spend near that putting new bearings & brakes thru an existing axle. I have to tidy up the chassis a bit when I fit the new axle, but its pretty simple to do.  Got my new hubcaps & trim rings from “Chevs of the 40’s” in the USA just before we left for Mt. Gambier, & put them on the rims & tyres. I’m happy with them for about $270 delivered to my door, for 3 sets. 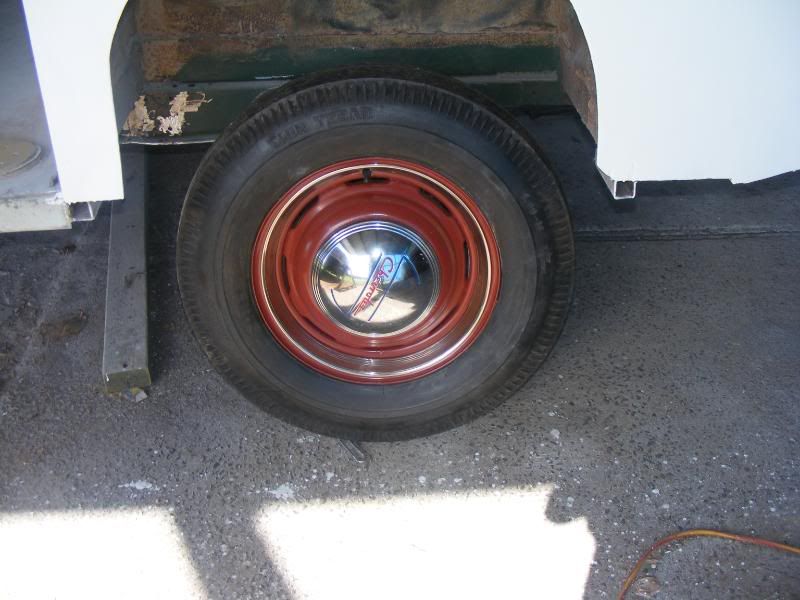 Removed front 1/8” aluminium sheet that had suffered a lot of small dents & other marks. I then found that the rot in the RH front corner was a bit worse than I thought. So it gets a new ply front panel, as well as the replacement on the lower front RH 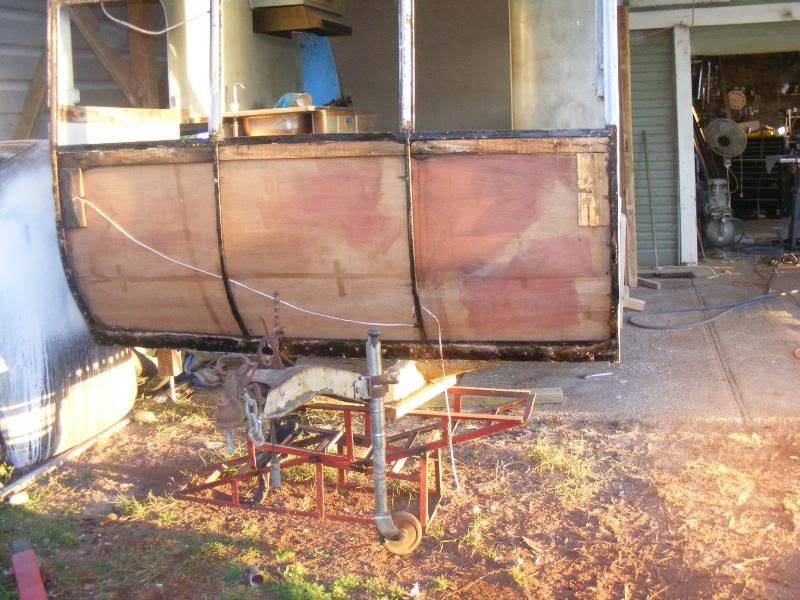 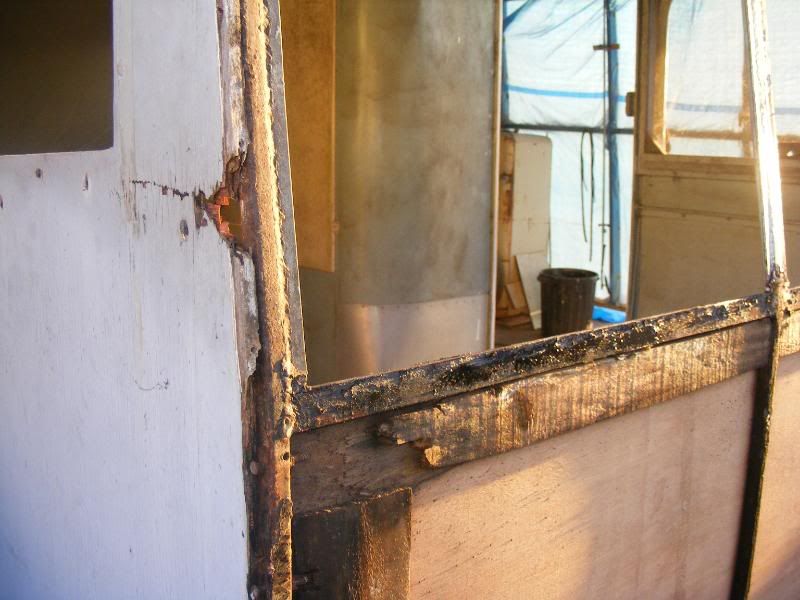 We are going to remove the 2 side windows from the front panel, & raise the centre window up to line up with the side windows. This will also help replace the rot above the existing front panel windows. More to come as it happens Jailbarjuice |
|
|
|
Post by Don Ricardo on Apr 12, 2008 21:26:25 GMT 10
Great work JBJ,
What a transformation - but then you only do transformations!!
Lucille is coming along so well - I really appreciate the thought and work you put into your restoration work. Like the new wheels and caps.
Yours with admiration,
Don Ricardo
|
|
goingrey
New Member
 "GREY" an engine, & haircolour of distinction!!!
Posts: 45
|
Post by goingrey on Apr 12, 2008 21:40:38 GMT 10
Gedday Dennis, Great work ;D ;D ;D Its fantastic to see so many pics of your progress, it all seems so quick and easy watching your project come to life by scrolling down through the thread........but I bet your hands and back and liver are a little battle sore by now ;D theres some serious work gone into it so far.... Those tyres you`ve got look just like to ones I have on my FC. Does that say TWIN TREAD on the side wall? Mine are also made in india and have MRF, TWIN TREAD, 6 PLY NYLON, 6.40-13 (obviously a different size) on the side wall. I've done around seven thousand miles on them including pulling the V.van and they havent missed a beat. However they do get big flatspots if the car sits for a month or so without being driven, but the bangada, bumpada, thumpada for the first few miles down the road still puts a smile on my face while they round themselves out again ;D Just make sure everything in the van is well secured at the start of each journey  I look forward to seeing more pics of the progress to get me inspired to start my next project... Chow, Brendan. |
|
|
|
Post by kingy on Apr 13, 2008 7:35:26 GMT 10
Hiya Den.
Getting stuck into it mate, it'll up and running in no time
unlike my 2nd van - another loose end -
looking forward to seeing what will be a unique van - something different.
Say hello to Sue for us
Kingy's
|
|
|
|
Post by earlee on Apr 13, 2008 8:08:59 GMT 10
hey JBJ, Thats a lot of work you have been doing on the van and its looking great. It will be good for at least another 50 years when you are done. ;D Where are you going to position the water tank and what type will you use? Will you have enough time to get it ready for Neurum Creek?- (long drive for you) vintagecaravans.proboards30.com/index.c.cgi?board=runevent1&action=display&thread=1202785085Please post pics of the suspension setup when its going in, regards earlee. ;D |
|
|
|
Post by JBJ on Apr 13, 2008 19:24:57 GMT 10
Hi Brendan
The tyres are the Indian specials.
I"m running the same tyres on the Sunliner as you are on your FC
Lucille has 6.00x16 8 ply . thats all I could get. But the rims are only 4" wide so thats OK.
When I leave towing the van behind either of my V8's, I dont really notice the tyres having flat spots.
I havent hurt my liver too much so far. Its the shit I cop from others that hurts it more than what I drink.
Its all fun
jailbarjuice.
|
|